
Look, I know staring down a recipe called “seaweed rolls” can sound way more complicated than it actually is. Especially if you’re thinking about sushi—we don’t need that kind of pressure in our weekday cooking routine! That’s why I’m obsessed with translating something truly fantastic using basic pantry items: **tuna kimbap**. Seriously, this is the ultimate level-up for your lunch game. We call it *Chamchi Kimbap* in Korea, and what you’re getting here is rich, savory flavor wrapped up tight. If you’ve been looking for a fantastic quick Korean lunch idea that comes together in about 15 minutes—total—this is it. Forget intimidation; this is probably the best beginner Korean cooking project you could ever tackle. We’re taking simple canned tuna and turning it into something you’ll crave daily.
- Why This Easy Spicy Tuna Kimbap Recipe Works (Kitchen Slang Translation)
- Gathering Your Ingredients for Perfect Tuna Kimbap
- Step-by-Step: How to Make Tuna Kimbap Like a Pro
- Tips for Success When Making Tuna Kimbap
- Serving Suggestions for Your Homemade Gimbap
- Storage and Make Ahead Korean Snacks Information
- Frequently Asked Questions About Tuna Kimbap
- Understanding the Nutrition of Tuna Kimbap
- Share Your Homemade Tuna Kimbap Creations
Why This Easy Spicy Tuna Kimbap Recipe Works (Kitchen Slang Translation)
When I translate a recipe for you, I’m cutting out the fluff chefs use to sound fancy. With tuna kimbap, the ‘secret’ isn’t complicated; it’s about maximizing flavor with minimal effort. We’re focusing on speed and pantry access, which is what really matters when you need dinner fast. You can even whip up a dipping sauce from our guide on easy dumpling sauce to go alongside this!
- It’s genuinely a 15-minute meal if you have your rice ready to go. Zero cooking means zero stress!
- We’re ditching fancy ingredients for that incredible umami punch using canned tuna, which is the core of this Chamchi Kimbap guide.
- The filling comes together faster than deciding what to watch on TV.
Quick Korean Lunch Ideas Ready in 15 Minutes
This roll is a powerhouse for grabbing and going. If you ever need quick Korean lunch ideas that kids (and adults!) will actually eat, this is your hero. Pack it while still slightly warm, or let it cool for the absolute best picnic food recipes experience.
Mastering the Spicy Tuna Filling Recipe
This is where the flavor hits. We aren’t just using mayo; we are building a proper spicy tuna filling recipe. The Sriracha gives you that customizable kick. Mix that drained tuna, the bright green onions, and the creamy Japanese mayo until it’s fully cohesive—it should look like thick, glorious tuna salad. That’s your ticket to amazing tuna kimbap.
Gathering Your Ingredients for Perfect Tuna Kimbap
Okay, listen up. To nail this tuna kimbap roll, you can’t just toss things in haphazardly. Because we’re aiming for that perfect, tight roll that doesn’t fall apart when you slice it—remember, this is an Easy Kimbap recipe, not rocket science—we need to be precise with our components. Gather everything up before you even touch the rice. I’ve broken it down into three simple groups: the rice base, the spicy filling, and what you need for final assembly.
For the rice, you’ll need 2 cups of cooked short-grain rice. That’s key! We season it simply with 1 teaspoon of sesame oil, 1 teaspoon of sesame seeds, and 1 teaspoon of salt. Mix that gently; we don’t want smashed rice! If you’re interested in other rice projects, I’ve got a whole breakdown on Japanese milk bread tangzhong recipe to check out when you’re ready for something challenging.
Now for the star, the filling: Grab one can (that’s about 5.3 oz) of tuna packed in oil—make sure you drain it really well! You’ll mix that with 2 tablespoons of creamy Japanese mayonnaise, 1 tablespoon of Sriracha for that heat we love, and 2 tablespoons of finely chopped green onion for a little bite.
For assembly, you need 4 sheets of roasted seaweed—that’s nori or gim. If you have them, grab 4 perilla leaves; they add such an amazing background flavor. Finally, you need a little extra sesame oil for brushing the outside and topping with sesame seeds.
Ingredient Notes and Substitutions for Your Tuna Kimbap
If you’re deep-diving into a Chamchi Kimbap guide, you need to know about two things: the mayo and the green leaf. First, the mayonnaise. If you can find Japanese mayonnaise, like Kewpie, please use it! It’s richer and tangier and makes the spicy tuna filling recipe sing. If you can’t find it, regular mayo is fine, but you might want to add a tiny splash of rice vinegar to the mix to cut the richness.
Second, those perilla leaves. If you’ve never used them, they taste kind of like mint crossed with basil—they are amazing. But if you can’t track them down, don’t stress one bit! Just skip them. Or, my quick fix for color and texture? Quickly blanch a few spinach leaves, blot them bone-dry, and lay those down on the nori instead. It gives you a beautiful base for rolling your homemade Gimbap without changing the core flavor profile too much.
Step-by-Step: How to Make Tuna Kimbap Like a Pro
This is where your pantry staples transform! Making great tuna kimbap isn’t about brute force; it’s about layering ingredients correctly. I want you to ditch the feeling that you need a specialized mat or years of practice. Honestly, once you nail the seasoning and the wrapping, you’ve basically cracked the whole system. I broke down the official steps so you can focus purely on technique. Think of this as your official entry into the world of accessible Homemade Gimbap. And hey, if you need some baking inspiration later, don’t forget to check out my recipe for easy peanut butter cookies!
Seasoning the Rice for Authentic Tuna Kimbap Flavor
First things first: the rice seasoning. This step sets the stage for everything, so treat it gently. Take your cooked short-grain rice—and I mean *short-grain*, don’t argue with me on this!—and sprinkle over the tiny bit of sesame oil, the sesame seeds, and the salt. Now, here’s the trick: use a wide, flat paddle or a fork, and slice through the rice. Don’t mash it! You want to incorporate those flavors without crushing the grains into mush. We need that perfect sticky texture so it holds its shape later on.
The Secret to the Spicy Tuna Filling Recipe
This is my favorite part, hands down. When mixing your spicy tuna filling recipe, you want a consistency that’s almost too thick. That drained tuna needs to mingle happily with the mayo and Sriracha. I remember the first time I made this; I was too timid with the Sriracha, and it was just okay. Don’t be me! Add the tablespoon, mix it until there are absolutely no dry spots left, and taste it. It needs to feel rich, creamy, and have a noticeable kick. This tuna mix should hold its shape when you scoop it onto the rice; that’s how you know it won’t try to escape during the roll.
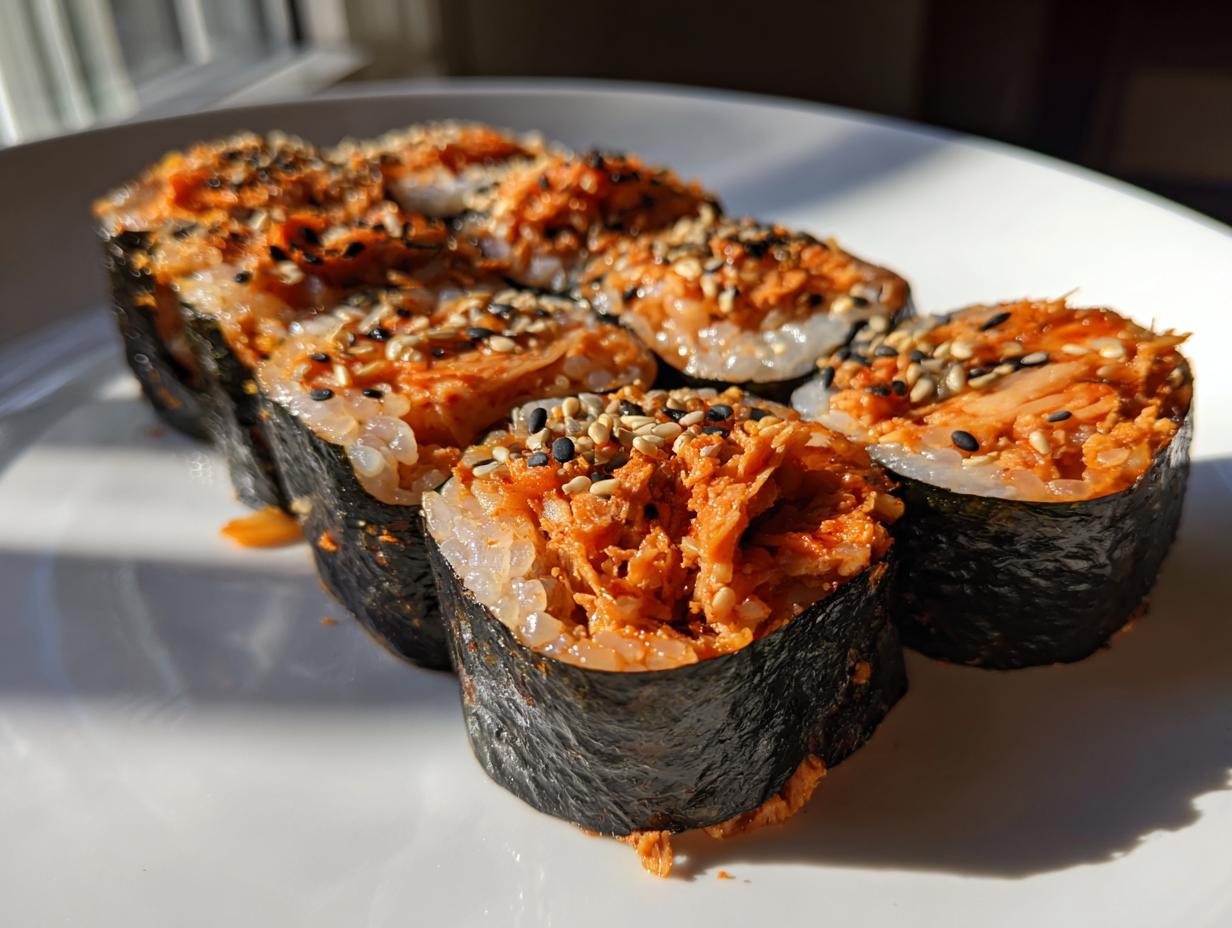
Rolling Technique: Achieving a Tight Seaweed Wrap
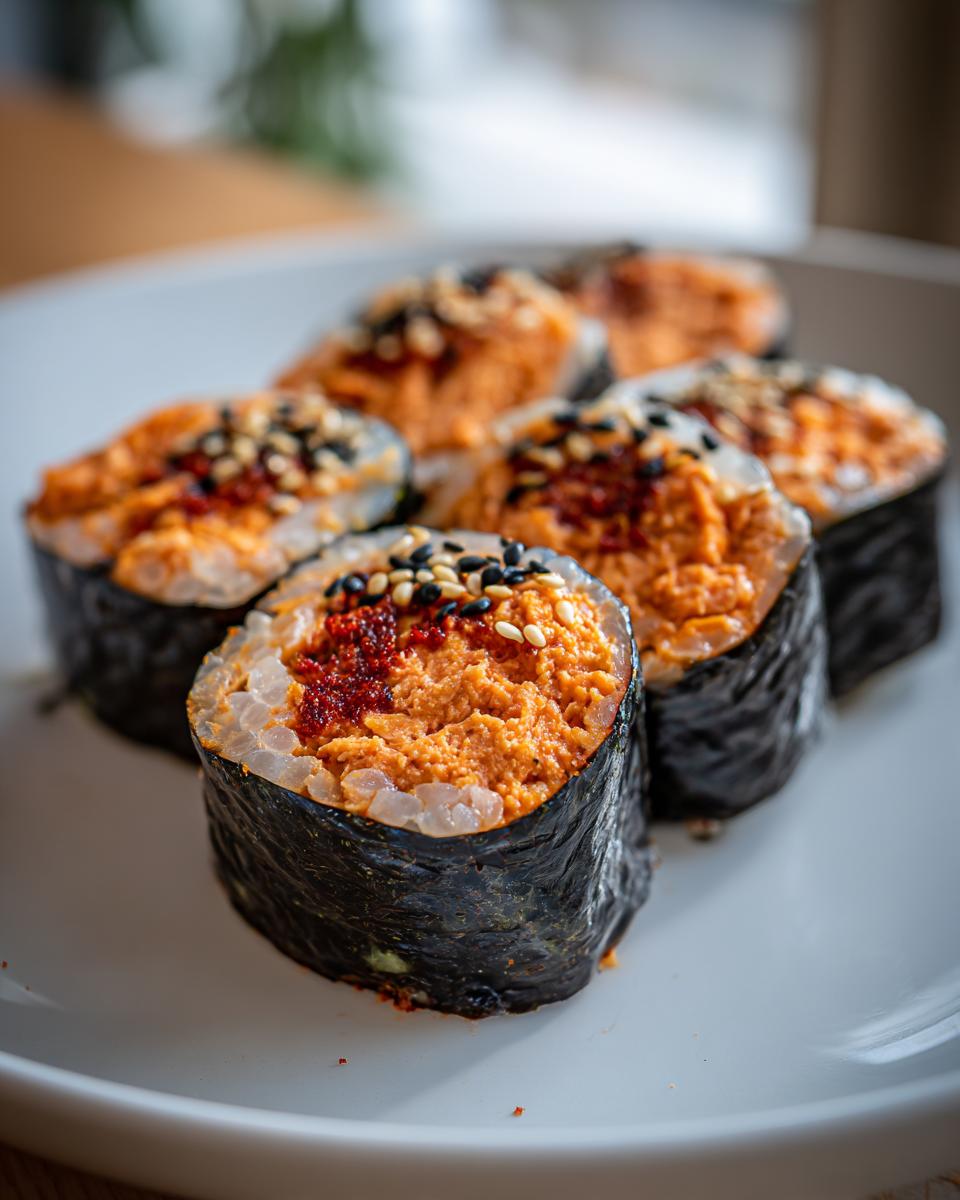
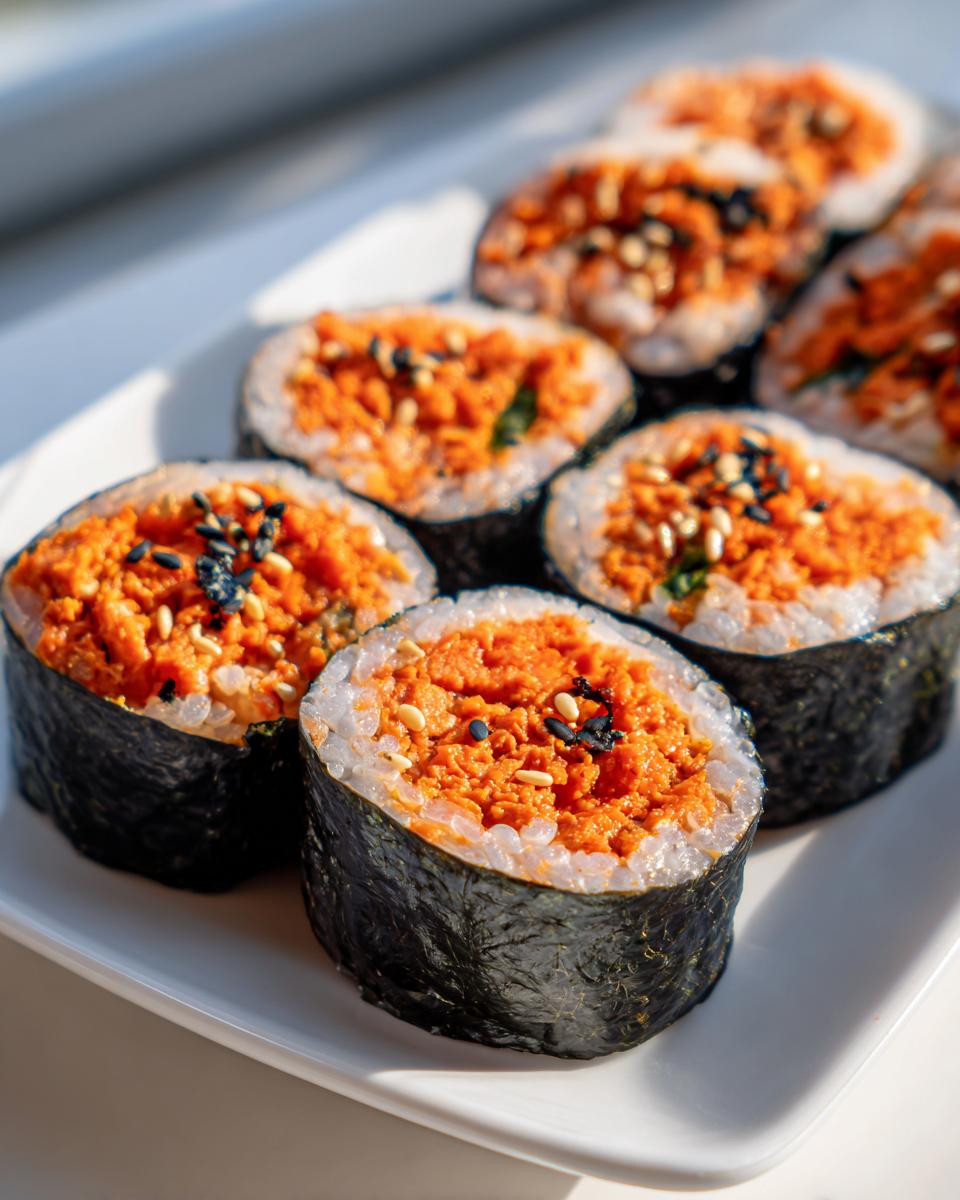
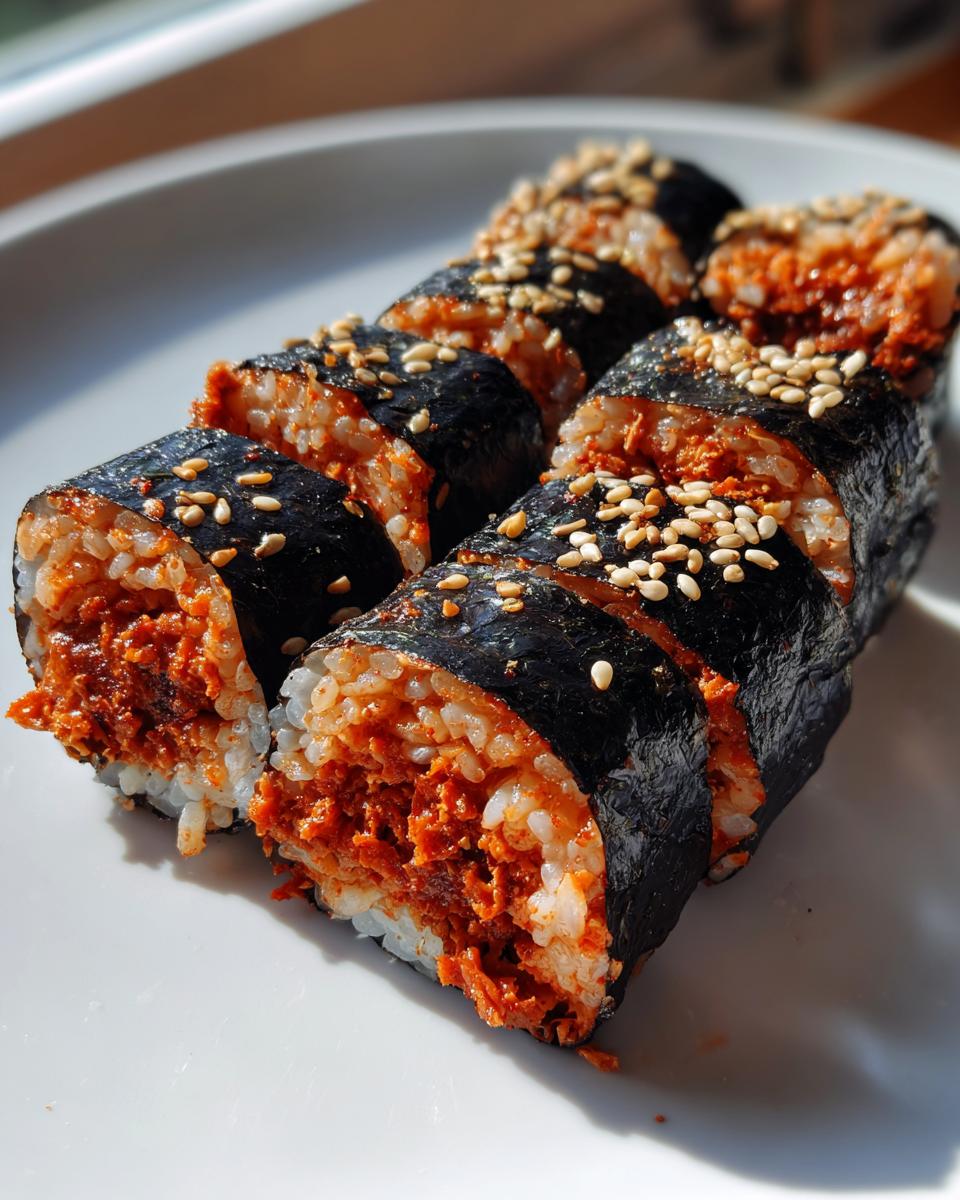
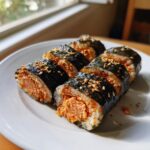
Time to roll! Lay your nori (shiny side down) on your bamboo mat. Spread maybe a half-cup of that seasoned rice evenly, but pay attention: leave that 1-inch border clear at the top edge. That dry strip is your glue! Lay the spicy tuna filling right in the middle, horizontally. Now, for the magic of the seaweed wrap technique: use your thumbs to lift the edge of the mat closest to you, tucking the edge of the nori over the filling. Pull gently but firmly toward you, compressing the roll tightly as you go. Roll completely over until you reach that clear rice-free edge, moisten that edge slightly with a finger dipped in water, and press to seal everything in. That compression is vital for slicing later!
Tips for Success When Making Tuna Kimbap
Okay, you’ve got the roll made, but now you’re staring at it wondering if it’s going to deflate the second you touch it. Don’t worry; that happens to everyone when they first try making tuna kimbap. Since this is your new favorite Easy Kimbap recipe, I want to give you the pro-level moves to make sure every roll is tight, clean, and ready for its close-up.
The biggest failure point, trust me, is rice management. If your rice is too wet, your roll will be slack. If you used too much rice, you won’t be able to seal it tightly, and it will just push out the ends when you press it. Think thin layers—you should barely cover the seaweed. When you season your rice, make sure you’re using that short-grain variety; anything long-grain like Basmati just won’t have the ‘glue’ needed to hold this structure together.
If your rolls are frequently falling apart, you probably aren’t getting enough compression during that initial tuck. You need to roll it snugly first, stop, press down hard on the mat along the length of the roll to compact it, and *then* finish the roll. This removes the air pockets we don’t want inside the finished product.

Now, let’s talk about slicing, because a messy slice ruins the whole presentation. You need a very sharp knife, and here’s the kicker: constantly dampen the blade with water between every single cut. Seriously, keep a small bowl of water next to your cutting board. If the knife drags the rice or seaweed, that roll is going to tear open. A damp, sharp knife slides right through, leaving you with those beautiful, clean circles you see everywhere. This technique is vital for making your homemade Gimbap look professional.
And if you’re feeling ambitious and want to test out a different flavor profile later, you can check out my tips on a simple easy chili recipe—though I promise, this spicy tuna filling is all you’ll need for now!
Serving Suggestions for Your Homemade Gimbap
So, you’ve made your beautiful tuna kimbap! They look so perfect lined up on the cutting board, and now you’re thinking, “What now?” Presentation matters, even when we are moving fast. This isn’t just food; it’s fuel, and we want it to look as good as it tastes, especially if you’re packing it up.
These rolls are absolutely fantastic candidates for bento box filler ideas. Since they are self-contained and don’t require heating, they travel like champions. I always use fun silicone cupcake liners to separate the kimbap pieces from any other sides in the lunch box—it keeps the sesame oil smell from mingling with, say, some fruit salad. It just looks neater, you know?
For picnics, these are unbeatable picnic food recipes; just wrap each piece tightly in plastic wrap or place them directly into a sturdy container. They hold their shape better than a mushy sandwich, and nobody ever complains about getting a beautiful seaweed roll scattered across the blanket!
As for dipping? You don’t *need* anything, because that spicy tuna filling is robust enough on its own, but a little dip never hurt anyone! I often just put out a simple dish of soy sauce mixed with a tiny drop of rice vinegar and maybe a sprinkle of toasted sesame seeds. If you want something creamier to go with the spice, you could honestly just whip up some extra mayonnaise, maybe thin it with a tiny bit of lemon juice. If you’re looking for other appetizer vibes, I have a killer guide on making homemade guacamole recipe game day dip that would be a fun side for a casual gathering, but for our Chamchi Kimbap, keep the dips light!
Storage and Make Ahead Korean Snacks Information
This is a really important part of mastering any fresh roll, whether you call it tuna kimbap or *Chamchi Kimbap*. Because we’re dealing with fresh rice and fillings that have mayo, we have to be smart about how long we keep these bad boys around. The absolute best way to eat them? Freshly made, within the hour, when the rice is still forgiving and the seaweed is crisp.
The good news is that the star of the show—that incredible spicy tuna filling recipe—is amazing for making ahead! This is where our make ahead Korean snacks philosophy comes into play. You can mix up that tuna, mayo, and Sriracha combo, seal it tight, and pop it in the fridge for up to a full day. Seriously, having that filling ready means you just need to cook the rice, season it, and start rolling. That cuts your active *tuna kimbap* time down even further the next day!
Now, when it comes to the fully assembled rolls, you have to be a little more careful. Once you roll the seaweed wrap, the moisture from the rice starts to affect the nori instantly. If you wrap the whole roll tightly in plastic wrap—like, really tightly, making sure you press the wrap against the roll itself—you can safely store it in the fridge for about 12 hours. I wouldn’t push it past one day, though. After that, the rice gets hard because it’s cold, and the seaweed gets chewy. It’s still edible, but it loses that lovely texture that makes our Easy Kimbap recipe so good.
If you are doing a big batch for meal prep, I highly recommend only prepping the filling and the rice separately. Layer the rice and filling onto the nori when you’re ready to eat, then roll it immediately. It takes five minutes and guarantees the best texture for your homemade Gimbap every single time. For more ideas on planning ahead, swing by my guide on make ahead Korean snacks!
Frequently Asked Questions About Tuna Kimbap
I get the same questions every time my friends first try making this tuna kimbap, and honestly, they are all great questions! It’s good to know the ‘why’ behind the ingredients, especially when starting out with new Korean food recipes. Let’s clear up some of the common roadblocks so your Chamchi Kimbap guide journey is smooth sailing.
Is Tuna Kimbap the same as sushi?
This is what trips everyone up! No, they are definitely not the same, even though they look related. The biggest difference is the rice. For sushi, the rice gets seasoned heavily with rice vinegar and sugar to give it that signature tang. Our tuna kimbap rice—that perfectly seasoned base for your tuna rice roll tutorial—just gets salt, sesame oil, and sesame seeds. It’s savory, nutty, and relies on the fillings for its main profile, not the vinegar punch. That’s a huge difference between Korean and Japanese traditions right there!
Can I add more vegetables to my spicy tuna filling recipe?
Absolutely you can—that’s the beauty of Homemade Gimbap! The filling is incredibly forgiving. If you want more texture mixed right in with the tuna, go for it. Finely shredded, lightly sautéed carrots work really well, and you definitely want to include some pickled radish if you have it on hand; that crunch is addictive. But here’s the translation from the line cook: whatever veggies you add, they *must* be dry. If you throw in watery things like fresh cucumber slices directly into the tuna mix, it will make your filling soupy. Watery fillings ruin the seaweed wrap technique every time, so blot everything dry first!
What is the best rice for this Chamchi Kimbap guide?
If you take away only one piece of critical advice from this whole Easy Kimbap recipe, let it be this: use short-grain rice. That’s the sticky rice used for traditional Korean and Japanese dishes. Long-grain rice (like Basmati or Jasmine) just doesn’t have the right starch profile. It won’t stick together properly when it cools, which means when you slice your beautiful roll, it will immediately start to crumble apart. Short-grain rice is essential because it has that natural stickiness needed to hold the structure for a perfect tuna kimbap roll.
If you want to explore making other savory things that pair well with this, you should look at my notes on garlic parmesan mashed potatoes for a totally different kind of comfort food!
Understanding the Nutrition of Tuna Kimbap
Now, I’m not going to pretend that this tuna kimbap is the same as eating a plain salad—we’ve got mayo, we’ve got oil-packed tuna, and we’ve got rice, which is delicious energy! But honestly, when you look at what’s inside compared to some overly processed grab-and-go meals, this is a nutritional winner. Since this recipe relies on pantry staples and simple fillings, you have a ton of control over what goes in, which is fantastic for anyone watching macros.
I ran the numbers based on the exact recipe I gave you above, using standard canned tuna measurements and average Japanese mayo. But remember, this is kitchen math, so these are my best estimates, not a lab analysis! If you use low-fat mayo or tuna packed in water, those numbers change immediately. Think of this as a baseline for your perfect high-protein overnight oats counterpart!
The big takeaway here is the protein. That canned tuna, even when mixed with mayo, packs a solid punch, making this a genuinely satisfying meal, not just a snack. If you’re looking for big flavor with a decent calorie count for a quick meal, this is it.
- Serving Size: 1 roll section (Approx. 1/4 of a full sheet roll)
- Calories: 280
- Protein: 14g (Hello, tuna!)
- Fat: 10g (Mostly healthy fats from the tuna oil and sesame)
- Carbohydrates: 35g
I always advise people, especially when making Homemade Gimbap, to prioritize fresh veggies if you are worried about carbs, because those don’t add much to the count but bulk up the meal beautifully. It’s all about balance, right?
Share Your Homemade Tuna Kimbap Creations
Alright, now I need to see your beautiful work! Once you’ve mastered the seaweed wrap technique and you’ve got your spicy, creamy filling wrapped perfectly, you’ve earned bragging rights. Don’t keep that deliciousness to yourself—we’re building a community here where everyone can feel confident cooking great Korean food recipes.
When you make this tuna kimbap, I sincerely hope you loved it as much as I do. If you followed the steps and found this to be the best Easy Kimbap recipe you’ve tried, please, do me a solid and leave a rating! Five stars helps other home cooks find this translation and feel brave enough to try making their own Chamchi Kimbap. Nothing makes me happier than knowing this recipe is showing up in lunch boxes across the country.
Snap a photo of your finished rolls—whether they’re destined for a picnic, a bento box, or just sitting on your kitchen counter looking perfect—and tag me online! Seeing your perfectly sliced tuna rice roll tutorial masterpieces is the fuel that keeps me translating more kitchen slang for you. I love seeing your takes on presentation, too. Don’t forget to tag me when you share your version of this amazing Korean staple.
If you ran into any snags, or if you have a genius twist on the spicy tuna filling recipe that you think everyone should know about, please head over to the contact page and let me know! Happy rolling, everyone!
PrintEasy Spicy Tuna Kimbap (Chamchi Kimbap)
Make quick, flavorful Korean seaweed rice rolls at home using pantry staples. This recipe focuses on a spicy tuna filling and is perfect for lunch boxes or picnics.
- Prep Time: 15 min
- Cook Time: 0 min
- Total Time: 15 min
- Yield: 4 servings 1x
- Category: Main Dish
- Method: Rolling
- Cuisine: Korean
- Diet: Vegetarian
Ingredients
- 2 cups cooked short-grain rice
- 1 teaspoon sesame oil (for rice)
- 1 teaspoon sesame seeds (for rice)
- 1 teaspoon salt (for rice)
- 1 can (5.3 oz) canned tuna in oil, drained
- 2 tablespoons Japanese mayonnaise (Kewpie or regular)
- 1 tablespoon Sriracha sauce (adjust for spice level)
- 2 tablespoons green onion, finely chopped
- 4 sheets roasted seaweed (nori or gim)
- 4 perilla leaves, washed and dried (optional)
- 1 teaspoon sesame oil (for brushing rolls)
- 1 teaspoon sesame seeds (for topping)
Instructions
- Prepare the seasoned rice: In a bowl, combine the cooked short-grain rice with 1 teaspoon sesame oil, 1 teaspoon sesame seeds, and 1 teaspoon salt. Mix gently until combined. Let it cool slightly.
- Make the spicy tuna filling: In a separate bowl, combine the drained canned tuna, Japanese mayonnaise, Sriracha sauce, and chopped green onion. Mix well until you have a cohesive filling.
- Prepare the seaweed sheets: Lay one sheet of nori, shiny side down, on a bamboo rolling mat. If using perilla leaves, place one leaf on top of the nori.
- Spread the rice: Take about half a cup of the seasoned rice and spread it evenly over the seaweed, leaving about a 1-inch border clear at the top edge.
- Add the filling: Place a line of the spicy tuna mixture horizontally across the center of the rice.
- Roll the kimbap: Starting from the edge closest to you, tightly roll the mat forward, pressing gently to compact the ingredients. Moisten the clear edge of the nori with a little water to seal the roll closed.
- Finish the roll: Brush the outside of the finished roll lightly with the remaining 1 teaspoon of sesame oil and sprinkle with sesame seeds.
- Slice and serve: Using a sharp, damp knife, cut the roll into bite-sized pieces. Serve immediately or pack for a quick Korean lunch idea.
Notes
- If you do not have perilla leaves, you can skip them or substitute with a thin layer of blanched spinach for color.
- For an easier roll, use slightly less rice; too much rice makes rolling difficult.
- You can prepare the tuna filling ahead of time and store it in the refrigerator for up to one day.
Nutrition
- Serving Size: 1 roll section
- Calories: 280
- Sugar: 2
- Sodium: 450
- Fat: 10
- Saturated Fat: 2
- Unsaturated Fat: 8
- Trans Fat: 0
- Carbohydrates: 35
- Fiber: 1
- Protein: 14
- Cholesterol: 30