
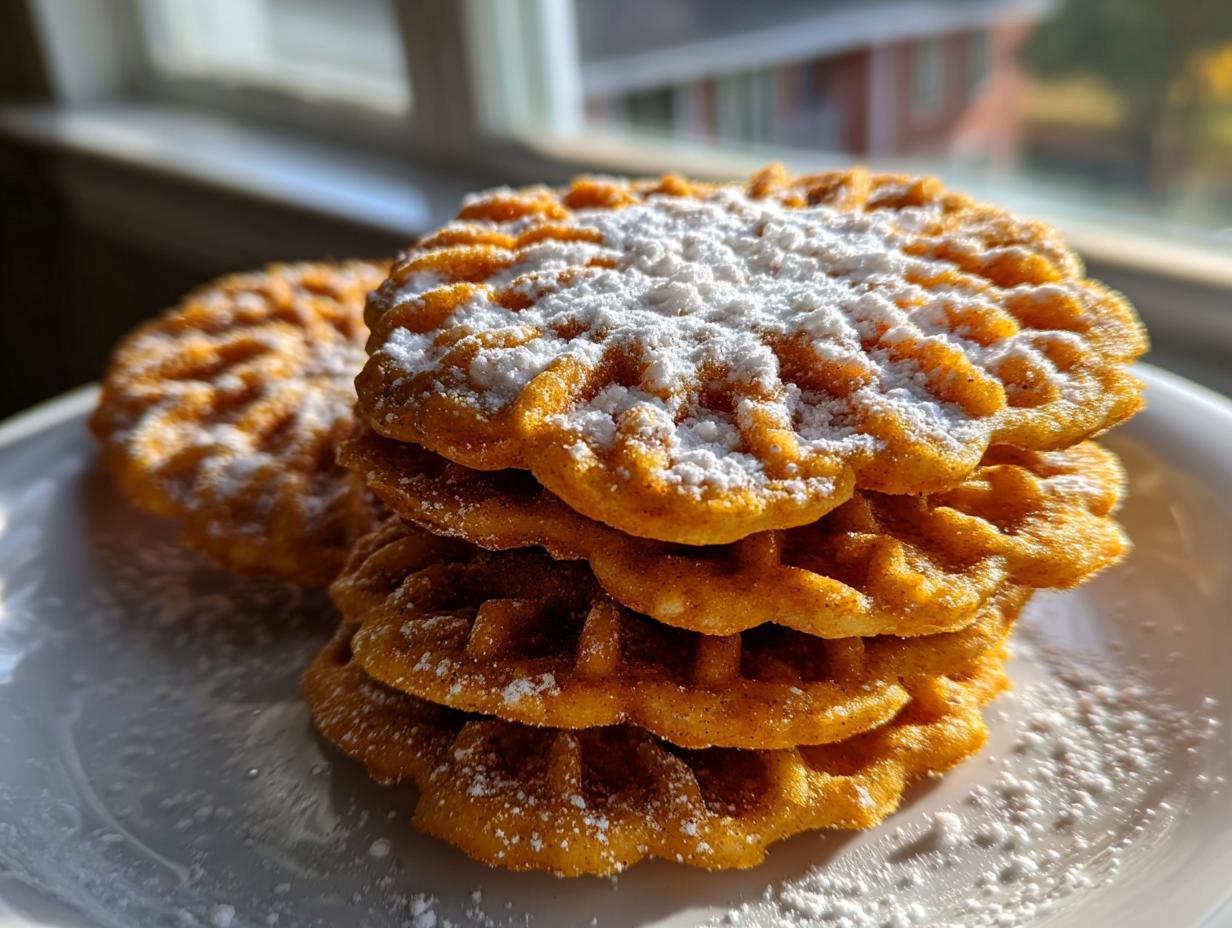
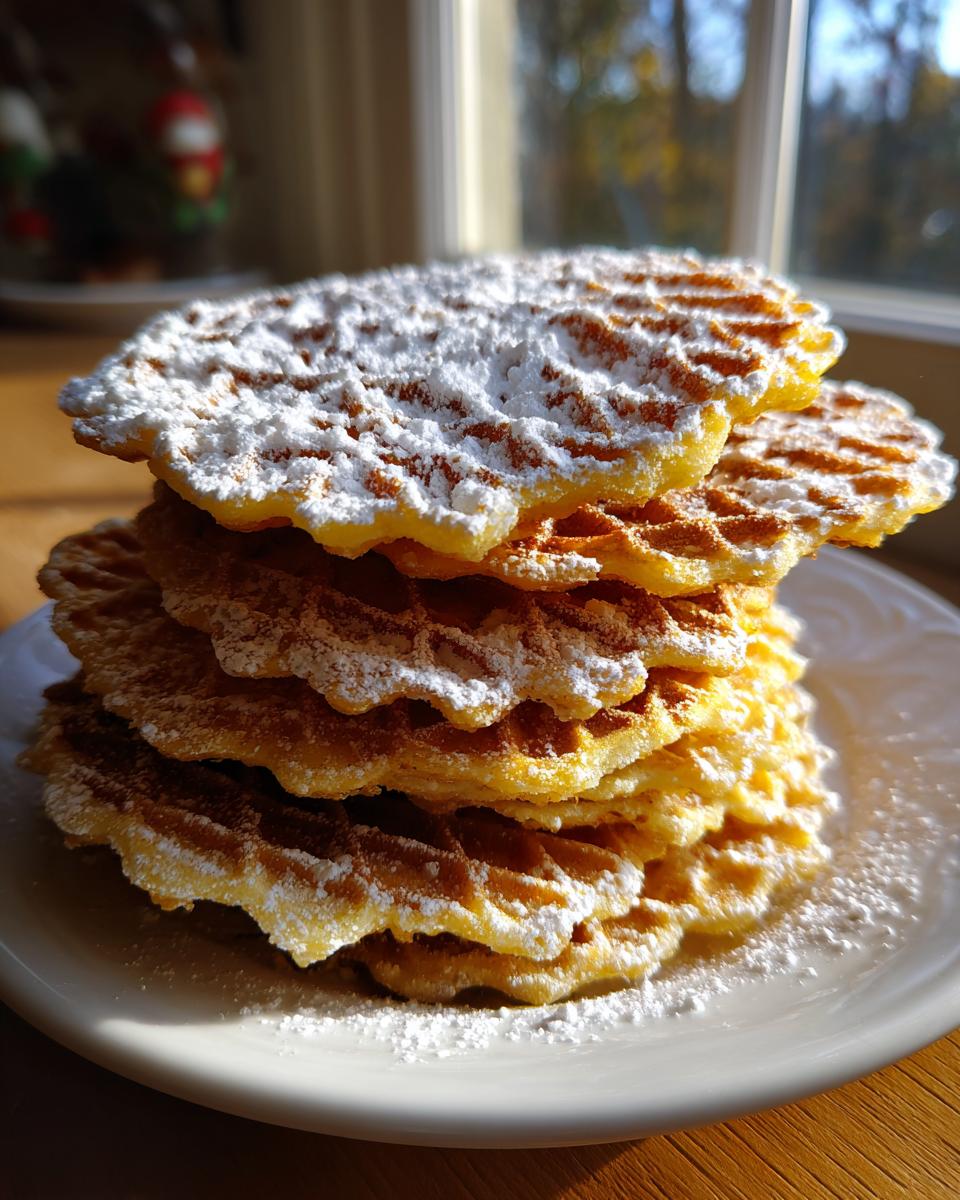
If you’ve ever stood by a tray of these beautiful, delicate, patterned cookies, you know the feeling. They snap when you break them, they taste like nostalgia and butter, and they smell faintly of anise or vanilla—it’s the language of true pizzelle cookies. For years, I thought these treats were locked behind a secret handshake only my old-school relatives knew. Turns out, they aren’t complicated at all! I learned the real language of these Crispy Waffle Cookies—the rhythm, the timing, the small tricks—working in a loud bistro kitchen after absorbing the secrets from my family’s Italian baking traditions. I’m Zoe Thompson, and here at Kitchen Slang, my job is to translate that insider knowledge for you. Forget intimidating recipes; this is my foolproof translation for making Authentic Italian Baking accessible right on your countertop.
- Why This Classic Vanilla and Anise pizzelle cookies Recipe Works
- Gathering Your Ingredients for pizzelle cookies
- Traditional pizzelle maker recipe Instructions
- Making pizzelle cookies for the Holidays
- Equipment Needed for this Italian Cookie Recipe
- Storage and Reheating pizzelle cookies
- Troubleshooting Common pizzelle Texture Issues
- Frequently Asked Questions About pizzelle cookies
- Serving Suggestions for Your pizzelle cookies
Why This Classic Vanilla and Anise pizzelle cookies Recipe Works
So many recipes promise the world, but they fall flat when you bite into a soft, almost cakey imitation. That’s not what we’re after here. This recipe nails the essential texture we’re looking for—those Delicate Thin Cookies that shatter perfectly. The magic really is simple: a buttery base combined with the classic vanilla and anise extracts ensures you get that true taste of Authentic Italian Baking. We’re keeping the ingredient list short so the quality of the mix really shines through. For better crispness, I always check out other tested methods, like the ones shared over at this baker’s site, just to double-check my heat settings. It’s all about hitting that sweet spot for perfect Crispy Waffle Cookies.
The Secret to Perfect pizzelle Texture Tips
Look, you can’t fake the crunch here. The number one rule is that you absolutely must have a properly heated iron. If you throw batter onto cool iron plates, you’re steaming the cookies, not baking them. Heat them up, let them sit for ten minutes after they reach temperature, and *then* start. Trust me on this. Also, timing is everything. Pull them off the iron the second they look golden, even if they seem a little floppy. They crisp up entirely on the cooling rack. That quick transfer from hot iron to cool wire is the chef’s shortcut for true snap.
Gathering Your Ingredients for pizzelle cookies
Okay, let’s get down to business. The beauty of making these traditional pizzelle cookies is that they use pantry staples. There’s no weird specialty flour or complicated paste you have to make—it’s straight-up baking honesty! Because we aren’t using much leavening, every single ingredient is playing a major role in the taste and structure. I want you to look at this list and see quality. Seriously, use real butter; margarine just won’t give you that buttery patterned cookie flavor we need. This simple list is what separates a truly authentic batch from something store-bought.
- 1 cup all-purpose flour
- 1 teaspoon baking powder
- 1/4 teaspoon salt
- 3 large eggs
- 3/4 cup granulated sugar
- 1/2 cup unsalted butter, melted and cooled
- 1 teaspoon vanilla extract
- 1/2 teaspoon anise extract
Ingredient Notes and pizzelle Variations
Now for the fun part: customizing! While this recipe is built around the classic sweet vanilla base, the anise extract gives you that distinctive, almost mysterious, aromatic kick. If you’re allergic or just not a fan of licorice notes, you absolutely can swap it out. My sister prefers almond extract, which gives you a sweeter, softer profile for your Anise Flavored Cookies. If you’re feeling bold, try using a tiny bit of both vanilla and almond! Don’t be afraid to experiment with these Pizzelle Variations; just remember that when you change the liquids, you might need to slightly adjust the batter consistency later.
Traditional pizzelle maker recipe Instructions
Alright, this is where we move from chatting about ingredients to actually making magic happen. Don’t let the iron intimidate you—it’s just a fancy stamp press, really! The process is super fast, which is why I call it a Quick Italian Dessert; once your iron is hot, you’re cooking these in under a minute each. Remember everything we talked about regarding that snap? It all comes down to this execution phase. If you’re looking for some really neat ideas on coloring these beauties, check out this traditional color tutorial, though we’re sticking to classic vanilla and anise today.
Mixing the pizzelle cookies Batter
First things first: we separate our dry and wet elements. In one bowl, whisk together the flour, baking powder, and salt until they look happy and uniform. In your bigger bowl, you need to really whip up those eggs and sugar until they lighten up beautifully—this takes a solid two minutes. Now, incorporate the slightly warm melted butter and your flavor extracts into that egg mixture. When you finally combine them, add that dry mix in slow batches. Stop mixing the second you see everything just come together. I’m serious about this: do not overmix! Overmixing develops gluten, and gluten means chewy, not crispy. We want a smooth batter, but we don’t want to work it hard.
Cooking and Shaping your Delicate Thin Cookies
This is the moment of truth: heating up that iron! You must preheat it fully—let it sit hot for a good ten minutes before you even think about adding batter. Heat is crispness insurance. Spoon just one teaspoon right in the center of the iron and close it quickly. You’ll hear that sizzle and see steam escaping. When the steam slows way down, usually in less than a minute, it’s done. Use a thin spatula to lift it off gently. It will be soft, kind of like a flexible crepe. You MUST work fast here. If you want those classic rolled shapes or cannoli over cones, wrap it around your tool immediately, or use a flat surface area like the one discussed at this baking inspiration spot. If you’re just dusting with sugar, lay it flat on the rack. They turn rock-hard crispy in about twenty seconds flat.
Making pizzelle cookies for the Holidays
You know, if you ask anyone who grew up in an Italian household, pizzelle cookies weren’t just a treat; they were a countdown clock to Christmas Eve. This recipe immediately takes me back to December because making them was a whole-day event. It’s the quintessential Christmas Cookie Tradition in our family.
I remember spending every holiday afternoon right next to my Nonna, the iron heating up and filling the entire house with that warm, slightly bitter-sweet smell of anise. We would stack the cooling, lacy rounds high on platters, waiting for the final batch before we decorated the tree. They’re light enough that you can genuinely eat a dozen without feeling guilty! If you want a fun twist on the classic look, check out some great ideas for variety over at this lovely recipe resource.
Honestly, these buttery patterned cookies feel more special than anything you’d buy pre-made. They scream ‘homemade love’ when you gift them!
Equipment Needed for this Italian Cookie Recipe
When people ask me, “Zoe, what’s the secret behind a really classic pizzelle cookies batch?”—besides the batter, of course—the answer is always the equipment. You just can’t fake the signature look or the melt-in-your-mouth texture of these Buttery Patterned Cookies without one specific tool. If you’re hunting for an Easy Homemade Pizzelle that looks just like the Italian bakeries make, you’ve got to invest in the iron. It’s the non-negotiable part of this whole process.
I’ve tried flattening them with a skillet and rolling pin (don’t bother, it doesn’t work!), so just trust me on this translation: you need the right press. Here’s the short list of what you need to make this Traditional Pizzelle Maker Recipe work perfectly.
- Pizzelle Maker (Electric or Stovetop): This is the main piece. Get one that gets hot enough!
- Two Mixing Bowls: One for your dry stuff and one big one for making the batter smooth.
- Whisk or Hand Mixer: For whipping the eggs and sugar until they are pale and fluffy.
- Melted Butter Bowl: Make sure the butter is fully melted and then give it time to cool down before adding it to the eggs.
- Thin Spatula or Offset Spatula: Essential for carefully lifting the hot, soft cookies off the iron without breaking them.
- Wire Cooling Racks: You need airflow underneath so they crisp up correctly. If they don’t cool fast, they stay soft!
Storage and Reheating pizzelle cookies
These beautiful, intricate pizzelle cookies are wonderful because they last a surprisingly long time, provided you store them right. The biggest enemy of the pizzelle? Humidity. If air gets to them, even the crispiest cookie turns soggy faster than you can say, ‘Oops, I ate too many!’
The absolute best way to keep these Buttery Patterned Cookies crisp is in an airtight container at room temperature. Seriously, seal them up tight as soon as they are completely cool—and I mean stone cold, maybe give them an hour just to be safe. I always keep a little trick up my sleeve, too: toss a few food-safe silica gel packets (the ones that come in packaging for things like jerky or vitamins—run them under hot water and dry them thoroughly first!) into the container. They act like tiny moisture sponges. They’ll soak up any stray humidity trying to ruin our wonderful texture.
Now, what happens if you open the container a week later and find they’ve gone a little limp? Don’t freak out! This is a common issue with any Delicate Thin Cookie. Rescue is easy. Just pop them back onto your warm pizzelle iron for about 10 to 15 seconds each. You don’t need any batter, just let the residual heat shock the moisture right out of them. Pull them right back off and let them cool again on the wire rack for a minute. Voila! Crackly crispness restored. You’ll never waste a batch that got soft on you.
Troubleshooting Common pizzelle Texture Issues
Listen, even when you’ve got the best recipe—and this one is solid, trust me—baking is never 100% predictable, especially when you’re dealing with precise heat and timing. That’s why we have a little kitchen slang for when things go sideways! If your beautiful pizzelle cookies aren’t behaving, don’t despair or throw the whole batch out. We can usually correct it with a quick translation of technique.
The two biggest complaints I hear are always about sticking or softness. If your first cookie sticks to the iron, it means your heat isn’t quite right, or maybe you skipped that light greasing step. If your maker is super modern, it might not need grease, but if you see drag, use a pastry brush dipped in a *tiny* bit of vegetable oil and wipe the plates while they are hot. Don’t pour oil, just brush lightly!
If you’re finding your Anise Flavored Cookies turn out soft and bendy instead of having that perfect snap, it’s almost always a cooling issue. You need those cookies off the iron and onto the wire rack immediately. If they are still soft after cooling completely, don’t worry, that’s what the note in the recipe chart alluded to. Think of them as “undercooked” in terms of moisture. You can throw them back on the iron for 15 seconds a piece—just long enough to drive the residual moisture out. I actually learned that trick from a chef years ago who used to “re-crisp” thin wafers for plating desserts. It totally works!
If you’re running into trouble and want to see how others fix their dough consistency, check out some visual cues on this baker’s site—sometimes seeing the slightly runny batter helps you realize if you over-floured.
Frequently Asked Questions About pizzelle cookies
I know what you’re thinking: “Okay, Zoe, this sounds great, but can I realistically pull this off?” Absolutely, you can! Most of the questions I get boil down to equipment substitutes or flavor swaps. This recipe is designed to be your go-to for Easy Homemade Pizzelle, but knowing the answers to these common hurdles makes the process totally stress-free.
What if I don’t own a pizzelle iron? Can I use a waffle maker?
This is the question I get the most! If you’re reading this and thinking of pulling out your fluffy Belgian waffle maker, hold up. You can’t really substitute it, my friend. Pizzelle are meant to be Delicate Thin Cookies, almost flat, and traditional waffle makers create deep pockets that steam the batter instead of pressing it thin and crisp. You really need a dedicated pizzelle iron—they come in electric and stovetop models. If you’re just starting out with Vanilla Pizzelle Instructions, look for a basic electric one; they usually have better temperature control than the older stovetop versions. It’s worth the investment if you want that true texture!
Can I skip the anise extract in the recipe? I really prefer pure vanilla.
Yes, you definitely can skip the anise! Our recipe is built around that traditional flavor profile, which is what makes ours stand out as an Italian Cookie Recipe, but you are the chef in your kitchen. If you skip it, you are left with a beautiful, buttery, vanilla-forward cookie. It’s still delicious! You can even amp up the vanilla extract to a full teaspoon and a half, or swap in almond extract for a different, slightly sweeter note. Just remember, without that anise, you lose that signature bold flavor that many people associate with Authentic Italian Baking, but the texture will be identical.
How long do these buttery patterned cookies stay crispy?
If you’ve managed to get them perfectly crisp—and I know you will—their staying power depends entirely on how you store them. If they are bone dry when they come off the rack, they can last about a week in a truly airtight container at room temperature. If you feel like you might be making these weeks ahead for a party, I actually highly recommend wrapping them tightly in plastic wrap first, then putting them in a container. Think of it like wrapping them in a moisture shield! For more tips on maximum freshness, I often look at baking guides, like the wonderful one over here.
Can I freeze the pizzelle batter until I’m ready to bake?
That’s a smart question for folks who want to manage their time better! Unfortunately, no, I don’t recommend freezing the batter for these pizzelle cookies. Because the batter is quite thin—more like a thick cream than a paste—freezing it is messy, and thawing it evenly is almost impossible without messing up the liquid ratios when it melts. It’s much better to mix it fresh. Since the prep time is so short, it’s best to treat this as a Quick Italian Dessert you make right before you want to serve it.
What are the best ways to use up leftover pizzelles that might have gone soft?
Don’t toss them! If they soften up on you, re-crisping them on the iron for 15 seconds is the solution—we talked about that earlier. But if you want to use them up in a different way, crushing them makes an *amazing* topping! Crush them up—big chunks are best—and sprinkle them over vanilla ice cream or use them as a crunchy base layer for a trifle. They are also fantastic when lightly crushed and mixed with powdered sugar to dust cannoli shells or cream puffs, adding texture to any leftover filling.
Serving Suggestions for Your pizzelle cookies
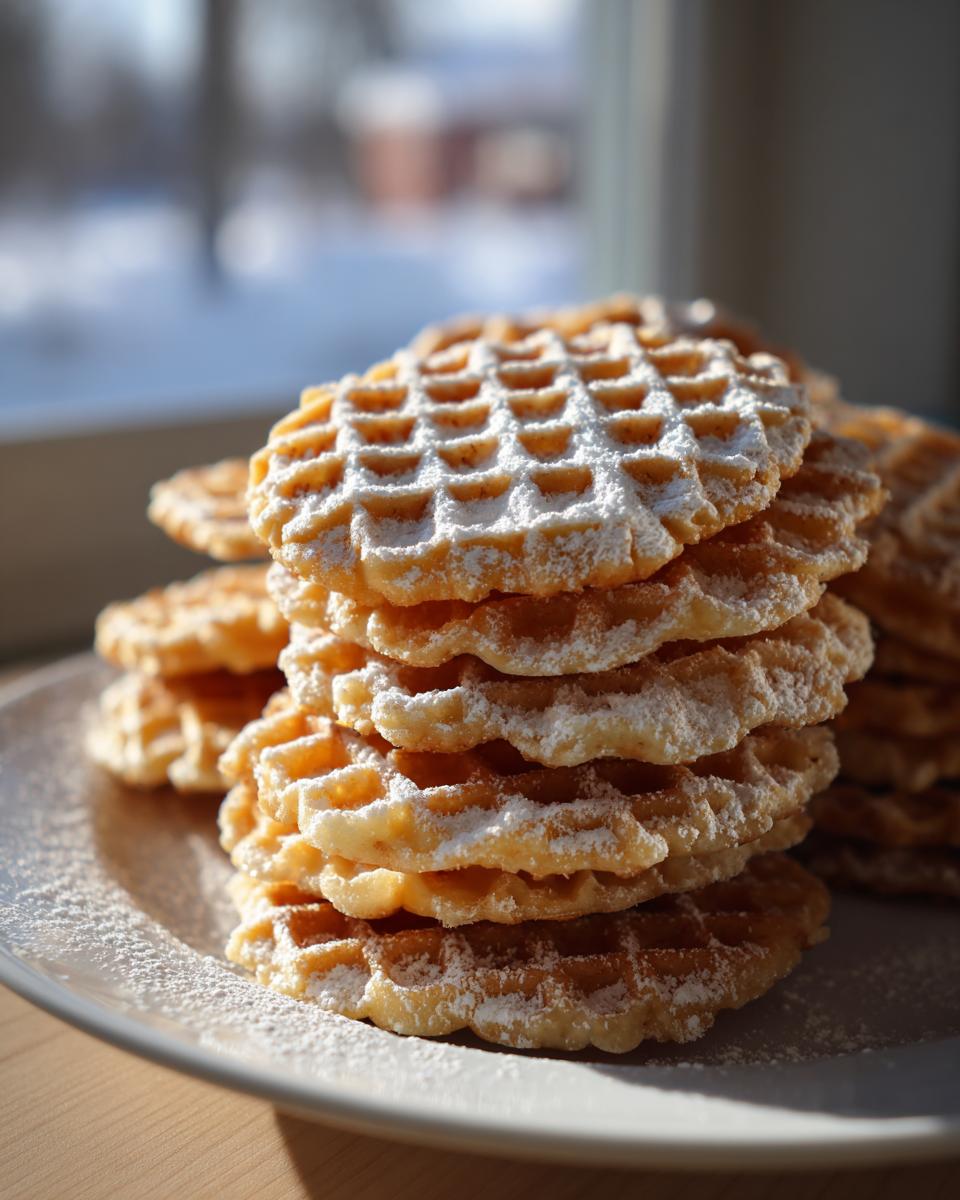
Part of the fun of making these beautiful pizzelle cookies is deciding what to do with them once they are crisp! While just dusting them lightly with powdered sugar and eating them with a hot cup of coffee makes for a perfect, simple moment, you can definitely get creative.
Remember how I mentioned shaping them while they are hot? That’s where you turn these from a simple cookie into an elegant presentation. You can roll the warm ones into little cones to fill with sweetened ricotta—instant, homemade cannoli shells! Or, you can gently drape them over a rolling pin to make curved taco shapes for holding mousse or custard. For a simple treat, try dipping half of the completely cooled cookie into melted dark chocolate, letting it set on parchment paper, just like they suggest for other flavors over at this baking inspiration site. They just look so festive!
PrintClassic Vanilla and Anise Pizzelle Cookies

Make traditional Italian pizzelle cookies. These are thin, crispy waffle cookies flavored with vanilla and anise. This recipe gives you the texture and flavor of authentic Italian baking.
- Prep Time: 15 min
- Cook Time: 20 min
- Total Time: 35 min
- Yield: About 3 dozen 1x
- Category: Dessert
- Method: Pressing/Ironing
- Cuisine: Italian
- Diet: Vegetarian
Ingredients
- 1 cup all-purpose flour
- 1 teaspoon baking powder
- 1/4 teaspoon salt
- 3 large eggs
- 3/4 cup granulated sugar
- 1/2 cup unsalted butter, melted and cooled
- 1 teaspoon vanilla extract
- 1/2 teaspoon anise extract
Instructions
- Combine flour, baking powder, and salt in a medium bowl. Whisk these dry ingredients together.
- In a separate large bowl, whisk the eggs and sugar until the mixture is pale and slightly thickened. This takes about two minutes.
- Whisk the cooled melted butter, vanilla extract, and anise extract into the egg mixture.
- Gradually add the dry ingredients to the wet ingredients, mixing until you form a smooth batter. Do not overmix.
- Heat your pizzelle maker according to the manufacturer’s directions. This is key for crispness.
- Lightly grease the iron if your model requires it.
- Drop one teaspoon of batter onto the center of the hot iron. Close the lid quickly.
- Cook for 30 to 60 seconds, or until the steam stops escaping and the cookie is golden brown. The cooking time depends on your iron’s heat.
- Carefully remove the pizzelle using a thin spatula. It will be soft initially.
- Immediately place the hot pizzelle onto a wire cooling rack. If you want to shape them (into cannoli or cones), do so while they are still hot and pliable.
- Let the cookies cool completely on the rack. They will crisp up as they cool.
- Repeat with the remaining batter. Dust with powdered sugar before serving, if desired.
Notes
- For the best crispy texture, work quickly when removing the cookies from the iron. They set fast.
- If your pizzelle cookies come out soft, return them to the warm iron for 10-15 seconds to dry them out further.
- You can substitute almond extract for anise extract, or use both for a mixed flavor profile.
- This is a traditional pizzelle maker recipe; you must have a pizzelle iron to make these delicate thin cookies.
Nutrition
- Serving Size: 1 cookie
- Calories: 85
- Sugar: 5
- Sodium: 35
- Fat: 4
- Saturated Fat: 2
- Unsaturated Fat: 2
- Trans Fat: 0
- Carbohydrates: 11
- Fiber: 0
- Protein: 1
- Cholesterol: 30