
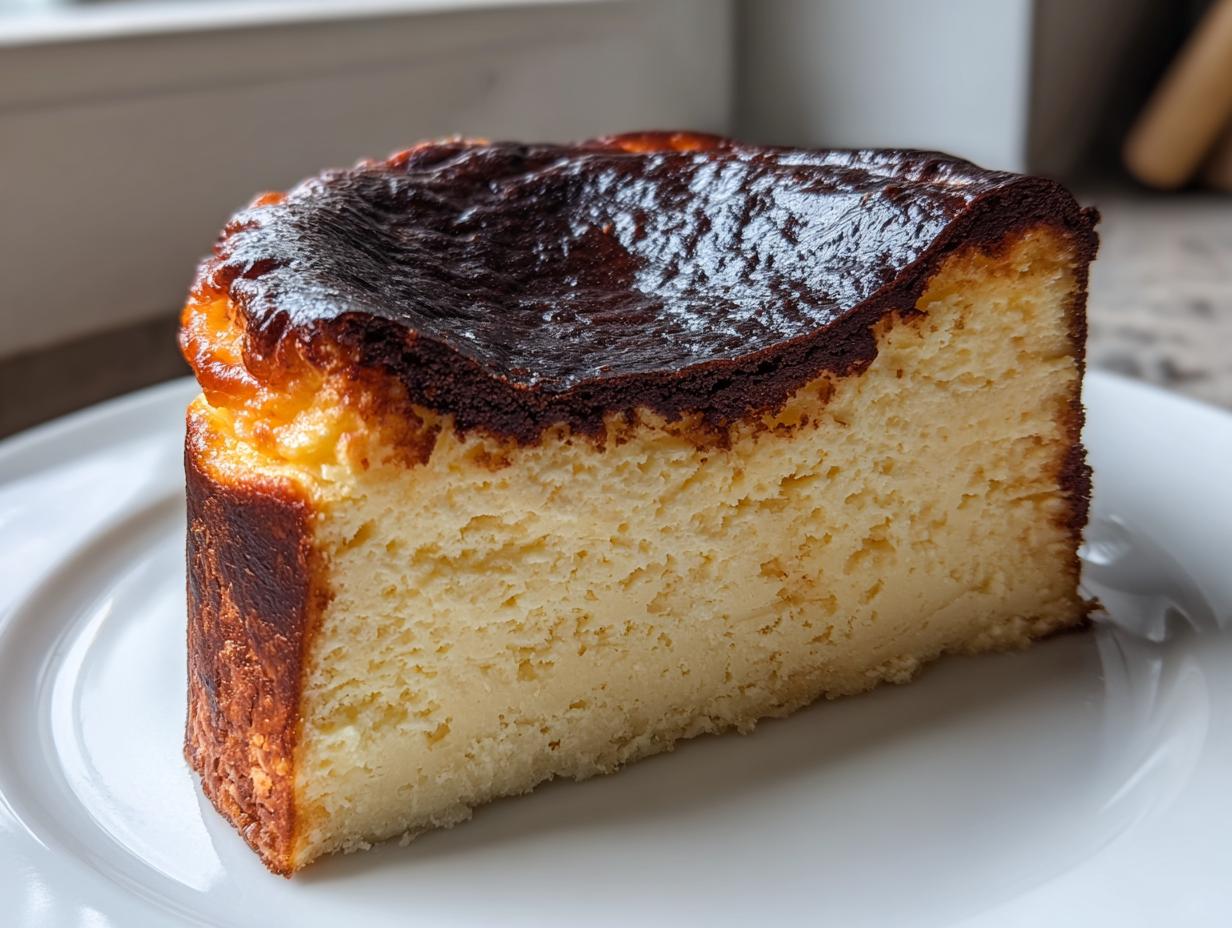
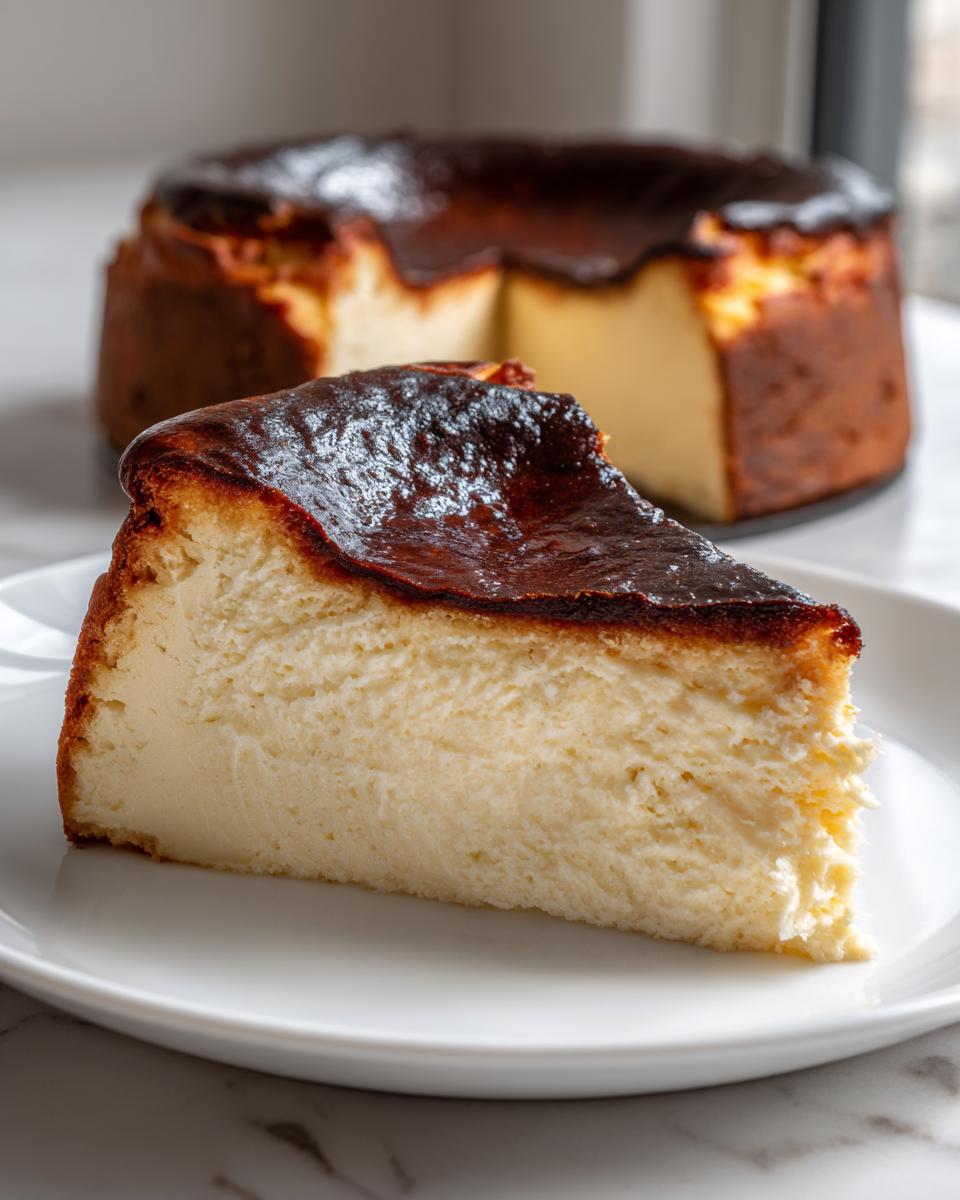
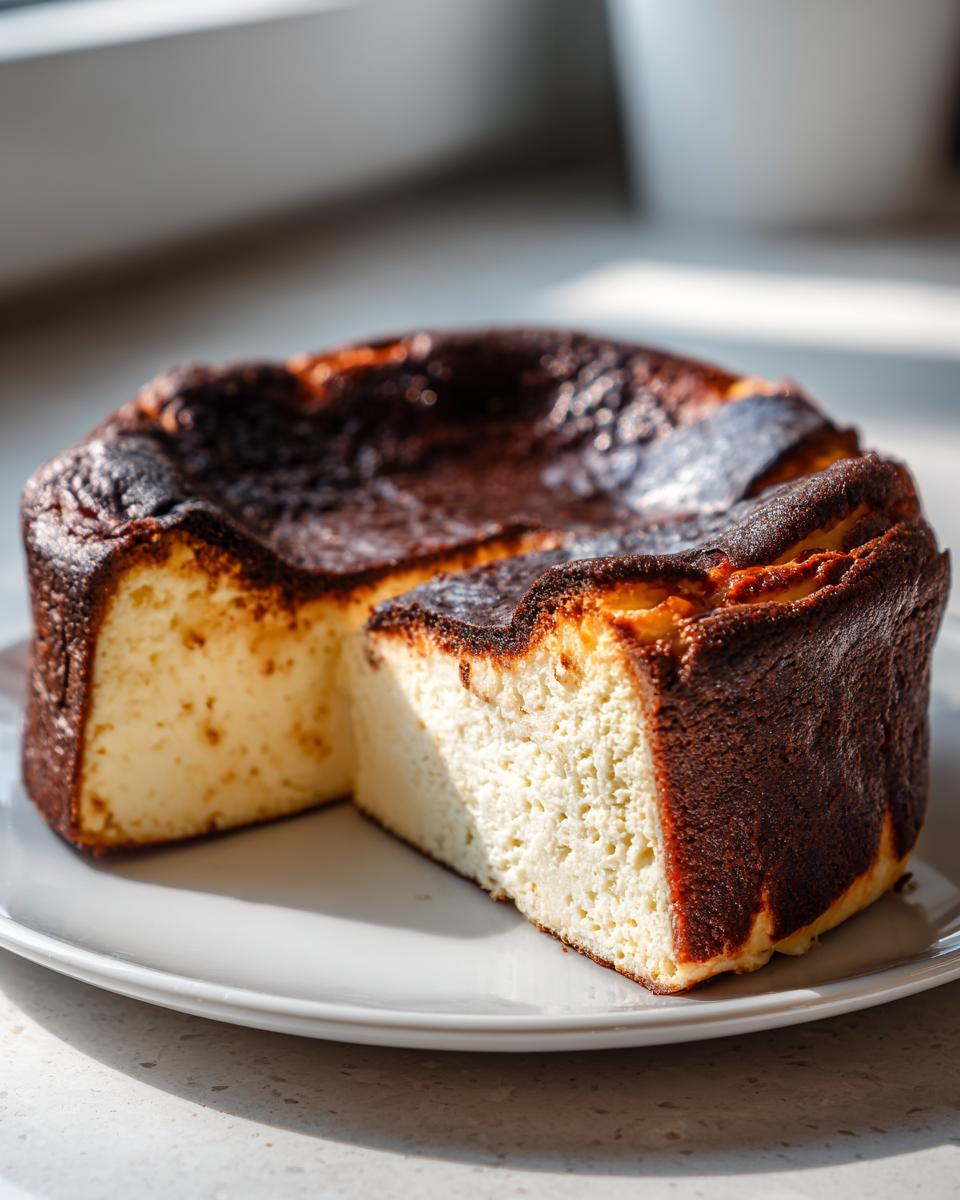
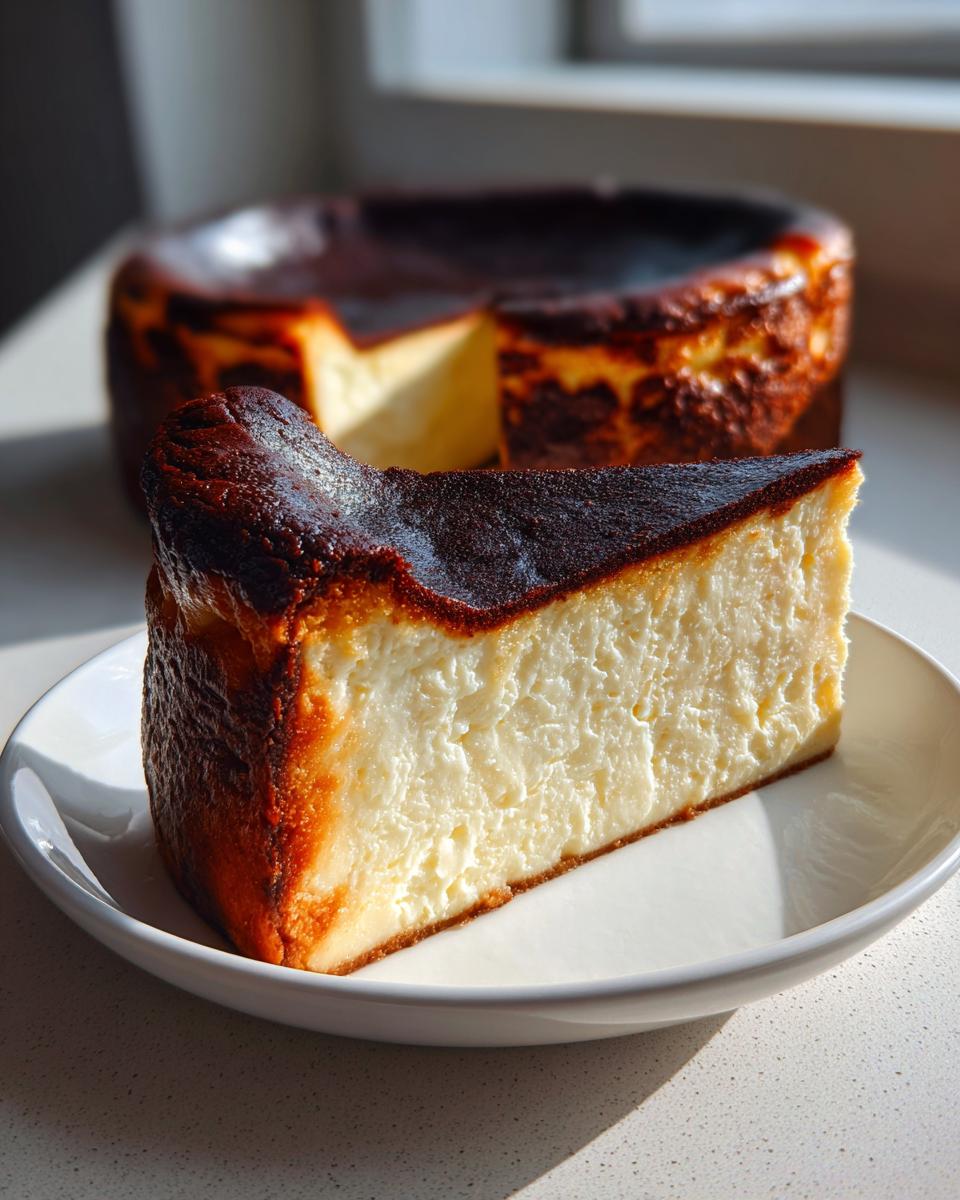
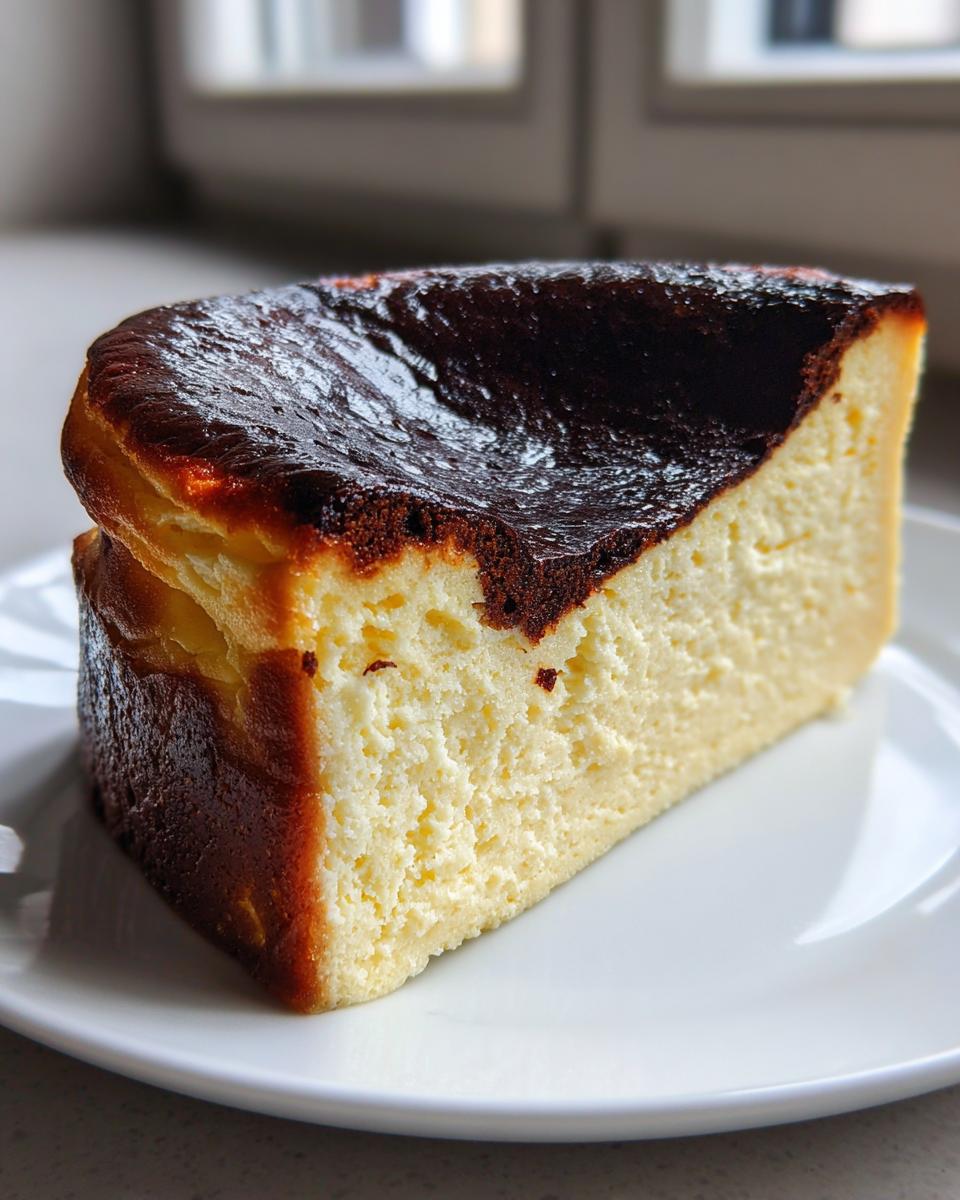
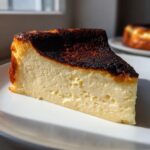
That top—that dark, dramatically caramelized, almost blistered crown—is what draws everyone to the Basque cheesecake. It looks like it requires a culinary degree and a whole lot of drama, right? Wrong. Forget everything you think you know about fussy cheesecakes with their temperamental water baths; that’s kitchen slang we’re officially banning here at Kitchen Slang. I’m going to translate this Spanish stunner for you. We’re making what I call ‘The Ultimate Easy & Creamy Burnt Basque Cheesecake (No Water Bath Required).’ It’s rustic, it’s incredibly decadent, and honestly, it’s way easier than making box brownies. Trust me, once you see that batter go into the hot oven, you’ll realize this has been the best-kept secret in gourmet desserts.
- Why This Basque Cheesecake Recipe is Your New Go-To
- Gathering Your Ingredients for the Basque Cheesecake
- Step-by-Step Instructions for the Ultimate Basque Cheesecake
- Tips for Success with Your Crustless Cheesecake
- Variations: Making a Loaf Pan Cheesecake Recipe
- Serving Suggestions for Your Basque Cheesecake
- Storage and Reheating Instructions for the Basque Cheesecake
- Frequently Asked Questions About Basque Cheesecake
- Share Your Homemade Basque Cheesecake Experience
Why This Basque Cheesecake Recipe is Your New Go-To
Honestly, this recipe is my answer when someone asks for an impressive dessert that doesn’t require me to spend all day hovering over the oven. It cuts out all the fussy, professional noise. This is kitchen slang for foolproof satisfaction!
- It delivers that legendary creamy cheesecake texture you see in every beautiful photo.
- We skip the dreaded water bath entirely. Yep, this is a true no water bath cheesecake method.
- The result is consistently stunning, hitting that beautiful dark, caramelized cheesecake top every time.
Achieving the Perfect Creamy Cheesecake Interior
The secret to that melt-in-your-mouth texture is twofold: room-temperature ingredients and super high heat. When you bake it hot and fast, the outside sets quickly, but the inside stays beautifully underdone—almost like a custard that just sets up right as it cools. That quick blast of heat is what prevents that dense, grainy texture you sometimes get in standard baked cheesecakes. It’s magic, but it’s *easy* magic.
The Secret to a Rustic Caramelized Cheesecake Top
That dark top isn’t a mistake, it’s the whole point of the Burnt Basque Cheesecake! This is where all the deep, slightly bitter, caramelized notes develop, which perfectly balances the sweet, rich body of the dessert. Don’t panic when it looks dark; that’s the signal the heat is doing exactly what it should be doing to deliver an authentic Spanish Dessert Recipes experience.
Gathering Your Ingredients for the Basque Cheesecake
Okay, let’s talk ingredients because this is where we nail the ‘easy’ part of this Easy Cheesecake Recipe. The good news about this San Sebastian Cheesecake is that it doesn’t ask for much time or too many fussy components. We want high-quality basics, though. Since this is a crustless cheesecake, every single component has to pull its weight in terms of texture and flavor.
You’ll need 900 grams of full-fat cream cheese, which is the large brick size—don’t even think about low-fat, that’s not letting us achieve that rich and velvety dessert feel! Then, 1 1/2 cups of sugar, six large eggs, two full cups of heavy cream, a teaspoon of vanilla extract, a pinch of salt, and just a small amount of flour. Simple, right? Check out my other delicious dessert recipes for other simple bakes while you gather these.
Ingredient Notes and Substitutions for Your Basque Cheesecake Recipe
Let’s get specific, because ingredient quality builds trust in a recipe. First, the cream cheese absolutely must be full-fat and fully softened—I leave mine out for at least four hours. Those lumps are the enemy of a smooth batter! Second, the flour. I use 1/4 cup of all-purpose flour, but if you want that slightly softer, cloud-like interior, swap it for the same amount of cornstarch. This is a truly minimal ingredient cheesecake, so do not skip the full-fat cream cheese; that fat content is crucial for structure!
Step-by-Step Instructions for the Ultimate Basque Cheesecake
This is where the magic—the high-heat, rustic baking—happens! We’re moving fast and trusting the process, just like you would on a busy dinner service line. Don’t worry about the batter looking thin; that’s exactly what we want for an amazing, crustless cheesecake.
Preparing the Pan and Oven for the Basque Cheesecake
First things first, crank that oven heat! We need it roaring hot at 400°F (200°C). For the pan—use an 8- or 9-inch springform—line it with two sheets of parchment paper, overlapping them. You want that paper sticking way up over the sides, maybe 3 or 4 inches high. This paper crinkles up, and that’s what gives our rustic baked cheesecake its signature messy, beautiful look when it bakes up tall. Don’t trim it; let it fly!
Mixing the Creamy Cheesecake Batter Correctly
Get that softened cream cheese into your big bowl, and beat it until it is silky smooth—zero lumps are allowed, so scrape those bowl sides down constantly. Next, add your sugar and just mix until it’s barely combined. Now, the eggs! Add them one by one, and keep that mixer on LOW speed. We want to incorporate them gently; whipping air into this batter is the enemy of that creamy cheesecake texture we’re after. Finish by folding in the cream, vanilla, salt, and that little bit of flour on the absolute lowest setting.
Baking and Cooling Your Caramelized Cheesecake Top
Pour that thin batter right into your prepared pan and slide it into that hot oven. You’re looking for 50 to 60 minutes of baking time. When it’s ready, the edges will look set, but the absolute center should have a serious wobble—like soft gelatin. Take it out! Let it cool completely on the counter for about two hours; it will deflate, don’t freak out! Then, wrap it loosely and chill it overnight. Seriously, overnight chilling is mandatory for that mind-blowing texture, after which you can check out more delicious dessert recipes.
Tips for Success with Your Crustless Cheesecake
Want to make sure this is the best cheesecake ever you’ve ever tackled? It comes down to two simple non-negotiables, trust me. First, temperature management. If your cream cheese or eggs are cold, you *will* end up with lumps, and that ruins the smooth interior we’re aiming for. Get that cream cheese out early enough—several hours, if you have to—until it’s soft enough to press your finger into easily. That’s the only way to get that pure, lush batter.
Second, commitment to the heat! This isn’t the time to wimp out on the oven temperature. The high heat is what creates that beautiful, contrasting texture between the dark, savory crust and the silky center. Don’t be tempted to peek early or lower the heat just because it’s browning fast. That caramelization needs that high heat to develop its flavor properly. Bake it hard, cool it slow, and you’re set. For more baking wisdom, check out my other delicious dessert recipes.
Variations: Making a Loaf Pan Cheesecake Recipe
You know how sometimes you just don’t want to pull out the big springform pan? Or maybe you’re baking for a smaller crowd? That’s exactly why I love adapting this recipe into a loaf pan cheesecake recipe. It keeps all the rustic charm, but it’s perfect for slicing onto a tiny plate!
The good news is, the batter quantity we made works beautifully in a standard 9×5 inch loaf pan, provided you line it well with parchment paper—make sure those sides are high, just like the springform version! The only real change you need to make is in the oven time. Because the loaf pan is deeper, the heat takes a little longer to penetrate the center. You’ll want to check it about 10 to 15 minutes sooner than the round pan instructions suggest. Keep an eye on that wobble, and for more easy ideas, check out my delicious dessert recipes.
Serving Suggestions for Your Basque Cheesecake
Now that you’ve mastered this incredible, almost effortless dessert, let’s talk about presentation! Remember how I stressed serving this at room temperature? That’s when this decadent dessert truly shines, transforming into that silken texture that blows people away. For me, the best way to serve this is totally unadorned; the dramatic, dark top speaks for itself!
However, if you feel like dressing it up a little, keep it simple. A light dusting of powdered sugar over the plate edges provides a nice contrast, or you can serve it alongside fresh raspberries or some macerated strawberries for a bit of brightness. For another truly impressive dessert idea, try a tiny drizzle of good quality balsamic glaze. It sounds wild, but that acidic tang beautifully cuts through the richness of this gourmet cheesecake. Check out my other delicious dessert recipes for pairing ideas!
Storage and Reheating Instructions for the Basque Cheesecake
So you have leftovers of this incredible, rich and velvety dessert—lucky you! The chilling time is actually critical for achieving that final, dense texture we all obsess over. You absolutely must chill this cheesecake for a minimum of six hours, but honestly, overnight is best. Store it covered loosely in the fridge; it keeps beautifully for up to five days!
When you’re ready to serve the next day, don’t just cut it straight from the fridge. That’s when it’s too firm. Take it out onto the counter about an hour before you plan to slice it. Letting it come up to room temperature slightly brings back that creamy, luscious center. That one hour is the difference between a good slice and the best cheesecake ever!
Frequently Asked Questions About Basque Cheesecake
When you start baking something that looks as intense as this, questions pop up—and that’s totally normal! We’re translating this gourmet dessert so you aren’t second-guessing yourself halfway through. Here are the most common things people ask me about making this phenomenal Basque cheesecake at home.
Is the dark top on the Basque Cheesecake supposed to be burnt?
Yes, absolutely! This is the signature look of a true San Sebastian Cheesecake. That dark, almost black char isn’t a mistake; it’s crucial for providing that balancing, deep caramelization that makes the otherwise simple cake taste so complex and luxurious.
Can I use an electric mixer for the entire Basque Cheesecake Recipe?
You can start with it when you’re beating the cream cheese until it’s smooth! But once those eggs go in, switch to low speed. Even better? Use a whisk for the final additions of cream and flour. We want minimal air incorporated into this specific crustless cheesecake recipe to keep the center perfectly dense and creamy.
If you have any other cooking questions, feel free to look through my other delicious dessert recipes for more kitchen slang translations!
Share Your Homemade Basque Cheesecake Experience
Okay, now it’s your turn to join the conversation! Did this recipe demystify the world of ultra-creamy desserts for you?
I genuinely want to see what you come up with. Snap a picture of that dramatically burnt top and share it! Drop your rating below and tell me if this became your new go-to impressive dessert. Seeing your success is seriously the best part of translating all this kitchen slang.
PrintThe Ultimate Easy & Creamy Burnt Basque Cheesecake (No Water Bath Required)
This recipe gives you the rich, creamy interior and signature caramelized top of a true Burnt Basque Cheesecake without the fuss of a water bath. It is a simple, crustless dessert that impresses every time.
- Prep Time: 15 min
- Cook Time: 60 min
- Total Time: 7 hours 15 min
- Yield: 8 servings 1x
- Category: Dessert
- Method: Baking
- Cuisine: Spanish
- Diet: Vegetarian
Ingredients
- 900g full-fat cream cheese, softened to room temperature
- 1 1/2 cups granulated sugar
- 6 large eggs, room temperature
- 2 cups heavy cream
- 1 teaspoon vanilla extract
- 1/4 teaspoon salt
- 1/4 cup all-purpose flour (or use 1/4 cup cornstarch for a slightly softer texture)
Instructions
- Preheat your oven to 400°F (200°C). Take an 8-inch or 9-inch springform pan. Line the bottom and sides with two overlapping sheets of parchment paper, allowing the paper to extend several inches above the rim of the pan. This excess paper is key for the rustic look.
- In a large bowl, use an electric mixer to beat the softened cream cheese until it is completely smooth and there are no lumps. Scrape down the sides of the bowl often.
- Add the sugar to the cream cheese and beat until just combined and creamy. Do not overmix at this stage.
- Add the eggs one at a time, mixing on low speed after each addition until the yolk disappears into the batter.
- Pour in the heavy cream, vanilla extract, and salt. Mix on low speed until everything is just incorporated.
- Sift the flour over the batter and mix on the lowest speed until no streaks of flour remain. The batter will be thin; this is correct for a creamy cheesecake.
- Pour the batter into the prepared pan.
- Bake for 50 to 60 minutes. The top should be deeply caramelized, almost black in spots, and the edges should look set. The center will still have a significant wobble, like soft gelatin.
- Remove the cheesecake from the oven. Let it cool completely on a wire rack at room temperature for about 2 hours. The center will deflate as it cools.
- Once cool, cover the pan loosely with plastic wrap and chill in the refrigerator for at least 6 hours, or preferably overnight, for the best creamy texture.
- When ready to serve, carefully remove the parchment paper sides and slice. Serve at room temperature for the creamiest result.
Notes
- For a loaf pan cheesecake recipe, use a 9×5 inch loaf pan lined with parchment paper, reducing the baking time by about 10-15 minutes.
- If you prefer a denser texture, chill the cheesecake completely before serving. For a soufflé-like, rich and velvety dessert experience, serve it slightly warmer, about 30 minutes after removing it from the fridge.
- This crustless cheesecake relies on high heat for the signature burnt top; do not attempt to use a water bath, as it prevents the necessary caramelization.
Nutrition
- Serving Size: 1 slice
- Calories: 450
- Sugar: 35g
- Sodium: 250mg
- Fat: 35g
- Saturated Fat: 22g
- Unsaturated Fat: 13g
- Trans Fat: 0.5g
- Carbohydrates: 30g
- Fiber: 0g
- Protein: 8g
- Cholesterol: 180mg