
Look, we’ve all been there: shelling out way too much money at a restaurant just for six little shrimp that disappear in two bites. I get it. In my years working the line, I learned a serious kitchen slang term for that perfect, shatteringly crisp seafood coating that shops charge a premium for. Forget tricky batters that slide right off! I’m Zoe Thompson, and my whole deal here at Kitchen Slang is translating those pro secrets so you can nail them on your home countertop. We’re skipping the fuss but keeping the flavor; this Ultimate Crispy Coconut Shrimp recipe is fast, uses Panko for that epic crunch, and tastes way better than takeout. Seriously, you’ll be whipping these up for dinner tonight.
- Why This Crispy Coconut Shrimp Recipe Works Every Time
- Ingredients for Ultimate Coconut Shrimp and Sweet Chili Dipping Sauce
- How to Make Restaurant Style Coconut Shrimp (Frying Method)
- Alternative Cooking Methods for Easy Coconut Shrimp
- Tips for Perfect Crunchy Coconut Shrimp Every Time
- Serving Suggestions for Your Tropical Seafood Recipe
- Storing and Reheating Your Homemade Coconut Shrimp
- Frequently Asked Questions About Coconut Shrimp
- Nutritional Snapshot of This Coconut Shrimp Recipe
Why This Crispy Coconut Shrimp Recipe Works Every Time
If you’re chasing that incredible crunch you usually only get behind a restaurant pass, the secret isn’t just the coconut—it’s the architecture of the coating. This recipe is engineered for maximum crispiness, no matter which way you cook it. Back in the bistro, temperature control was everything. If your oil isn’t hot enough, you’re just soaking your shrimp in grease, and guaranteed, sogginess follows. That’s why we make such a huge deal about patting those shrimp bone-dry first.
Dry shrimp means the coating sticks like glue. Then, we use Panko breadcrumbs mixed with the coconut. Panko is just superior for that light, almost shatteringly crisp texture. It’s the difference between a good Coconut Shrimp Recipe and the kind people beg you to make again. If you’re baking or air frying, remember: that high heat is what toasts that coconut and Panko perfectly. If you want the best Crispy Coconut Shrimp, you have to respect the heat! If you’ve mastered crispy coatings on wings, you’ll ace this amazing air fryer chicken wings recipe, too—it’s all about those surface textures.
The Secret to Ultra-Crunchy Coconut Shrimp Coating
We use a simple three-step dredging process, standard issue back in the kitchen. The flour is the first hug, giving the egg something to cling to. The egg? That’s the glue. But here’s the part people skip sometimes: the final press into the Panko Crusted Shrimp mixture. Don’t just roll it gently. You need to press that breading firmly onto every inch of the shrimp. This compression fuses the layers together so when it hits the hot oil or the air fryer basket, it cooks into one solid, gorgeous crunch shell.
I also always toss the dry shrimp with a pinch of salt *before* flouring. Salt pulls out any hidden surface moisture and also seasons the shrimp deep beneath that crust. Trust me, bland shrimp hiding under great seasoning is a tragedy. You want flavor all the way through, from tail to tip!

Ingredients for Ultimate Coconut Shrimp and Sweet Chili Dipping Sauce
Okay, let’s talk haul. You need the right gear for this mission. Remember, we are making this ultra-crispy, so every ingredient plays a role in that texture game. This list is designed to be ready in under 15 minutes so you can get to the frying—or air frying, whatever floats your boat! You can find another great sauce recipe for dumplings here if you need more dipping inspo: easy dumpling sauce recipe.
For the Coconut Shrimp
Keep these simple and ready to go:
- 1 lb large shrimp, peeled and deveined (make sure they are totally naked and dry!)
- 1 cup all-purpose flour
- 2 large eggs, beaten until they look yellow and frothy
- 1 cup Panko breadcrumbs (This is key, don’t use regular crumbs!)
- 1 cup sweetened shredded coconut
- 1 teaspoon salt
- 1/2 teaspoon black pepper
- Vegetable oil, enough for about 1 inch deep in your skillet
For the Sweet Chili Dipping Sauce
This sauce is totally balanced, sweet but with a little kick. If you wanted a true copycat sauce, like that thick orange glaze you get at some big chain seafood places, you could swap the chili sauce for apricot preserves mixed with a little horseradish. But honestly, this version is faster!
- 1/2 cup sweet chili sauce
- 2 tablespoons rice vinegar
- 1 teaspoon lime juice
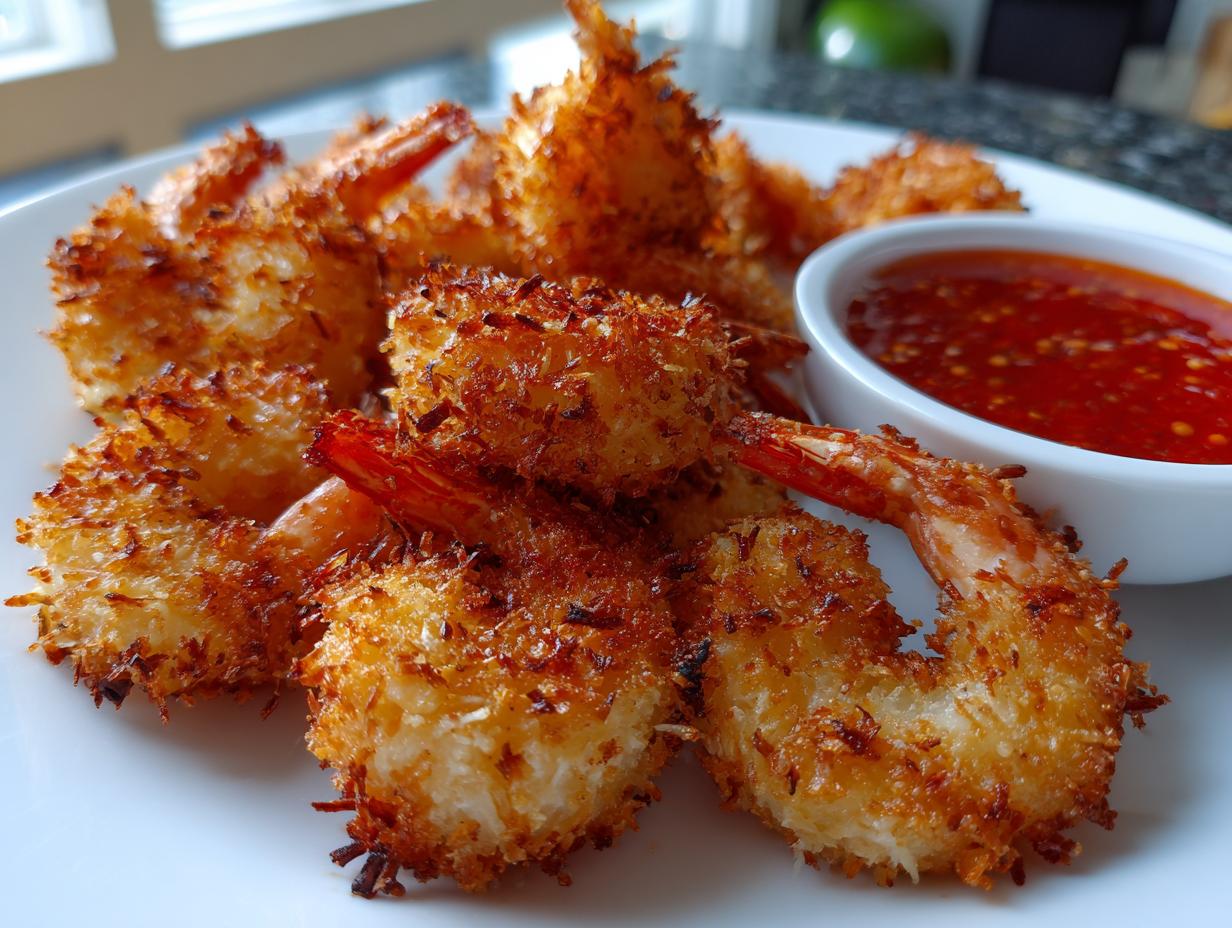
How to Make Restaurant Style Coconut Shrimp (Frying Method)
This is where the magic happens, and honestly, this is the method that gets you that ultra-crisp shell you crave. When I started out in that bistro kitchen, the line cooks would shout if we brought a batch of shrimp to the fryer that wasn’t perfectly dry. They were obsessed with temperature control, which I initially thought was overkill until I saw how fast a soggy mess can ruin a whole service. You need to treat your oil like it’s precious—it is!
Before you even touch the shrimp, mix up that dipping sauce and set it aside. Remember, this is all about assembly-line efficiency for the best coconut shrimp.
Setting Up the Dredging Stations
You need three stations ready to go, lined up in this exact order because your shrimp will only go through once. First, put your flour on a plate. Second, whisk the two eggs in a shallow bowl—make sure they’re nicely agitated. Third, and this is the crunchy part, combine your Panko breadcrumbs, the sweetened coconut flakes, salt, and pepper on the final plate. Mix that Panko blend really well so the coconut isn’t just clumped in one spot.
Now, take your peeled, deveined shrimp and pat them with paper towels until you think they are dry, and then pat them one more time. Seriously, they need to be bone dry. Take one shrimp, dip it in the flour, tap off the excess. Next, dunk it completely in the egg wash. Finally, press that wet shrimp *firmly* into the Panko-coconut mix. I mean press it! You want that crust layered on thick and tight. Place them on a clean tray and move fast to the next stage!
Frying the Coconut Shrimp to Golden Perfection
Get your vegetable oil heated up in a deep skillet—you need about an inch of depth. You absolutely must use a thermometer here; we are aiming for a solid 350°F (175°C). If you don’t have a thermometer, wait until a tiny sprinkle of the coating mixture bubbles immediately and vigorously, but doesn’t smoke. If you drop too many shrimp in at once, the temperature crashes, and you get that floppy, oily texture nobody wants. Work in small batches!
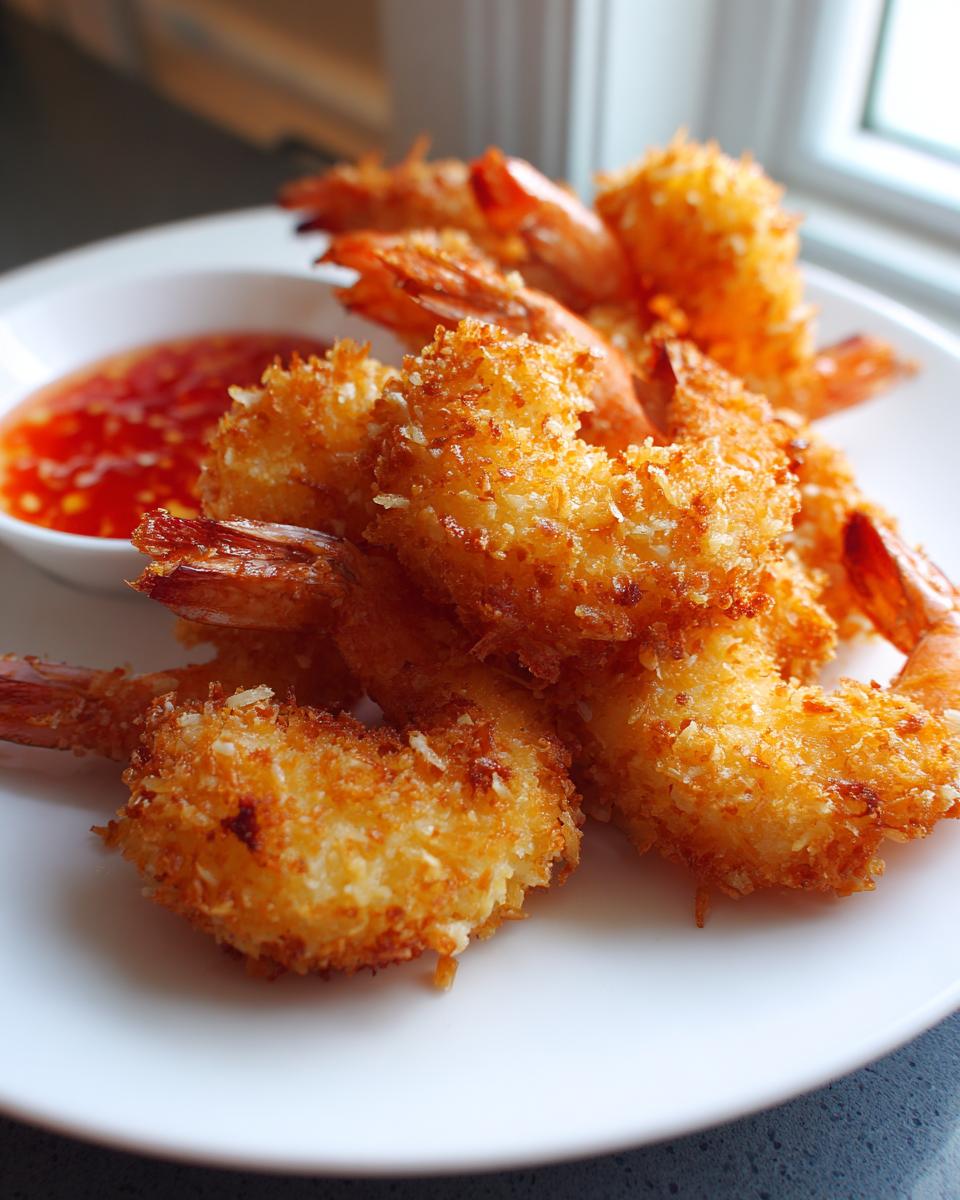
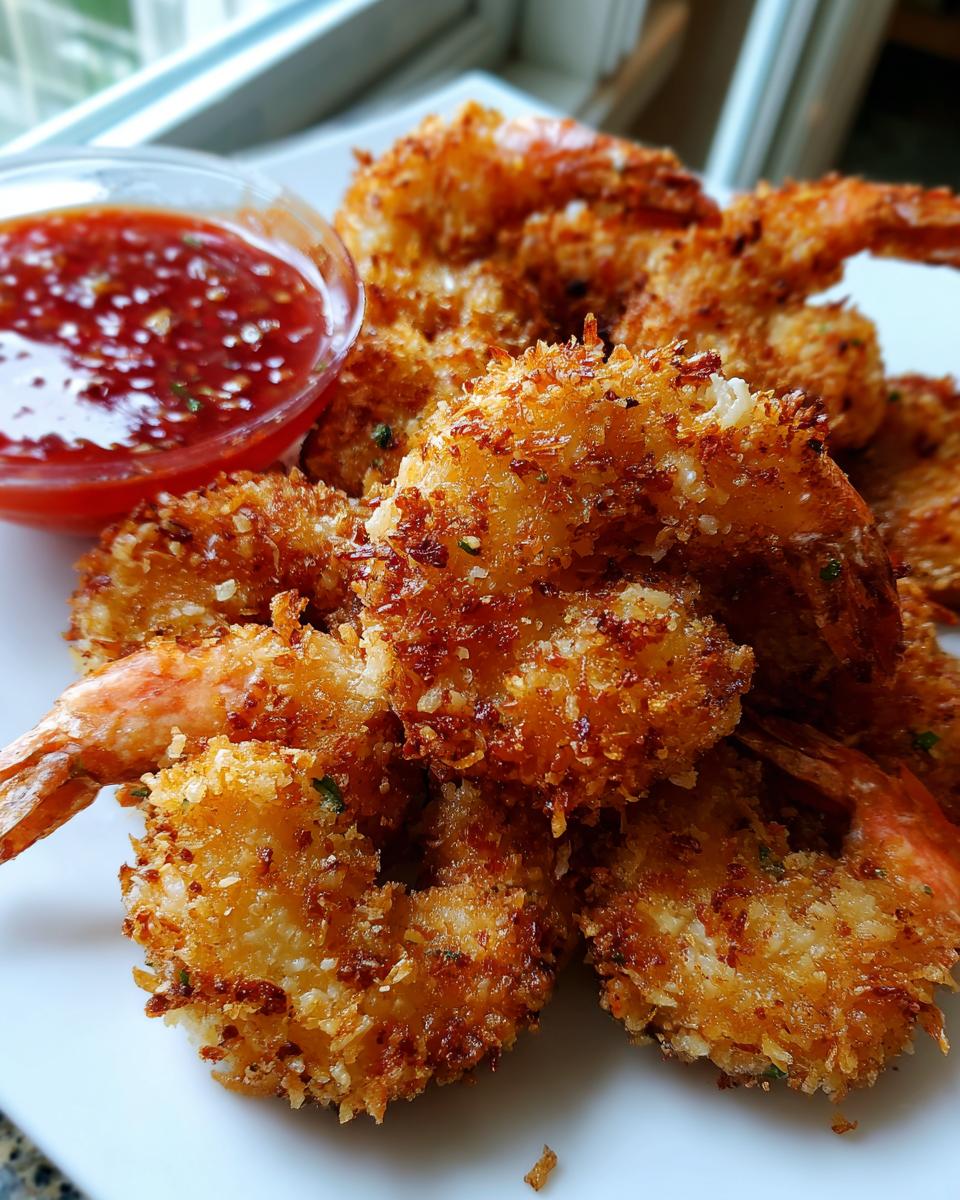
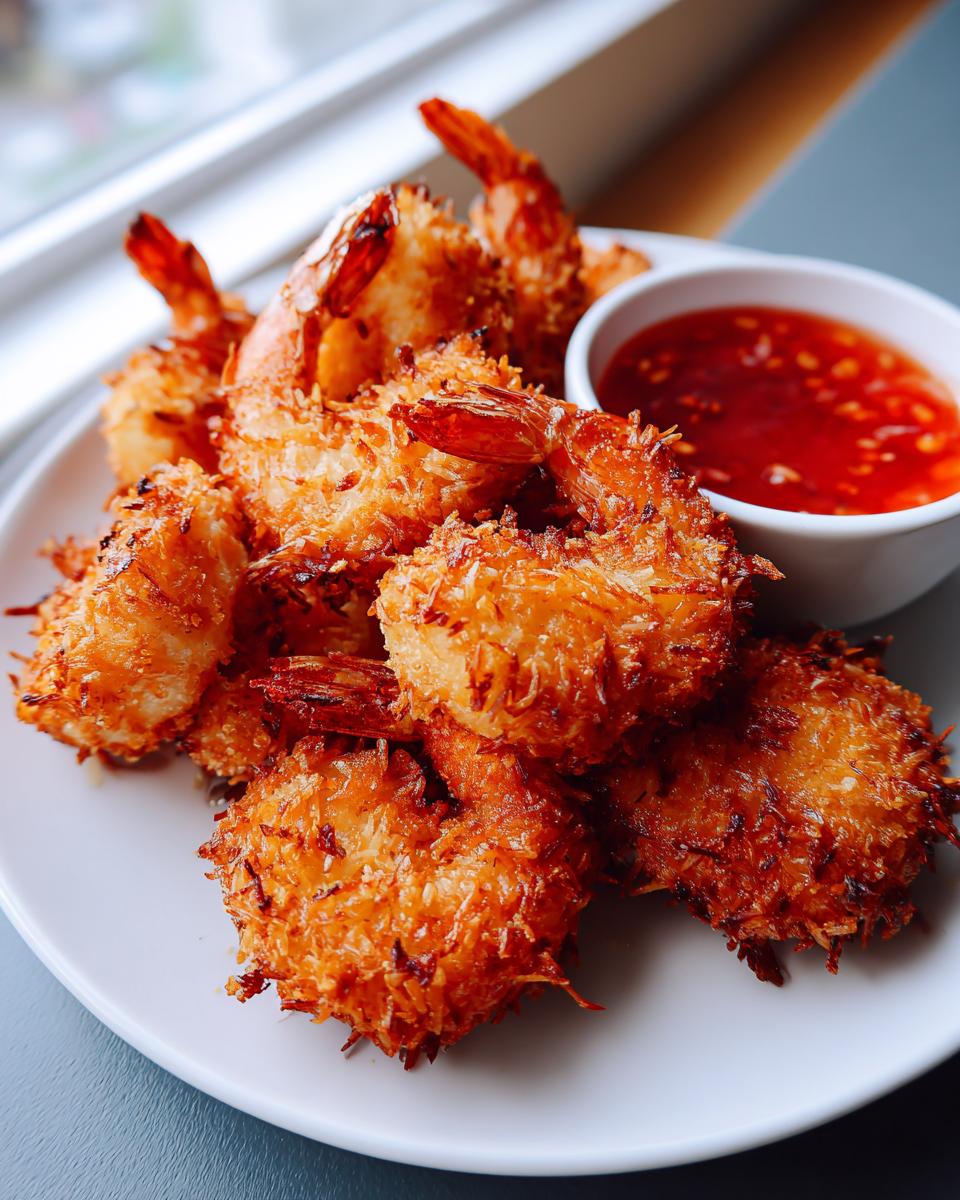
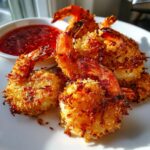
Carefully lower them in, and let them hang out for maybe 2 to 3 minutes per side. They cook fast! You are looking for that beautiful, even golden tan. Use a slotted spoon to fish them out and immediately transfer them to a wire rack set over a sheet pan. Those racks are essential—they let the air circulate underneath so the bottoms don’t steam. Once they drain for a minute, they are ready to go—maybe even better than the ones at that fancy place. If you’re looking for spice in your next seafood dish, check out this recipe for quick Cajun shrimp!
Alternative Cooking Methods for Easy Coconut Shrimp
Okay, look, deep frying gets you the ultimate indulgence, but sometimes you just want that tropical crunch without the whole oil situation. That’s totally fine! We can absolutely adjust the technique to make these a fantastic air fryer salmon recipe level of weeknight wonder.
The good news is that the coating process stays exactly the same—that beautiful Panko and coconut crust holds up really well whether dry-fried or baked. The main difference is that you need to ensure the shrimp aren’t touching each other so you get air all the way around them to achieve that genuine Crispy Coconut Shrimp texture.
For those who want to reduce the fat but keep the flavor, here’s how to nail the non-frying options we talked about in the notes:
For Baking Coconut Shrimp
If you’re using the oven, make sure you’re using a wire rack set over a baking sheet. Don’t skip that rack! If the bottom sits directly on the pan, it traps steam and instantly turns soggy. Preheat your oven to 400°F (200°C). Lay those crusted shrimp out in a single layer, making sure they have some breathing room. Bake these beauties for about 12 to 15 minutes total. You need to flip them halfway through so you get even golden-brown color on both sides. This method is great when you’re making a big batch for a party!
For Air Fryer Coconut Shrimp
The air fryer is seriously fast, which is why I love it for a Quick Shrimp Dinner. You want the air fryer set to 375°F (190°C). Spray the basket lightly with cooking spray first, then arrange your shrimp in a single layer—you’ll definitely have to work in batches here. They only take about 8 to 10 minutes. After about 5 minutes, give the basket a good shake to move them around. They come out incredibly crunchy, maybe even slightly crunchier than baked, and it requires barely any oil at all. It’s a fantastic way to turn this indulgence into an Easy Shrimp Appetizer you can feel good about eating any night!
Tips for Perfect Crunchy Coconut Shrimp Every Time
Even with the best recipe, things can go sideways fast, especially when you’re dealing with a delicate coating like this one. If you’re finding your crust is shrinking or maybe just refusing to stick, I’m going to give you the three non-negotiable rules I learned hustling shrimp orders in the restaurant. Rule number one, which I can’t stress enough, is totally about moisture control. You have to pat those shrimp dry until they feel squeaky. Any surface moisture equals steam, and steam kills crunch.
Next up, temperature. If you are frying, use that thermometer! If the oil is under 340°F, the coating melts before the shrimp cooks enough, leading to that droopy, greasy texture. If you’re air frying, the same applies to the basket temperature; preheating is mandatory. Seriously, trust me on this. If you want the secret to perfect fruity dips to go along with this crunch, check out this simple no-fluff fruit dip recipe sample. It’s the same principle: dry ingredients meet hot, fast action!
Serving Suggestions for Your Tropical Seafood Recipe
So, you’ve got a giant platter of perfectly Crispy Coconut Shrimp cooling on the rack, or maybe you went the Mediterranean lemon rice route and need something to put them on top of. Wonderful! The sweet, savory, crunchy profile of these shrimp makes them flexible. They aren’t just a snack; they can absolutely anchor a light, fantastic dinner.
For a stellar Quick Shrimp Dinner on its own, I love keeping the sides bright and fresh to cut through that sweetness. Think about what makes a great tropical vibe. A simple slaw tossed with lime juice and cilantro is amazing. Or, you could serve them over white rice mixed with a little coconut milk—it leans into the theme without stealing the show.
If you’re dealing with a crowd, which you will be, because honestly, these disappear instantly, they are tops for any Party Appetizer Ideas list. They look so impressive stacked high, especially next to that sweet chili dip. Just make sure you have plenty of napkins ready, because nobody eats these politely!
Here are a few ideas for rounding out the meal or loading up the appetizer platter:
- Green Goodness: A quick mix of arugula, shaved carrots, and a simple vinaigrette. The peppery bite of arugula is the perfect counterpoint to the sweet coating.
- Fruit Forward: If you want another dip, try a fresh mango salsa instead of the chili sauce. The pure, tangy fruitiness is heaven next to the fried breading. You can even serve a few shrimp nestled right on top of the salsa!
- Starchy Base: For a filling meal, spoon them over plain steamed jasmine rice, or if you have time, perhaps some seasoned cilantro-lime rice. Keep the sides simple so you can focus on dipping those crunchy bites!
Don’t forget the drinks! This dish seriously sings with an ice-cold beer or a simple glass of crisp Sauvignon Blanc. Enjoy that tropical flavor!
Storing and Reheating Your Homemade Coconut Shrimp
It’s rare, I know, that you actually have leftover coconut shrimp, but when you do, we have to treat those crispy guys right. If you just toss them in the fridge in a sealed plastic container, they are going to weep and get sad and chewy by morning. Nobody wants sad shrimp! The enemy of all things crispy is moisture retention, so we have to give them space to breathe.
If you’ve got leftovers fresh from the fryer (or the air fryer, lucky you!), let them cool completely down to room temperature first before storing them. Then, put them in a zip-top bag or an airtight container, but here’s the pro trick: Lay a paper towel on the bottom layer, put the shrimp on top, and then lay another paper towel over them before sealing it up. The paper towel absorbs any condensation trying to sneak up on your crunch.
Now, when it comes to reheating, we need heat, not steam. Do yourself a huge favor and skip the microwave—it’s the crispiest coating’s worst enemy. It just steams the breading right off the shrimp. If you want that shatteringly crispy coconut shrimp texture back? You have two main options, both quick because we aren’t cooking them again, we are just waking them up:
Oven Revival
Preheat your oven to about 375°F (190°C). Spread the cooled, leftover shrimp on a baking sheet lined with a wire rack—yes, we use the rack even for reheating! Pop them in for about 6 to 8 minutes. Keep an eye on them; since they are already cooked, you’re just drying out the coating and warming the shrimp through. They come out tasting almost brand new.
Air Fryer Quick Blast
This is my favorite method if I’m reheating just a few pieces. Set the air fryer to 350°F (175°C) and toss the shrimp in for maybe 3 to 4 minutes. Give the basket a quick shake midway through. The circulating hot air hits that Panko crust from every angle, and BAM—instant crunch is back. These are perfect for turning leftovers into an amazing easy shrimp appetizer again the next day!
Frequently Asked Questions About Coconut Shrimp
Listen, I know you’ve got questions. When you’re dealing with that perfect crust, you want to make sure every step is locked down. That’s what this section is for—getting you the insider answers so your homemade coconut shrimp is always a winner, whether it’s the main event or just a seafood potluck snack!
Can I freeze the shrimp after I bread them?
Yes, you totally can! This is one of the best party appetizer ideas secrets because you can prep these ahead of time. Once you’ve done the whole flour-egg-Panko dredge, lay the coated shrimp in a single layer on a baking sheet lined with parchment paper. Pop that whole tray into the freezer for about an hour until they are completely solid. Then, quick-transfer them into a freezer-safe bag, squeezing out all the air. They keep well for about a month. When you want to cook them, pull them out and cook straight from frozen—just add about 2-3 extra minutes to your frying or air frying time. Don’t thaw them first, or the coating will get mushy!
What is the absolute best dipping sauce for coconut shrimp?
Ask ten cooks, and you’ll get ten answers! My go-to, which we covered in the main recipe, is the Sweet Chili Dipping Sauce—it hits that perfect bridge between sweet and tangy. But if you really want to elevate this into a truly restaurant style coconut shrimp copycat experience, you need something with a little bite. Try making a batch of my spicy jalapeno popper-style dip, though maybe dial down the heat for shrimp; a good swap for heat is adding a little dry mustard powder to a sweet mayo base. Or, for a classic version, you can never go wrong mixing orange marmalade, a splash of soy sauce, and a dab of horseradish for a zesty kick. Honestly, you can find some fantastic sauce ideas, like this jalapeño popper dip recipe inspiration, that can be adapted for dipping!
Is this recipe a good option for a big party spread?
Are you kidding me? This is *the* best dish for a party! It checks all the boxes: it’s visually stunning, it requires minimal silverware (finger food!), and it tastes great served warm or at room temperature—perfect for grazing. If you know you’ll need to make a huge batch, I highly recommend using the oven or the air fryer instead of batch frying. Doing it in the oven lets you cook 20-30 pieces at once on racks, keeping everything ready around the same time. These disappear faster than anything else on the table, I promise you that.
Can I use Jumbo shrimp, or is this strictly for large shrimp?
The recipe calls for “large shrimp,” which usually means 21-25 count per pound. If you get Jumbo shrimp (say, 16-20 count), they are great, but they will take longer to cook through in the hot oil. If you use Jumbo, watch your time carefully; you want to make sure the center isn’t raw when the outside is perfectly brown. I like keeping the size consistent when I make an easy shrimp appetizer because it ensures everyone gets a uniform, perfectly cooked bite!
How do I maximize the crunch if I use the baked coconut shrimp method?
This is where my pro knowledge comes in handy! The single most important thing when baking for crunch—besides the Panko, of course—is the spray. Before they go into the 400°F oven, give those crusted shrimp a very liberal coat of cooking spray, even if you think you sprayed enough. You want to essentially mist the entire surface area until the coconut and crumbs look slightly wet. This slight bit of oil helps the exterior toast and crisp up rather than just dry out. A light dusting of spray right before they go in, a flip halfway, and another quick spray on the other side seals the deal for a seriously crunchy shrimp bite!
Nutritional Snapshot of This Coconut Shrimp Recipe
Okay, here’s the real talk part. Because the magic of this coconut shrimp recipe involves that beautiful, glorious frying oil—or whichever method you choose—the numbers are going to shift a bit based on what you do. We are going for restaurant quality here, so we need to be honest about what that means, calorically speaking!
I pulled these estimates straight from the calculations based on the frying method listed in the recipe. Remember, this is just a guide cooked up in my kitchen; your pantry ingredients and exact oil absorption rates will make things vary. If you use the baked or air fryer method, you’re definitely shaving off some of that fat and calorie count, making it an even better choice for a quick shrimp dinner!
When I look at this, I think of it as a fantastic, slightly indulgent party appetizer, not necessarily an everyday staple. But hey, everything in moderation, right? These numbers reflect a good, solid portion size designed to fill you up!
Here is the breakdown for a standard serving size of four shrimp:
- Serving Size: 4 shrimp
- Calories: Roughly 350 (Be cautious here—frying drives this number up!)
- Protein: About 20g (That’s good, solid protein from the shrimp!)
- Carbohydrates: Around 25g (Mostly from the coconut and the Panko coating)
- Fat: Approximately 18g (This is the biggest variable depending on oil.)
- Sugar: Around 12g (That’s from the *sweetened* coconut and the dipping sauce, so watch that sauce portion!)
My biggest piece of advice? If you’re worried about the fat content, this is where that air fryer shines. You can get that amazing crunchy exterior with maybe 5 grams of fat instead of 18g. It shifts the whole nutritional profile for the better without sacrificing that crunch we worked so hard to achieve. Cook smart, eat well, and enjoy these!
PrintUltimate Crispy Panko Coconut Shrimp with Sweet Chili Dipping Sauce
Recreate restaurant-style coconut shrimp at home. You get a shatteringly crisp texture using Panko breadcrumbs, perfect as an easy appetizer or light dinner entree.
- Prep Time: 15 min
- Cook Time: 10 min
- Total Time: 25 min
- Yield: 4 servings 1x
- Category: Appetizer
- Method: Frying
- Cuisine: American
- Diet: Vegetarian
Ingredients
- 1 lb large shrimp, peeled and deveined
- 1 cup all-purpose flour
- 2 large eggs, beaten
- 1 cup Panko breadcrumbs
- 1 cup sweetened shredded coconut
- 1 teaspoon salt
- 1/2 teaspoon black pepper
- Vegetable oil, for frying
- For the Sweet Chili Dipping Sauce:
- 1/2 cup sweet chili sauce
- 2 tablespoons rice vinegar
- 1 teaspoon lime juice
Instructions
- Set up your dredging stations. Place flour on a plate. Whisk eggs in a shallow bowl. On a third plate, combine Panko breadcrumbs, shredded coconut, salt, and pepper.
- Pat the shrimp completely dry using paper towels. This step is key for crispiness.
- Take one shrimp and dredge it lightly in the flour, shaking off any excess.
- Dip the floured shrimp into the beaten egg, letting the extra drip off.
- Press the shrimp firmly into the Panko-coconut mixture, ensuring it is fully coated. Place the coated shrimp on a clean tray.
- Heat about 1 inch of vegetable oil in a deep skillet to 350°F (175°C). Use a thermometer to check the temperature; oil that is too cool results in soggy shrimp.
- Carefully place shrimp into the hot oil, working in batches to avoid overcrowding the pan. Do not let the oil temperature drop significantly.
- Fry the coconut shrimp for 2 to 3 minutes per side, until golden brown and crisp.
- Remove the shrimp with a slotted spoon and place them on a wire rack set over a baking sheet to drain excess oil.
- While the shrimp drain, prepare the dipping sauce. Whisk together the sweet chili sauce, rice vinegar, and lime juice in a small bowl.
- Serve your crispy coconut shrimp immediately with the dipping sauce.
Notes
- For a lighter version, bake the shrimp at 400°F (200°C) for 12-15 minutes, flipping halfway, or use an air fryer at 375°F (190°C) for 8-10 minutes.
- If you want a Red Lobster copycat sauce, substitute the sweet chili sauce with 1/2 cup apricot preserves mixed with 1 tablespoon of prepared horseradish.
- For the best crunch, make sure your coating ingredients are dry and your oil is hot enough before you start frying.
Nutrition
- Serving Size: 4 shrimp
- Calories: 350
- Sugar: 12
- Sodium: 450
- Fat: 18
- Saturated Fat: 8
- Unsaturated Fat: 10
- Trans Fat: 0
- Carbohydrates: 25
- Fiber: 1
- Protein: 20
- Cholesterol: 150