
You know those days? When the sun is absolutely blazing, and the thought of turning on your oven feels like a personal betrayal? Or maybe you just need a seriously decadent, rich dessert ready *fast* because company just showed up unexpectedly. Trust me, I’ve been there. That’s why this **no bake peanut butter pie** is the recipe I pull out when I need a miracle. I’m Zoe Thompson, and my whole goal at Kitchen Slang is translating those insider tricks chefs use for efficiency into something that works perfectly on your home counter. This isn’t just easy; it’s guaranteed creamy indulgence with zero oven time. If you’re looking for the best ways to satisfy that sweet tooth without turning up the heat, you need to check out my roundup of delicious dessert recipes, but first, let’s make this pie!
- Why This No Bake Peanut Butter Pie is Your New Go-To Quick Dessert Recipe
- Gathering Ingredients for Your Homemade Peanut Butter Pie
- Step-by-Step: Making the Best No Bake Pie
- Setting and Serving Your Icebox Peanut Butter Pie
- Pro Tips for the Perfect No Bake Peanut Butter Pie
- Storage and Making Ahead: Your Make Ahead Dessert Strategy
- Frequently Asked Questions About This Easy Peanut Butter Pie
- Estimated Nutritional Snapshot for Your No Bake Peanut Butter Pie
- Share Your No Bake Peanut Butter Pie Success
Why This No Bake Peanut Butter Pie is Your New Go-To Quick Dessert Recipe
Look, the best part about this recipe isn’t just that it’s ridiculously fast—it’s that it captures all that rich, **decadent peanut butter dessert** flavor profile without any of the fuss. We’re talking about a true **make ahead dessert** that practically builds itself. This isn’t fussy pastry work; this is pure kitchen efficiency channeled into something spectacular. It’s easily the **best no bake pie** I’ve ever whipped up when I needed a reliable crowd-pleaser.
Zero Oven Time: The Ultimate Summer Dessert No Bake
If it’s eighty degrees outside, the absolute last thing I want is to heat up the kitchen. That’s the magic here! This whole process is about assembly and chilling. You get that amazing sweet fix with zero oven commitment, making it the textbook definition of a perfect summer dessert no bake option. It’s the definition of my philosophy: real talk for real good food, and right now, that means keeping the stove off.
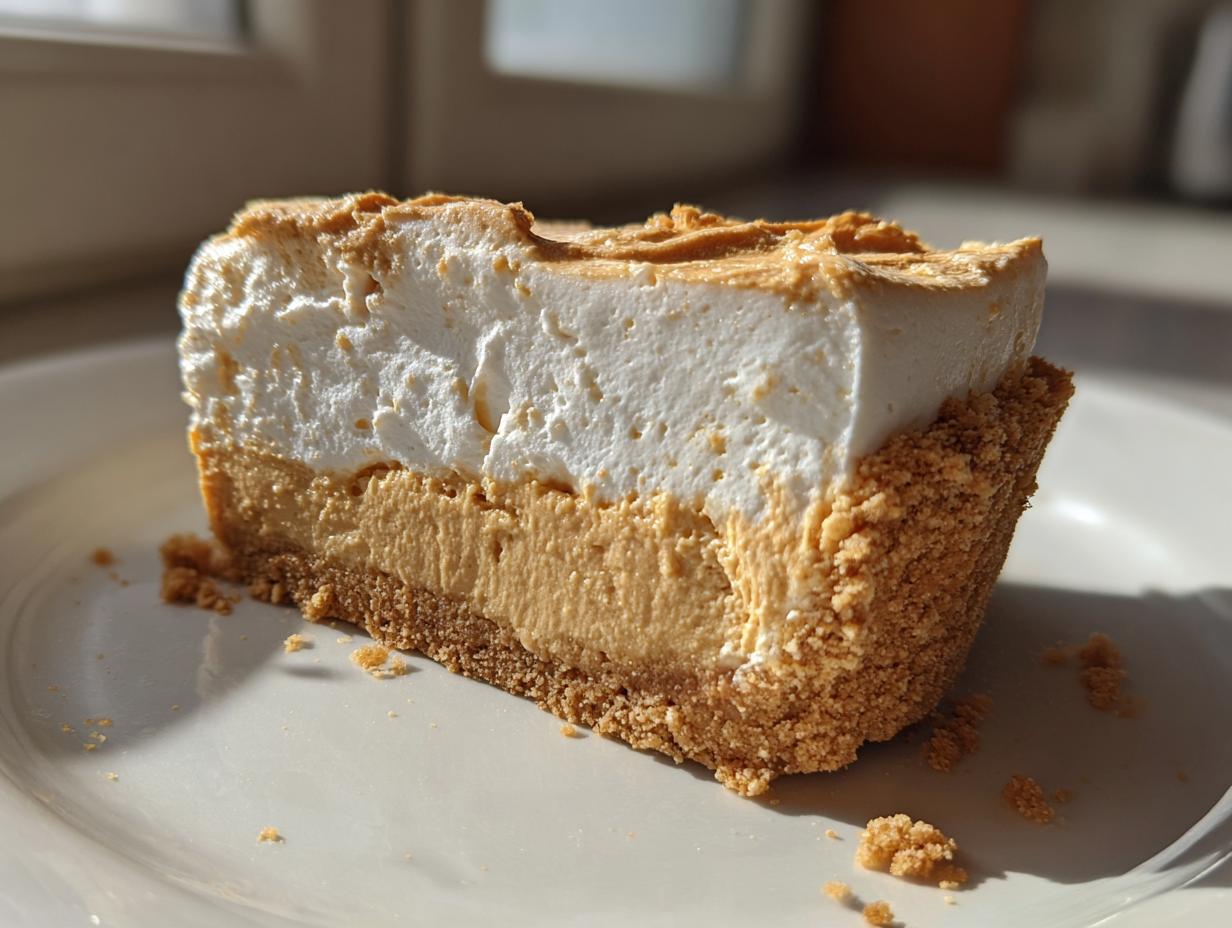
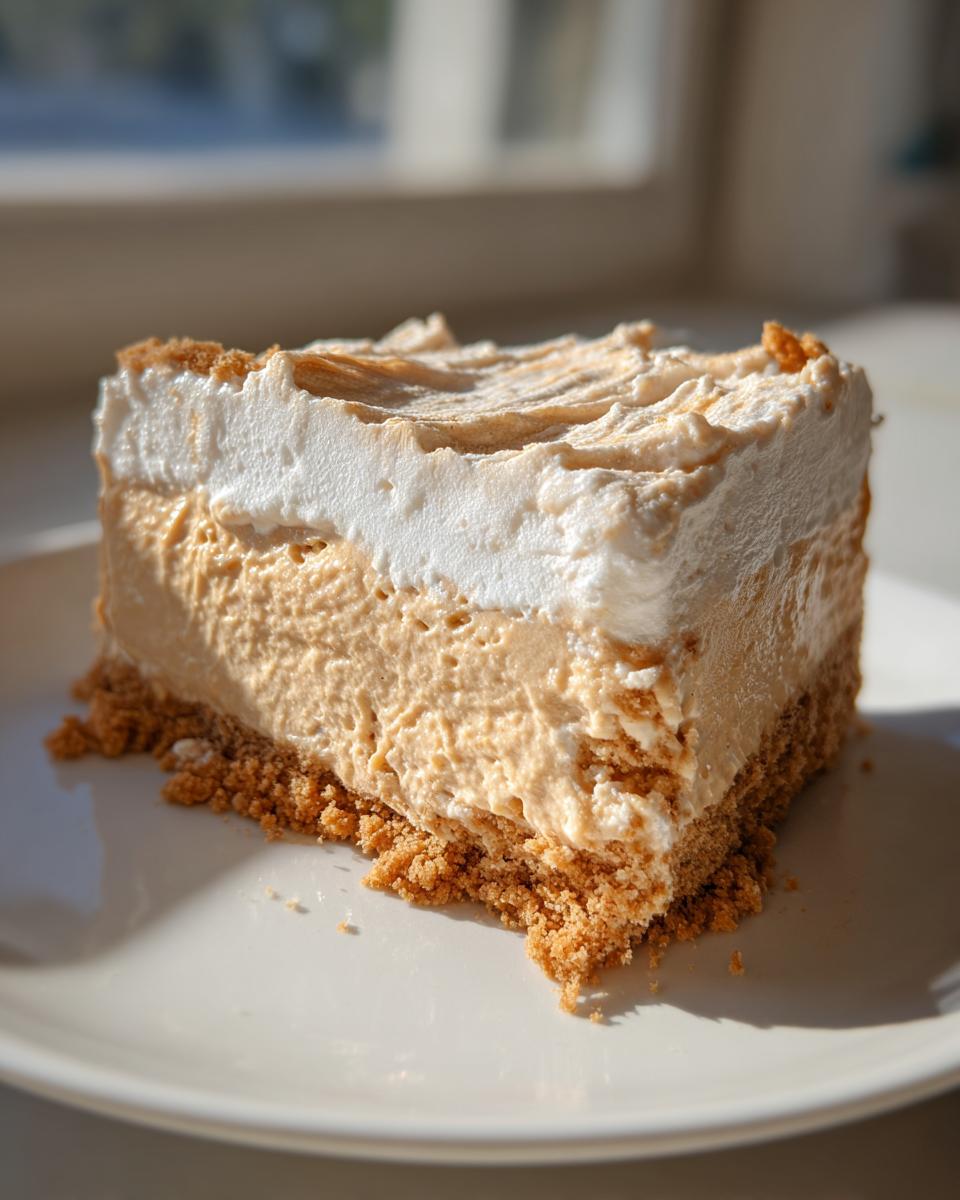
Achieving That Creamy Peanut Butter Pie Texture
So many recipes fall flat because the filling ends up gritty or runny. Not this one! We rely on two heavy hitters: softened cream cheese and whipped topping. They emulsify perfectly with the peanut butter and powdered sugar to create that ultra-smooth, almost cloud-like structure. That’s how we get that incredible, signature **fluffy peanut butter pie filling**—all the richness, none of the baking anxiety. If you’re also looking for something quick and sweet you can make anytime, check out my guide for easy peanut butter cookies!
Gathering Ingredients for Your Homemade Peanut Butter Pie
Alright, let’s get down to business. Because this is a **no bake peanut butter pie**, the quality and state of your ingredients matter way more than if you were just tossing everything into a mixer. Clarity here is key to getting that perfect, rich texture later on. This is where the precision I learned in professional kitchens really helps you out at home. Don’t forget to check out my easy fruit dip recipe if you need another quick win!
Crust Components: Classic Graham Cracker Crust Pie
For the base, we need three things, and they need to be mixed just right. We are going for that classic, buttery foundation here. Don’t reach for whole crackers—we need the fine crumbs!
- 1 1/2 cups graham cracker crumbs (finely crushed, please!)
- 1/4 cup granulated sugar
- 6 tablespoons unsalted butter, melted (Make sure that butter is fully melted, not just soft!)
The Fluffy Peanut Butter Pie Filling Assembly
This is the core of our **creamy peanut butter pie**. Pay close attention to the condition of the cream cheese and the topping. If they aren’t prepped right, your filling will fight you!
- 1 (8 ounce) package cream cheese, *softened* (Needs to be room temp—take it out early!)
- 1 cup creamy peanut butter (Use the regular stuff, not that natural runny kind—we need stability!)
- 1 1/2 cups powdered sugar
- 1 teaspoon vanilla extract
- 1 (8 ounce) container frozen whipped topping, *thawed* (Thawed means fridge-soft, not runny, okay?)
- Optional: Chocolate syrup for drizzling when we finish up!
Step-by-Step: Making the Best No Bake Pie
Okay, now that we have all our ingredients ready—and I mean *ready*—we can move fast. This is where that pro efficiency comes in handy. We build the crust while it chills, so we’re moving right into the filling. If you haven’t checked out my guide for easy weeknight dinners, you’ll see this rhythm in action—get one component ready while another is processing! It saves so much time.
Building the Graham Cracker Crust Pie Base
In a medium bowl, combine those graham cracker crumbs, the sugar, and the melted butter. Mix it up until it looks like wet sand—you should be able to squeeze a handful and have it hold its shape. Don’t be shy; press that mixture firmly into the bottom and sides of your 9-inch pie plate. I mean *firmly*. Once it’s packed tight, pop that whole thing into the freezer while you tackle the filling. Chilling it hard now guarantees you don’t end up with a crumbly mess later.
Mixing the Creamy Peanut Butter Pie Filling
This next part is crucial for texture; listen up! Grab your large bowl. First, beat that *softened* cream cheese until it’s perfectly smooth—no lumps allowed, zero tolerance! Once that’s looking luxurious, mix in the peanut butter until it’s totally combined. Then, and this is important, gradually beat in the powdered sugar and vanilla. If you dump the sugar all at once, you’ll get a cloud of white dust and lumps, which defeats the purpose of a smooth pie!
Folding in the Whipped Topping for the No Bake Peanut Butter Pie
We need air in this filling, so bring out the thawed whipped topping. Don’t just dump it in and beat it! Take half of that fluffy topping and gently fold it into the peanut butter base. I mean *fold*—use a spatula and cut down the middle, scraping up the side. You want to incorporate it without squishing out all the nice lift we just built up. Once that’s mostly mixed, fold in the remaining topping until *just* combined. If you overmix here, you lose that heavenly fluffiness!
Setting and Serving Your Icebox Peanut Butter Pie
We’re almost there, but do not—and I mean do not—get tempted to cut into this pie too soon! This is the stage where our hard work sets up. Since we didn’t use any eggs or baking chemistry to stabilize this **no bake dessert**, we are relying entirely on cold temperatures to make it sliceable. If you’re making this fuss-free classic for a crowd, this chill time is your secret weapon for looking like a dessert pro. If you need more inspiration for no-oven treats after this, check out my guide for delicious dessert recipes!
Crucial Chilling Times for the No Bake Dessert
This step is non-negotiable for structure. You need to give that rich filling and crumbly crust time to bond. I always suggest covering the pie loosely with plastic wrap—we don’t want it absorbing any weird smells from the fridge! You absolutely must let it chill in the refrigerator for a minimum of four hours. Seriously, four hours is the bare minimum to get a decent slice without it oozing out.
Now, if you want that truly impressive, almost firm texture—that deep, satisfying density that lets you get a clean slice every time—you need to let it go overnight. Overnight chilling turns this from a simple **icebox peanut butter pie** into a bakery-worthy creation. It firms up beautifully, making it perfect for slicing or even freezing for later!
If you decided to drizzle on some chocolate syrup, wait until the pie has chilled for at least two hours before you add the drizzle. If you put it on too early, the chocolate just sinks right into the whipped topping. If you wait until it’s mostly set, your chocolate lines will stay crisp and beautiful on top. It’s all about timing, even when you aren’t baking!
When you’re ready to serve, pull it out about ten minutes before slicing, especially if it’s been in the deep chill. That just lets the texture soften slightly so it melts in your mouth beautifully. This is the reward for all your patience waiting after that quick mixing stage!
Pro Tips for the Perfect No Bake Peanut Butter Pie
Okay, you’ve assembled the pie, you’ve tucked it away to chill, but let’s talk about those little details that take this from good to legendary. I picked up a few things over the years working fast-paced kitchens—things that make sure your results are always consistent, no matter how hectic things get. If you’re looking for more ways to avoid oven time, definitely check out my guide for easy apple crumble recipe ideas!
Crust Swaps: From Graham Cracker to Oreo Crust Peanut Butter Pie
The graham cracker crust is classic, right? It gives you that buttery, slightly spiced base. But sometimes, you just need chocolate complexity! If you want to pivot to an Oreo crust peanut butter pie, it’s super easy. Just swap out the graham crumbs for about two cups of finely crushed Oreos. You can use the whole cookie—filling and all! You might adjust the butter slightly, maybe drop it down to 5 tablespoons since the Oreo filling has its own fat, but honestly, it usually works out just fine as a direct sub for an extra dark, rich base.
Peanut Butter Selection for Decadent Peanut Butter Dessert
Here’s a pro line cook secret: skip the fancy, natural peanut butter for this recipe. Seriously, don’t do it! You know the kind I mean—the one where the oil separates and you have to stir it forever? That oil separates again when it chills, and it can make your beautiful, **creamy peanut butter pie** filling turn a little oily or grainy around the edges. We need the stabilized stuff—the creamy, dependable Jif or Skippy style works best here. That ensures the filling stays locked in that perfect, silky texture we worked so hard to achieve. For more simple flavor boosts, take a peek at my easy dumpling sauce tips!
Storage and Making Ahead: Your Make Ahead Dessert Strategy
This whole recipe is built around making your life easier, so naturally, it excels as a **make ahead dessert**. We are talking about a low-stress option for holidays or parties that you can knock out the day before and completely forget about until serving time—that’s peak kitchen efficiency right there!
Since this **no bake peanut butter pie** relies on cold to set up the structure, storing it cold is how we keep it perfect. Once it’s fully chilled and firm (after those mandatory four hours minimum!), you’ll want it wrapped up nice and snug in the fridge. I usually cover it loosely with plastic wrap or put a large cake dome over it. Don’t try to serve it straight from the fridge after it’s been sitting for a day, though. Pull it out about 10 to 15 minutes before you plan to slice it. This lets the texture soften just a hair so it glides through the crust without cracking.
And yes, you absolutely can freeze this! If you need a genuine frozen peanut butter pie experience, wrap it tightly—I mean really tightly, maybe in plastic wrap *and* foil—and pop it in the freezer. It keeps wonderfully for about a month. When you’re ready to eat it, let it thaw in the fridge for a good half-day, or about 3 to 4 hours on the counter. It maintains that rich, dense flavor even after thawing. If you’re looking for other make-ahead magic, my recipe for no bake pumpkin cheesecake is another life-saver when you’re planning ahead!
Frequently Asked Questions About This Easy Peanut Butter Pie
It’s totally normal to have questions when trying out a new favorite recipe, even when it’s a no-bake situation! I always tell folks that the kitchen vocabulary we use often means the real technique is more important than the ingredient list. Here are the common things I hear about getting this easy peanut butter pie just right. If you’re still looking for more simple recipes, take a look at my guide for an easy chili recipe!
Can I use a different crust besides graham crackers for my no bake peanut butter pie?
Absolutely! I love that you asked this. While the classic graham cracker crust is what I used in the main recipe, switching it up is fun. If you want something richer and more chocolatey, you can definitely swap for an Oreo crust peanut butter pie! Just use about two cups of finely crushed Oreos, mixing them with the same amount of melted butter. Honestly, shortbread cookies make a really nice, buttery base too, if you have those on hand. The key is always to press it firm and freeze it hard.
How long does this creamy peanut butter pie last in the fridge?
Because this pie is so heavy on the dairy—cream cheese and whipped topping—we need to respect the refrigeration time. Once it’s fully set, this pie is good for about 3 to 4 days tucked away in the fridge. Any longer and the crust might start to get a little soft against the filling. Now, if you want to keep it even longer, this structure freezes like a dream! Wrap it really well and you’ve got a fantastic frozen peanut butter pie ready for whenever you need it, though you’ll want to thaw it in the fridge for a few hours before serving.
What if my filling seems too soft? How do I fix my simple dessert no oven?
This is the number one panic moment for folks who haven’t mastered the art of chilling! If you cut into it and it’s just too loose—more like soft peanut butter fluff than a sliceable dessert—nine times out of ten, it just needs more time. This **simple dessert no oven** setup relies entirely on cold temperatures. Put it back in the fridge for another two blissful hours. If it’s still too soft after that, you may have over-folded the whipped topping, which knocked too much air out. Next time, fold that topping in just until you see no more white streaks; don’t mix until it’s homogenous!
Estimated Nutritional Snapshot for Your No Bake Peanut Butter Pie
Listen, I always tell people that when you’re making something this purely indulgent, you probably aren’t doing it for the macro count, right? But still, it’s good to know what you’re dealing with! I ran the numbers on this classic recipe—the creamy filling, the sweet crust—and here’s what we came up with.
Keep in mind, this is just an estimate based on the standard ingredients listed. If you swapped cream cheese for a low-fat version or used sugar substitutes, things change completely. This snapshot reflects the rich, traditional version of our no bake peanut butter pie. If you’re tracking things closely, you might want to check out my guide on high-protein overnight oats for a different kind of power-up!
- Serving Size: 1 slice
- Calories: 450
- Fat: 28g (with 10g Saturated Fat)
- Carbohydrates: 45g
- Sugar: 30g
- Protein: 9g
- Cholesterol: 40mg
Share Your No Bake Peanut Butter Pie Success
That’s it! You’ve navigated the mixing, waited out the chilling time, and now you have the most glorious, creamy, effortless **no bake peanut butter pie** sitting on your counter. Now comes the best part of having a kitchen community: telling me how it went!
Did you use the classic graham cracker crust, or did you pivot to that rich Oreo version? Did you swirl on that optional chocolate drizzle? I want to hear all about it! When you make something that tastes this good with this little effort, you deserve a little fanfare.
Head down to the comments right now and leave me a rating—five stars if you licked the bowl clean! Seriously, your feedback helps me keep translating the best techniques for all of us. If you snapped a picture of your finished slice, tag me! It genuinely makes my day to see my kitchen slang making its way into your family celebrations. And hey, if you ever need to get in touch for a specific question or feedback, you know where to find the translator at my contact page. Happy eating!
PrintThe Best Easy No Bake Peanut Butter Pie
You need this recipe for a rich, creamy, no bake peanut butter pie with a graham cracker crust. It sets up perfectly in the refrigerator and requires zero oven time, making it a fast, decadent dessert for any occasion.
- Prep Time: 20 min
- Cook Time: 0 min
- Total Time: 4 hr 20 min
- Yield: 8 servings 1x
- Category: Dessert
- Method: No Bake
- Cuisine: American
- Diet: Vegetarian
Ingredients
- 1 1/2 cups graham cracker crumbs
- 1/4 cup granulated sugar
- 6 tablespoons unsalted butter, melted
- 1 (8 ounce) package cream cheese, softened
- 1 cup creamy peanut butter
- 1 1/2 cups powdered sugar
- 1 teaspoon vanilla extract
- 1 (8 ounce) container frozen whipped topping, thawed
- Optional: Chocolate syrup for drizzling
Instructions
- Prepare the crust: In a medium bowl, mix the graham cracker crumbs, granulated sugar, and melted butter until the mixture resembles wet sand. Press this mixture firmly and evenly into the bottom and up the sides of a 9-inch pie plate. Place the crust in the freezer while you prepare the filling.
- Make the filling base: In a large bowl, beat the softened cream cheese until it is smooth. Add the peanut butter and beat until fully combined and smooth.
- Sweeten the filling: Gradually beat in the powdered sugar until the mixture is fully incorporated. Mix in the vanilla extract.
- Lighten the texture: Gently fold in half of the thawed whipped topping until just combined. Do not overmix.
- Assemble the pie: Spread the peanut butter filling evenly into the chilled graham cracker crust.
- Top the pie: Spread the remaining half of the whipped topping over the peanut butter layer. If you want a chocolate drizzle, warm the chocolate syrup slightly and drizzle it over the top layer.
- Chill and set: Cover the pie loosely with plastic wrap and refrigerate for at least 4 hours, or until the filling is firm. For a firmer, almost frozen texture, chill for 6 hours or overnight.
- Serve: Slice and serve cold.
Notes
- For an Oreo crust variation, substitute 2 cups of finely crushed Oreo cookies (filling removed or included) for the graham cracker crumbs.
- If you want a richer peanut butter flavor, use creamy peanut butter that is not the ‘natural’ style, as the oil separation can affect the texture.
- This pie sets best when chilled for a minimum of 4 hours. Plan ahead for best results.
Nutrition
- Serving Size: 1 slice
- Calories: 450
- Sugar: 30g
- Sodium: 350mg
- Fat: 28g
- Saturated Fat: 10g
- Unsaturated Fat: 18g
- Trans Fat: 0g
- Carbohydrates: 45g
- Fiber: 2g
- Protein: 9g
- Cholesterol: 40mg