
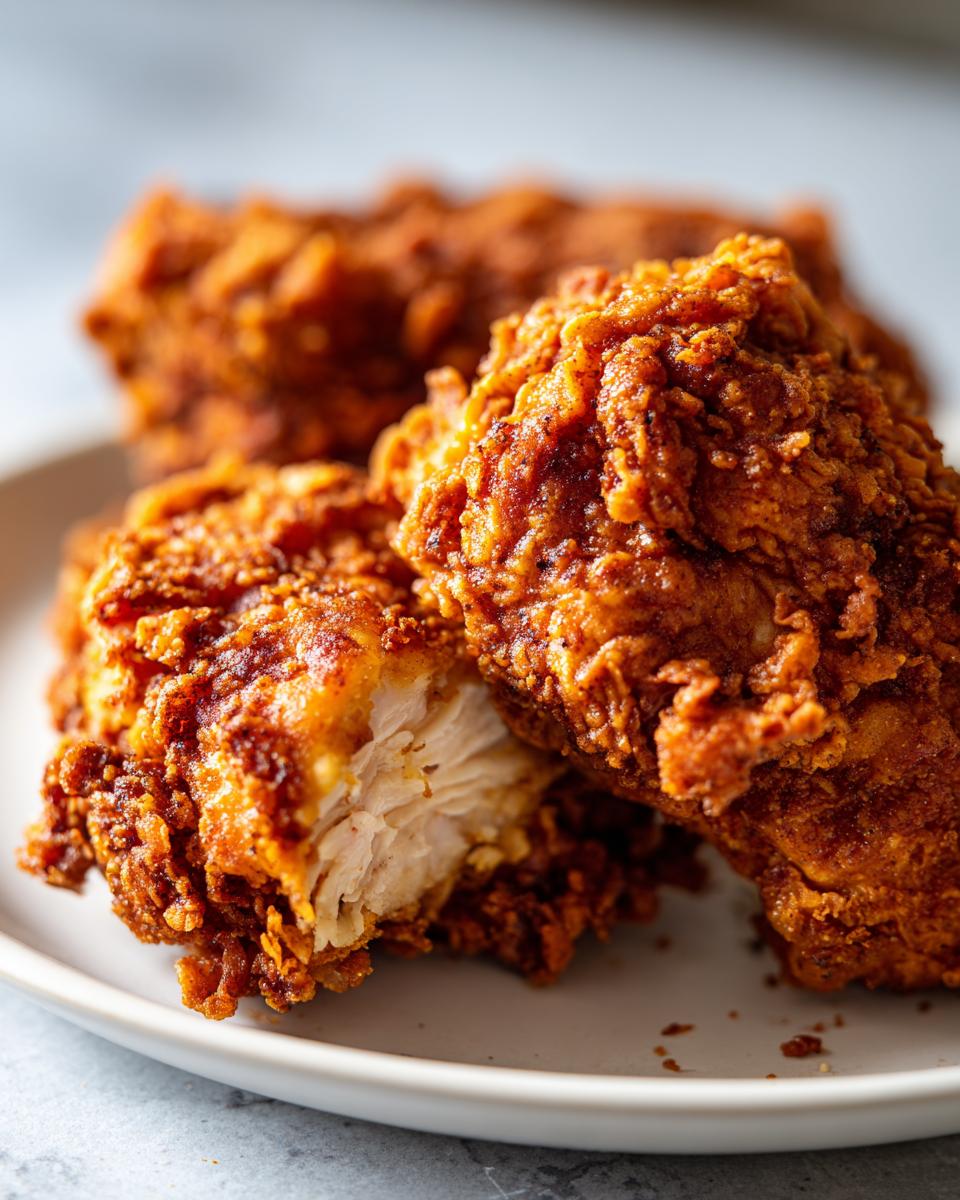
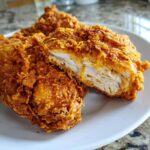
We all crave that deep, satisfying crunch and juicy interior that only classic Southern fried chicken gives you, right? But let’s be real, hauling out the deep fryer mid-week just isn’t going to happen. That’s why I cracked the code on making the best air fryer fried chicken you will ever try. I took the techniques I picked up working under those high-pressure bistro chefs, filtered them through my family’s love for comfort food, and translated it all for your kitchen. If you want that golden, crispy exterior and meat so juicy it practically melts, this buttermilk soak method is the ultimate solution. Trust me, you’re about to ditch the deep fryer for good because this healthy fried chicken alternative delivers on flavor every single time. This recipe is perfect for when you need something fast without sacrificing real flavor—check out my guide to easy weeknight dinners for more streamlined meals!
- Why This Buttermilk Air Fryer Fried Chicken is Your New Go-To
- Gathering Ingredients for Air Fryer Fried Chicken
- The Buttermilk Soak: Secret to Juicy Air Fryer Chicken
- Coating and Prepping for Perfect Air Fryer Fried Chicken
- Step-by-Step Instructions for Crispy Chicken in Air Fryer
- Tips for the Best Air Fryer Chicken Results
- Serving Suggestions for Your Air Fryer Comfort Food
- Storage and Reheating Instructions
- Common Questions About Making Air Fryer Fried Chicken
Why This Buttermilk Air Fryer Fried Chicken is Your New Go-To
Look, nobody wants the guilt that comes with serious comfort food, but we all secretly crave that shatteringly crisp, Southern-style coating. This recipe gives you both the satisfaction and the shortcut. It’s what I rely on when I need that classic flavor without the oil bath. If you want that crunch without the fuss, you need to check out my air fryer chicken parmesan next!
- It delivers unbelievably juicy air fryer chicken from start to finish—no dry white meat here!
- It’s the perfect healthy fried chicken alternative; we cut the oil by about 75% without sacrificing texture.
- The final product is genuinely golden brown chicken in air fryer, looking exactly like it came off the deep fryer.
- It’s fast! We’re talking dinner on the table in under 45 minutes total, which is a lifesaver on busy nights.
Achieving Maximum Crunch with Less Oil
Here’s the line cook secret: the buttermilk brine doesn’t just tenderize; it actually helps the dry coating adhere better once that super-hot air hits it. See, the milk solids thicken slightly under the coating. When you hit that high heat, the moisture in the buttermilk evaporates fast, essentially locking in the seasoned flour crust. That means you get that gorgeous, craggy, crispy chicken in air fryer texture instantly, without needing oil to conduct the heat.
Gathering Ingredients for Air Fryer Fried Chicken
Alright, let’s talk gear. When we’re making air fryer fried chicken, your ingredients list is shorter than you might think, but every single item pulls double duty. Clarity here is key, because mixing up your salt and your sugar is a rookie mistake I’ve seen happen when people rush! We are aiming for that authentic, full-flavor Southern coating, just without the giant vat of hot oil. Keep everything measured out before you start the soak; it makes the dredging process way less stressful.
You’ll need the full roster:
- Two pounds of chicken pieces. I usually go for a mix of thighs and drumsticks because those bone-in, skin-on pieces get the crispiest. If you want to use breasts or wings, that’s fine, but remember they cook faster!
- Two full cups of buttermilk. Yep, that much! This is the foundation for juicy air fryer chicken. Don’t skimp on the buttermilk; it’s what breaks down the proteins and keeps everything moist.
- One splash of hot sauce if you like a little kick—totally optional, but it wakes up the flavor profile, trust me.
- For the dry dredge, we need two cups of all-purpose flour, plus a quarter cup of cornstarch. That cornstarch is essential for that extra light, shatteringly crisp finish in the air fryer basket.
- Then we hit the spices: two teaspoons of salt, one teaspoon each of black pepper, paprika, garlic powder, and onion powder. Finish it off with half a teaspoon of cayenne for that subtle background heat.
- And finally, don’t forget your cooking spray—whatever oil you prefer spraying on top before it cooks. That little bit of fat helps everything turn golden brown evenly.
Grab all this, have your bowls ready, and you’re already halfway to winning dinner tonight. If you’re looking to round out the meal, check out my tips for air fryer chicken wings for more quick wins!
The Buttermilk Soak: Secret to Juicy Air Fryer Chicken
If you decide to skip any step in this whole process—and please, don’t—just don’t skip the buttermilk bath. I learned this the hard way back in the bistro when we were running specials. We were using breasts that had been sitting a little too long, and they were looking dry before they even hit the fryer. The head chef threw them into a quick buttermilk-and-pickle-juice soak, just 30 minutes, and the difference was night and day. That acidity works magic, breaking down just enough protein to let the chicken suck up moisture like a sponge. It’s the foundational move for getting truly juicy air fryer chicken.
Here’s the deal on timing. You need these pieces submerged completely in that milky bath, along with your optional splash of hot sauce. The absolute minimum time to make a noticeable difference is four hours. Seriously, set a timer. But if you’re planning ahead, this is where you win big: letting it soak overnight. When I make this air fryer fried chicken for the weekend, I get that chicken soaking first thing Saturday morning, and by Sunday dinner, the meat is unbelievably tender. You don’t need fancy saltwater brines; this simple soak is all you need for that fantastic moisture retention underneath the crust.
It feels like a long time in the fridge, I know, but trust me on this. When you’re pulling that perfectly golden brown chicken in air fryer later, you’ll see that the texture inside is worth every minute of that chill time. It’s a non-negotiable part of my process for any protein that I want to keep flavorful and moist!
Coating and Prepping for Perfect Air Fryer Fried Chicken
This is where the magic happens—turning a wet, buttermilk-soaked piece of chicken into something that’s ready to crisp up beautifully in the air fryer. Remember, we aren’t deep frying; we’re building a protective, seasoned shell that needs to hold its shape against that blast of hot air. If that coating is flimsy, you end up with pale, sad chicken, and we are not making sad chicken here!
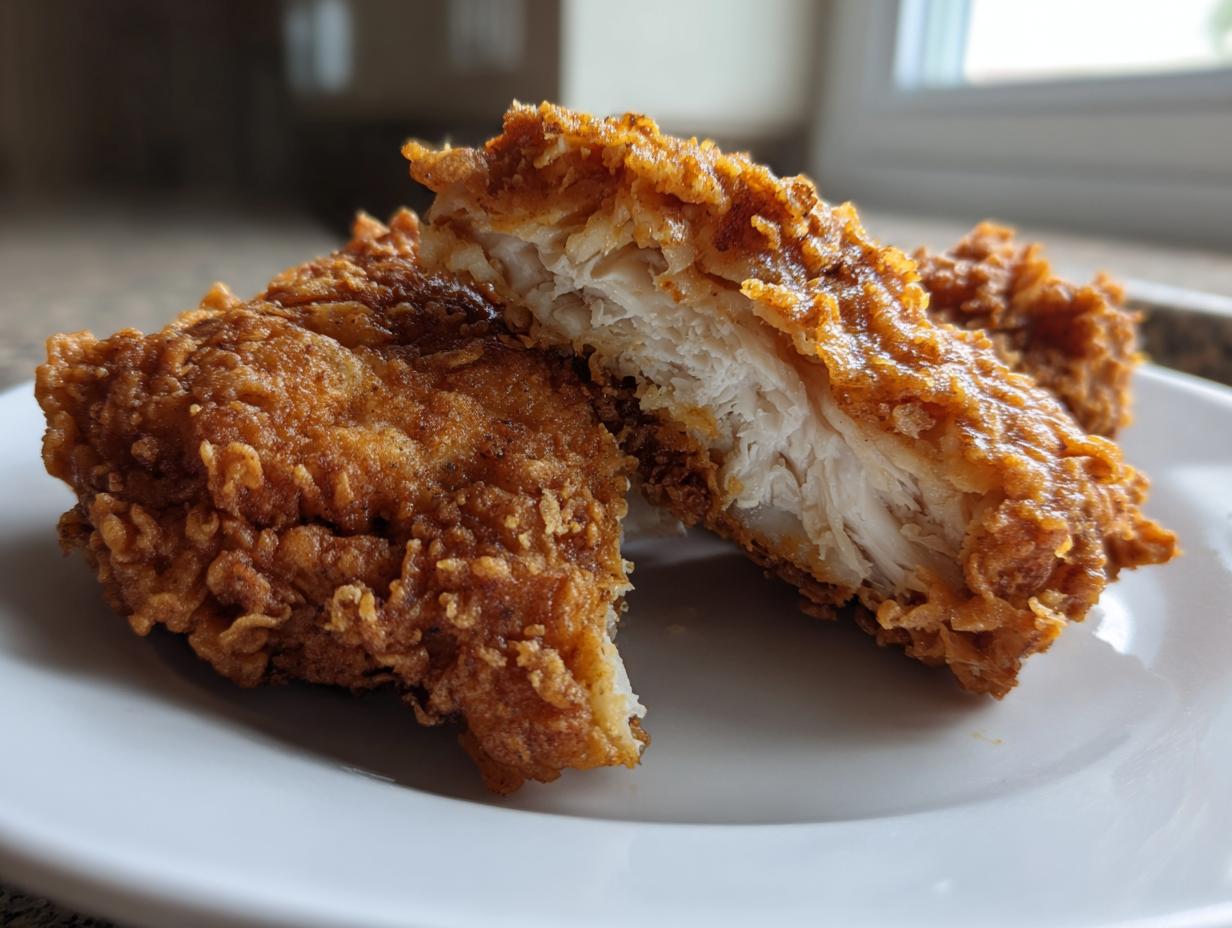
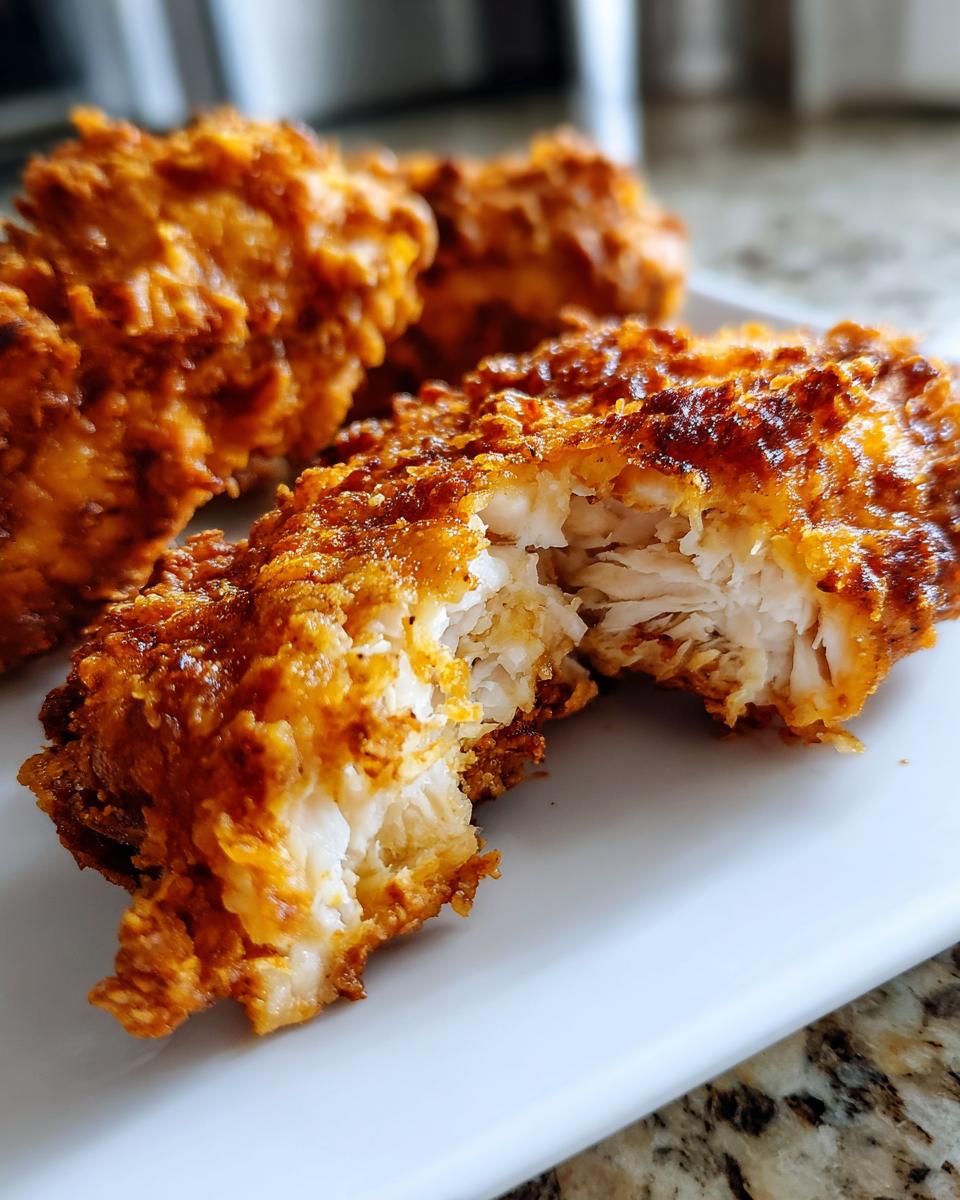
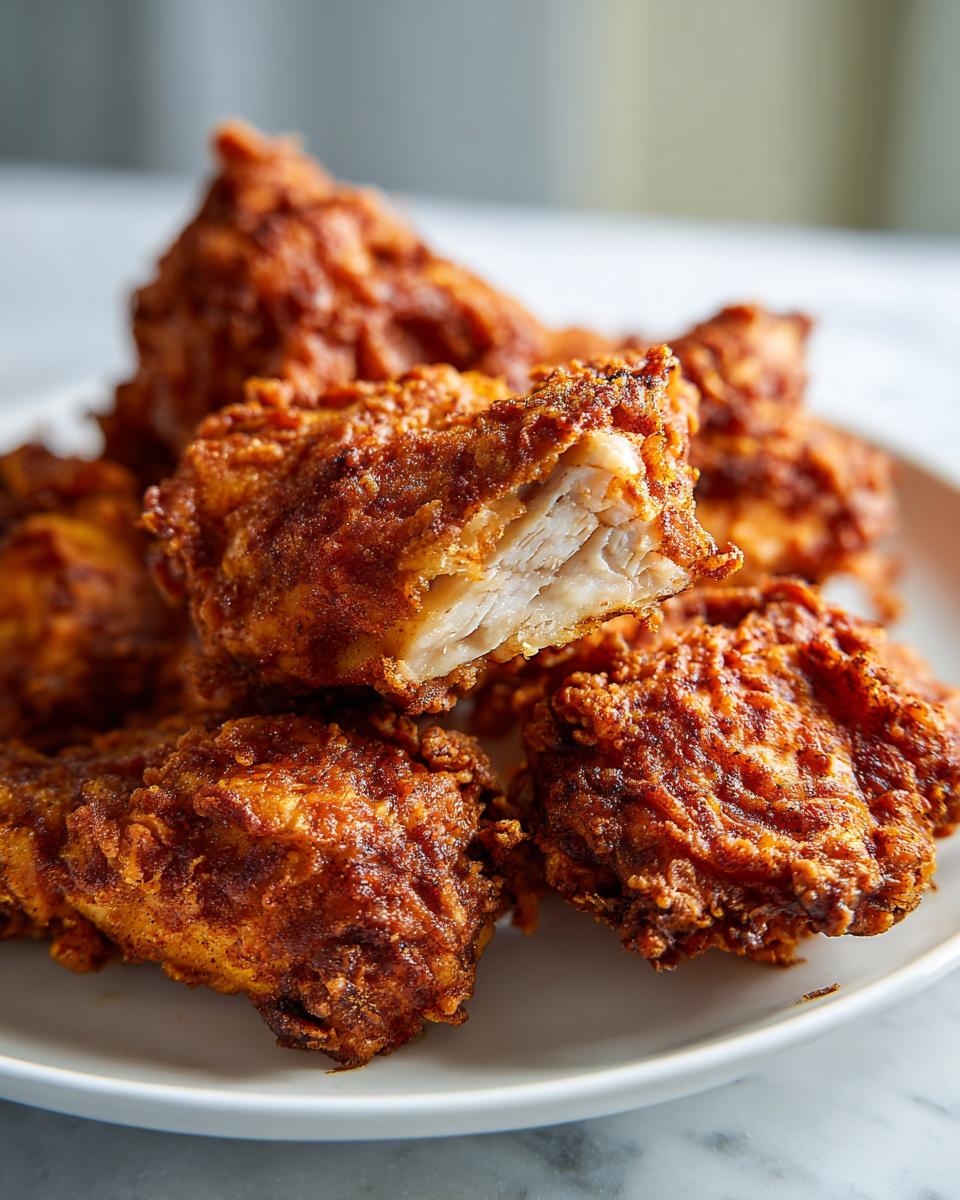
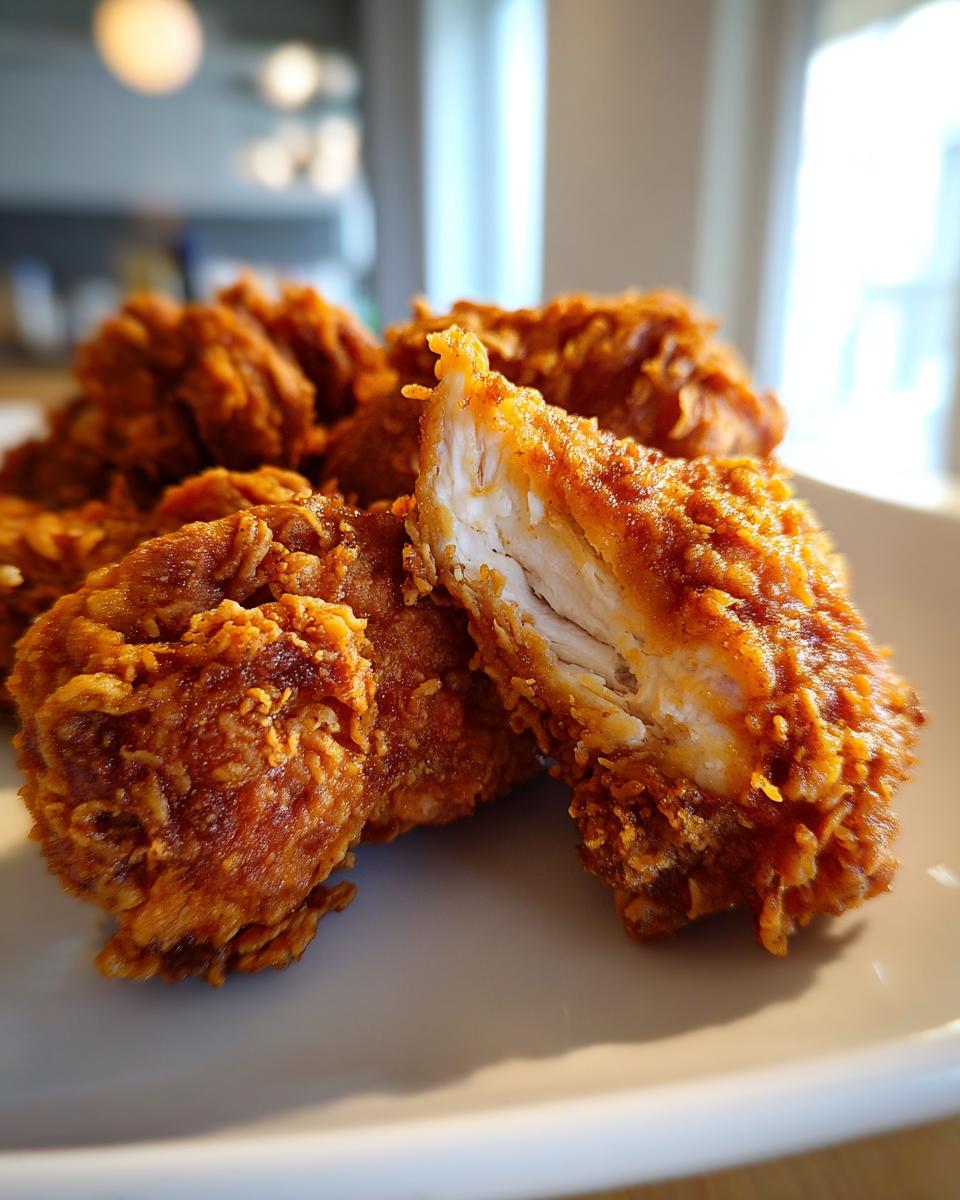
First things first, pull your chicken out of the fridge. You only need to let the excess buttermilk drip off; don’t rinse it! That wet residue is our glue. Now, take your seasoned flour mixture—the one with the cornstarch? That’s your armor. You need to dredge each piece thoroughly. I mean it, dredge it like you mean it! Don’t just toss it lightly. Lay the piece down in the flour, flip it, and then press the flour onto the chicken with your hands. I press it down firmly over every surface. That pressure creates those lovely nooks and crannies that bake up into that super crunchy, golden brown chicken in air fryer finish.
Once you’ve got a beautiful, thick coating on every piece, place them on a wire rack. Do not pile them up! This is critical. If you stack them right now, the moisture trapped between the pieces will turn your beautiful crust soggy before it even hits the heat. We need every surface exposed to the air so that when you go to place them in the basket, they are ready for action. Think single-file line, not a crowded bus. If you need to cook in batches, use a clean tray while the first batch is cooking, like I show in my instructions for easy garlic naan bread pairings!
Expert Tip for Maximum Coating Adhesion
If you’re struggling to get that heavy crust to stick, here’s a fast line cook trick. The key is temperature shock. Your buttermilk should be ice cold, right out of the fridge. Your dry flour mix needs to be room temperature, maybe even slightly warm if your kitchen is cool. When that very cold, wet chicken hits the room-temp flour, the temperature difference actually pulls the coating tight onto the surface fast! It’s science, baby. Press hard, and you’ll have a crust that doesn’t budge, guaranteeing that satisfying crunch when you bite in.
Step-by-Step Instructions for Crispy Chicken in Air Fryer
Okay, now for the fun part where we turn that craggy flour shell into crackling perfection. This is where you earn your wings, because this whole procedure moves quickly. Since you’ve already done the heavy lifting with that buttermilk soak, this process is actually incredibly simple, making this a fantastic easy weeknight chicken choice. Remember, airflow is your best friend here; we need space between every piece to ensure every side gets that beautiful, even crisp! If you’re working with lots of pieces, you’ll definitely need to run this in batches. If you need more inspiration for quick cooking, check out my tips for air fryer chicken wings.
- First up, preheat! Never skip this. You want your air fryer basket ready and hot—set it to 380 degrees Fahrenheit.
- Lightly spray the bottom of your air fryer basket with your cooking spray. This gives the first batch a little insurance against sticking.
- Carefully place your dredged chicken pieces into the basket. Make sure they are lying flat in a single layer and crucially, don’t let them touch. We need space for the air to circulate around them.
- This is the most important spraying step for color: generously spray the tops of the chicken pieces with cooking spray. Don’t just mist them; you want to see a nice layer of oil sitting on top of the coating. This helps it turn that perfect golden color.
- Air fry for about 20 to 25 minutes total. Midway through this cooking time—maybe around the 12-minute mark—you need to pull the basket out, flip every piece over, and give the other side a nice spray of oil too.
- Once you flip them, that’s when we start thinking about that final crunch. We’ll address that in the next section, but the flipping ensures even cooking inside while the outside starts to firm up.
- The final check involves a thermometer, always. Chicken has to hit 165 degrees Fahrenheit internally to be safe. Don’t guess!
- When it’s done, pull it out, and seriously, let it rest on a clean plate or cutting board for five minutes before you dig in. That resting time lets the juices redistribute. That is what guarantees that juicy air fryer chicken experience!
Air Fryer Temperature Management for Air Fryer Fried Chicken
Managing the heat is how we trick the air fryer into doing the work of a deep fryer. We start lower, at 380 degrees Fahrenheit. This lower-but-still-hot temperature gives the interior chicken meat time to cook all the way through without immediately burning that beautiful flour crust you worked so hard to build. We are aiming for even cooking across all those different parts—breasts, thighs, whatever you used.
Once everything is looking cooked internally (around the 20-minute mark), we kick the temperature up to 400 degrees Fahrenheit for the last three minutes of the cook time. This blast of high heat is the stylist; it instantly dehydrates the surface of the coating, making it super brittle and exponentially crispier. This two-stage temperature approach is the secret sauce for all the best air fryer chicken recipes because it prioritizes juicy meat first, then maximizes crunch second. It’s efficient, and efficiency wins in the kitchen!
Tips for the Best Air Fryer Chicken Results
So you’ve nailed the soaking, you’ve pressed that coating on tight, and you’ve cooked it perfectly—but we aren’t done yet! Achieving the *best air fryer chicken* means understanding that not all cuts behave the same way in that hot basket. If you’ve got a mix of pieces, you need to juggle them a bit. Thighs, bless their fatty hearts, are resilient; they can handle the full cook time because the extra fat keeps them happy and moist.
Now, if you’re using thicker or boneless air fryer chicken breast cuts, you have to play defense against drying out. Before you even dredge them, take a meat mallet and pound them slightly until they are an even thickness, say about three-quarters of an inch. This is a classic chef move to guarantee even cooking, which means they don’t overcook on the edges while you wait for the middle to finish. This little bit of prep work prevents those dry, sad ends you sometimes get with leaner cuts.
And please, for the love of crispy skin, let the chicken rest! I know you’re starving, especially after smelling that glorious aroma coming from the machine, but you have to fight the urge to slice into it immediately. When that chicken comes out, all the internal moisture is surging toward the outer edges. If you cut it right away, all those delicious juices—the reason you did the buttermilk soak—just run right out onto the plate. Let it hang out on a cutting board for a solid five minutes. This resting time settles the juices back into the meat fibers, making every bite of your air fryer fried chicken intensely delicious. Then, you can pile it high next to some creamy garlic parmesan mashed potatoes!
Serving Suggestions for Your Air Fryer Comfort Food
Okay, the main event is done—the air fryer fried chicken is crispy, juicy, and smells like pure happiness. You’ve got the best air fryer comfort food sitting right there, waiting. But what do you serve with such a legendary piece of poultry? When I make this, I stick to the classics because I don’t want anything competing with that savory, spiced crust. You want sides that absorb those chicken juices, plain and simple.
Forget the complicated stuff. This chicken shines next to simple, buttery, comforting things. I usually go for something green and something starchy. If you’re looking for the perfect starchy match, you absolutely have to try my recipe for garlic parmesan mashed potatoes. They’re creamy, salty, and the perfect pillow for setting that crispy piece of chicken on.
If you want something less heavy than potatoes but still deeply satisfying, a crisp, vinegary slaw is amazing for cutting through the richness of the fried coating. A simple vinegar-based dressing is better than a heavy mayo bomb here. It gives you that essential bright counterpoint.
And listen, if you’re doing this on a chilly night and feel like leaning *hard* into comfort, I sometimes pair it with a smaller pot of my easy chili recipe on the side—just a small bowl, mind you! It sounds weird, but the smoke and spice of the chili next to the buttermilk crunch? It’s unexpected but totally works for a heartier, low-effort meal. The key here is letting the chicken be the star. Keep the supporting cast simple, salty, and delicious!
Storage and Reheating Instructions
Nobody ever plans on having leftovers of my air fryer fried chicken because it is usually inhaled the moment it comes out of the basket, but when you do manage to save a piece or two, storing and reheating it correctly is crucial. If you just toss it in a plastic container in the fridge, you’re going to wake up to soggy sadness, and we absolutely refuse to let that happen! The goal is to preserve that hard-won texture we developed with the buttermilk soak and the high-heat blast.
First, you must cool the chicken completely before wrapping it up. Don’t rush this! If you seal up warm chicken, the steam trapped inside will instantly turn that gorgeous crust chewy. Let it sit out on a plate until it reaches room temperature.
For storage, ditch the flimsy zip-top bags. You need air circulation, even in the fridge. I like to line a shallow container with a paper towel, place the chicken pieces in a single layer (if you can!), and then cover the container loosely with the lid, or even wrap it tightly in foil. This keeps the moisture out but still lets the chicken breathe a little. It keeps perfectly fine in the fridge for about three days. If you’ve got more than that, freezing works too, but the texture might change slightly upon reheating.
Now for reheating—this is where the air fryer earns its stripes again! Forget the microwave; it’s the enemy of crispiness. You’re going to reheat it using the same method you cooked it: high, dry heat. Preheat your air fryer to about 350 degrees Fahrenheit. You don’t need to spray it with much oil this time, maybe just a very light mist if the coating looks dry. Place the cold chicken inside, making sure there’s space around each piece, just like when you cooked it fresh.
Reheat for just 5 to 8 minutes, depending on the size of your piece. Check it after 5 minutes. You want it hot all the way through, but the goal here is to crisp up that exterior again. Once it’s piping hot and you hear that satisfying little crackle when you tap it, it’s ready. Reheating in the air fryer brings back that fresh-off-the-line crunch beautifully. It’s the only way to do leftovers justice! If you’ve successfully stored some and want another great air fryer recipe for later, save my guide to crispy air fryer chicken parmesan for another night!
Common Questions About Making Air Fryer Fried Chicken
I get it—when you’re stepping away from tradition, you start having little doubts creep in, right? That’s why I pulled together the questions I hear the most when people try making this for the first time. We need to squash any fears so you feel totally confident hitting that start button. This technique is designed to be straightforward, but knowing the why behind the answer helps build that kitchen confidence!
Can I skip the buttermilk marinade?
Oh, I really, really wouldn’t recommend it if you’re after that juicy air fryer chicken experience. Skipping the buttermilk means skipping the tenderizing acid that breaks down the meat fibers and prepares them to hold moisture during that intense air fryer blast. If you must skip it for time reasons, you can do a quick 30-minute soak in milk mixed with a teaspoon of vinegar or lemon juice. It’s not as good as the real buttermilk, but it’s better than nothing! If you’re looking for more fast cooking ideas once you master this, peek at my easy weeknight dinners roundup.
How do I get it brown without burning it?
This is all about the spray and the two-stage temperature plan we talked about earlier. Remember: if you just sprinkle oil over the flour, it soaks in unevenly, leading to pale spots or burned edges. You have to *spray* it generously right before it goes in. The initial temperature (380°F) cooks the chicken through without scorching the coating. Then, that final 3-minute blast at 400°F is just enough heat to force that coating to brown up perfectly without overcooking the meat inside. It’s that quick temperature spike that gives you that beautiful, evenly golden brown chicken in air fryer look!
Can I use frozen chicken right out of the bag?
No, please don’t try this with frozen chicken pieces. The air fryer is designed to circulate dry heat rapidly. If you put frozen chicken in, you end up steaming it for the first 15 minutes of cooking while the ice melts. That moisture ruins the flour dredge, turning your crust gummy before it even has a chance to crisp up. You have to fully thaw your chicken first, and honestly, I prefer it even starting from slightly chilled from that buttermilk soak. If you’re planning ahead, go for the overnight soak—it’s worth the tiny bit of planning!
Is this truly a less oil chicken recipe?
Absolutely, yes! This is what makes this recipe so fantastic for real life. Traditional deep-fried chicken absorbs anywhere from half a cup to a full cup of oil depending on the size of your batch. With this air fryer fried chicken method, we are using maybe one or two tablespoons of oil total—mostly applied via spray to the exterior coating to help it brown. We are using the circulating hot air, not oil submersion, to achieve that crispness. It’s a genuine, delicious, and significant less oil chicken recipe that tastes like the real deal!
PrintUltimate Crispy & Juicy Buttermilk Air Fryer Fried Chicken
Make classic Southern-style fried chicken with a crispy coating and juicy interior using your air fryer. This recipe cuts down on oil while delivering maximum comfort food flavor.
- Prep Time: 20 min
- Cook Time: 25 min
- Total Time: 45 min
- Yield: 4 servings 1x
- Category: Dinner
- Method: Air Frying
- Cuisine: American
- Diet: Low Fat
Ingredients
- 2 lbs bone-in, skin-on chicken pieces (thighs, drumsticks, or breasts)
- 2 cups buttermilk
- 1 tablespoon hot sauce (optional)
- 2 cups all-purpose flour
- 1/4 cup cornstarch
- 2 teaspoons salt
- 1 teaspoon black pepper
- 1 teaspoon paprika
- 1 teaspoon garlic powder
- 1 teaspoon onion powder
- 1/2 teaspoon cayenne pepper
- Cooking spray (oil of choice)
Instructions
- In a large bowl, combine the buttermilk and hot sauce. Submerge the chicken pieces completely in the buttermilk mixture. Cover and refrigerate for at least 4 hours, or preferably overnight. This step is key for juicy air fryer chicken.
- In a separate shallow dish, whisk together the flour, cornstarch, salt, black pepper, paprika, garlic powder, onion powder, and cayenne pepper. This is your seasoned coating.
- Remove the chicken from the buttermilk, letting excess drip off, but do not rinse.
- Dredge each piece of chicken thoroughly in the flour mixture, pressing the coating onto the chicken firmly to create a thick layer. Place the coated chicken on a wire rack.
- Preheat your air fryer to 380 degrees Fahrenheit. Lightly spray the bottom of the air fryer basket with cooking spray.
- Arrange the chicken pieces in a single layer in the air fryer basket, ensuring they do not touch. Work in batches if necessary to avoid overcrowding, which prevents crispy chicken in the air fryer.
- Spray the tops of the chicken pieces generously with cooking spray.
- Air fry for 20 to 25 minutes, flipping the chicken halfway through the cooking time. For extra crispiness, increase the temperature to 400 degrees Fahrenheit for the last 3 minutes.
- Check the internal temperature with a meat thermometer; chicken is done when it reaches 165 degrees Fahrenheit.
- Remove the chicken and let it rest for 5 minutes before serving. This is the best air fryer chicken for a quick weeknight dinner.
Notes
- For the crispiest skin, ensure your buttermilk is cold and your flour coating is pressed on hard.
- If using chicken breasts, you may need to pound them slightly to an even thickness for consistent cooking time.
- This recipe works well for chicken tenders or boneless thighs; reduce the cook time by 5-7 minutes for tenders.
Nutrition
- Serving Size: 1 piece
- Calories: 350
- Sugar: 2
- Sodium: 550
- Fat: 15
- Saturated Fat: 4
- Unsaturated Fat: 11
- Trans Fat: 0
- Carbohydrates: 18
- Fiber: 1
- Protein: 35
- Cholesterol: 110