
There’s this amazing moment when you realize you can actually conquer candy-making right in your own kitchen. Forget that intimidating restaurant lingo—this is about making something truly special without the fuss. I’m sharing the vocabulary for success with what I genuinely think are the Best Soft, Chewy Sea Salt Homemade Caramels you’ll ever try. This is the tried-and-true, old-fashioned method that delivers those glorious, melt-in-your-mouth results every single time. It’s my translation of classic technique into practical steps so you feel totally confident. Get ready for some seriously buttery sweet treats!
- Why This Old-Fashioned Method Makes the Best Soft Caramels Recipe
- Simple Ingredient Treats for Perfect Homemade Caramels
- Step-by-Step Instructions for Soft, Chewy Caramels
- Expert Tips for No Fail Caramel Making
- Flavor Variations: Beyond Classic Sea Salt Caramels
- How to Package and Gift Your Homemade Caramels
- Storage and Shelf Life for Buttery Sweet Treats
- Frequently Asked Questions About Making Caramels
- Sharing Your Best Homemade Candy Success
Why This Old-Fashioned Method Makes the Best Soft Caramels Recipe
Look, I get it. Sometimes you see those quick microwave caramels pop up, and you think, “Why bother stirring for 20 minutes?” But trust me on this: if you want that genuinely rich, buttery, and perfectly soft texture, you need the control this stovetop method gives you. This isn’t just about speed; it’s about creating complex layers of flavor that you just can’t rush. Don’t settle for anything less than the best for your salted caramels!
When we talk about the soft caramels recipe that stands the test of time, we’re leaning into tradition. This old fashioned candy method allows the sugars to emulsify correctly with the fat over steady heat. It creates a structure that is firm enough to cut but still squishes perfectly when you bite into it. It’s the difference between good candy and *great* candy, which is why I stick to the steady, slower cook right here.

Achieving That Perfect Chewy Candy Texture
The secret sauce to the perfect chewiness—the kind that makes them melt in your mouth—is the temperature. You absolutely must use a candy thermometer for this part. We are aiming for exactly 245 degrees Fahrenheit, which is the soft-ball stage. Hitting that precise point ensures these turn into fantastic chewy candy squares. Come in too low, and they’re gooey sauce; too high, and they become hard little toffee nuggets. Precision here means success later!
Simple Ingredient Treats for Perfect Homemade Caramels
One of the best things about turning out great homemade caramels is that you don’t need a giant pantry full of specialty items. We’re sticking to the classics here—the foundational building blocks of real buttery goodness. When you gather these few things, know that you are setting yourself up for success. It’s all about the ratios, not the number of ingredients!
To make about 64 squares of perfection, here is exactly what you need on your counter before we even think about turning on the heat. If you want to see how to turn these into a sauce later, check out my recipe for easy homemade salted caramel sauce.
- 1 cup granulated sugar
- 1 cup light corn syrup
- 1 cup heavy cream
- 1 cup packed light brown sugar
- 1 cup (2 sticks) unsalted butter, cut into pieces
- 1 teaspoon pure vanilla extract
- 1/2 teaspoon coarse sea salt, plus more for topping
Step-by-Step Instructions for Soft, Chewy Caramels
Okay, this is the fun part where we turn simple pantry staples into actual magic! Remember, we are making caramels here, so safety first—that sugar mixture gets ridiculously hot. Just follow along methodically, and you’ll have no trouble. If you are looking for ways to use these candied treats, check out my recipe for caramel popcorn later for inspiration!
Pan Preparation and Initial Mixing for Your Caramels
First thing: get your pan ready. You need an 8×8 inch dish, and you absolutely, positively must line it with parchment paper. I mean it! Make sure the paper hangs over two of the sides like little handles. That overhang is your best friend later when you need to lift this whole block of perfection out later on. Lightly grease that parchment paper—a little spray or swipe of butter works fine. Then, in your heavy saucepan, combine the granulated sugar, corn syrup, heavy cream, and brown sugar. Get that stirring motion going until the sugars dissolve and it starts to boil.
Cooking to the Soft-Ball Stage for Melt in Your Mouth Candy
The second you hit a full boil, stop stirring! Now, you insert your candy thermometer. This is where we lock in that perfect chewiness. You need to monitor it carefully until it hits exactly 245 degrees Fahrenheit—the soft-ball stage. For me, this usually takes about 15 to 20 focused minutes of watching it bubble away. Resist the urge to stir it around; that messes up the crystallization process. Once you hit that magic number, pull the pan off the heat RIGHT away. You’re aiming for that luxurious, melt in your mouth candy texture, and 245°F is the gatekeeper to get you there. You can find more great ideas for classic sweets like these on other great cooking sites, but this method is ours!
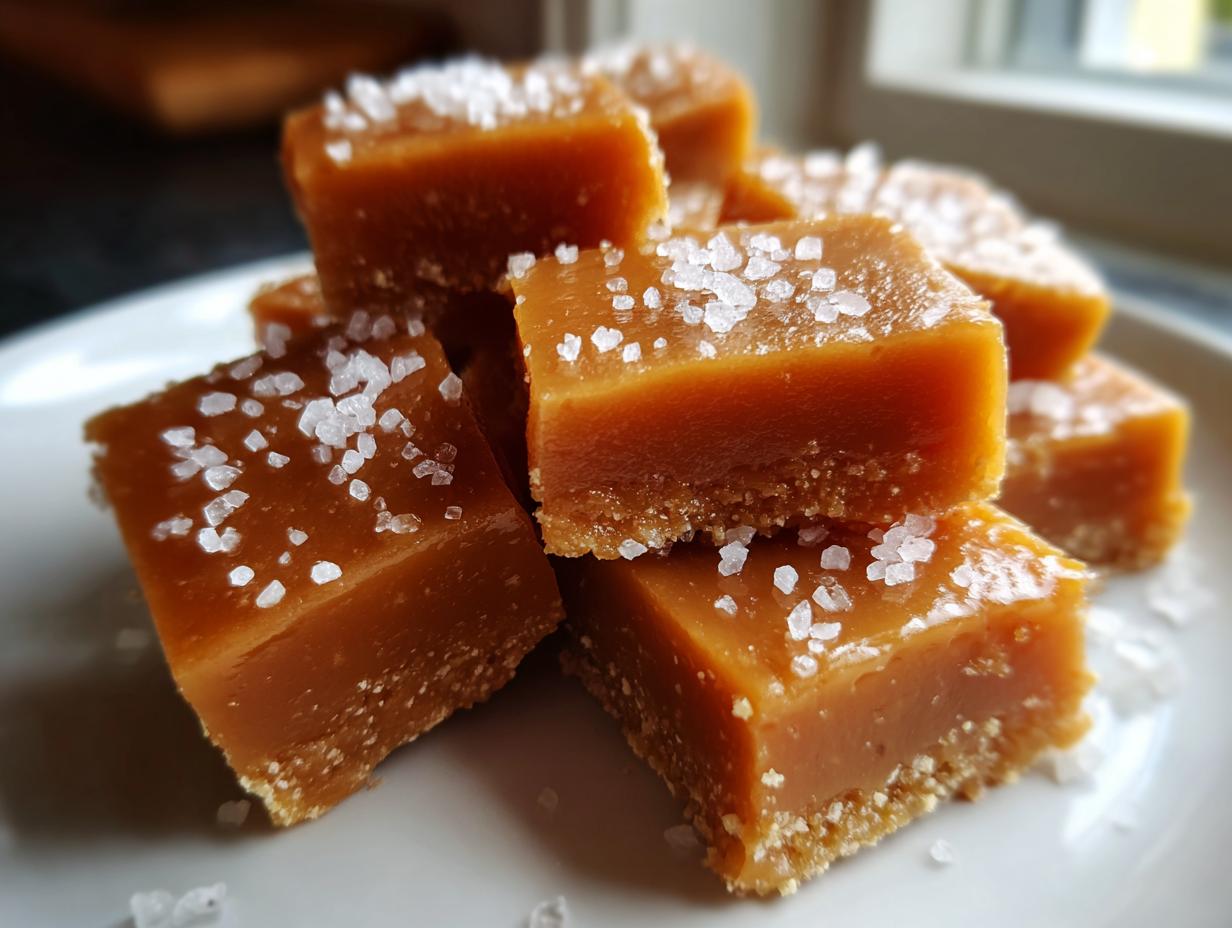
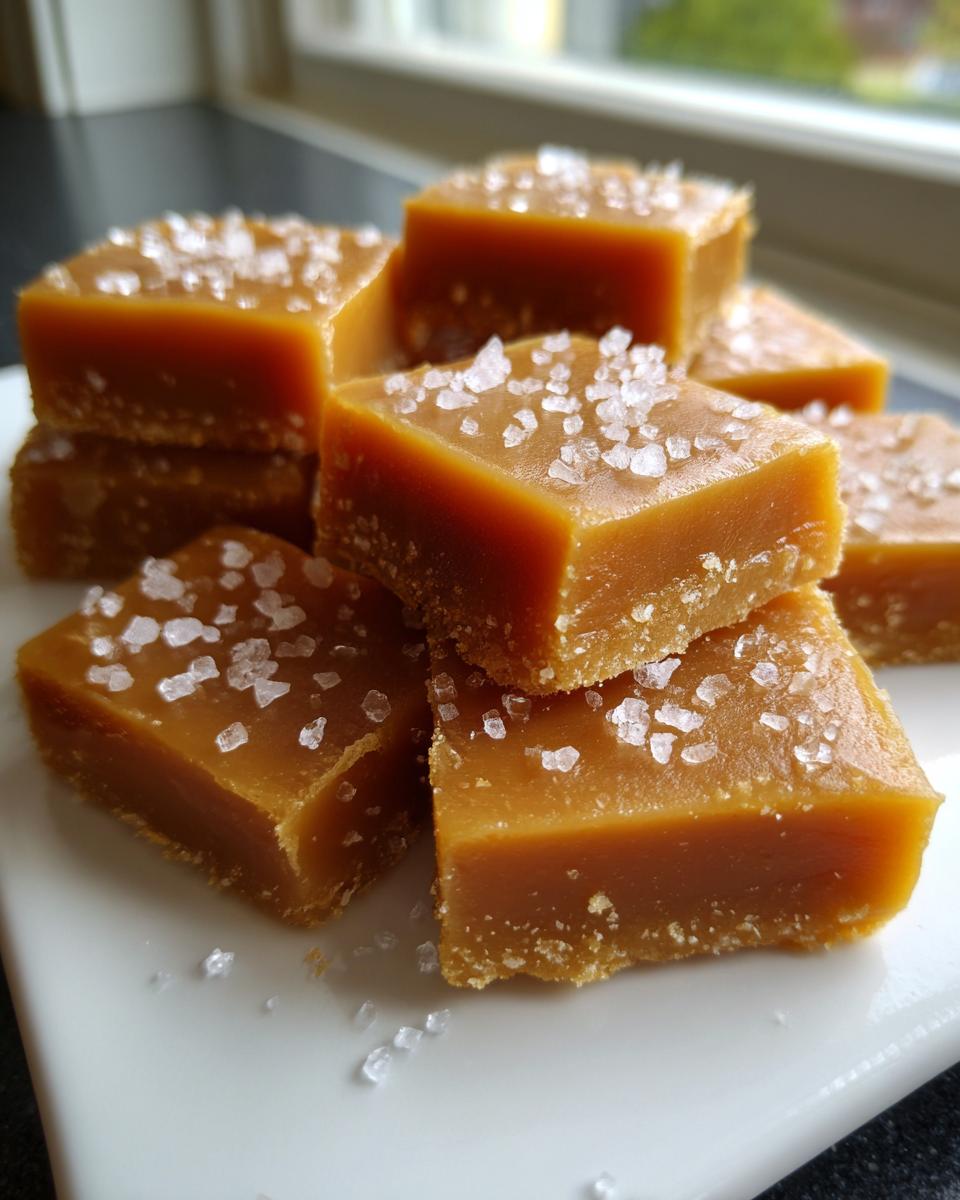
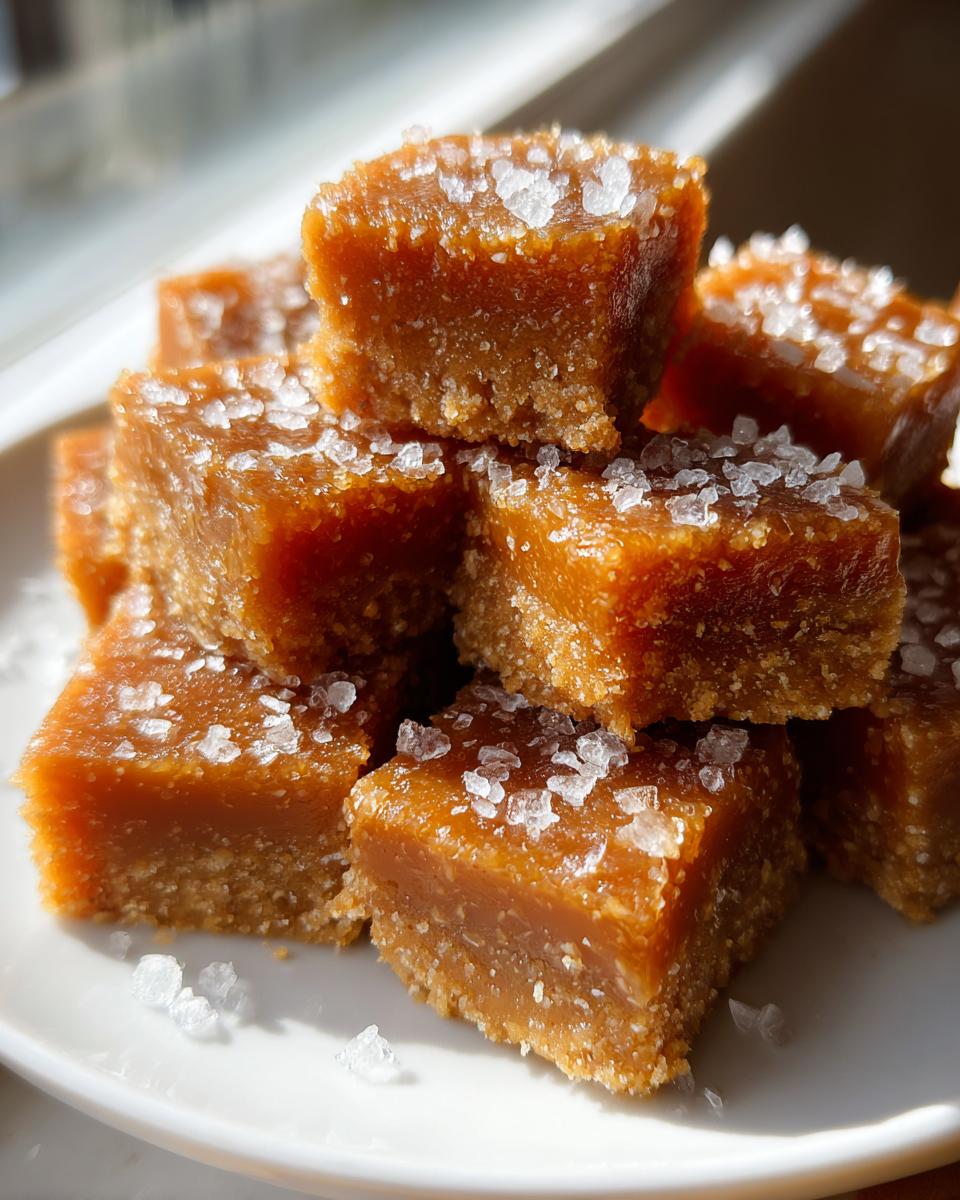
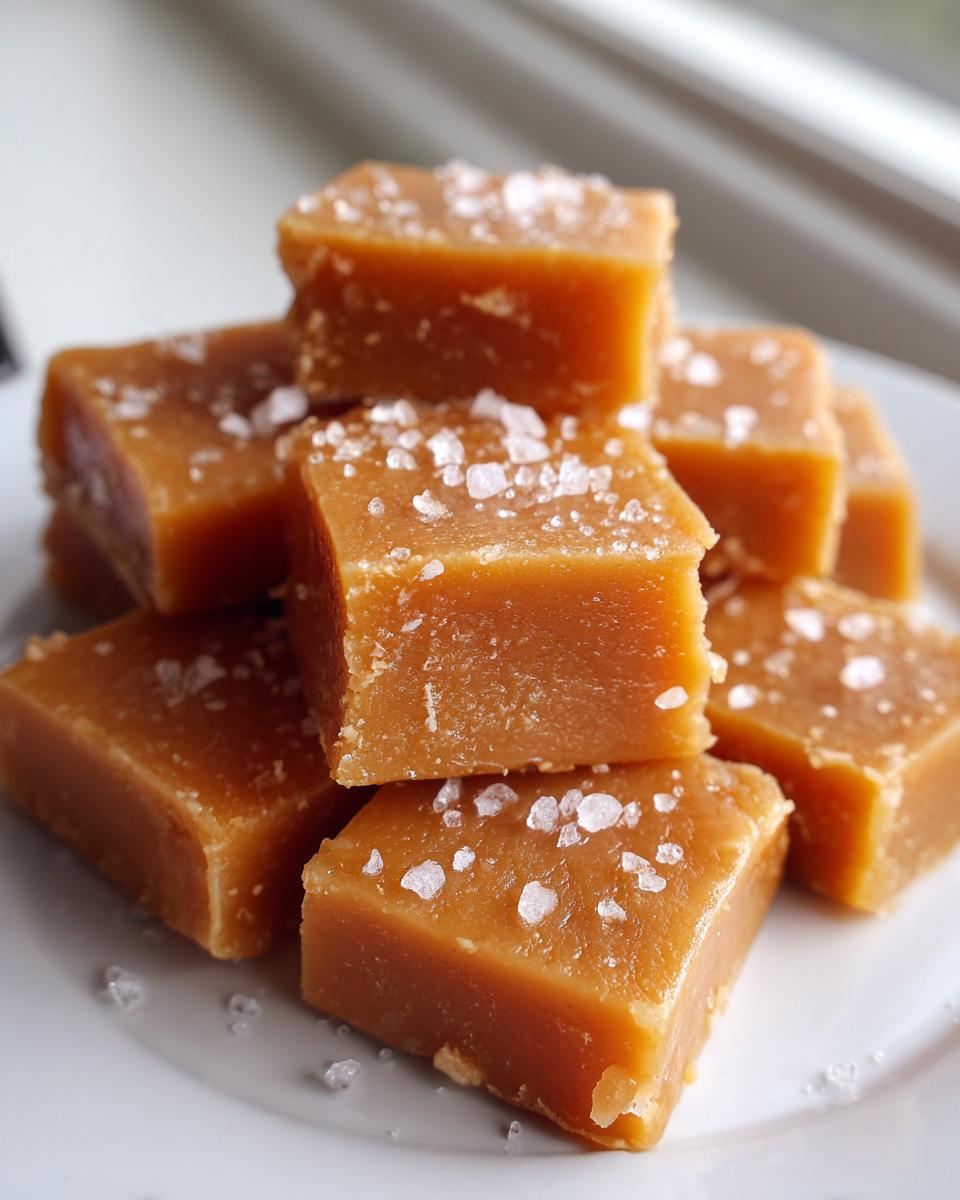
After taking it off the heat, whisk in that butter bit by bit until it’s all melted and incorporated—it’ll bubble up impressively, don’t panic! Finally, stir in your vanilla and that 1/2 teaspoon of sea salt. Pour the whole glorious thing into your prepared pan and sprinkle the top generously with more coarse sea salt. Then, you wait! Let it cool completely, at least three hours, before you attempt to cut it. Seriously, walk away!
Expert Tips for No Fail Caramel Making
I love sharing inside knowledge because making candy shouldn’t feel like a high-stakes science experiment. If you’re looking for a truly no fail caramel approach, using that candy thermometer is the most important insurance policy you can buy. However, I know not everyone has one sitting in their drawer, so let’s talk about the old-school test. If you don’t hit 245°F exactly, you can test doneness by dropping a tiny bit of the syrup into a glass of ice water.
If it forms a soft, pliable ball when you roll it between your fingers—that’s your soft-ball stage right there! Pull it off the heat immediately. That’s the tell-tale sign that you’ve achieved the right consistency for that melt-in-your-mouth texture.
Now, I want to be clear: while I mentioned the quick 6-minute microwave caramels method exists if you’re in a huge rush, I always steer people toward this stovetop method. Why? Because the gradual heating in the saucepan allows the sugars to develop that deep, complex flavor profile. This texture is richer and lasts longer. If you’re making these for holiday candy gifts, stick to the stovetop for that gourmet result!
Flavor Variations: Beyond Classic Sea Salt Caramels
Once you master the basic recipe—which you totally will, because this is a no fail caramel foundation—the fun really starts! We used sea salt because that little pop cuts the richness beautifully, but these buttery sweet treats are eager for a little personality tweak. Think about incorporating just a dash of pure maple syrup when you add the butter for a gorgeous, subtle warmth. It transitions these perfectly into easy fall baking territory!
If you love that creamy vanilla note, you can easily dial it up. Try adding a half-teaspoon of almond extract along with the vanilla for a different fragrant finish. Or, if you’re feeling adventurous, you could even make a quick batch of Christmas jam to swirl into the pan just before pouring, though that needs careful attention not to mess with the temperature too much.
For an absolutely luxurious finish—if you want to lean into the rich, decadent side of these classic sweets—you can check out how others achieve deeper flavors, like those wonderful vanilla cream caramels ideas out there. But honestly? Sometimes the simplest additions make the biggest impact for your homemade dessert ideas.
How to Package and Gift Your Homemade Caramels
One of the most satisfying parts of making candy—truly—is packaging it up for someone else. These buttery, chewy squares are just begging to be given away, especially around the holidays! Since we made them sturdy enough without the fridge, you just need the right wrapping to keep that fresh flavor locked in. If you’re looking for more ideas on no-bake treats for gifting, you should definitely peek at my recipe for chocolate rum balls.
The key takeaway here is separation. You cannot let these delicious caramels touch each other, or you’ll end up with one giant, sticky caramel block by the time they reach their destination! That parchment paper overhang we used earlier makes lifting the whole thing out so easy, right?
Once you’ve cut them into nice 1-inch squares, grab some wax paper or clear cellophane squares. Cut your wrapper material slightly bigger than the caramel square itself. Wrap each one tight, twisting the ends like a classic piece of candy you used to get at the corner store. This simple step protects them beautifully for gifting. These make the best holiday candy gifts because they feel so wonderfully homemade and gourmet!
You can stack the wrapped pieces into cellophane bags, tie them with a nice ribbon, or line them up in a small tin. They look impressive without requiring any actual skill in presentation, which is totally the Kitchen Slang way!
Storage and Shelf Life for Buttery Sweet Treats
We’ve gone through all this trouble to make these perfect homemade caramels, so we need to make sure we store them right! The absolute best place for these isn’t the fridge, which can actually make them a bit too firm. I want you to let them cool completely, then wrap them individually as we talked about.
Once they are wrapped up snug, pop them into an airtight container. That’s it! Keep that container sitting right on your counter at room temperature. Because of the high sugar content in these buttery sweet treats, they are wonderfully stable. You can expect them to stay perfectly soft and delicious for up to three weeks. That’s plenty of time to enjoy them before they disappear!
Frequently Asked Questions About Making Caramels
I’ve gathered the most common questions I get when people first try making their own caramels. Don’t let past kitchen mishaps scare you off; most problems are just little language barriers that we can easily translate here. If you’re looking for more inspiration for your homemade dessert ideas, stick around and check out some of my other posts!
Can I skip the candy thermometer when making caramels?
Yes, you absolutely can, though it’s my preferred tool for making these classic sweets perfectly every time! If you don’t have a thermometer, use the ice water test we talked about in the tips section. Drop a tiny bit of the hot mixture into a glass of ice water. If you can pull it out and roll it into a **soft, pliable ball** in your fingers, you’re good to go. If it melts right away, keep cooking! That’s the secret to getting that soft texture without the gadget.
Why are my homemade caramels grainy instead of smooth?
Ugh, graininess is the worst! It means the crystallization process went rogue on us. This usually happens for one of two reasons: either you stirred the sugar mixture *after* it started boiling, or you had tiny sugar crystals clinging to the side of the pot that fell back in and became seeds for the rest of the batch to crystallize. Next time, wipe down the sides of the pan with a wet pastry brush while it’s heating up to wash those rogue crystals down. This keeps your soft caramels recipe smooth and luxurious.
What if my caramels get too hard?
If they end up a little harder than you wanted, don’t toss them! It just means the temperature went a little too high—we cooked past the soft-ball stage toward a firmer stage. They won’t be quite as melt-in-your-mouth, but they are still fantastic! You can use those firmer pieces to make amazing salty-sweet magic mixed into ice cream, or you can even chop them up and use them as crunchy toppers for cookies or brownies. They are still delicious easy fall baking additions, just with a different texture!
Sharing Your Best Homemade Candy Success
Now look at you! You dove headfirst into kitchen candy making and came out the other side with soft, sticky, glorious caramels. Seriously, I’m so proud you took the leap!
Whether you made these for a cozy movie night snack or carefully wrapped them all up as holiday candy gifts, I want to know how they turned out. Did the sea salt hit just right? Was the chewy texture exactly what you were hoping for? Don’t keep the flavor secrets to yourself!
Head down to the comments section below and give this recipe a rating. Tell me if you stuck strictly to the sea salt, or if you tried adding a little something extra to the mix—maybe a swirl of chocolate or a hint of spice? Sharing your successes (and any little kitchen mishaps we can laugh about!) is exactly why we built this community here at Kitchen Slang. You can always learn more about what we’re testing next over on our About page!
Happy cooking, and I hope you enjoy every last one of these best homemade candy squares!
PrintBest Soft, Chewy Sea Salt Homemade Caramels

Make melt-in-your-mouth, buttery sweet treats with this easy, no-fail recipe for soft, chewy homemade caramels. These classic sweets are perfect for holiday candy gifts or a simple dessert.
- Prep Time: 15 min
- Cook Time: 20 min
- Total Time: 3 hours 35 min
- Yield: About 64 pieces 1x
- Category: Candy
- Method: Stovetop Cooking
- Cuisine: American
- Diet: Vegetarian
Ingredients
- 1 cup granulated sugar
- 1 cup light corn syrup
- 1 cup heavy cream
- 1 cup packed light brown sugar
- 1 cup (2 sticks) unsalted butter, cut into pieces
- 1 teaspoon pure vanilla extract
- 1/2 teaspoon coarse sea salt, plus more for topping
Instructions
- Prepare an 8×8 inch baking pan by lining it with parchment paper, leaving an overhang on two sides for easy removal. Lightly grease the parchment paper.
- Combine the granulated sugar, corn syrup, heavy cream, and brown sugar in a heavy-bottomed, medium saucepan.
- Place the saucepan over medium heat. Stir constantly until the sugar dissolves and the mixture begins to boil.
- Stop stirring once the mixture boils. Insert a candy thermometer and cook until the mixture reaches 245 degrees Fahrenheit (soft-ball stage). This usually takes about 15 to 20 minutes of cooking without stirring.
- Remove the pan from the heat immediately when it reaches 245 degrees Fahrenheit.
- Carefully stir in the butter until it is completely melted and incorporated. The mixture will bubble up.
- Stir in the vanilla extract and the 1/2 teaspoon of sea salt.
- Pour the hot caramel mixture into the prepared baking pan. Sprinkle the top evenly with extra coarse sea salt.
- Let the caramels cool completely at room temperature for at least 3 hours, or until firm. Do not refrigerate.
- Once firm, use the parchment overhang to lift the block of caramel out of the pan. Cut into 1-inch squares. Wrap each piece individually in wax paper or cellophane for storage or gifting.
Notes
- For a quick version, you can try the 6-minute microwave caramels method, but this old-fashioned method gives the best texture.
- If you do not have a candy thermometer, the caramel is ready when a small drop placed in ice water forms a soft, pliable ball.
- Store your finished, wrapped caramels in an airtight container at room temperature for up to three weeks.
Nutrition
- Serving Size: 1 square
- Calories: 100
- Sugar: 16g
- Sodium: 35mg
- Fat: 4g
- Saturated Fat: 2.5g
- Unsaturated Fat: 1.5g
- Trans Fat: 0.1g
- Carbohydrates: 16g
- Fiber: 0g
- Protein: 0.5g
- Cholesterol: 15mg