
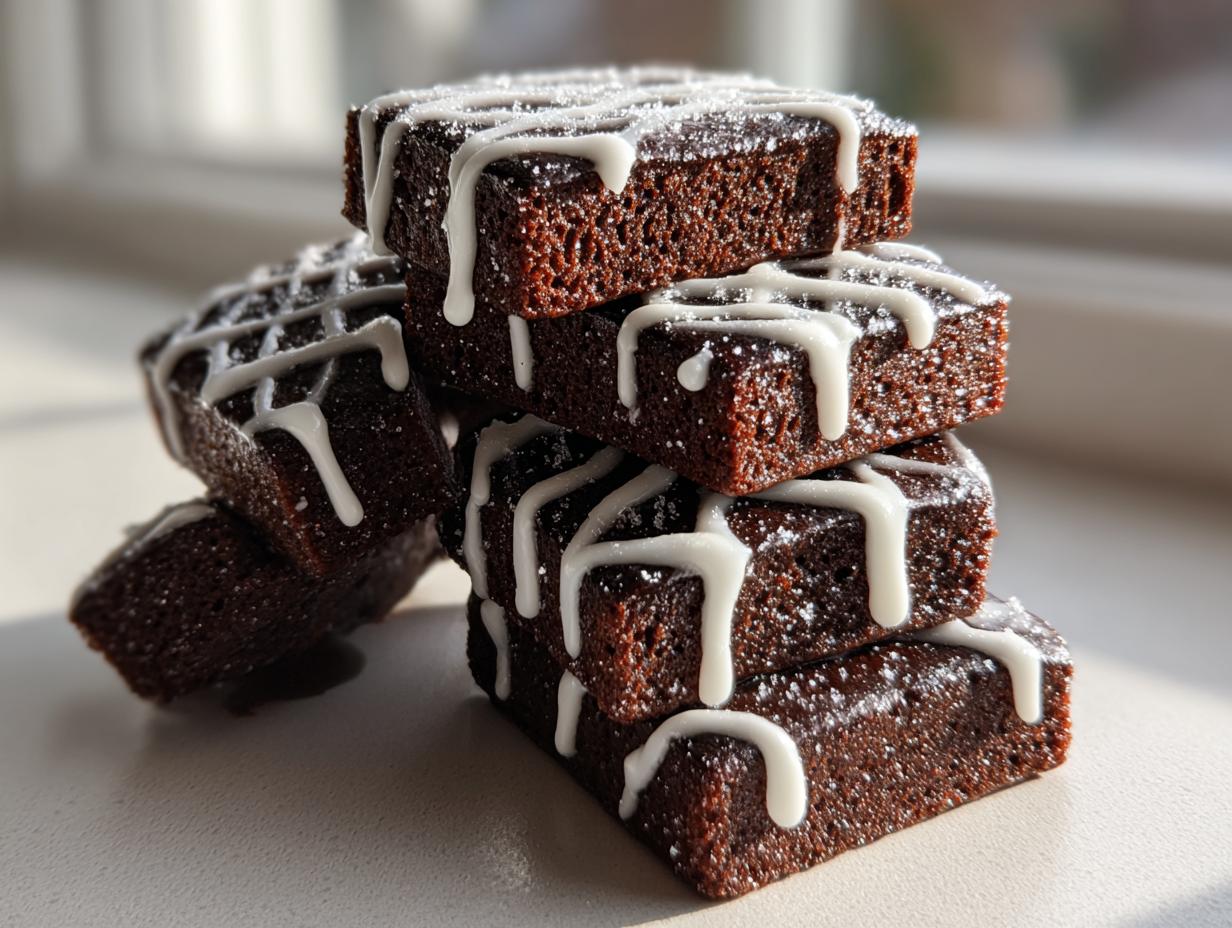
Okay, let’s talk about the holidays. The pressure to create that perfectly Instagrammable, rock-solid gingerbread house can drain the joy right out of December, right? I’ve seen too many beautiful cookie pieces crumble when they meet the icing. That’s why this isn’t your average soft cookie recipe; this gingerbread house recipe is engineered to build things. Seriously. When I was working those long bistro shifts, I learned there’s a huge difference between baking something delicious to eat and baking something structurally sound—like baking brick, but spiced! Trust me, you want building material, not a meltable cookie.
This guide is the translation you need for a stress-free holiday baking project. We’re pairing a stiff, no-spread dough with construction-grade icing so your creation stands proud all season long. You can try exploring some holiday jams while the dough chills, like my favorite slow-cooked cranberry spice jam, but don’t get distracted; this dough needs time! I’ve seen some excellent results over at Taste Itinerary, but this version here is my personal winner for guaranteed stability.
- Why This Sturdy Gingerbread House Recipe Works for Building
- Gathering Ingredients for Your Gingerbread House Recipe
- Step-by-Step Instructions for the Gingerbread House Recipe Dough
- Baking and Preparing Pieces for Your Gingerbread House Recipe
- Assembly: How to Build a Gingerbread House Using Sturdy Dough
- Making This Gingerbread House Recipe a Fun Family Christmas Activity
- Storage & Reheating Instructions for Your Christmas Centerpiece Baking
- Frequently Asked Questions About the Gingerbread House Recipe
- Next Steps for Your Winter Fun Baking Ideas
Why This Sturdy Gingerbread House Recipe Works for Building
If you’ve ever made a gingerbread house that turned into a floppy, sad pancake right out of the oven, I feel you. That’s because most recipes aim for soft, chewable cookies. That’s great for snacking, but terrible for building! This Sturdy Gingerbread House Recipe avoids that mess because we’re focusing less on ‘soft’ and more on ‘structural integrity.’
We cut back on the moisture slightly here, which sounds counterintuitive, but it’s pure science! Less moisture means less steam, which means less spreading once it hits the heat. Think of it as creating dense, spiced wood rather than cake. While you might want to check out my sugar cookie icing guide for decorating later, remember that for the structure itself, stability comes first. I’ve seen some excellent results over at The Garden Style; they really nail the *no spreading* aspect too.
The Secret to Best Gingerbread Dough for Building
The biggest differentiator in this recipe is how you handle the dough *before* it sees the oven. We want a firm dough, and we want it rolled thick—I’m talking a solid 1/4 inch. Thin dough buckles under its own weight, especially with heavy candy decorations later on.
Here’s a little pro tip from the line: In true construction doughs, we often skip baking powder or soda entirely. While this recipe needs a tiny bit for texture in the flavor, remember that leavening agents create lift. Fewer bubbles equal stronger walls! The long chill time, easily two hours or more, locks in those cut shapes, which is the absolute key to getting a successful No Spreading Gingerbread Recipe.
Gathering Ingredients for Your Gingerbread House Recipe
Okay, getting organized is half the battle when you’re aiming for a structure that lasts past Christmas morning. Kitchen Slang means being clear about what goes where! We need precise measurements here because we are baking for structure, not just flavor—though trust me, the flavor is unbelievable. Don’t skimp or make substitutions on the core items in the dough; they are what make this recipe work.
When you’re ready to bake, make sure you’ve got everything prepped before you start mixing. This is part of the pro workflow, and it keeps that butter from getting too warm while you’re hunting for the ground cloves!
Dough Ingredients: Building the Foundation
These proportions are locked in for strength. Grab your measuring cups and measure carefully. Remember, the butter needs to be softened, not melted. I always leave mine out for about an hour before I start mixing up my dough.
- 3 cups all-purpose flour
- 1 teaspoon ground ginger
- 1 teaspoon ground cinnamon
- 1/2 teaspoon ground cloves
- 1/2 teaspoon ground nutmeg
- 1/2 teaspoon salt
- 1/2 cup granulated sugar
- 1/2 cup (1 stick) unsalted butter, softened
- 1 large egg
- 1/2 cup molasses
- 1 teaspoon vanilla extract
If you want to read up on molasses—because it’s the backbone of that deep gingerbread flavor—I have a great piece on chewy molasses cookies that explains why that sticky gold is so vital.
Royal Icing Ingredients for Gingerbread House Construction Icing
Now, for the cement! Forget that fluffy white frosting you put on sugar cookies. We need walls that stick fast and never sag, which means real royal icing. This Gingerbread House Construction Icing dries like concrete—it’s perfect for your framework. This is the recipe I rely on every holiday.
- 3 large egg whites
- 4 cups sifted powdered sugar (sifting is non-negotiable here!)
- 1 teaspoon of cream of tartar
We are beating this stuff until it forms stiff, glossy peaks. You want it so firm that if you held the whisk up, the icing would stand straight up without even thinking about drooping. That’s the signal that it’s ready to hold your entire house together.
Step-by-Step Instructions for the Gingerbread House Recipe Dough
Alright, we’re moving into the active phase. This is where we take all those measured ingredients and turn them into something usable. Remember what I said about pro workflows? Having everything near by makes this process fast, and fast means great temperature control. Follow these steps for the perfect gingerbread house recipe dough, and you won’t have any issues when it comes time to roll things out.
First up, you need to manage your dry team and your wet team separately. Whisk together all your flavors—the flour, the ginger, the cloves, all of it—in a big bowl. Set that aside. In your mixer bowl, cream that softened butter and sugar until it’s actually fluffy, not just mixed up. I always stop and scrape down the sides halfway through because those forgotten bits end up clumping later!
Mixing and Chilling the Best Gingerbread Dough for Building
Once the butter and sugar are light, you introduce the egg, the molasses, and the vanilla. Mix until that’s just one happy, dark mixture. Now, here’s the crucial part: add the dry ingredients slowly, mixing on low speed only until you see it combine. Stop mixing the second you don’t see white streaks of flour anymore! Overmixing this dough is how you get tough gingerbread, and we need pliable, but strong, pieces.
Once it comes together into one stiff ball—and it will be stiff, don’t panic—divide it into two disks. Wrap them up tight in plastic, and they need a serious nap in the fridge. I insist on a minimum of two hours for chilling. My secret? If you rush the chill time, the dough expands too fast in the oven, and boom—your walls spread out on the baking sheet. Wrap ’em up, save them for later, or check out this easy apple crumble recipe while you wait. The longer it chills, the flatter your house sides will bake, guaranteed!
When you’re ready to bake those pieces, you can find the full instructions over at Sugar and Charm, but the cold dough part is the real game-changer.
Baking and Preparing Pieces for Your Gingerbread House Recipe
It’s time to introduce our perfectly chilled building blocks to the heat! Preheat that oven to 350°F (175°C). You’ll want to line your baking sheets with parchment paper—this is non-negotiable for easy cleanup and transfer. If you’ve been baking other holiday treats, maybe you’ve already mastered my whipped shortbread cookies, but this process is slightly different because we are not aiming for soft cookies.
Now, grab one of those firm disks of dough. No cheating! You have to roll this baby out to 1/4 inch thick. That’s the minimum for walls that won’t bow under the weight of the roof or candy decorations. Cut out your template pieces directly on the dough—floor, walls, windows, all of it. When you transfer these cut pieces to the prepared sheets, remember they are spaced out enough to not touch while baking. This prevents merging, which ruins your straight edges!
Bake them for about 12 to 15 minutes. How do you know they are done? They should look firm and dry around the edges. You are looking for structural integrity here, so give them a minute or two longer than you would for regular, soft Spiced Gingerbread Cookies for Decorating. They should come out sturdy enough to handle some serious construction!
Tips for Baking Flat, Building-Grade Gingerbread House Recipe Components
The cooling stage is almost as important as the baking time itself! After you pull the sheets out, just let those pieces sit right there on the hot baking sheet for a good five minutes. This lets them firm up just enough so they don’t immediately collapse when you try to move them.
Once they’ve set up a bit, gently slide the whole thing—parchment and all—onto a wire cooling rack until they are 100% cool to the touch. They must be completely cool, maybe even overnight depending on your kitchen humidity, before you try to assemble anything. That’s when the real chef’s secret comes in: If, after cooling, a piece warped slightly (and it happens to everyone!), don’t panic. Take a serrated knife or a clean kitchen grater and gently trim the edges flat once the piece is hard. That little bit of trimming guarantees perfectly straight walls when it’s time to build your masterpiece.
Assembly: How to Build a Gingerbread House Using Sturdy Dough
The moment of truth! You’ve got structurally sound pieces, now it’s time to learn How to Build a Gingerbread House. This is where that hard-setting royal icing comes into play. Think of this icing as super-strong adhesive, not just pretty trim. You want those walls standing tall and proud, ready for the roof addition without wobbling!
We start by piping a thick seam of that stiff icing onto the base where the first wall piece will sit. You’re going to need a partner or a few heavy cans (clean ones, obviously!) to hold things steady for the first few minutes. Seriously, hold that wall in place until the icing starts to grab, otherwise, gravity wins the fight against your efforts. While you’re waiting for that initial set, maybe peek at my recipe for easy garlic naan bread—something savory to balance out all that sugar!
Assemble the four walls first, letting that base structure dry completely before you even think about touching the roof pieces. I know it’s agonizing when you’re ready to move onto spraying on rock candy, but you have to let the walls solidify. This is the true secret to making your **gingerbread house recipe** a permanent holiday feature rather than a one-day wonder.
Mastering Gingerbread House Construction Icing Application
Remember, the icing for construction needs to be rock solid. If you look at the recipe notes, we beat that icing until it forms stiff peaks. If it looks too soft or wet when you pipe it, it won’t have the sheer gripping power needed for load-bearing walls.
When piping the seams, go thick and generous where the pieces join. When you press two walls together, you want a little bit of excess icing to squeeze out—that’s the squeeze-out seal, and it’s good! Wait at least a few hours, preferably overnight, before attempting to place the roof on. If you need inspiration for your heavy-duty glue, check out the details over at Savory Skies on construction icing. Patience now buys you a centerpiece that lasts until New Year’s!
Making This Gingerbread House Recipe a Fun Family Christmas Activity
See, the best part of this whole process isn’t just the amazing, sturdy **gingerbread house recipe**—it’s the memory-making! Once you’ve let your structure cure overnight and you know those walls aren’t going anywhere, it’s time to bring in the little helpers. This moves the project from a solitary baking challenge into a full-blown **Fun Family Christmas Activity**.
The construction phase is tricky; that’s the technical work only adults should handle. But decorating? That’s where the artistry and the mess happens, and honestly, the mess is part of the charm! Kids absolutely love turning these neutral spice walls into glittering castles full of candy details. It truly becomes one of those magical **Edible Holiday Crafts** that we look forward to all year long. Think of it as collaborative sculpture!
Before you get too far, you need a game plan for the decorations. You can check out some incredible finished looks over at Qn Recipes for inspiration on what to aim for. We’re going to make the icing sturdy, so you can pile on the candy once the structural glue is dry. Maybe whip up an easy brunch casserole, like my cinnamon roll casserole, for the crew while you decorate!
Template Tips for Your Holiday Baking Project
I know I’ve stressed the importance of measuring, but you can’t just eyeball the sides of a house, even with this perfect dough. You absolutely need a good pattern! Before you even think about rolling out this dough for your **Holiday Baking Project**, you have to secure your blueprints.
The easiest route is to search online for an “Easy Gingerbread House Template.” Look for one that uses basic shapes—two rectangles for the walls, two simple trapezoids for the peaked side walls, and two rectangles for the roof panels. Keep the design simple the first few times you try this. A complex roof pitch is just asking for disaster when you rely on icing to hold it up! Once you have your template printed, trace it firmly onto parchment paper so you can cut right around the lines when you roll out your dough. That’s your recipe for clean, straight pieces!
Storage & Reheating Instructions for Your Christmas Centerpiece Baking
Now that you’ve built your masterpiece—your shining Christmas Centerpiece Baking achievement—storage is all about keeping that gingerbread hard and keeping the candy from getting sticky. If your house isn’t meant to be eaten right away (and honestly, if I’m spending all that time on construction, I want it to last!), you need a strategy.
The finished house needs cool, dry air. Do NOT put it in the fridge or near a steamy window. A cool corner of a room is perfect. Moisture is the enemy of our sturdy dough and our rock-hard icing. If you have leftover dough pieces you didn’t bake, wrap them super tight in plastic wrap and tuck them into an airtight container in the fridge. I like to make extra walls sometimes just in case of accidents!
If you made extra, unbaked dough, it lasts about a week in the fridge or several months frozen. When you want to use that leftover dough, just let it thaw slightly on the counter, and you can roll it out again just like new, maybe checking if you need to dust a little extra flour on your surface. If you’re looking for other make-ahead holiday plans, try my homemade granola recipe to keep handy for quick breakfasts!
Frequently Asked Questions About the Gingerbread House Recipe
I know when you’re deep into a project like this, questions pop up. It’s totally normal! Most of the questions I get circle back to sturdiness—which is exactly what we aimed for with this guide. Don’t worry if your first attempt isn’t perfect; cooking (and building!) is always about learning. I’ve pulled together the sticking points I hear most often from folks tackling their first big structural bake like this amazing **gingerbread house recipe**.
If you’re looking for something warm and hearty while you wait for that icing to dry, you should check out my easy chili recipe—it’s perfect comfort food for a cold day in the kitchen!
Why is my gingerbread dough spreading while baking?
This is the number one heartbreak of every holiday baker! If your dough is spreading, it usually boils down to one of two things: either your butter was way too soft when you creamed it, sacrificing the structure right upfront, or you didn’t chill the dough long enough. Remember, this specific **gingerbread house recipe** is designed to be super stable, which means it needs that lengthy chill time to keep those cut shapes firm when the heat hits them. If you see spreading, it means the butter softened too much before it could set in the oven.
Can I make the dough ahead of time for this gingerbread house recipe?
Absolutely, and I highly recommend it! Making the dough ahead of time is a huge win for managing the chaos of the season and makes this whole event a much more relaxed **Holiday Baking Project**. The dough keeps beautifully wrapped tightly in the plastic wrap in the fridge for up to a week. If you’re really prepping early, you can freeze the disks for a couple of months.
When you pull it from the fridge, just let it sit on the counter for 15 to 20 minutes to soften up just enough to roll out easily without cracking. I always try to use recipes that let me get ahead, which is why I love that you can bake the pieces first and assemble later!
How long does the Royal Icing need to dry before I can decorate?
This depends entirely on what you’re using the icing for! If you’re using it for the structural build—the four walls and the roof—you need R&R, rest and rigidity! You must let that icing dry completely hard, which means waiting several hours, but honestly, waiting overnight is your safest bet before you attempt to add the roof or start gluing on heavy gumdrops. If the structure is still soft, it’ll shift.
For simple decoration, like piping dots around the window frames or a little snow drift border on a cooled piece you plan to eat immediately, one or two hours might be okay. But for building, the icing needs to mimic solid adhesive! For more on getting that perfect icing texture, you can see a great guide over at Cooking With Emy.
Next Steps for Your Winter Fun Baking Ideas
Well, there you have it! We’ve moved past the intimidation factor and we’ve turned sticky molasses into solid, spiced construction-grade lumber. You’ve successfully translated a classic idea into a sturdy, achievable **Winter Fun Baking Idea**. Now the best part begins—the assembly and the pure, unadulterated candy decoration!
Don’t wait until the last minute to start this project. The dough needs that rest, and the icing needs that drying time. Tackle the baking one day, assemble the frame the next, and then let the kids loose on the decorating! I really want to see what you all come up with this year. Did your walls stand straight? Did your icing hold up like cement?
Seriously, come back here and drop a comment below so I know how your **gingerbread house recipe** turned out! I love hearing about your successes and troubleshooting any tiny wobbles. If you need a savory dish after all that sugar—maybe something flavorful to feed the crew—you should definitely try my maple mustard pork tenderloin next week.
And if you want to see what questions other people are asking about construction right now, float over to The Flavor Bender’s comments section for some real-world feedback!
PrintSturdy Gingerbread House Recipe for Construction

This recipe creates strong, non-spreading gingerbread pieces perfect for building a durable holiday centerpiece. We pair it with a reliable royal icing for construction.
- Prep Time: 45 min
- Cook Time: 30 min
- Total Time: 3 hours 15 min (includes chilling and drying time)
- Yield: One standard house structure
- Category: Dessert
- Method: Baking
- Cuisine: American
- Diet: Vegetarian
Ingredients
- 3 cups all-purpose flour
- 1 teaspoon ground ginger
- 1 teaspoon ground cinnamon
- 1/2 teaspoon ground cloves
- 1/2 teaspoon ground nutmeg
- 1/2 teaspoon salt
- 1/2 cup granulated sugar
- 1/2 cup (1 stick) unsalted butter, softened
- 1 large egg
- 1/2 cup molasses
- 1 teaspoon vanilla extract
Instructions
- Whisk together the flour, ginger, cinnamon, cloves, nutmeg, and salt in a large bowl. Set aside.
- In a separate bowl, cream the softened butter and sugar until light and fluffy. This takes about 3 minutes with a mixer.
- Beat in the egg, molasses, and vanilla extract until combined. Scrape down the sides of the bowl.
- Gradually add the dry ingredients to the wet ingredients, mixing on low speed until just combined. Do not overmix. The dough will be stiff.
- Divide the dough in half, flatten each half into a disk, wrap tightly in plastic wrap, and chill for at least 2 hours. This chilling step is key for a no-spreading recipe.
- Preheat your oven to 350°F (175°C). Line baking sheets with parchment paper.
- On a lightly floured surface, roll out one disk of dough to about 1/4 inch thickness. Cut out your template pieces (walls, roof, etc.). For building grade gingerbread, do not roll thinner.
- Carefully transfer the cut pieces to the prepared baking sheets.
- Bake for 12 to 15 minutes. Baking time depends on the thickness of your pieces. The edges should look firm and dry.
- Let the pieces cool on the baking sheet for 5 minutes before carefully moving them to a wire rack to cool completely. They must be fully cool and hard before assembly.
- Prepare your royal icing (recipe below). Use the icing to ‘glue’ the walls together first. Hold pieces in place until the icing sets slightly. Let the structure dry completely, usually several hours or overnight, before adding the roof or decorating.
Notes
- For the strongest construction, use a template and cut pieces before baking. If pieces warp slightly during baking, use a sharp grater or serrated knife to carefully trim the edges flat once they are cool.
- Use this royal icing recipe for construction: Beat 3 large egg whites until foamy. Gradually add 4 cups of sifted powdered sugar and 1 teaspoon of cream of tartar. Beat on high speed until stiff, glossy peaks form (about 7-10 minutes). This icing dries rock hard.
- If you want softer gingerbread for eating, reduce the baking time by 2-3 minutes. For building, bake until the pieces feel completely firm.
Nutrition
- Serving Size: 1 structural piece
- Calories: 180
- Sugar: 18g
- Sodium: 150mg
- Fat: 8g
- Saturated Fat: 5g
- Unsaturated Fat: 3g
- Trans Fat: 0g
- Carbohydrates: 25g
- Fiber: 1g
- Protein: 3g
- Cholesterol: 40mg