
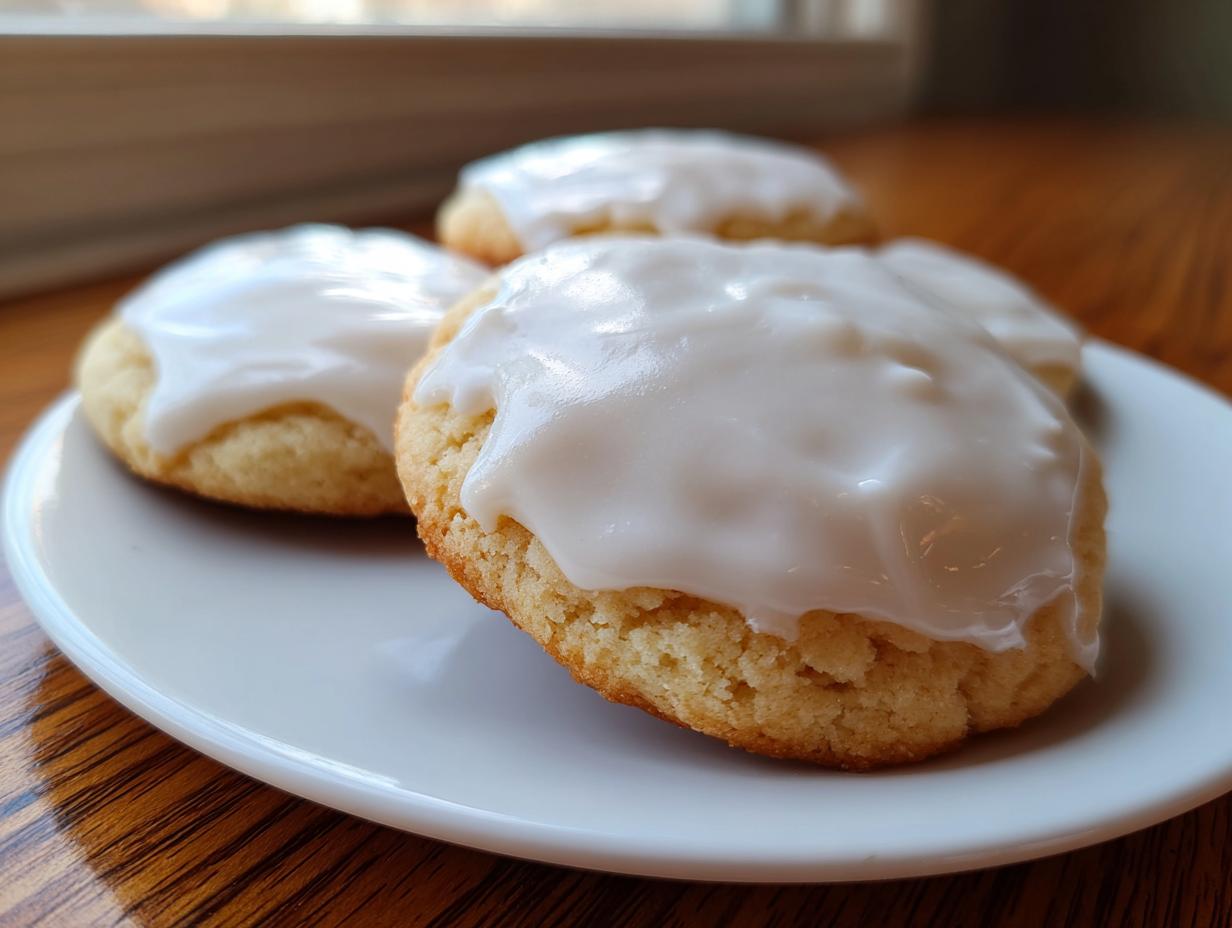
Are you tired of spending hours perfectly cutting and decorating sugar cookies only to have your finished masterpiece turn into a sticky, soft mess overnight? Oh, I know that feeling! It’s the worst when you want that gorgeous, professional, bakery-style cookie look, but your frosting just refuses to cooperate. Well, stop worrying about silly ingredients like corn syrup, because I found the language for you! I’m Zoe, and I started Kitchen Slang because I believe cooking should be an act of joy, not a test of skill. My whole deal here is translating those secret professional tips for your home kitchen, which is why I’m sharing my absolute favorite sugar cookie icing recipe. This technique, which uses simple pantry staples, gives you that perfect hard-setting shell so you can stack, gift, and admire your beautiful cut-out cookies without disaster. Trust me; this one delivers that smooth, shiny finish every single time.
- Why This Is the Best Sugar Cookie Icing Recipe for Hardening
- Essential Ingredients for Your Sugar Cookie Icing Recipe
- Step-by-Step Instructions for the No Fail Cookie Frosting
- Coloring and Decorating with Your Bakery Style Cookie Icing
- Tips for Success with This Sugar Cookie Icing Recipe
- Storage and Make-Ahead Tips for Your Cookie Icing
- Frequently Asked Questions About This Shiny Cookie Glaze Recipe
- Estimated Nutritional Data for This Sugar Cookie Icing Recipe
- Share Your Holiday Cookie Decorating Ideas
Why This Is the Best Sugar Cookie Icing Recipe for Hardening
If my biggest frustration when developing this stuff was soft, tacky frosting, know that this **sugar cookie icing recipe** fixes that problem right up front. We aren’t messing around with glazes that stay tacky for days. The real secret weapon here, the ingredient that separates the pros from the panickers, is the meringue powder. This is where Kitchen Slang steps in to translate a professional trick for you! Meringue powder stabilizes everything. If you want the results they talk about over at Emma’s Cake Studio, you need this element.
When you use meringue powder in your mixture, it helps the icing dry quickly and, crucially, dry completely hard. That means no more worrying about cookies sticking together in the tin when you stack them up for gifting. This reliable result is why I call this the ultimate icing recipe that hardens perfectly for cut-outs. It’s sturdy enough to handle being moved but still looks incredible.
Achieving That Smooth Cookie Glaze Tutorial Look
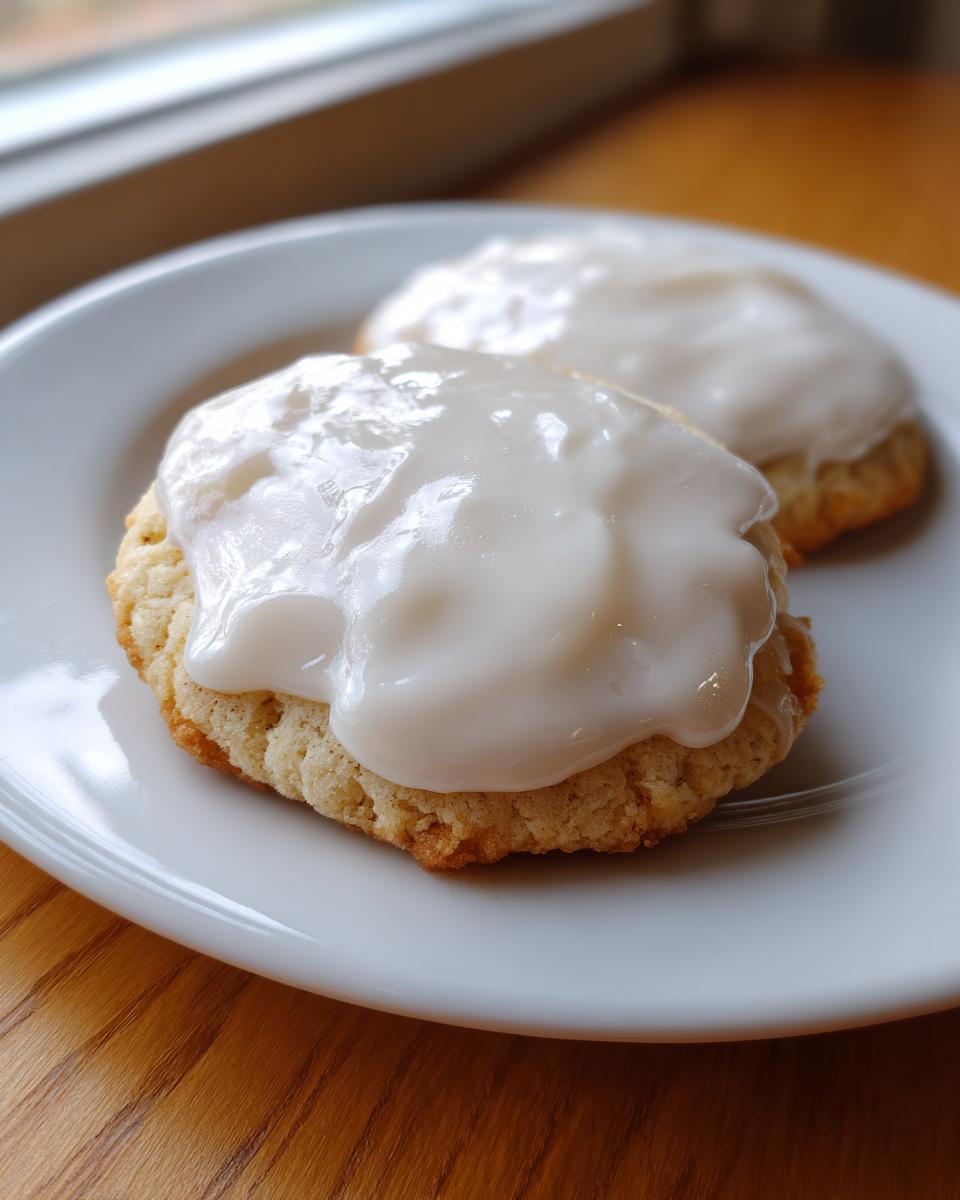
So, how do we get that flawless, almost porcelain-like shine? It all happens in the mixing bowl. First, you have to sift your powdered sugar. I know, I know, it feels fussy, but trust me—no one wants tiny, gritty lumps in their perfectly smooth coating. Sifting gets rid of those aggregates.
Next, you have to beat it for a solid few minutes on medium-high speed after everything is combined. This introduces tiny air pockets which give you that glossy sheen rather than a dull finish. Following these steps turns this simple mixture into a genuine smooth cookie glaze tutorial masterpiece. It’s all about the fluff time after you add the liquid!
Essential Ingredients for Your Sugar Cookie Icing Recipe
Okay, let’s look at what you need. This **sugar cookie icing recipe** is shockingly simple, which I love. When I put this list together, I made sure every item pulled its weight to ensure that hard, perfect finish you are hunting for. Remember, our goal is reliability, so follow these amounts!
- 4 cups powdered sugar, sifted (Seriously, sift it!)
- 3 tablespoons meringue powder (The secret weapon, remember?)
- 1 teaspoon vanilla extract (For that classic flavor)
- 6 tablespoons room temperature water (We need this to be adjustable)
That’s it! Four things make this magic happen. We’re keeping it clean and simple here at Kitchen Slang.
Ingredient Notes and Substitutions for This Sugar Cookie Icing Recipe
I want to talk about that meringue powder for just a second. Since this is a royal icing base, the meringue powder is non-negotiable if you need that smooth texture that dries completely hard and stackable. It’s essentially dried egg white, which gives the icing structure and ensures it cures properly. If you absolutely, positively cannot find it at the store? You can substitute it with about two large fresh egg whites.
But, if you go the egg white route, you have to be careful! Fresh egg whites introduce more moisture differently, and you might need slightly less water than the recipe calls for. Also, when using fresh eggs, you absolutely must know you are using pasteurized egg whites for safety, especially when serving kids or folks who might be sensitive. Stick to the powder if you can; it truly is the key to this icing recipe that hardens without worry.

Step-by-Step Instructions for the No Fail Cookie Frosting
Alright, let’s get mixing! Getting this right means you’ll have a no fail cookie frosting ready to go, smooth as glass. This process is quick, but you can’t rush the mixing parts, or you won’t get that professional shine we talked about. Grab your electric mixer for this part—your arm will thank you!
First, the dry stuff first. Whisk your sifted powdered sugar and the meringue powder together in the bowl. This ensures that the hard-setting agent (the powder) is totally distributed before we introduce any liquid. Add your vanilla extract, and then start adding the water, maybe 5 tablespoons to begin. I learned this system while perfecting recipes like my fruit pizza sugar cookie base—mix the dry things first!
Mix it slow until it just comes together and scrape down the sides. Then, crank that mixer up to medium-high and let it go for a solid three to five minutes. This high-speed beating is critical! It’s what whips structure into the icing and makes it beautiful and glossy. Don’t stop early, or it’ll look dull. You want that professional look they feature on other recipe sites!
Once it’s mixed, *then* we check the consistency, which is where most beginners stumble. You need to know the two main techniques for decorating cut-out cookies, which I break down next. Remember, these cookies need to dry uncovered at room temperature for 6 to 12 hours, so plan ahead!
Mastering Icing Consistency Guide: Outline vs. Flood
This is the secret sauce for looking like you hired a professional decorator! You need two separate thicknesses for this **sugar cookie icing recipe**. For outlining the edges of your cookie—that barrier that keeps the rest of the icing in place—you want a thick consistency. It should be ribbon-like when you lift the whisk; it should slowly sink back into the bowl but leave a visible river mark on the surface for about three seconds before it disappears. That’s your outline consistency.
For filling in the center, that’s called “flooding,” and it needs to be thinner. For flooding, we keep adding water, one tiny half-teaspoon at a time, until that ribbon mark disappears completely in about 10 seconds flat! This detailed approach, getting your icing consistency guide down, is how you avoid cracking and messy edges later. Now you’re decorating like a pro!
Coloring and Decorating with Your Bakery Style Cookie Icing
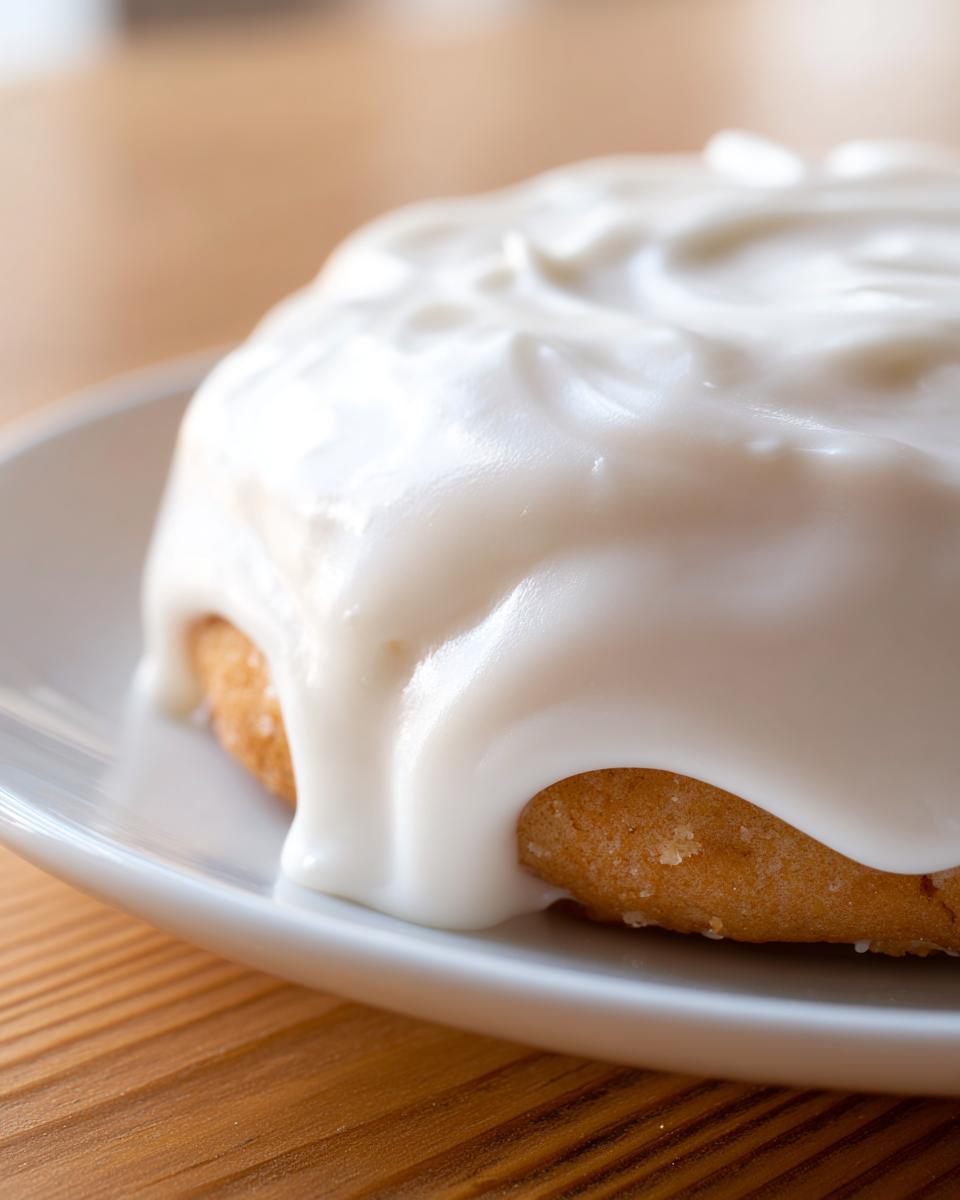
Now that you have this perfect base—this incredible sugar cookie icing recipe that actually dries hard—it’s time for the fun part: color! If you want that crisp, professional look, you absolutely need to ditch the standard liquid food coloring. I can’t stress this enough. Those liquid dyes add way too much water to the mix, and too much water is the enemy of a hard-drying glaze!
Instead, grab some gel food coloring. A tiny dab of gel gets you intense color without messing up the structural integrity of the icing. When you divide your batch, just stir the gel color in slowly until you hit the shade you need for your bakery style cookie icing. I love using squeeze bottles for flooding because they give me way more control than a knife edge. It makes the whole process of decorating sugar cookies so much cleaner and faster. Remember, the more moisture you add, the longer those cookies will take to set up, so keep the liquids minimal! If you’re looking for other fun ways to decorate bases, check out my tips for whipped shortbread cookies too—it’s all about technique!
Tips for Success with This Sugar Cookie Icing Recipe
Phew! We’ve covered the mixing and the flooding, but a few little insider pointers can turn ‘almost perfect’ into absolutely stunning. Think of these as the last little tweaks I learned working those long shifts—the things that stop you from having to start all over again! This sugar cookie icing recipe is fantastic, but preventing disaster is always better than cleanup.
First up: adjusting thickness. If you realize halfway through outlining that the icing is just too thick and you can barely squeeze it out, don’t panic! Just whisk in more liquid, but you have to go slow. We’re talking one tablespoon of water at a time, mixing well after each addition. Conversely, if you overshot and your icing is suddenly running off the whisk like water to fill (that’s too thin!), just whisk in more sifted powdered sugar, one tablespoon at a time, until you get that ideal consistency back. Every batch is a little bit different!
Now, let’s talk about cracking. If you’ve ever had your beautiful, colorful cookies dry with tiny, annoying fractures running across the surface, listen up! That’s usually a chemistry issue, though it can be devastating on holiday cookies. When this happens, it means you added just a hair too much water, or perhaps you skimped just a little bit on that vital meringue powder. That powder gives the icing the strength to cure properly. If you see cracking, it’s a sign you need to lean heavier on the meringue powder next time or be stricter about adding only the *minimum* amount of water needed for your consistency.
My personal, off-the-clock tip for cleaner lines when decorating sugar cookies? Invest in small piping bags or plastic squeeze bottles. Trying to use a butter knife to spread that thick outline icing is messy and slow. A piping bag lets you create crisp, clean perimeter walls fast. You get beautiful, sharp edges every time, which just makes the whole process feel more professional. You can see some great techniques demonstrated on sites like Anaplates for handling these tools!

Storage and Make-Ahead Tips for Your Cookie Icing
One of the best parts about this sugar cookie icing recipe is that you can prep a bit ahead of time, which is a lifesaver when you’re juggling cookies, family, and holiday demands. However, this icing *hates* being left out uncovered, even for a minute. If you leave it exposed, you get that awful crust on top that is nearly impossible to mix back in without getting lumps—and remember, we are chasing that smooth, shiny finish!
If you have leftover icing after you’ve finished decorating, here is the kitchen slang trick: you need to press a piece of plastic wrap directly onto the surface of the icing. I mean, press it down until it’s making direct contact with the glaze everywhere. Then, pop it into an airtight container. This seals out the air that causes drying and crusting. Stored this way, it usually lasts just fine on the counter for a day or two, maybe longer if your kitchen isn’t too warm.
When you go to use it again, it might look a little stiff or separated, which is totally normal. Just give it a quick stir with a clean spoon, and if necessary, add one tiny teaspoon of water to loosen it back up to the right consistency—whether you need it for outlining or flooding. I try to do all my outlining first, let those edges set up for about 20 or 30 minutes while I clean up my coloring bowls, and then flood them. That way, I’m always mixing fresh when I need it, but I’m not racing against the clock.
Frequently Asked Questions About This Shiny Cookie Glaze Recipe
Even when you follow a straightforward sugar cookie icing recipe, I know questions pop up! That’s just part of learning any new technique, especially when you are aiming for that professional, hard-setting finish. I always tell people, don’t call me a professional until you’ve asked a few basic questions, ha! Here are the things I hear most often about achieving a gorgeous, shiny cookie glaze recipe.
Can I make this sugar cookie icing recipe without meringue powder?
I understand that sometimes you just can’t get to the store for meringue powder! If you absolutely have to skip it, you can use fresh egg whites, but it’s tricky. As I mentioned before, fresh whites mean you have to be extra careful about starting with less water, and you really need to make sure those eggs are pasteurized for safety. To be totally honest, if you want the reliable, rock-hard result this icing recipe that hardens is famous for, the meringue powder is worth finding. It’s what cuts the headache out of the whole process!
How long does it take for this icing to dry completely?
This is the biggest make-or-break question for holiday baking where you need to stack cookies! For this mixture, which is designed to be a sturdy coating, you should plan for a minimum of 6 hours, but 8 to 12 hours is safer, especially if you’re decorating a big batch. Humidity is your enemy here, too. If you live somewhere really damp or rainy, it might take a full 24 hours for the icing to feel truly rock hard. Always let them dry uncovered at room temperature; popping them in the fridge can slow down the curing process. If you are looking for quick decorating tricks, check out my guide on easy decorating icing for simple flooding methods.
We want these cookies to last, right? If you’re curious about how much this recipe yields, you can check the nutritional estimates down below, but remember, those are just guides. The main thing is the texture! If you want more advice on reliable coating looks, folks over at Nourish With Recipes have done some great tests on hardening times, too!
Estimated Nutritional Data for This Sugar Cookie Icing Recipe
Okay, I know that when you’re whipping up a giant bowl of sweet goodness like this, the calories aren’t exactly what you’re worrying about! But because we believe in full transparency here—it’s part of learning the lingo of the kitchen—I wanted to share the approximate nutritional breakdown for this sugar cookie icing recipe. This is our best guess based on how much icing it makes, so treat these numbers as educated estimates!
Keep in mind that this batch covers a lot of cookies—about two dozen medium ones, so the serving size is pretty small, helping keep those numbers managed. If you eat half the bowl yourself (don’t worry, I won’t tell anyone!), those numbers obviously change!
- Serving Size: 1/4 cup
- Calories: 450
- Sugar: 110g (Yup, it’s straight sugar, but it’s worth it!)
- Protein: 2g
- Fat: 0g
- Sodium: 15mg
- Carbohydrates: 112g
I have to throw in a standard disclaimer here: these are just estimates based on the volume of powdered sugar, meringue powder, and the small amount of vanilla we use. Where you buy your ingredients and how thick you make that final glaze will mean the actual numbers move around a little bit. But for a beautiful, hard-setting cookie topping, this information should give you a good idea of what you’re working with!
Share Your Holiday Cookie Decorating Ideas
So there you have it—my absolute favorite, sure-fire, never-fail sugar cookie icing recipe. Now that you know how to get that smooth, glossy finish that actually dries hard, I want to see what you create! This recipe is perfect for Christmas, birthdays, or just because it’s Tuesday and you deserve a ridiculously pretty cookie.
Don’t forget to try out some fun holiday cookie decorating ideas this year! Maybe you’re doing intricate layering or just simple dots, but this icing is the foundation that makes it all look perfect. I love seeing what colors people choose and what challenges everyone tackles!
If you found this glaze as dependable as I do, please hop down to the comments and leave a rating. Seriously, that little star rating helps other home cooks who are scared of icing right now. Let them know they can trust this tutorial and banish sticky frosting forever! If you’re interested in other classic flavors for gifting, you should check out my recipe for Christmas jam, too. Happy decorating, and good luck keeping those cookies around long enough to gift them—I know I struggle!
For more foolproof hardening techniques, you can always check out the great comparisons other bakers make, like the insights found over at Sana Cooks. Go mix up a batch and have some fun!
PrintEasy Sugar Cookie Icing Recipe That Hardens Smoothly

Follow this simple recipe to make smooth, bakery-style sugar cookie icing that dries hard and non-sticky. This glaze is perfect for decorating cut-out cookies for any occasion.
- Prep Time: 10 min
- Cook Time: 0 min
- Total Time: 10 min
- Yield: Covers about 2 dozen medium cookies 1x
- Category: Dessert
- Method: Mixing
- Cuisine: American
- Diet: Vegetarian
Ingredients
- 4 cups powdered sugar, sifted
- 3 tablespoons meringue powder
- 1 teaspoon vanilla extract
- 6 tablespoons room temperature water (approximate)
Instructions
- In a medium bowl, whisk together the sifted powdered sugar and meringue powder until fully combined.
- Add the vanilla extract and 5 tablespoons of the water to the dry ingredients.
- Mix on low speed with an electric mixer until the ingredients are just combined. Scrape down the sides of the bowl.
- Increase the mixer speed to medium-high and beat for 3 to 5 minutes until the icing is smooth and glossy.
- Check the consistency. If the icing is too thick for outlining, add the remaining water, one teaspoon at a time, until you reach a thick, ribbon-like consistency.
- For flooding consistency, add more liquid, one half teaspoon at a time, until the icing flows slowly off the whisk and levels out on the surface in about 10 seconds.
- Divide the icing into separate bowls for coloring, if desired. Use gel food coloring for best results.
- Use the icing immediately to outline your cooled sugar cookies. Let the outline dry for at least 15 minutes before flooding the center.
- Flood the centers of the cookies and gently spread the icing to the edges. Tap the cookie sheet gently on the counter to release air bubbles.
- Allow the cookies to dry uncovered at room temperature for 6 to 12 hours, or until the icing is completely hard to the touch.
Notes
- For a thinner consistency, add liquid slowly. For a thicker consistency, add more powdered sugar, one tablespoon at a time.
- If you need to store leftover icing, press plastic wrap directly onto the surface of the icing to prevent a crust from forming, then seal the container.
- If the icing cracks upon drying, you likely added too much liquid or did not use enough meringue powder.
Nutrition
- Serving Size: 1/4 cup
- Calories: 450
- Sugar: 110g
- Sodium: 15mg
- Fat: 0g
- Saturated Fat: 0g
- Unsaturated Fat: 0g
- Trans Fat: 0g
- Carbohydrates: 112g
- Fiber: 0g
- Protein: 2g
- Cholesterol: 0mg