
Okay, let’s talk about achieving that perfect, gold-medal crunch without getting the deep fryer hot. I’ve seen good home cooks stop right before the finish line because they think that crispiness is professional-only lingo. But listen, that secret language? I picked it up. What I’m translating for you today is how to get the juiciest, crunchiest air fryer chicken tenders that are genuinely ready in under 30 minutes. Forget the soggy compromises; this method pulls the chef’s trick—a technique that guarantees flavor locks in and the oil stays out. This is going to change your weeknight game, trust me. If you need more easy wins like this, check out my guide on easy weeknight dinners.
- Why This is the Best air fryer chicken tenders recipe (The Kitchen Slang Translation)
- Ingredients for Perfect air fryer chicken tenders
- How to Prepare Crispy air fryer chicken tenders: Step-by-Step
- Tips for the Juiciest air fryer chicken tenders Every Time
- Serving Suggestions for your air fryer chicken tenders
- Storage and Reheating air fryer chicken tenders
- Troubleshooting Common air fryer chicken tenders Issues
- Frequently Asked Questions about air fryer chicken tenders
- Nutrition Estimates for air fryer chicken tenders
Why This is the Best air fryer chicken tenders recipe (The Kitchen Slang Translation)
When you’re looking for the best air fryer chicken tender recipe, you’re really looking for a magic trick: how do you get zero-oil crunch? Here’s the chef translation: it’s all about surface tension and creating a barrier. We want tender and juicy chicken tenders inside, and that means we have to lock the moisture in before that hot air hits them. That’s why this method works so well. Prepping the chicken correctly is the key to speed, nailing the juiciness, and getting that beautiful color fast. We’re trading deep frying for smart coating, and it cuts your cook time way down.
Achieving Maximum Crunch with Breaded air fryer chicken tenders
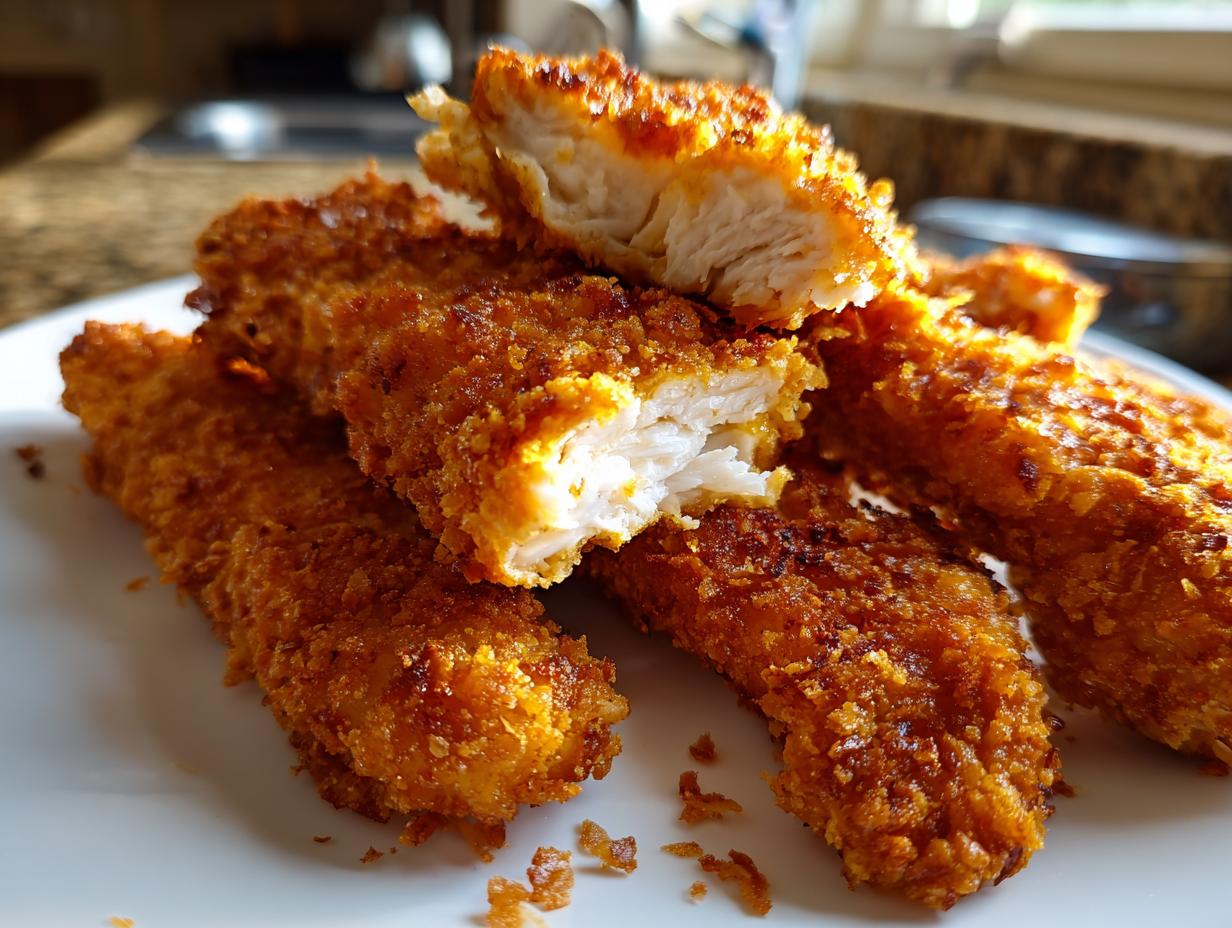
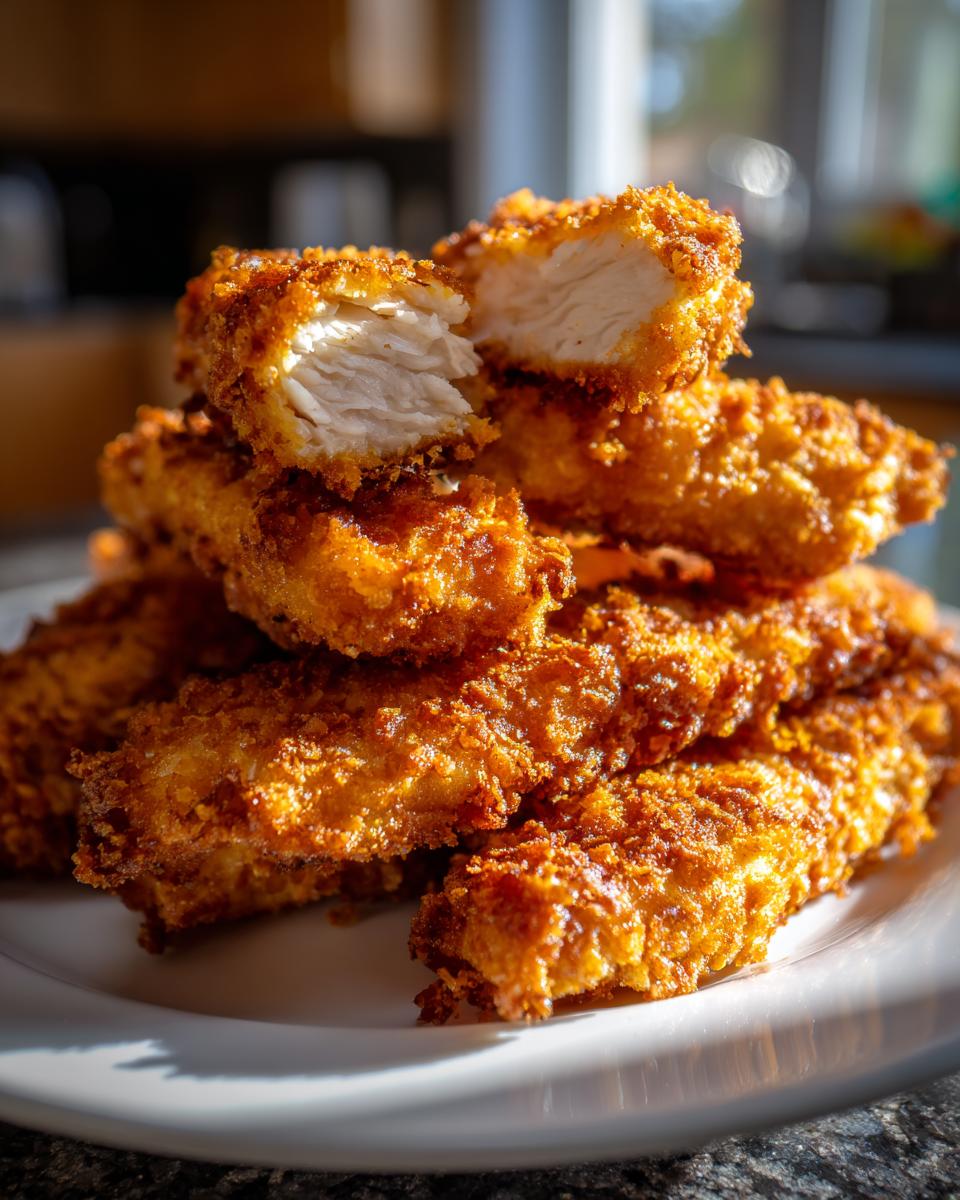
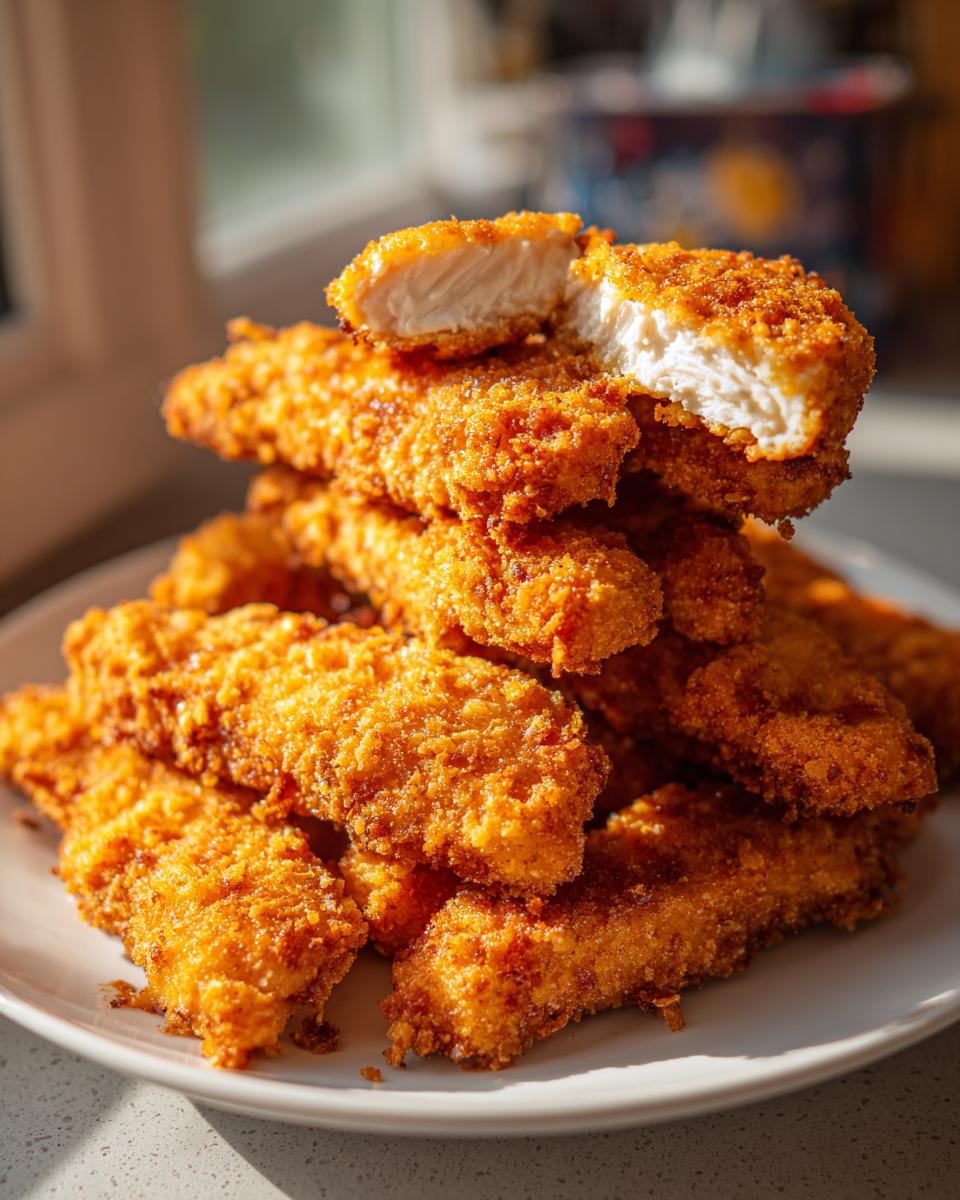
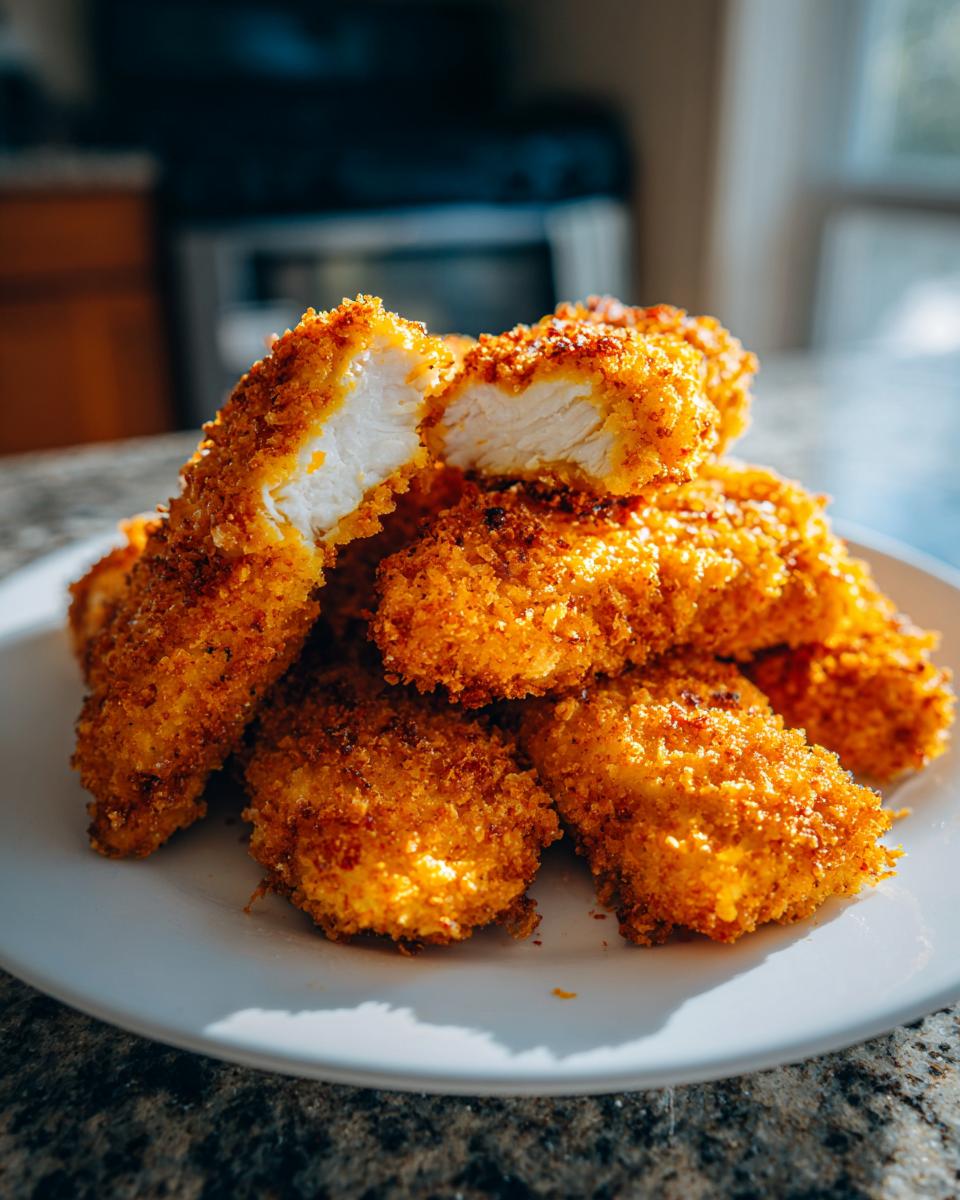
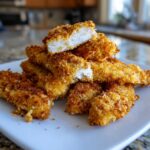
We use Panko breadcrumbs, period. Normal breadcrumbs are like sand; Panko are fluffy, jagged little shards that act like tiny solar panels for crispiness. They stand up higher off the surface of the chicken, meaning more air hits them, and they puff up beautifully. The double dredge—flour, then egg, then Panko—isn’t just for looks. The flour grabs the egg, and the egg acts as the glue for the Panko. When these hit that 380°F heat, you get that ultimate crispy air fryer chicken crust without needing a single extra drop of oil.
Ingredients for Perfect air fryer chicken tenders
Okay, this is the ingredient list, but I want you to look at it like a station setup, not just a grocery list. Every item here has a job to do to make sure we hit that juicy air fryer chicken target. If you have your chicken breasts, make sure you’ve cut them into even strips, about one inch wide. Uniformity is everything for even cooking, especially for a quick dinner recipe under 30 minutes.
You’ll need the Panko breadcrumbs, obviously, because they are the key to that incredible crunch. But don’t forget your seasoning inside that breadcrumb dish—that’s where the flavor develops! And yes, you absolutely need to measure out the flour and the eggs for the dredge. We aren’t just guessing here; we are building layers for success. The final piece, which everyone skips, is the cooking spray. It’s non-negotiable for getting that deep golden color on our breaded air fryer tenders even with chicken tenders less oil.
How to Prepare Crispy air fryer chicken tenders: Step-by-Step
Alright, now we get down to the action. Learning how to make air fryer chicken tenders that actually stay crispy is all about the order of operations and not getting sloppy. First thing’s first: turn your air fryer on! You need that basket hot before the chicken ever sees it. Preheat to 380°F (195°C) for a solid five minutes. Don’t skip this. Just like a good restaurant kitchen, we need our tools ready to go.
Zoe’s Pro Tip: Remember that note about letting the breaded tenders rest? Do it now! After you coat them, set them on a wire rack for about 10 minutes while the air fryer finishes preheating. This lets the coating hydrate just enough to really stick, which prevents them from falling apart when you flip them later. This is a small step that makes a huge difference in your final crunch.
Setting Up Your Dredging Station for air fryer chicken tenders
You need three shallow dishes ready to roll. Dish one is just plain flour. Dish two is your beaten eggs—no weird additions here, just simple binder. Dish three is where the party is: your Panko mixed with all those spices. When you dredge the chicken, you must be precise. First, shake off every bit of excess flour—a heavy flour layer steams instead of crisps up. Then, dip in the egg, let that drip off, and finally, PRESS it into the seasoned Panko. Press firmly! You want every single nook and cranny covered so you get that beautiful, even golden brown chicken tenders air fryer finish.
The Air Frying Technique for Juicy air fryer chicken tenders
Once they look perfectly coated, they go into that hot air fryer basket. Work in a single layer only! If you stack them, you get steamed chicken, which defeats the whole purpose. We are aiming for separation and space. Once they are lined up, hit the tops with a quick spray of your cooking spray—this is your artificial frying oil. Cook for about 10 to 12 minutes total, but set a timer for 6 minutes. When you flip them halfway through, spray the other side again. We check for that magic number: 165°F (74°C) internally. That is your guarantee for safe, juicy air fryer chicken.
If you want to see how I use similar high-heat techniques for other favorites, you have to check out my air fryer chicken parmesan guide next!
Tips for the Juiciest air fryer chicken tenders Every Time
So you’ve nailed the cooking process, but how do we take these from great to legendary? It comes down to a couple of pro moves that really lock in that moisture. I’m bringing back that resting tip because I see so many people skip it, and then they wonder why they aren’t getting the juicy air fryer chicken they deserve. Letting those breaded tenders squat on a rack for those ten minutes before they even see the basket makes the coating set up just right.
Also, if you are prepping these ahead of time for easy chicken meal prep air fryer lunches, you absolutely need to use my gluten-free substitution. While I love the traditional flour, GF breadcrumbs and almond flour work beautifully if you need them for dietary reasons. They still come out golden and retain 95% of that incredible texture. If you want more tips on streamlining your cooking schedule, check out my post on easy weeknight dinners for more make-ahead strategies.
Serving Suggestions for your air fryer chicken tenders
We nailed the main event, but let’s be real—tenders are just a vehicle for dipping sauce, right? This is where you tailor these air fryer snacks recipes for the whole family. Since these are such a fantastic option for kid friendly air fryer meals, you want the sides to be quick and easy too. Don’t complicate things after all that breading work!
If you’re leaning into the ‘quick weeknight dinner air fryer‘ vibe, I always pair these with some quick-blanched broccoli or some super-simple sweet potato fries tossed in paprika. Fast, colorful, done. But the real star needs to be the dips. Forget the plain ketchup every time. You deserve better!
I absolutely insist you try these with a homemade dipping sauce. My recipe for garlic aioli is unbelievably simple and makes these tenders sing. If you need something slightly zesty and fresh, you can’t go wrong with my homemade guacamole. It’s a little richer, but it makes these tenders feel way more special than just grabbing a jar off the shelf. Seriously, ditch the sugary bottled stuff! These homemade tenders deserve homemade flavor partners.
Storage and Reheating air fryer chicken tenders
Nobody wants sad, floppy leftovers, right? That’s the downside of achieving perfect crispiness—it can sometimes be fragile the next day. But trust me, these air fryer chicken tenders bounce back beautifully if you treat them right. If you have any left over from your quick dinner recipes under 30 minutes, the first rule is that they need to cool completely before storage.
Once they’re totally cool, get them into an airtight container. You want to prevent moisture from building up, so don’t pack them tight against each other if you can help it. They’re good to go in the fridge for maybe three days—any longer than that and you risk dry texture, even if stored perfectly.
Now for reheating. This is where people mess up and revert to a microwave, which turns your gorgeous crisp coating into sad, steamed leather. Nope. We are air-frying them back to life! Pop those cooled tenders back into the preheated air fryer basket at 375°F (190°C). They only need about 3 to 5 minutes. Keep an eye on them, but that blast of dry, circulating heat will wake up the Panko and they’ll be crunchy again before you can even debate ordering takeout. It’s the best way to enjoy those homemade chicken tenders air fryer style again the next day.
Troubleshooting Common air fryer chicken tenders Issues
Look, even when you follow the steps, sometimes the food gods aren’t smiling on you. That’s okay! The sign of a good cook isn’t just knowing what works; it’s knowing what to do when things go sideways. We are going to solve the big two issues that crop up when making air fryer chicken tenders so you never have to worry about messing up this quick dinner recipe again.
Biggest failure point number one: They aren’t crispy. I see this all the time. If your tenders look pale or only have patches of gold, I can usually bet two things happened. Either you tried to cram too many pieces in there at once—remember, air needs room to work! Overcrowding means you are steaming them, not crisping them. Or, you totally skipped spraying the tops with oil before you put them in. That tiny bit of oil is what carries the heat to brown that Panko crust. Don’t skip that spray!
Failure point number two, and this one drives me nuts: the breading slides right off in the basket. If your beautiful coating is sitting in a pile under your chicken, you missed the most crucial prep step. The chicken wasn’t dry enough. You have to attack those breasts with paper towels until they feel almost tacky, not wet. That moisture will fight the flour every single time, and the flour will lose. Pat them dry until you think they are dry, and then pat them one more time. That ensures you get that solid seal for the best air fryer chicken tender recipe.

Frequently Asked Questions about air fryer chicken tenders
I get so many questions about these crispy beauties! People always want to know how to make them healthier or how to get them done even faster. Here are the answers to the stuff I hear most often that should clear things up as you whip up your next batch of these amazing air fryer snacks recipes.
Can I make these air fryer chicken tenders without breading?
You absolutely *can*, and I know why you’re asking! Skipping the breading makes them naturally lower carb and cuts out a step, which is great if you are aiming for genuinely healthy air fryer tenders. However, if you want that supreme, golden, shatteringly crisp crust that we worked so hard to achieve in this recipe? You need the Panko. When you skip the breading, you are relying only on the spice mix directly on the chicken, and while it tastes great and cooks up juicy, it won’t have the same crunch factor. If you skip it, make sure you season that bare chicken heavily and don’t skimp on the oil spray!
How do I ensure my air fryer chicken tenders cook in under 30 minutes?
That 27-minute total time is real, as long as you honor the time commitment for preheating. The single biggest thing that pushes you over the 30-minute mark is starting with a cold air fryer. Remember, you need to preheat to 380°F for those five minutes before the chicken goes in! Also, cutting your chicken strips uniformly small—about one inch thick—is crucial. If you have some big chunks and some tiny slivers, the small ones will dry out while you wait for the big ones to cook. Keep everything the same size to nail that 10-to-12-minute cook time and keep this a true quick dinner recipe under 30 minutes.
If you’re looking for more fast ideas that fit into a busy schedule, make sure to check out my full guide on healthy lunch recipes for midday meals that take no time!
Nutrition Estimates for air fryer chicken tenders
Look, I’m a cook, not a registered dietitian, but I know you want to know what you’re putting into your body—especially when we’re talking about making healthier swaps like these air fryer chicken tenders. We used standard estimates for boneless, skinless chicken breast and calculated the additions of flour and Panko, keeping the oil minimal.
These numbers represent just four tenders, which is a solid serving for our healthy air fryer tenders goal. Keep in mind that this is just an estimate, okay? If you deep-fry these, or if you use a lot more oil spray than recommended, those fat and calorie counts are going to spike fast. Always measure what you use!
- Serving Size: 4 tenders
- Calories: 320
- Protein: 38g
- Fat: 10g (mostly unsaturated from the light spray)
- Carbohydrates: 18g
- Sodium: 450mg
We’re aiming for high protein and keeping the saturated fat low by avoiding that deep fryer. If you swap out white flour for something like almond flour for a lower-carb version, these numbers will change, so keep that in mind if you’re prepping for specific goals. This is just the baseline for our quick air fryer chicken classic!
PrintCrispy Air Fryer Chicken Tenders (Breaded)
Make golden, crunchy chicken tenders in your air fryer. This recipe delivers a juicy interior and a perfectly crisp coating using less oil than traditional frying. It is a quick, kid-friendly dinner or snack.
- Prep Time: 15 min
- Cook Time: 12 min
- Total Time: 27 min
- Yield: 4 servings 1x
- Category: Dinner
- Method: Air Frying
- Cuisine: American
- Diet: Vegetarian
Ingredients
- 1.5 lbs boneless, skinless chicken breasts, cut into 1-inch strips
- 1 cup all-purpose flour
- 2 large eggs, beaten
- 1.5 cups panko breadcrumbs
- 1 teaspoon salt
- 0.5 teaspoon black pepper
- 0.5 teaspoon garlic powder
- 0.5 teaspoon paprika
- Cooking spray (oil-based)
Instructions
- Prepare the chicken: Pat the chicken strips completely dry with paper towels. This step helps the coating stick and promotes crispiness.
- Set up the dredging station: Place the flour in one shallow dish. In a second dish, whisk the eggs. In a third dish, combine the panko breadcrumbs, salt, pepper, garlic powder, and paprika.
- Coat the chicken: Dredge each chicken strip first in the flour, shaking off excess. Next, dip it into the egg mixture, letting excess drip off. Finally, press the strip firmly into the seasoned panko breadcrumbs to coat completely.
- Preheat the air fryer: Preheat your air fryer to 380°F (195°C) for 5 minutes.
- Spray the basket: Lightly spray the air fryer basket with cooking spray.
- Arrange the tenders: Place the breaded tenders in a single layer in the air fryer basket. Do not overcrowd the basket; work in batches if necessary.
- Spray the tops: Lightly spray the tops of the tenders with cooking spray. This helps them brown evenly.
- Air fry: Cook for 10 to 12 minutes, flipping the tenders halfway through the cooking time. Continue to spray lightly with oil during the flip.
- Check for doneness: The tenders are done when they reach an internal temperature of 165°F (74°C) and the coating is golden brown and crisp.
- Serve immediately with your favorite dipping sauce.
Notes
- For extra crispiness, let the breaded tenders rest on a wire rack for 10 minutes before air frying.
- If you want a gluten-free option, substitute almond flour for the all-purpose flour and use gluten-free breadcrumbs.
- Do not skip spraying the tenders with oil before cooking; this is key for achieving that golden brown color.
Nutrition
- Serving Size: 4 tenders
- Calories: 320
- Sugar: 1
- Sodium: 450
- Fat: 10
- Saturated Fat: 2
- Unsaturated Fat: 8
- Trans Fat: 0
- Carbohydrates: 18
- Fiber: 1
- Protein: 38
- Cholesterol: 110