
Let’s be real: that jar of pre-made stuff just doesn’t cut it. It tastes like sadness and syrup, right? When you decide to bake a pie, you deserve way better than something scooped out of a can. We’re ditching that immediately! I’m going to show you how to make the absolute best apple pie filling right on your stovetop. We are talking thick, perfectly spiced with rich brown sugar, and so juicy you’ll want to eat it with a spoon. This is one of those kitchen translations where taking five minutes longer yields flavors that taste like a week’s worth of hard work. Trust me, this is the essential recipe every home baker needs to have under their belt—it’s honestly better than any apple crumble recipe I’ve ever tried!
- Why This Stovetop apple pie filling is Your New Go-To
- Ingredients for the Best Apple Pie Filling
- Mastering Your Stovetop Apple Filling Instructions
- Tips for Perfect Homemade Apple Pie Filling
- Versatile Uses for Your Dessert Apple Filling
- Storing Your Homemade apple pie filling from Scratch
- Frequently Asked Questions About apple pie filling
- Nutritional Snapshot of This apple pie filling
- Share Your Spiced Apple Filling for Pies Success
Why This Stovetop apple pie filling is Your New Go-To
Look, nobody wants a soupy pie filling that ruins a perfectly beautiful crust. That’s why we use this Stovetop Apple Filling method. It’s foolproof, fast, and delivers that rich, gooey texture we crave. Forget standing around waiting for an oven to preheat! This technique gets you that perfect balance of spices and deep brown sugar flavor in under 40 minutes total.
- This is the definition of a Quick Pie Filling—you get dessert component perfection without the hassle.
- We control the liquid content absolutely, meaning no weeping apples here!
Quick Pie Filling Prep Time
We’re talking 20 minutes of prep and only 15 minutes on that burner. Thirty-five minutes total, and you have enough filling for a stunning pie. That’s faster than running back to the store for a jar, trust me.
Achieving a Thick Apple Pie Filling
The secret weapon in here is the cornstarch mixed right into the sugars before we start. When we cook this down, that starch activates perfectly, creating a glossy, thick coating on every slice. This ensures your crust stays flaky because the liquid is suspended beautifully. You get that ideal Thick Apple Pie Filling every single time. If you want more ideas for quick desserts, check out the apple snickerdoodle dump cake guide!
Ingredients for the Best Apple Pie Filling
When we talk about building flavor from scratch, the ingredients list is where the translation work really starts. You can’t fake that deep, caramelized taste! We are using a mix of both sugars here—the brown sugar brings that molasses warmth we need, and the granulated sugar helps the cornstarch structure set up right. Don’t swap out the lemon juice either; it’s non-negotiable for keeping your apples looking vibrant and not turning brown before they hit the heat.
Here’s exactly what you need for one standard 9-inch pie. If you’re making a double-crust situation, just plan on doubling this whole list, easy peasy! And remember, if you’re looking for a fun way to use up leftovers, these ingredients are nearly perfect for my apple pie cookies!
- 6 large apples (that’s about 3 pounds, folks—aim for firm ones!)
- 3/4 cup packed brown sugar (packed means really press it into the cup!)
- 1/4 cup granulated sugar
- 1/4 cup cornstarch (this is our thickener, the MVP!)
- 1 tablespoon lemon juice (do not forget this step!)
- 1 teaspoon ground cinnamon
- 1/4 teaspoon ground nutmeg
- 1/4 teaspoon ground allspice
- Pinch of salt
- 1/2 cup water
- 2 tablespoons unsalted butter (cold is fine, it melts right in at the end!)
Mastering Your Stovetop Apple Filling Instructions
This whole process moves fast once you get the apples prepped, which is why mastering this Stovetop Apple Filling method is just smart cooking. It’s about staging your work, just like they teach you on a kitchen line. Don’t just dump things in—we layer our flavors and thickeners strategically. If you follow these simple steps, you’re going to nail the texture and avoid any sad, runny pie centers. This is where we translate good ingredients into a masterpiece! For ideas on using up leftover apple butter ingredients, check out my apple butter slow cooker recipe!
Preparing the Apples and Thickening Base
First things first: the apples. Peel, core, and get those slices uniform—aim for about 1/4-inch thick pieces. As soon as they are sliced, toss them right away in that bowl with the tablespoon of lemon juice. This isn’t just for flavor; it’s our insurance policy against oxidation. Don’t let those beauties sit out raw! While the apples are chilling out with the lemon, use a separate bowl to whisk together all your dry stuff: both sugars, the cornstarch, the cinnamon, nutmeg, allspice, and that tiny pinch of salt. Whisk it until it looks like perfectly blended brown sand. That’s your thickening base, and getting rid of any cornstarch clumps now is crucial.
Cooking Down the Cinnamon Apple Filling
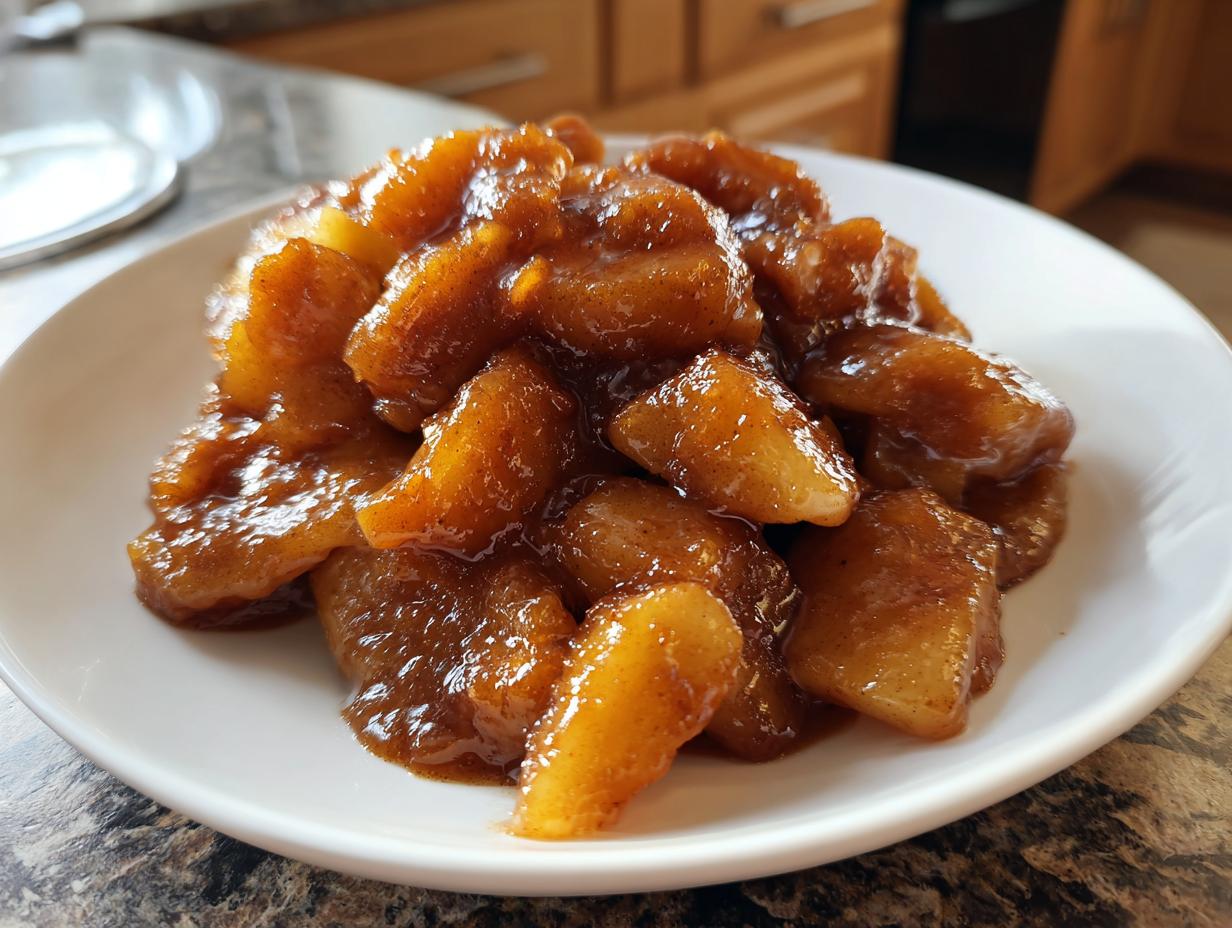
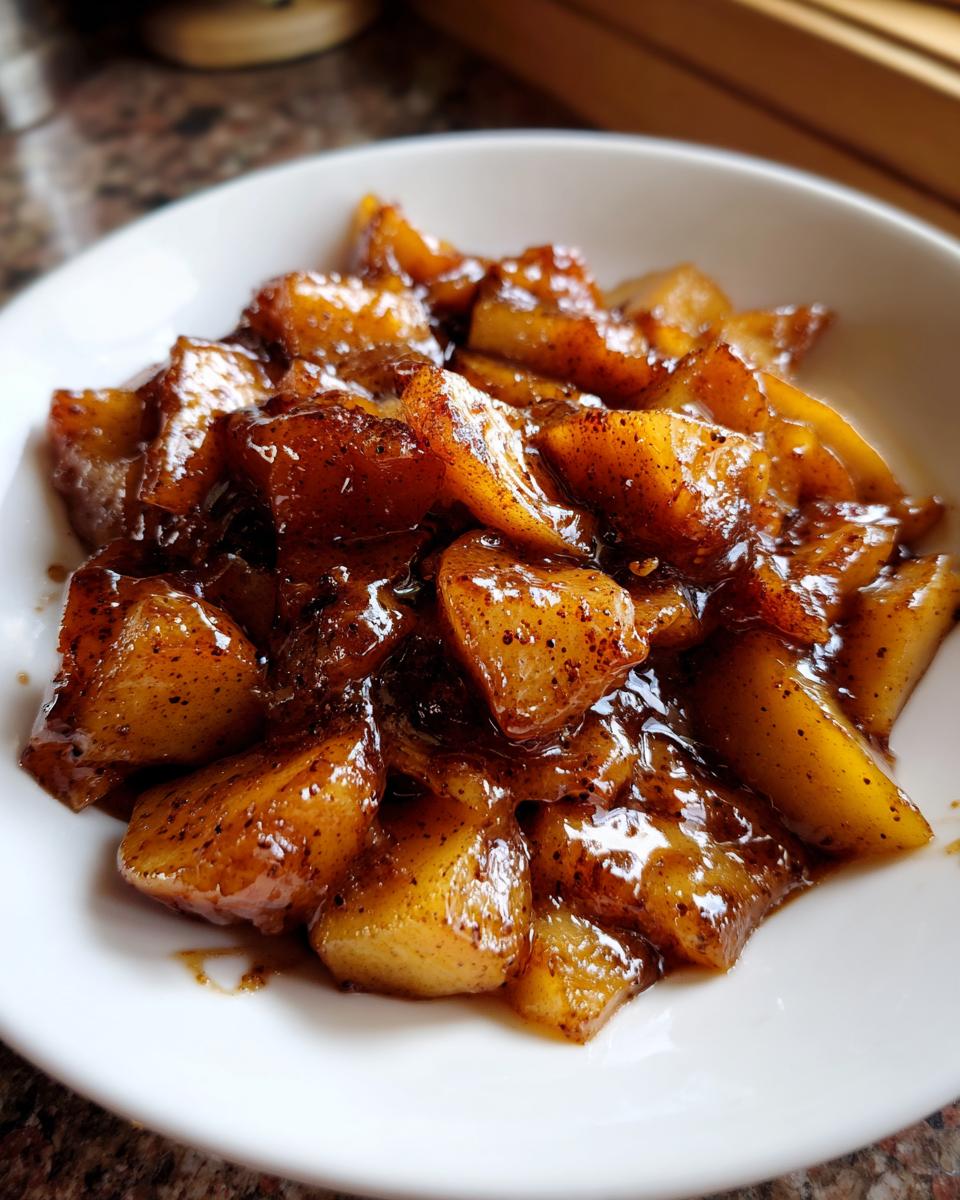
Now we move to the heat. Get your apples and the water—just half a cup here—into a big saucepan. Bring that to a simmer on medium heat for about 5 to 7 minutes. You just want them to start softening up a bit; they shouldn’t turn to mush yet, because they’ll keep cooking! Once they look slightly softened, reduce that heat down to medium-low. Now, gradually sprinkle in your sugar-spice mix while stirring constantly! Keep stirring for another 5 to 8 minutes. Watch it closely! When it bubbles and gets glossy, clinging thickly to the apples, you know you’ve got that perfect Cinnamon Apple Filling locked in. Take it off the heat and stir in the two tablespoons of butter just until it melts away. That little bit of extra fat makes everything taste richer. Let it chill before using it in your pie!

Tips for Perfect Homemade Apple Pie Filling
You’ve nailed the stovetop technique, but true mastery—the kind that gets you asked to manage the dessert cart—comes down to small, crucial decisions upfront. That’s where we build that amazing E-E-A-T into our baking. Think beyond just following the steps; we’re talking about the *why* behind the apple choice and how to make sure this filling works hard for you, whether it’s inside a pie ditching store-bought versions or spooned over your morning waffles. If you’re looking for another wonderful fall bake, this recipe is almost as good as my easy cinnamon oat crumble!
Choosing Apples for Your apple pie filling
Listen, if you use soft, mushy apples, you get apple mush in your pie. It’s science! When selecting fruit for your apple pie filling, you need structure. Granny Smiths are a classic for a reason—they hold up beautifully and give you that necessary tartness to balance the sugar. I also love working with Honeycrisps or Braeburn; they keep their shape even after that cook time on the burner. Never, ever use something you wouldn’t happily eat raw. Firmness is the key to keeping those slices distinct and giving you a truly Juicy Apple Filling that isn’t just liquid sugar.
Making Brown Sugar Apple Pie Filling for Other Desserts
The best thing about mastering this base is its versatility. That rich flavor from the molasses in the brown sugar means it works magic way outside of a pie shell. If you’ve got extra—and you probably will because this stuff is addictive—you can use it instantly. Think of it as your go-to Brown Sugar Apple Pie Filling base for so many other sweet things. Want a quick breakfast? Spoon it warm over pancakes or French toast. Making a crisp? Just mix this filling with some oats, flour, a little extra butter, and bake it off. It’s honestly the perfect, easy foundation for any fall dessert you throw at it. I saw a great way to use it in a coffee cake variation over at this link, which is a brilliant idea!
Versatile Uses for Your Dessert Apple Filling
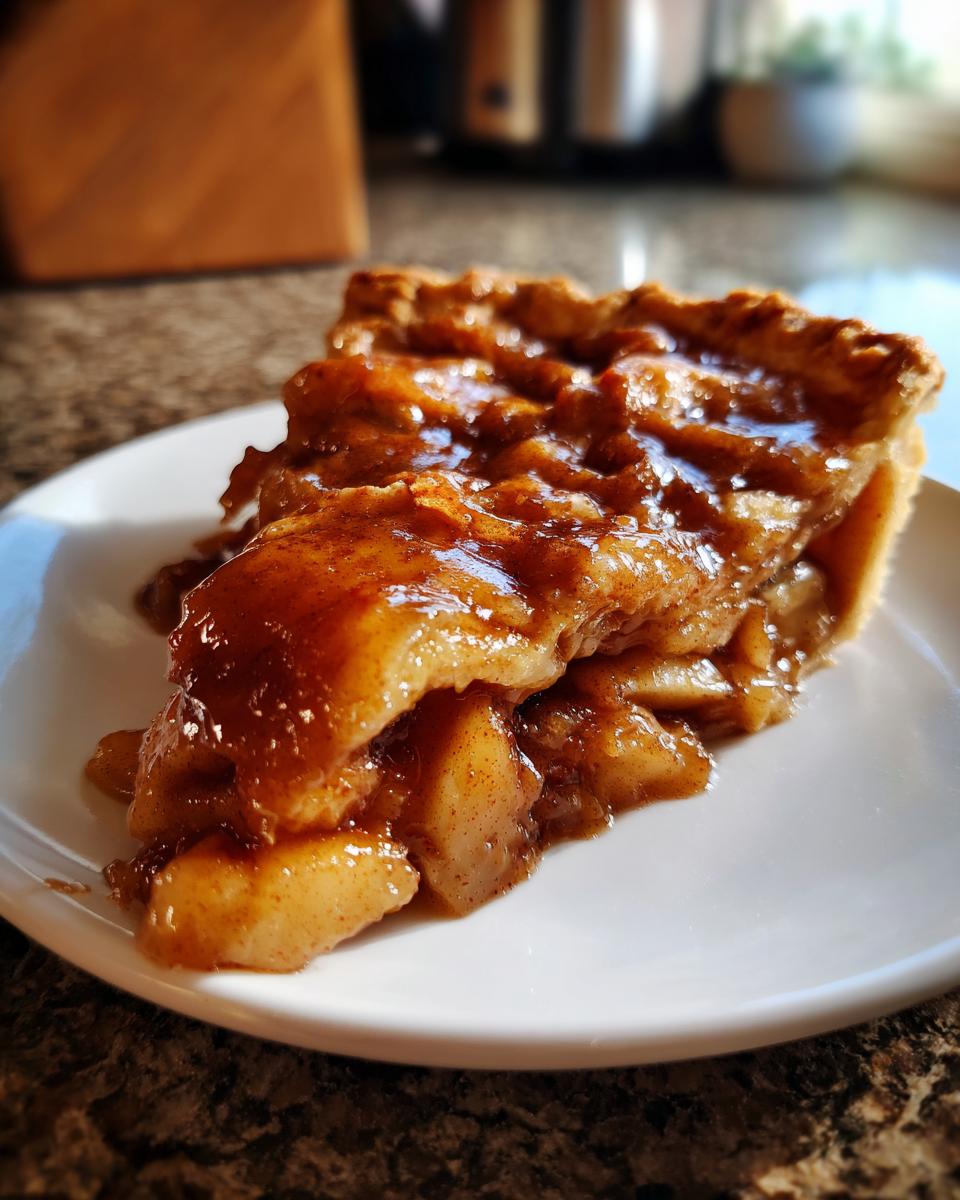
One reason I insist you learn the homemade apple pie filling process is that once you have this perfect base, you unlock so many other meals! Seriously, don’t let this amazing, thick, spiced mixture sit around waiting for a pie crust. It shines as a powerful Apple Pie Topping Recipe on practically anything.
Waffles? Yes. Pancakes? Absolutely! If you’re having brunch, warm up a scoop of this delicious Dessert Apple Filling and pour it right over the top. It’s also my new favorite base for making a skillet crisp—just toss it with some oats and butter, bake until bubbly, and boom, dessert is done. If you need ideas for using this filling inside something amazing and gooey, you have to try it in my cinnamon roll casserole recipe!
Storing Your Homemade apple pie filling from Scratch
Okay, so you successfully whipped up this incredible batch of Homemade Apple Pie Filling from Scratch. Congrats! Now we need to make sure it stays perfect until you’re ready to use it, whether that’s tomorrow or next week. The whole beauty of making it on the stovetop is that it chills down beautifully and solidifies just enough to make it super easy to scoop.
The first thing you absolutely must do is let it cool down completely. Pouring hot filling into a plastic container is a recipe for condensation and an unhappy filling later on. Let it sit on the counter until it’s room temperature. Seriously, don’t rush this part.
Once cool, transfer that thick, glossy goodness into an airtight container. Glass is usually my favorite because I can see exactly how much I have left, but any good quality, tight-sealing container works fine. If you store this correctly in the refrigerator, it should stay fantastic for up to a full week—and that’s way better than any sad, store-bought jar, right?

This longevity is key for meal prep! You can make a double batch when apples are in season, use half for your pie this weekend, and then have the rest tucked away for a quick dessert topping next week. It’s efficiency, which is basically professional cooking translated for the home kitchen. For more airtight storage wisdom, check out how I keep my guacamole fresh; the principles are the same!
Frequently Asked Questions About apple pie filling
We’ve covered the basics, but sometimes you just need a quick answer to a specific kitchen hurdle. Cooking is never just black and white, right? It’s about instinct, but having solid answers for the tricky parts really helps build confidence. Here are a few hard questions I get asked all the time regarding this amazing homemade filling. These are the little bits of kitchen slang that save the day!
Can I make this apple pie filling without cooking it first?
Oh, I totally get wanting to save a few dishes, but that’s a hard pass here. If you try to skip the stovetop, you won’t be able to activate that cornstarch we added. That means your final result will be a pool of sugary liquid instead of that beautiful, gooey, thick apple pie filling we are aiming for. The heat is essential to get that perfect glossy sauce that hugs the apple slices. Keep stirring on low heat; it’s worth those extra few minutes!
How do I make the filling more spiced apple filling?
If you want to pump up the flavor profile and lean harder into that cozy, warm aroma, that’s easy to do! This recipe is wonderfully adaptable. If you are looking for a deeper, richer spiced apple filling for pies, just take a tiny pinch more of the nutmeg or allspice we used—like, just a whisper more. Or, here’s my favorite pro tip: before you start cooking the apples (Step 3), swap out the plain water entirely and use apple cider instead. That cider adds a fantastic layer of concentrated apple flavor that just sings alongside the cinnamon.
Remember, if you struggle with pastry, check out my guide on making maple mustard pork tenderloin—a great savory palate cleanser before diving into all that sweet pie!
Nutritional Snapshot of This apple pie filling
Okay, let’s talk numbers for a second. I always preach that we cook amazing food for flavor and comfort, not to obsess over calories, but knowing what’s in your dessert is just part of being confident in the kitchen, right? This is the translation of what’s going into that beautiful, thick mixture we just cooked up.
Keep in mind, these are rough estimates based on dividing the whole batch into one-cup servings. If you spread it thinner in a pie, the numbers change! Also, this doesn’t account for the crust or any extra sugar you might add to your morning waffles. These figures reflect the pure goodness of the apple pie filling we made right on the burner.
If you’re tracking food, this is where you want a good system, like tracking the macros when you make my high-protein overnight oats. It helps keep everything in perspective!
- Serving Size: 1 cup
- Calories: 280
- Sugar: 55g (That’s where the brown sugar shines!)
- Sodium: 5mg
- Fat: 2g
- Saturated Fat: 1g
- Trans Fat: 0g
- Carbohydrates: 70g
- Fiber: 4g
- Protein: 0g
- Cholesterol: 5mg
See? Mostly fruit and natural sugars! When you make your own apple filling from scratch, you’re skipping all those funky preservatives that end up in the jars. That’s a win for everyone.
Share Your Spiced Apple Filling for Pies Success
Alright, team, we’ve done the work! We took simple apples and transformed them into this luxurious, deeply flavored base. That’s the beauty of translating kitchen slang—we went from humble fruit to the absolute best homemade apple pie filling imaginable. I hope you found this stovetop method is fast, reliable, and just tastes incredibly authentic.
Now it’s your turn to show off! Did you manage to keep this perfect Spiced Apple Filling for Pies contained within a crust, or did you get tempted? I want to hear about it! Did you use it as a delicious topping over your morning ice cream? Did you sneak a taste right out of the pot?
Go ahead and drop a star rating down below so other cooks can see how fantastic this recipe is. And seriously, leave me a comment telling me what you did with it! Were you brave enough to use it in my coffee cake muffins, or did you stick to the classic pie? I read every single comment, and nothing makes me happier than hearing you’ve successfully conquered another recipe. Happy baking!
PrintThe Best Stovetop Apple Pie Filling

Make this easy homemade apple pie filling from scratch. It is thick, perfectly spiced with cinnamon, and uses brown sugar for deep flavor. Use this versatile filling for pies, crisps, or as a topping.
- Prep Time: 20 min
- Cook Time: 15 min
- Total Time: 35 min
- Yield: About 6 cups 1x
- Category: Dessert Component
- Method: Stovetop
- Cuisine: American
- Diet: Vegetarian
Ingredients
- 6 large apples (about 3 pounds, peeled, cored, and sliced 1/4-inch thick)
- 3/4 cup packed brown sugar
- 1/4 cup granulated sugar
- 1/4 cup cornstarch
- 1 tablespoon lemon juice
- 1 teaspoon ground cinnamon
- 1/4 teaspoon ground nutmeg
- 1/4 teaspoon ground allspice
- Pinch of salt
- 1/2 cup water
- 2 tablespoons unsalted butter
Instructions
- Prepare your apples: Peel, core, and slice the apples into uniform 1/4-inch pieces. Place them in a large bowl and toss immediately with the lemon juice to prevent browning.
- Combine dry ingredients: In a separate medium bowl, whisk together the brown sugar, granulated sugar, cornstarch, cinnamon, nutmeg, allspice, and salt until no lumps remain. This is your thickening base.
- Cook the apples: Transfer the apple slices and water to a large saucepan or Dutch oven. Bring the mixture to a simmer over medium heat. Cook for 5 to 7 minutes, stirring occasionally, until the apples begin to soften slightly but still hold their shape.
- Thicken the filling: Reduce the heat to medium-low. Gradually sprinkle the sugar and spice mixture over the apples while stirring constantly. Continue to cook, stirring often, for another 5 to 8 minutes. The mixture will bubble and thicken significantly. You are looking for a glossy, thick sauce coating the apples.
- Finish the filling: Remove the pan from the heat. Stir in the butter until it melts completely into the filling.
- Cool: Transfer the homemade apple pie filling to a heatproof bowl. Let it cool to room temperature before using it in your pie crust or dessert. For best results when baking a pie, chill the filling completely first.
Notes
- Use firm, tart apples like Granny Smith, Honeycrisp, or a mix for the best texture.
- This recipe makes enough filling for one standard 9-inch pie. Double the recipe for a deep-dish pie.
- Store leftover thick apple pie filling in an airtight container in the refrigerator for up to one week.
- For a crisp topping, simply mix this filling with oats, flour, butter, and extra brown sugar, then bake.
Nutrition
- Serving Size: 1 cup
- Calories: 280
- Sugar: 55
- Sodium: 5
- Fat: 2
- Saturated Fat: 1
- Unsaturated Fat: 1
- Trans Fat: 0
- Carbohydrates: 70
- Fiber: 4
- Protein: 0
- Cholesterol: 5