
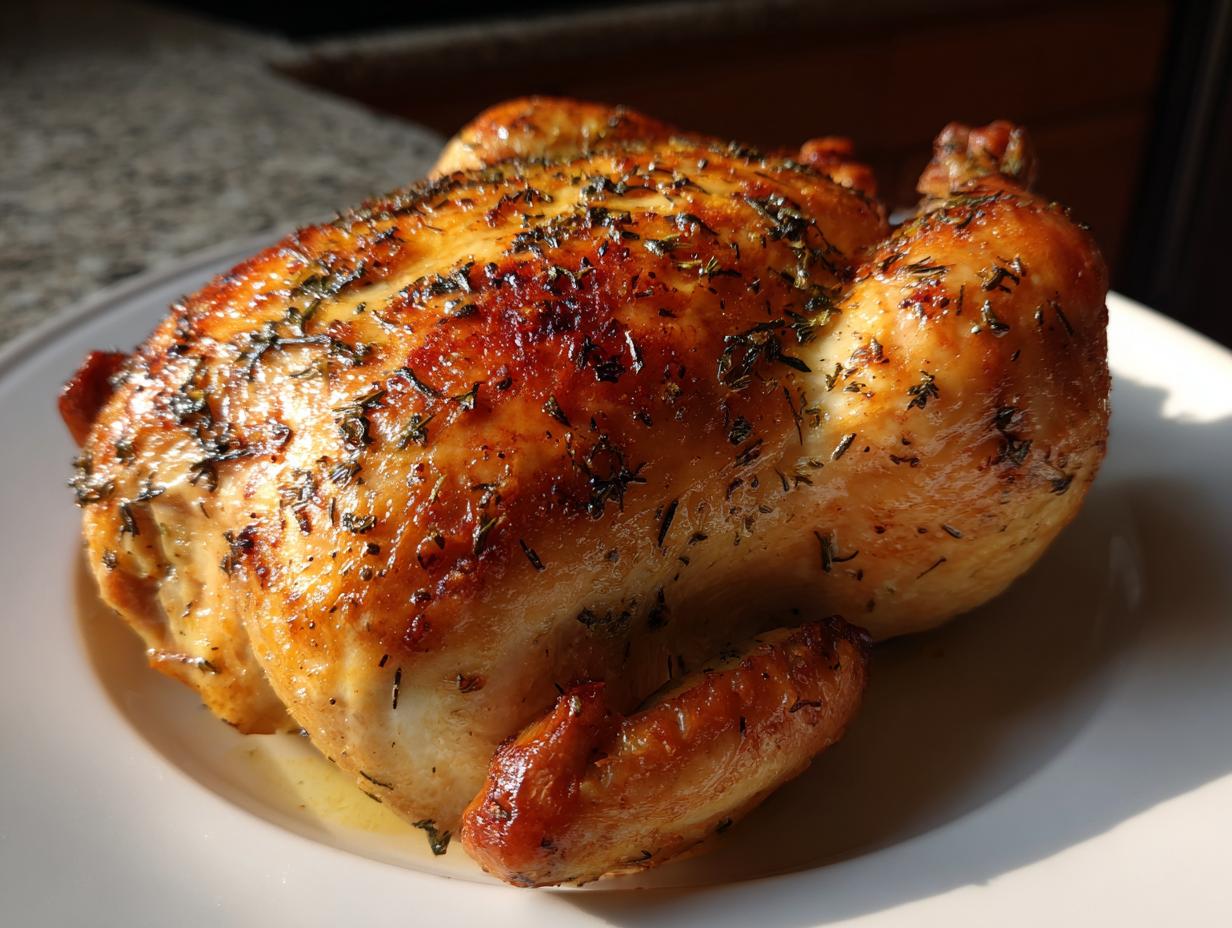
Look, we’ve all been there. You’re staring down a whole bird, you’ve got your herbs, you set the timer, and what do you get? Dry breast meat and skin that’s somehow both soggy and burnt. It’s frustrating! Cooking a perfect roasted chicken shouldn’t feel like a high-stakes exam. That’s why I created this method. Drawing from my time working the line in diners where efficiency and perfection were non-negotiable, I’ve translated those professional know-hows into something dead simple for you. This isn’t just another recipe; this is the foolproof technique that guarantees you unbelievably crispy skin and meat so juicy, you’ll think you hired a chef. Trust me, this is the last roasted chicken recipe you’ll ever need to look up.

- Why This Garlic Herb Butter Roasted Chicken is Your New Favorite
- Equipment Needed for Your Roasted Chicken
- Ingredients for the Foolproof Roasted Chicken
- How to Prepare Your Oven Roasted Chicken
- Expert Tips for the Best Roast Chicken Method
- Ingredient Notes and Substitutions for Your Classic Roast Chicken
- Serving Suggestions for a Simple Chicken Dinner
- Storage and Reheating Instructions for Leftover Roasted Chicken
- Frequently Asked Questions About the Whole Roasted Chicken
Why This Garlic Herb Butter Roasted Chicken is Your New Favorite
I know you’ve had bad luck roasting before. We’ve all wasted good butter trying to get that crackly crust! But this method is different, and it’s designed to fix what usually goes wrong. It’s quick enough for a Tuesday night, but amazing enough for Sunday dinner. Plus, cleaning up is simple, which is why this is perfect for easy weeknight dinners.
- It relies on temperature shock—a blast of high heat—to seal in juices while setting the skin instantly.
- The herb butter is applied *under* the skin, making sure every bite of meat is seasoned, not just the outside layer.
- It’s truly a foolproof chicken experience once you follow the steps!
Achieving Crispy Skin Chicken Every Time
The absolute secret here is the dry surface. Think about water on oil—they repel each other, right? We want the skin and the heat to connect directly for that perfect texture. That’s why we pat the bird bone-dry first, and then that initial 15 minutes at 425°F slams the door shut on moisture migration. That’s how you get guaranteed crispy skin chicken.
The Secret to Juicy Roast Chicken
Juiciness comes down to two things we nail in this recipe. First, we hide most of that glorious garlic butter directly against the breast and thigh meat, insulating it from drying out. Second? We do the resting. You absolutely cannot carve it right out of the oven! Letting it rest allows those tender juices to redistribute back into the meat fibers. That 15 minutes of patience is your ticket to supreme juicy roast chicken.
Equipment Needed for Your Roasted Chicken
When we talk about translating professional techniques, it often comes down to having the right tools, not complicated gadgets. You don’t need 15 different bowls or specialized tongs for this. We want efficiency in the kitchen, remember? Just grab these few basics, and you’re golden.
Here’s what you need to have ready before you even think about hitting that preheat button. Having these items out makes the process totally smooth.
- A Good Roasting Vessel: You need something sturdy that can handle high heat. I absolutely love using my heavy cast-iron skillet because the sides get wonderfully hot, which helps crisp up the lower parts of the chicken. If you don’t have one, a standard roasting pan or even a sturdy sheet pan with a small rack will do the job just fine.
- Paper Towels (Loads of them!): This is probably the most important item for the skin prep. You need enough to pat every single square inch of the bird dry, inside and out. Don’t skimp here!
- A Reliable Meat Thermometer: Seriously, toss out the guesswork. This isn’t just for food safety; it’s the secret weapon for perfect texture. You need to know when that thigh hits 165°F. If you’re still poking the meat hoping it’s done, you’re leaving perfectly tender chicken meat to chance. Get one!
- Mixing Bowl and Spatula: Just small things for whipping up that decadent garlic herb butter. Nothing fancy required for this simple chicken dinner base.
Ingredients for the Foolproof Roasted Chicken
Okay, this is where the magic starts to take shape, but honestly, it’s just your standard grocery haul. No obscure specialty items here! I always tell people that quality simple ingredients make for the best roasted chicken. We are using a standard 4-5 pound bird, which cooks up perfectly using our two-stage temperature method. Make sure your butter is soft—that’s important for mixing, not melting!
- 1 whole chicken (about 4-5 pounds), giblets removed
- 4 tablespoons unsalted butter, softened
- 2 cloves garlic, minced
- 1 tablespoon fresh rosemary, chopped
- 1 tablespoon fresh thyme leaves
- 1 teaspoon salt
- 1/2 teaspoon black pepper
- 1 lemon, halved
- 1 small onion, quartered
That’s it! With these simple things, we build huge flavor. The lemon and onion go inside to steam the meat from the cavity out; it’s a classic chef’s trick!
How to Prepare Your Oven Roasted Chicken
Now we get down to business! This is where that bistro knowledge really pays off. Forget complicated trussing or weird brining setups. We’re focusing on the two things that matter most: the surface texture and the internal temperature. If you nail these two things, you nail the roasted chicken every single time. Before you even think about turning on the oven, get your bird ready. And when it’s done? Walk away! That resting time is pure gold. For more inspiration on getting the perfect roast, check out this method for a great general idea.
Prep Work: Drying and Herb Butter Magic for Roasted Chicken
First thing’s first: take the chicken out of the fridge about an hour before you plan to cook. Letting it warm up slightly helps it cook more evenly. Then, get those paper towels out! Seriously, pat the chicken—inside the cavity and all over the skin—until it feels dry to the touch. You are wicking away surface moisture, which is the enemy of crispy skin. Next, smash that soft butter in a bowl with your minced garlic, rosemary, and thyme. See? That’s your herb butter. Gently slide your fingers between the skin and the breast meat, being careful not to tear anything, and push about two-thirds of that butter mixture underneath. Rub the rest on the outside. This guarantees incredible flavor right next to the meat while the outside skin is ready to crisp up perfectly.
Roasting Instructions for Golden Brown Chicken
Time for the heat! Preheat your oven to a screaming hot 425 degrees Fahrenheit. We start high at this heat for just 15 minutes. That blast of heat is what locks in the juices. After that 15 minutes, drop the oven temperature down to 375°F. Don’t panic, don’t open the door too much! Tuck your lemon and onion halves inside the cavity. Continue roasting. Your only job now is to check the temperature. Stick that thermometer right where the thigh meets the body, making sure you miss the bone. When it reads 165°F, it’s done. That two-stage approach is the secret sauce that delivers that beautiful golden brown chicken finish.
The Essential Resting Step for Tender Chicken Meat
I can’t stress this enough: Do NOT carve immediately! As soon as it hits 165°F, pull it out, tent it loosely with foil, and set a timer for 15 minutes. Look, all those wonderful juices that have been pushed to the outside edges while roasting are just waiting for a chance to soak back into the meat fibers. If you cut it now, all that beautiful liquid runs out onto the cutting board. After that rest, you’ll achieve the most amazing tender chicken meat imaginable. While that rests, maybe whip up some garlic parmesan mashed potatoes!
Expert Tips for the Best Roast Chicken Method
You’ve cooked the chicken by the book, but let me give you the insider language on how to make this best roast chicken method absolutely bulletproof. These aren’t suggestions; these are the rules I live by when I want a showstopper. I know you want that perfect roasted chicken every time, so listen up!
First, for skin that looks impossible—truly crackly—you have to use the cold air trick. After you pat it dry, skip just an hour. Take the bird, place it uncovered on a rack inside the fridge for 4 up to 24 hours. The cold air sucks every speck of surface moisture out. It sounds extreme, but wow, does it pay off. This is a professional secret for perfect results.
Second, about the browning. If you notice the breast is getting too dark before the thighs are done—which happens—don’t just blast the heat away. Take a tiny square of foil, make a loose little tent over the breast meat only, and keep roasting. It shields the skin from burning while the rest cooks through.
My personal pro tip? Don’t fuss with basting. All that opening and closing the oven cools things down when you’re trying to cook low. Instead, throw some chopped carrots and celery right under the bird in the pan. They soak up all those garlic butter drippings, like the ones you’d use in roasted garlic mashed potatoes! It’s efficient flavor extraction and you get built-in pan drippings!
Ingredient Notes and Substitutions for Your Classic Roast Chicken
When you’re aiming for that iconic, perfect roasted chicken flavor, sometimes you just don’t have everything fresh on hand. I get it! We aren’t always running out to the farmer’s market right before dinner. The good news is that the core technique of this recipe is so solid that it forgives minor swaps, as long as you follow one rule: don’t swap out the drying step!
Let’s talk herbs first. If you’re stuck with dried rosemary or thyme instead of fresh? You can definitely use them, but you have to adjust the amount. Dried herbs are way more potent than fresh ones. For every tablespoon of fresh herb called for, use just one teaspoon of the dried version. Mix the dried herbs right into that butter mix, and you’ll be fine. You still get that beautiful aromatic quality.
Now, the butter situation. My version calls for unsalted butter because it lets me control the salt level perfectly, especially since we are salting the skin directly. However, if you only have salted butter, just cut the added salt in the recipe down by about half a teaspoon. Can you use oil instead of butter? Look, you *can*, but you lose that rich, golden color and the flavor contribution. If you absolutely must substitute the butter for moisture/fat, use a high-fat cooking oil like avocado oil, but know that the resulting skin will be less deeply browned than our classic roast chicken usually achieves. Stick with butter if you can!
That lemon and onion going inside? If you don’t have a whole lemon, half of an orange works surprisingly well, too, adding a bit more sweet citrus note. The goal is just aromatic steam inside the cavity. If you want to see how you can tweak the seasonings for a slightly different flavor profile, check out this guide for building on that base flavor.
Serving Suggestions for a Simple Chicken Dinner
You’ve done the hard work—the bird is resting, the aroma is making your neighbors jealous, and now you need to build the plate! A fantastic roasted chicken is really satisfying on its own, but we need some supporting players to turn it into a full, glorious meal. We’re aiming for a hearty, colorful plate that takes minimal extra effort, keeping things true to the spirit of a simple chicken dinner.
Because we used the high-heat technique, the pan drippings are concentrated pure gold—don’t let those go to waste! They are perfect for pouring right over your starch. Start with a good base that can soak up all that garlic butter juice.
The Perfect Starch Pairing
You cannot beat potatoes with roast chicken. You could go for standard mashed potatoes, sure, but if you want to elevate that comfort factor without adding three extra steps, go for creamy mashed potatoes made richer by those incredible pan drippings. The savory, herby fat mixes right in. It’s honestly cheating how good it is!
A Necessary Vegetable Element
You need balance, even in comfort food. A roasted chicken is rich, so we need something with a little bite, maybe a slight bitterness or char to cut through that butter. My all-time favorite pairing is roasted Brussels sprouts. They get crispy on the outside while staying tender inside. Check out my recipe for crispy caramelized Brussels sprouts—they roast right alongside the chicken if you have the space! If not, quickly blanched asparagus tossed with a squeeze of fresh lemon juice works like a charm to keep things bright.
Don’t Forget the Green Salad
Sometimes, the best side is no-cook! Trust me, you deserve a break after wrestling the bird in the oven. A light, peppery arugula salad tossed with just olive oil, salt, and maybe a splash of red wine vinegar is perfect for rounding out the meal and adding freshness. It’s sophisticated, requires zero heat, and makes the whole simple chicken dinner feel complete.

Storage and Reheating Instructions for Leftover Roasted Chicken
Oh, leftovers! A perfectly cooked roasted chicken is truly a gift that keeps on giving. But here’s the thing: if you just toss the remaining bird in a plastic bag and shove it in the fridge, you’re going to wake up to dry, sad meat tomorrow. We need a strategy to preserve that juiciness we worked so hard to lock in!
First, you have to let it cool down *a little* bit first. You don’t want to put a massive hot piece of meat into a sealed container immediately, as that traps steam and messes with texture. Once it’s just warm to the touch, it’s time to pack it away. Use an airtight container—the flatter the container, the better, as it allows the chicken to cool faster and more safely. You’ve got about three to four days max for quality leftovers in the fridge.
The Rule for Keeping That Skin Satisfying
Listen, I’m going to be brutally honest: that melt-in-your-mouth crispy skin you achieved the first night? It’s cooked after the first day in the fridge. That’s physics, folks. If you try to reheat crispy skin chicken in the microwave, it will devolve into rubbery agony. Don’t do that!
To revive that outer layer, you have two options, and both use dry heat. Pop the pieces in a toaster oven or a regular oven set to about 350°F for maybe 10 minutes. If you happen to have an air fryer, that blasts the skin back into shape even faster—seriously, five minutes is usually enough at 375°F. The goal is to heat the meat gently while aggressively crisping the skin again. Never microwave the skin!
Reheating Tender Chicken Meat Without Drying It Out
For the actual meat, especially if you’re using larger pieces like the breast or thigh, the key is low and slow heat that doesn’t evaporate the remaining moisture. If you’re just eating the meat plain, the 350°F oven method above works great, too. But if you’re shredding it for sandwiches or making a quick soup, add a splash of liquid.
I mean a tiny splash—think a tablespoon of chicken broth or even water right into the container before you cover it with foil before putting it in the oven. That light steam keeps the muscle fibers happy. If you’re reheating a carved piece, pouring some of those delicious pan drippings (if you saved them!) over the meat before popping it in the oven is the ultimate move for maintaining that excellent moisture content we worked for in our roasted chicken.
Frequently Asked Questions About the Whole Roasted Chicken
Okay, I know you’ve probably got a few questions swirling around, especially if tackling a whole roasted chicken for the first time feels a bit intimidating. That’s totally normal! My job here is to sweep away any confusion so you feel confident walking into the kitchen. We covered the big stuff, but here are the quick hits that come up most often right before folks start roasting.
We want this process to be repeatable, whether it’s for an easy weeknight dinner or a bigger family gathering. Don’t worry if you think you missed a secret step; the core of this recipe is simplicity and dryness!
What temperature should I roast chicken at for crispy skin?
This is where our two-stage technique really pulls its weight! You can’t just pick one temperature and stick to it if you want both crisp skin and juicy meat. We start hot! Blast that bird at 425 degrees Fahrenheit for the first 15 minutes. That shock of heat crisps up the exterior fast. Then, you immediately drop it down to 375 degrees Fahrenheit to finish cooking gently. If you run those temperatures, you guarantee that golden, crackly finish without overcooking the breast meat.
How do I ensure my roast chicken is not dry?
If you remember two things only: remember the thermometer and remember to rest! Dryness happens when you cook past the point of doneness. For safety and texture, you must pull that roasted chicken when the deepest part of the thigh hits exactly 165°F. But here’s the real insurance policy: you MUST let it rest, tented with foil, for 15 minutes afterward. This lets the internal pooling juices redistribute. Skip the rest, and you pour that tenderness right out onto your cutting board. Follow those two rules, and you will never have dry meat again.
PrintFoolproof Roasted Chicken with Garlic Herb Butter

This recipe translates professional kitchen knowledge into a simple method for roasting a whole chicken. You get unbelievably crispy skin and juicy, tender meat every time you cook it.
- Prep Time: 15 min
- Cook Time: 75 min
- Total Time: 90 min
- Yield: 4 servings 1x
- Category: Dinner
- Method: Roasting
- Cuisine: American
- Diet: Low Fat
Ingredients
- 1 whole chicken (about 4–5 pounds), giblets removed
- 4 tablespoons unsalted butter, softened
- 2 cloves garlic, minced
- 1 tablespoon fresh rosemary, chopped
- 1 tablespoon fresh thyme leaves
- 1 teaspoon salt
- 1/2 teaspoon black pepper
- 1 lemon, halved
- 1 small onion, quartered
Instructions
- Take the chicken out of the refrigerator 1 hour before roasting. Pat the entire chicken, inside and out, completely dry using paper towels. This step is key for crispy skin.
- Preheat your oven to 425 degrees Fahrenheit.
- In a small bowl, mix the softened butter, minced garlic, chopped rosemary, thyme, salt, and pepper until combined. This is your herb butter.
- Gently loosen the skin over the chicken breasts and thighs. Push about two-thirds of the herb butter mixture under the skin, spreading it evenly over the meat. Rub the remaining butter mixture all over the outside of the chicken skin.
- Place the lemon halves and onion quarters inside the chicken cavity.
- Place the chicken breast-side up in a roasting pan or a large cast-iron skillet.
- Roast at 425 degrees Fahrenheit for 15 minutes to start crisping the skin.
- Reduce the oven temperature to 375 degrees Fahrenheit. Continue roasting for approximately 60 to 75 minutes more, or until a meat thermometer inserted into the thickest part of the thigh (not touching bone) reads 165 degrees Fahrenheit.
- Remove the chicken from the oven. Tent it loosely with foil and let it rest on a cutting board for 15 minutes before carving. This resting period keeps the meat juicy.
Notes
- For the crispiest skin, after patting the chicken dry, place it uncovered on a rack in the refrigerator for 4 to 24 hours before cooking. The cold air dries the skin further.
- If you want pan juices for gravy, place chopped carrots and celery under the chicken in the roasting pan.
- If the chicken skin browns too quickly during the lower temperature roasting time, loosely tent the breast area with foil.
Nutrition
- Serving Size: 6 oz cooked meat
- Calories: 450
- Sugar: 0
- Sodium: 350
- Fat: 28
- Saturated Fat: 12
- Unsaturated Fat: 16
- Trans Fat: 0
- Carbohydrates: 0
- Fiber: 0
- Protein: 45
- Cholesterol: 150