

Okay, settle in, because here is one of the biggest secrets I picked up working the line in a fast-paced kitchen: flavor doesn’t have to take forever. Seriously. You can unlock incredible depth—that rich, almost molasses-like sweetness—from something as humble as an onion. I’m talking about perfect caramelized onions, those jammy jewels that make everything taste gourmet, and we’re nailing them in under 45 minutes. When I was first learning the language of cooking, I thought this transformation was reserved for cooks who had all day, but I figured out the right heat, the right fat ratio, and bam—instant flavor upgrade. I use this onion cooking technique all the time when I’m rushing to throw together something amazing for those nights when you need easy weeknight dinners.
- Why This Method Creates the Best Caramelized Onions (The Kitchen Slang Technique)
- Ingredients for Perfectly Caramelized Onions
- Step-by-Step: How to Make Caramelized Onions Fast
- Tips for Success When Making Caramelized Onions
- Using Your Caramelized Onions: From Side Dish to Comfort Food Pasta
- Storage & Reheating Instructions for Caramelized Onions
- Troubleshooting Common Caramelized Onions Issues
- Frequently Asked Questions About Caramelized Onions
- Estimated Nutritional Data for This Kitchen Staple Onion Recipe
Why This Method Creates the Best Caramelized Onions (The Kitchen Slang Technique)
Look, I love a good culinary tradition, but sometimes waiting three hours for slow cooked onions just isn’t practical, right? That’s why this 45-minute method is my go-to. Traditional cooks will tell you this can’t be done, but they forget that the goal isn’t just cooking them down—it’s dissolving those cell walls and coaxing out those beautiful viral onion pasta flavors fast. By controlling the temperature and using the right balance of fat, we speed up the process without just burning the edges. You get that deep flavor payoff without the marathon cooking time. Seriously, these are the best caramelized onions you’ll ever make on a Tuesday night, guaranteed.
The Role of Fat and Heat in Caramelized Onions
This is the key to understanding the onion cooking technique. We start with medium-low heat, not medium or medium-high. That’s crucial! If it’s too hot, the outside burns before the sugars can form. We use half butter for flavor and half oil to raise the smoke point and prevent curdling. This combination melts down perfectly, allowing the sliced onions to sauté slowly and evenly, releasing their moisture instead of instantly steaming away.
Ingredients for Perfectly Caramelized Onions
When we talk about flavor building, you have to start with the right foundation. For the absolute best results, you want three large yellow onions. If you’re using those giant, mild ones, this is the ultimate sweet onions recipe vehicle! We combine butter and olive oil—never just one or the other—to get that amazing texture. Don’t forget the salt, which helps pull the moisture out to start the process. I also made a note about sugar being *optional*. That little pinch is a cheat code if you’re in a real rush, but trust me, the onions usually do the work just fine on their own.
- 3 large yellow onions (or sweet onions), thinly sliced
- 2 tablespoons unsalted butter
- 1 tablespoon olive oil
- 1 teaspoon salt
- 1 teaspoon sugar (optional, for faster caramelization)
- 2 tablespoons water or low-sodium broth (optional, for deglazing)
Step-by-Step: How to Make Caramelized Onions Fast
Alright, this is where we put the work in, but it’s mostly hands-off. First thing: peel and slice those onions evenly. If they are different sizes, some bits will burn while others are still crying for mercy. Once your skillet is warm with the fat—remember, medium-low heat—toss in all those slices and hit them with salt. Stir until everything is looking glossy and coated. This is important for starting the process right.
For the first ten minutes, you’re just softening them up. Don’t panic about color yet! Just stir every couple of minutes. After that initial softening, drop that heat down to low. Now we are cooking the magic into these caramelized onions. Hang out for another 20 to 30 minutes. You need to stir these every five minutes, no excuses! If you see anything sticking dark brown to the bottom of your pan, that’s flavor gold, not burnt food, okay? Add a tablespoon of water or broth and scrape it up—that’s your fond coming back to life! This step gives us that amazing deep flavor onions need.
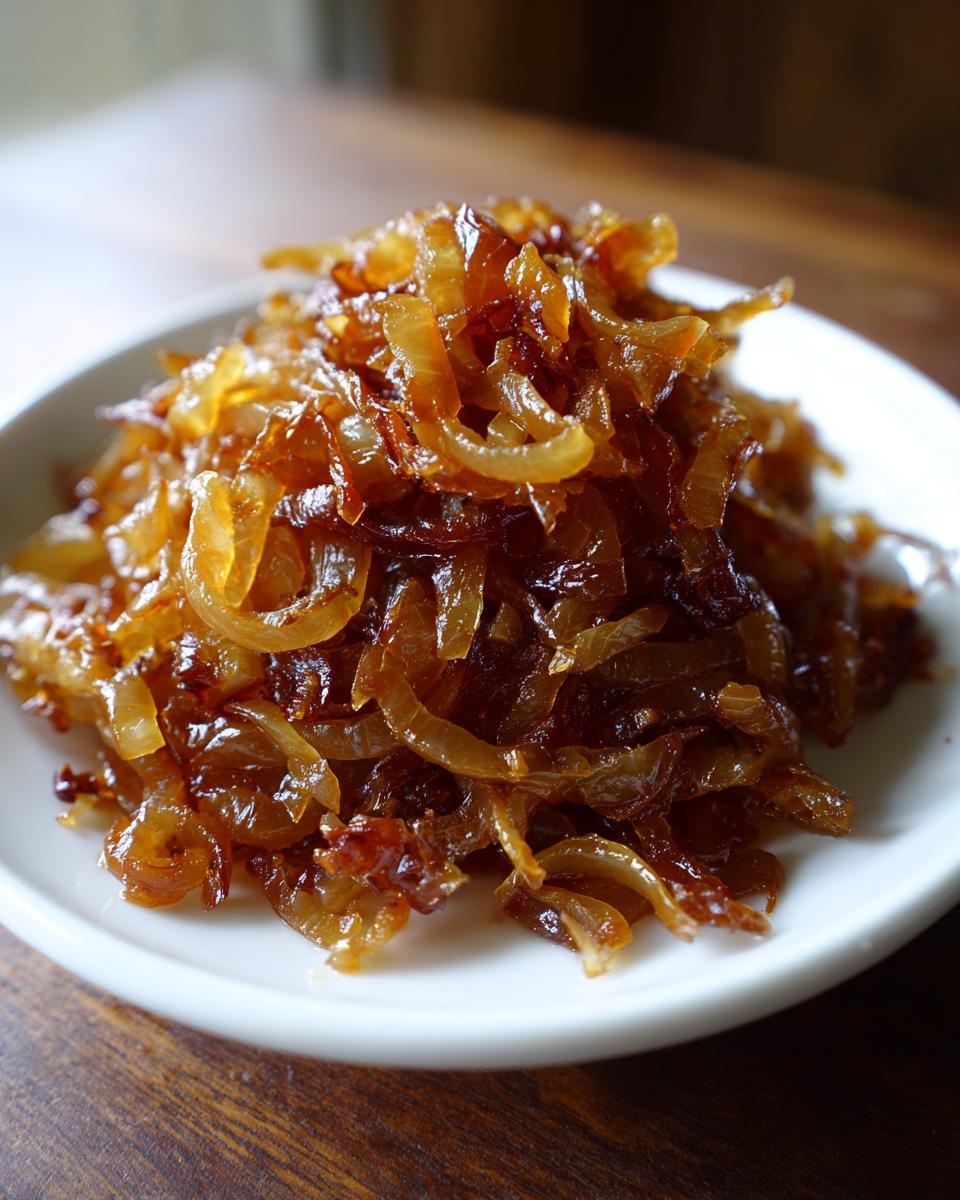
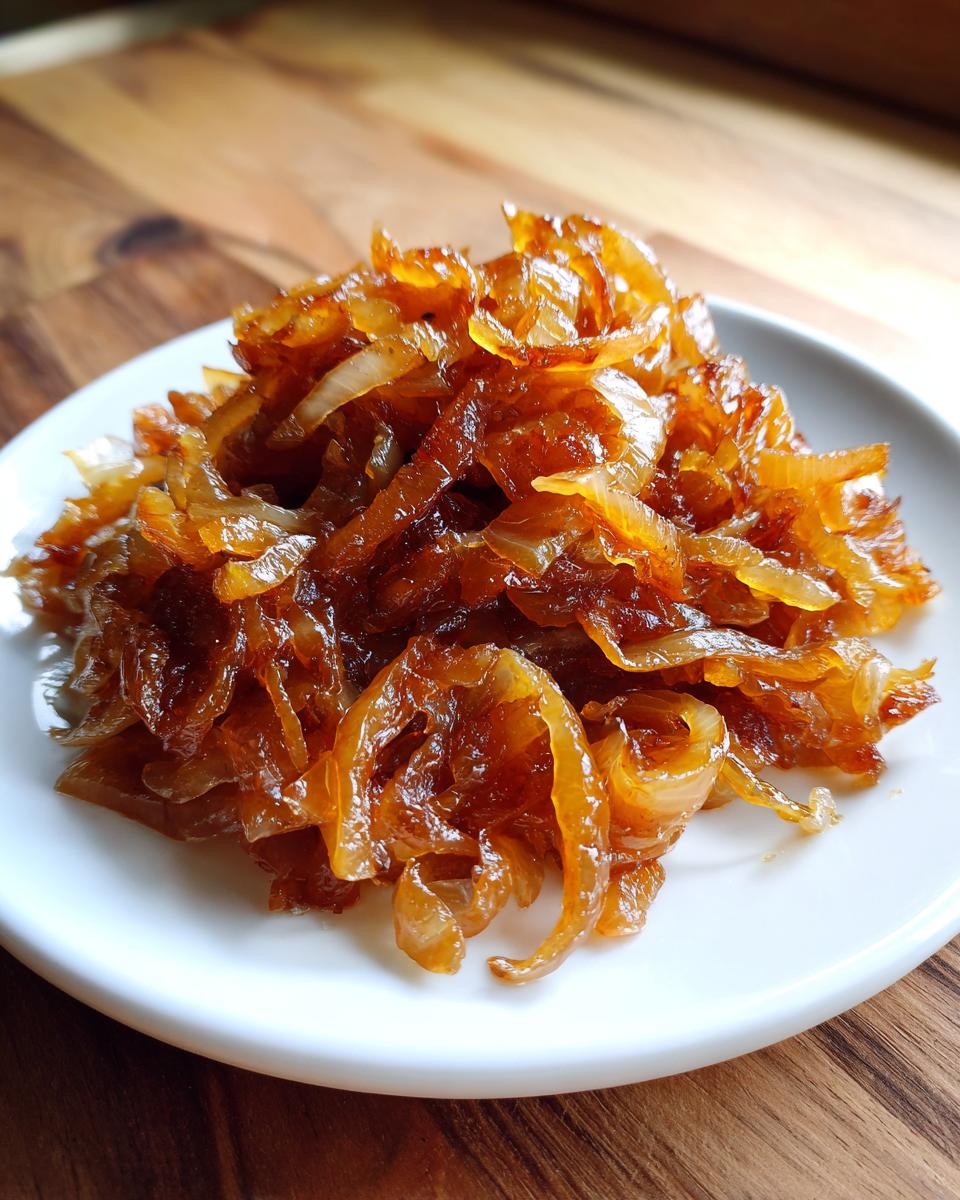
Keep going until they look completely different from what you started with. We want rich, dark brown, and thick, almost like a spread. That’s the sign these caramelized onions are ready to be used as a topping for savory sweet onion topping on anything!
Achieving Golden Brown Onions: The Final Stage
You’ll know you’ve hit perfection when the onions look significantly reduced—we’re talking maybe a quarter of the original volume—and they’re the color of rich mahogany. They should feel soft when lightly pressed, completely jammy, not chewy. If you added that optional pinch of sugar, wait until the very last five minutes. When they look done, pull them off the heat immediately. They will continue cooking for a minute or two even after being taken off the stove!
Tips for Success When Making Caramelized Onions
Listen, I’ve seen people mess this up by using the wrong gear, and it breaks my heart! The single most important tool here is a heavy-bottomed, wide skillet. Think cast iron, or anything that retains heat evenly. If your pan is too small or too thin, the onions steam. Steaming gives you mushy, pale onions, and we are hunting for that deep, sweet flavor that only beautiful caramelized onions deliver.
My personal tip? If you are doubling this recipe—and trust me, you should, because these freeze beautifully—use the widest pot you own. Try to keep the onions in a single layer or close to it. This lets the moisture escape so they brown instead of stewing in their own juices. Once they are totally cool after cooking, toss a scoop of these into a container for later use, maybe next time you’re whipping up some garlic parmesan mashed potatoes! These jewels make everything better.

Using Your Caramelized Onions: From Side Dish to Comfort Food Pasta
So you’ve got this big jar of gorgeous, sweet, caramelized onions—what now? This is where the real fun begins, because this isn’t just a boring side dish situation. These are your secret weapon for instant flavor elevation. If you’re whipping up burgers tonight, forget ketchup; pile these on! They make the best caramelized onions for burgers you’ve ever dreamed of. They instantly turn a simple grilled cheese into a stunner, or you can dollop them right next to a steak for that perfect savory, sweet complement.
But we can go bigger! Think about taking those leftovers and turning them into a decadent main course. If you’ve seen that trending comfort food pasta featuring French onion flavors, well, these are the exact building blocks you need. They provide that deep, complex base that makes people ask, “Wait, what magic is in this?” Or if you’re hosting, these smothered onions are definitely a gourmet onion side dish centerpiece.
Making the Creamy Onion Dip Recipe
One of my favorite ways to use up a batch is by turning them into a show-stopping appetizer. We’re talking about a phenomenal creamy onion dip recipe! You just take the cooled onions, mix them right into softened cream cheese with a little sour cream or mayo, garlic powder, and maybe some Gruyère if you’re feeling fancy. Whisk it all up, let it chill, and serve it warm or cold. It’s seriously unbeatable for holiday parties. You gotta check out the full details for the dip; I swear it’s going to disappear first at every gathering!
Storage & Reheating Instructions for Caramelized Onions
Don’t even think about throwing any leftover caramelized onions away! These are way too precious. Once they’ve cooled completely—and I mean totally cool, or you risk turning the insides of your fridge into an onion steam room—scoop them into an airtight container. They keep perfectly well in the fridge for about a week. I often make double batches just so I have them ready for quick toppings on a weeknight easy chili recipe later in the week.

If you made a huge haul, freezing works great too. Pop them onto a parchment-lined tray first, freeze them solid, and then transfer the frozen clumps into a freezer bag. That way, you can pull out one clump instead of thawing the whole batch. For reheating, just a quick stir in a skillet over low heat is usually all they need to get that jammy texture back. You can see some other great tips over at Perfect Caramelized Onions if you want more ideas!
Troubleshooting Common Caramelized Onions Issues
Sometimes the onions just don’t listen, right? If your onions are burning way too fast on the edges before they soften, you have the heat up too high. Seriously, back it down another notch. We want slow-motion cooking, not a quick sear. That’s our biggest enemy here.
The other major pitfall is when they get mushy and wet—that means they are steaming, not browning. Usually, this happens if you crammed too many onions into your pan. If you can’t see the bottom of the pan when you stir, you need a wider skillet or you need to work in batches. Remember, we need room for the moisture to escape so the sugars can show up and do their job. If they aren’t getting sweet enough, just give them more time on that low heat. Patience is the final ingredient for those beautiful, jammy results!
Frequently Asked Questions About Caramelized Onions
Can I skip the sugar in this sweet onions recipe?
Absolutely! I put the sugar in there as a cheat code, especially if you’re using regular yellow onions and want to speed things along. But honestly, if you have the patience for the full 35 minutes on a low simmer, the onions will create so much of their own natural sweetness that you won’t even miss it. This is the secret to the “deep flavor onions” everyone loves!
How long are slow cooked onions supposed to take traditionally?
Traditionally, when cooks are aiming for the absolute deepest possible flavor, they cook them for 60 to 90 minutes, stirring every ten minutes. That long-haul method gets every last bit of moisture out, resulting in a darker, almost black jam. My recipe gets you about 90% of the way there in under an hour, which is a huge win for a weeknight meal!
What makes these jammy onions recipe different from fried onions?
That’s a great question! Fried onions are cooked quickly over higher heat just until they are crisp and lightly golden. They stay separate and crunchy. Our goal is the opposite—we cook them low and slow until they have completely broken down, softening into that rich, sticky, sweet texture that defines a true easy garlic naan bread topping. We want them wilted and caramelized, not crispy!
Can I use shallots instead of yellow onions?
You can, but it changes the flavor profile a bit. Shallots are naturally sweeter and milder, so they don’t need as long to brown, and the yield will be much smaller. If you want that robust, savory-sweet punch for something like a big batch needed for a easy onion topping for burgers, stick to yellow or Vidalia/sweet onions recipe for the best bang for your buck.
Estimated Nutritional Data for This Kitchen Staple Onion Recipe
I always include this little section because, hey, we all want to know what we’re eating, even when it tastes like pure indulgence! These numbers are just estimates based on the main ingredients like the butter and onions; they change depending on how much fat you use and if you skip that optional sugar. So, take it with a grain of salt, but it’s good info to have for your homemade granola recipe tracking!
- Serving Size: 1/4 cup
- Calories: 85
- Sugar: 8g
- Sodium: 300mg
- Fat: 5g
- Protein: 1g
The Ultimate Guide: How to Perfectly Caramelize Onions (In Under 45 Minutes)

Learn the onion cooking technique to transform sharp onions into sweet, golden brown onions with deep flavor. This simple recipe is the kitchen staple for making jammy onions for burgers, dips, or pasta.
- Prep Time: 10 min
- Cook Time: 35 min
- Total Time: 45 min
- Yield: About 1.5 cups 1x
- Category: Side Dish
- Method: Stovetop Cooking
- Cuisine: American
- Diet: Vegetarian
Ingredients
- 3 large yellow onions (or sweet onions), thinly sliced
- 2 tablespoons unsalted butter
- 1 tablespoon olive oil
- 1 teaspoon salt
- 1 teaspoon sugar (optional, for faster caramelization)
- 2 tablespoons water or low-sodium broth (optional, for deglazing)
Instructions
- Prepare the onions: Peel and slice the onions thinly, aiming for uniform thickness.
- Start the heat: Place a large, heavy-bottomed skillet over medium-low heat. Add the butter and olive oil. Wait until the butter melts and coats the pan.
- Add onions and salt: Add all the sliced onions to the skillet. Sprinkle with salt. Stir to coat the onions evenly with the fat.
- Initial cook: Cook the onions uncovered for 10 minutes, stirring every few minutes. You want them to soften and start turning translucent. Do not let them brown yet.
- Lower heat and cook slowly: Reduce the heat to low. Continue cooking for 20 to 30 minutes. Stir the onions every 5 minutes. This slow cooking draws out the natural sugars.
- Encourage browning: If the bottom of the pan develops dark bits (fond), add 1 tablespoon of water or broth and scrape the bottom of the pan with a wooden spoon. This incorporates flavor back into the onions.
- Achieve color: Continue cooking until the onions reach a deep, rich, golden brown color and have a jammy texture. If you are using sugar, add it during the last 5 minutes of cooking.
- Finish: Remove the onions from the heat. They are now ready to use as a gourmet onion side dish or topping.
Notes
- For the fastest results, use a pinch of sugar to help speed up the caramelization process, but traditional methods rely only on the onion’s natural sugars.
- If you are making a large batch, use a wide, heavy-bottomed pot to allow the onions to cook in a single layer for even browning.
- These caramelized onions store well. Cool completely, then keep them in an airtight container in the refrigerator for up to one week.
- Use these smothered onions as a base for creamy onion dip or as a topping for your favorite comfort food pasta.
Nutrition
- Serving Size: 1/4 cup
- Calories: 85
- Sugar: 8
- Sodium: 300
- Fat: 5
- Saturated Fat: 2
- Unsaturated Fat: 3
- Trans Fat: 0
- Carbohydrates: 10
- Fiber: 2
- Protein: 1
- Cholesterol: 5