

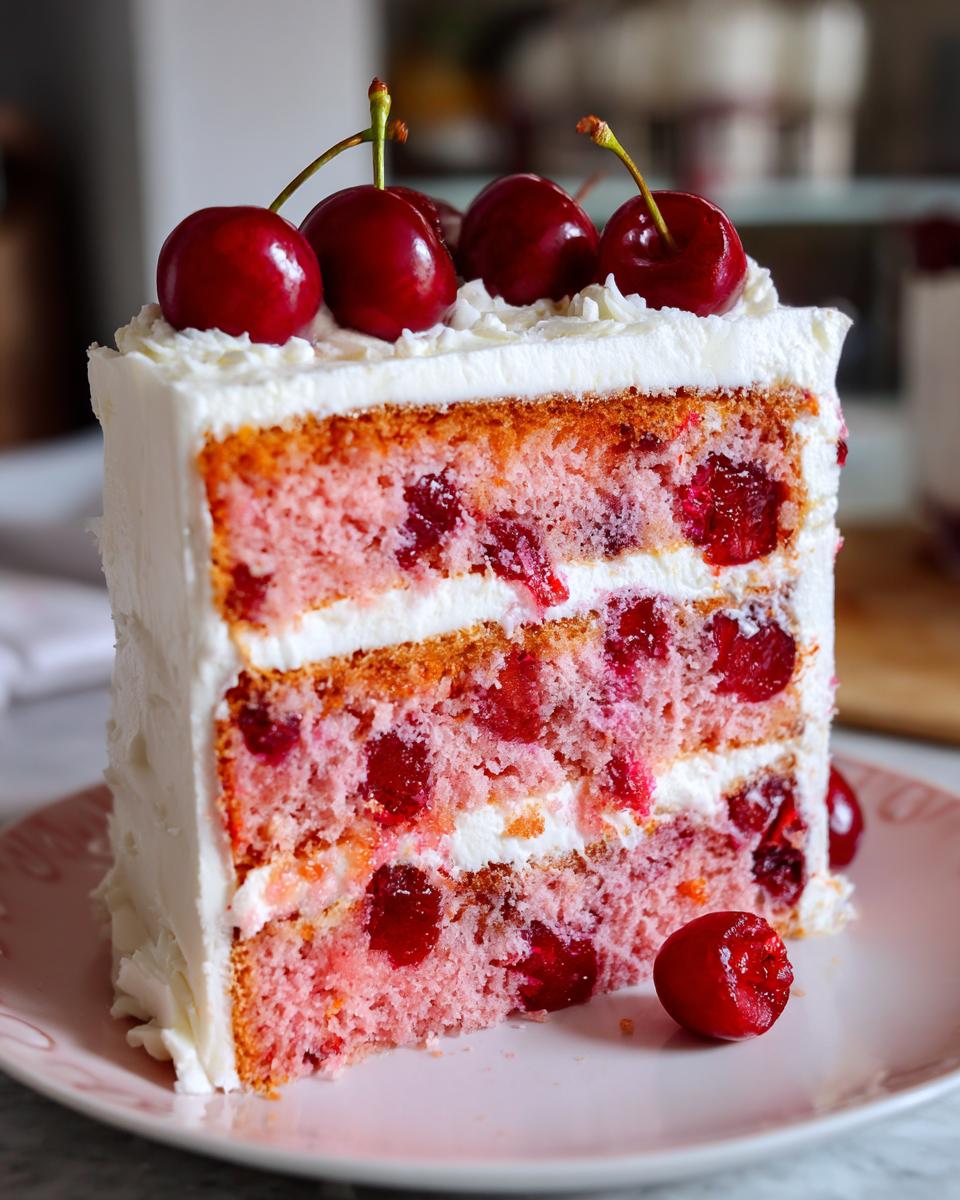
In the kitchen, color isn’t just for looks; it’s a flavor promise. And when you see that specific, dreamy pink hue, doesn’t it just pull you right back to a time when things felt a little simpler? That’s why I absolutely had to translate this amazing Vintage Maraschino Cherry Cake recipe for you. Forget anything complicated; this is pure, nostalgic flavor from my playbook of the best, most reliable delicious dessert recipes. This isn’t just any cherry cake; it’s an immediate mood-lifter that taps into that classic American baking vibe. As your translator here at Kitchen Slang, I’m showing you how to nail that old-school texture without any head-scratching.
- Why This Vintage Maraschino Cherry Cake Recipe Stands Out
- Gathering Your Ingredients for the Best Cherry Cake
- Step-by-Step Instructions for Your Homemade Cherry Cake
- Frosting and Finishing Your Vintage Maraschino Cherry Cake
- Tips for Success with Any Cherry Cake Recipe
- Storage and Make-Ahead Tips for Your Cherry Dessert Recipes
- Frequently Asked Questions About Making Cherry Cake
- Understanding the Nutrition in This Homemade Cherry Cake
- Share Your Vintage Cherry Cake Creations
Why This Vintage Maraschino Cherry Cake Recipe Stands Out
Look, there are a million ways to bake with cherries, but this specific cherry cake hits different. It’s the flavor throwback that people really crave—that bright, slightly artificial, totally wonderful taste you remember from childhood celebrations. This isn’t just a cake; it’s a little slice of edible nostalgia that happens to be incredibly moist. It’s the easiest, most foolproof homemade cherry cake you’ll ever pull from your oven, trust me.
The Secret to a Perfectly Moist Cherry Cake
The real magic in this specific cherry cake isn’t just the chopped fruit; it’s swapping out some of your traditional liquids for that syrupy maraschino cherry juice. That sugar and pectin in the syrup locks in moisture like nothing else! Now, here’s the pro move: once you add the flour, stop that mixer the second you see the last streak disappear. Overmixing chases out the air we worked so hard to create, leaving you with a dense brick instead of a tender crumb.
Flavor Profile: More Than Just Sweetness in This Cherry Cake
People think these bright red cherries just bring color, but they carry a unique punch. We balance that punch with pure vanilla, but for a real old-school twist—something I picked up working the line—try swapping half your vanilla for almond extract. That hint of almond against the sweet fruit in this cherry cake makes the flavor incredibly complex. It stops the bake from tasting one-note sweet; it gives it depth. That’s the kind of translation you need!
Gathering Your Ingredients for the Best Cherry Cake
Alright, we’re moving on to the building blocks. For any genuinely great cherry cake recipe, the precise ratios matter. I’ve tested this specific combination of flour, sugar, and our cherry liquids countless times to make sure it sets up perfectly every single time you bake it. If you want that beautiful, even texture in your final baking project, pay attention to the details here.
Ingredient Clarity: Measuring for a Perfect Layered Cherry Cake
Let’s get precise with what we need. You want all-purpose flour, 1 1/2 cups measured correctly, paired with baking powder and salt for lift. The fat here is half a cup of unsalted butter, and listen closely—it *must* be softened to room temperature, not melted! Sugar is one cup. We use two large eggs, mixed in one at a time. The wet side involves half a cup of milk and crucially, half a cup of maraschino cherry juice—that means you save the liquid from the jar itself, strained if it looks overly thick, for this phenomenal layered cherry cake. Finally, we gently fold in half a cup of chopped cherries, making sure they’re drained well first.
Step-by-Step Instructions for Your Homemade Cherry Cake
Okay, here’s where we turn those ingredients into magic. Remember, baking is just timing and rhythm. I learned this system working in a busy restaurant where efficiency means everything, but for this cherry cake, we’re slowing down just enough to make sure the aeration is perfect before we start layering. Getting these initial steps right is what keeps this from becoming heavy. This whole process is quicker than you think, and you can find more quick inspiration here: quick dinner inspiration, but trust the process for this bake!
Prep Work: Oven Setup and Dry Mix for the Cherry Cake
First things first: get that oven preheated to 350°F (175°C) right now. Don’t wait! While it’s heating up, grease and flour those two 8-inch pans. If they stick, I’ll hear about it later, so do a good job! Now, grab a bowl and whisk your flour, baking powder, and salt together really well. You aren’t just mixing; you’re making sure that leavening is totally evenly distributed throughout the dry mix. That’s how you guarantee an even rise in your beautiful cherry cake.
Building the Batter: Creaming and Alternating Wet/Dry for a Fluffy Cherry Cake
Take your softened butter and sugar and beat them hard until they look pale and fluffy—that should take around three solid minutes with a mixer. No rushing here; this is where you trap the air! Next, eggs go in, one by one. Then we switch to the alternating dance: add 1/3 of the dry ingredients, followed by 1/2 of your liquid (milk/cherry juice mix), then another 1/3 dry, the rest of your liquid, and finish with the final dry portion. And listen: Mix only until you don’t see white streaks anymore. Gently fold in your chopped cherries at the very end. This technique guarantees that tender, fluffy outcome every time you make this cherry cake.
Baking and Cooling the Layered Cherry Cake
Divide that gorgeous pink batter evenly between your two pans. Slide them carefully into the oven. They usually take 28 to 32 minutes, but you always test with a toothpick in the center—it should come out clean, maybe with a few damp crumbs clinging to it, but never raw batter. The critical final step for any good layer cake is patience: let the layers cool in the pans for a full 10 minutes before you turn them out onto a wire rack. If you flip them too soon, they’ll crack, and we don’t want that structural failure!

Frosting and Finishing Your Vintage Maraschino Cherry Cake
This bright, sweet cherry cake is honestly fantastic on its own, but we’re going for full impact here, right? Since the cake itself carries a lot of sugar from the juice and cherries, the frosting needs to balance that sweetness. A simple vanilla buttercream is fine, but if you want to really level up, I always lean toward a tangy cream cheese frosting. That little bit of acid cuts through the sweetness perfectly. If you’re not a fan of cream cheese, a light almond buttercream is another winner that echoes that vintage vibe. Check out my recipe for garlic aioli—it’s savory, but the technique for creaming the fat applies to frosting, too!
Tips for Success with Any Cherry Cake Recipe
Even with a solid blueprint like this, sometimes you need that extra bit of insider knowledge to really nail it down. That’s what separates baking by instruction from cooking with instinct! I want to make sure that whatever you do, your cherry cake turns out amazing, whether you stick exactly to the recipe or decide to customize a little. These tips are based on things I’ve tweaked over the years to make sure the texture and look are always spot-on.
Ingredient Swaps for an Almond Cherry Cake Variation
If you’re deep into that vintage vibe but want to lean into the complexity I mentioned earlier, here’s the easiest trick. Take that teaspoon of vanilla extract and swap out half of it—use a half-teaspoon of vanilla and a half-teaspoon of almond extract instead. It sounds small, right? But that subtle almond note is what makes people stop mid-bite and ask, “What is that incredible flavor?” It perfectly enhances the fruit in this cherry cake without tasting overtly nutty.
Controlling Color in Your Cherry Cake
The juice from the jar gives you a lovely, subtle pink infusion naturally, which is gorgeous for that authentic, slightly faded vintage look. But let’s be real: sometimes you want that vibrant pop, especially for a celebration. If you want to ensure that dazzling, bright look, just add one or two tiny drops of red food coloring when you mix your milk and cherry juice together. Remember, a little goes a long way—we’re aiming for cheerful, not alarming. This small move really sells the classic aesthetic of your layer cake.
If you want to see more techniques on maximizing fruit flavor in your bakes, swing by my guide on baking with cherries for more inspiration!
Storage and Make-Ahead Tips for Your Cherry Dessert Recipes
Alright, you’ve made this incredible, moist cake, and now the hard part: waiting to serve it! The good news is that this specific recipe holds up beautifully. Unlike a delicate chiffon, this cake has enough structure and sugar to stay fresh for days. That’s another win for the vintage style!
Unfrosted layers are your best friends if you’re planning ahead. Wrap those completely cooled layers tightly in plastic wrap—I wrap them twice, just to be safe—and they can hang out on the counter for a full day. If you need longer, the fridge is fine, but take them out an hour before you frost so they warm up a touch. Cold cake contracts, and we don’t want any accidental cracks during the frosting stage.
If the cake is fully frosted, let it sit uncovered at room temperature for about an hour to let the buttercream relax before you slice it. If you’re using a cream cheese frosting, though, you’ll need to keep the whole thing covered tightly in the fridge. Always check the frosting documentation if you get fancy! For keeping that fresh flavor humming, check out my guide on no-bake pumpkin cheesecake; the rules on keeping desserts cold often overlap!
And if you have leftovers? Store slices generously frosted in an airtight container. They stay perfectly delicious for three to four days on the counter if they aren’t sitting in direct sunlight. Seriously, this cake just refuses to go stale!
Frequently Asked Questions About Making Cherry Cake
I know baking always brings up questions—it’s part of learning the language of the kitchen! We’ve made this cherry cake recipe as streamlined as possible, but sometimes you just need a quick translation on a specific point. Here are the things I get asked most often about this bake. Don’t hesitate to ask more in the comments if you need them!
Can I use fresh cherries instead of maraschino cherries in this Cherry Cake recipe?
That’s a great question, especially if you have fresh cherries lying around! Yes, you absolutely can substitute them, and it will give you a different, but equally delicious, result. The thing is, fresh cherries have a lot more water content than the syrupy jarred ones. They will also bleed color a bit more. My tip? If you use fresh, make sure you drain them really well first. Then, toss those pitted cherries lightly in about a tablespoon of your reserved flour mixture before folding them into the batter. That light coating helps prevent them from all sinking right down to the bottom of your cherry cake recipe layers.
How do I turn this into an Easy Cherry Dump Cake?
That’s leaning into a totally different baking direction, but I love the flexibility! A true dump cake is all about ease—usually mixing canned cherry pie filling with a box of dry cake mix and melted butter, right? This recipe, on the other hand, is a true from scratch cherry cake. It involves creaming butter and sugar and alternating ingredients, which builds a much more refined structure, perfect for layering. If you want the ease of a dump cake, you should look for a dedicated recipe like that, but know you’ll lose the delicate texture we achieved here. Check out my notes on easy chili recipe for simple mixing concepts, but for cake structure, stick to the standard method!
What is the best way to calculate the nutrition for this Cherry Cake?
Honestly, getting a perfect number here is tricky because brands differ so much. Flour, sugar content in the butter, even how much juice you manage to squeeze out—it all shifts the dial. The values provided here are a general estimate based on standard supermarket products. If you are tracking very closely, you’ll need to input your exact ingredient weights into a reliable nutritional calculator. But for a general idea of what’s in your slice of this delightful cherry cake, those baseline numbers give you a good starting point.
Understanding the Nutrition in This Homemade Cherry Cake
Now, let’s talk numbers briefly. I always feel like if you’re going to indulge in something this tasty, you should have an idea of what you’re enjoying, even if we’re focusing more on flavor around here than macro counts! Remember, the figures I pull together are always estimates. We’re using standard ingredient weights, and as I always say, the specific brand of flour or sugar you use can shift these a little bit. Think of this as a really good starting point for understanding what’s in your beautiful slice of homemade cherry cake.
We’ve laid out the general breakdown below based on one standard serving size. If you want to dive deep into optimizing the macros, you can always plug these ingredients into your preferred tracking app. For more general health-focused recipes that use similar techniques but focus on lighter breakfasts, swing by my guide on high-protein overnight oats!
- Serving Size: 1 slice
- Calories: Around 350—perfect for a celebration treat!
- Sugar: This is where the cherries shine through, clocking in at about 35 grams.
- Fat: About 16 grams total, with 9 of those being saturated fat from that essential butter.
- Carbohydrates: Roughly 48 grams.
- Protein: A modest 5 grams.
- Sodium: About 250mg.

Share Your Vintage Cherry Cake Creations
Now that you’ve learned the lingo and conquered the technique, the best part is seeing your results! This cherry cake recipe is built on tradition, and I want to know how it fits into yours. Did you stick to the classic look? Did you add that almond kick? Please, take a moment and leave me a rating—a quick 5-star review means the world!
I absolutely live for seeing your photos and reading your thoughts in the comments below. Drop a line about your experience making this cake, or feel free to reach out directly through my contact page if you run into any snags. Happy baking, friends!
PrintVintage Maraschino Cherry Cake

This is a classic, moist cherry cake recipe using maraschino cherries for a distinct flavor and bright color. It is a simple layer cake that tastes like the old times.
- Prep Time: 20 min
- Cook Time: 30 min
- Total Time: 50 min
- Yield: 8 servings 1x
- Category: Dessert
- Method: Baking
- Cuisine: American
- Diet: Vegetarian
Ingredients
- 1 1/2 cups all-purpose flour
- 1 1/2 teaspoons baking powder
- 1/2 teaspoon salt
- 1/2 cup unsalted butter, softened
- 1 cup granulated sugar
- 2 large eggs
- 1 teaspoon vanilla extract
- 1/2 cup milk
- 1/2 cup maraschino cherry juice (from the jar)
- 1/2 cup chopped maraschino cherries, drained
- 1/4 cup maraschino cherries, halved (for topping)
Instructions
- Preheat your oven to 350°F (175°C). Grease and flour two 8-inch round cake pans.
- In a medium bowl, whisk together the flour, baking powder, and salt. Set this aside.
- In a large bowl, cream the softened butter and sugar together until the mixture is light and fluffy. This takes about 3 minutes with an electric mixer.
- Beat in the eggs one at a time, mixing well after each addition. Stir in the vanilla extract.
- In a separate small bowl, mix the milk and the maraschino cherry juice.
- Alternate adding the dry ingredients and the wet ingredients to the butter mixture, beginning and ending with the dry ingredients. Mix only until just combined; do not overmix.
- Gently fold in the chopped, drained maraschino cherries.
- Divide the batter evenly between the prepared cake pans.
- Bake for 28 to 32 minutes, or until a toothpick inserted into the center comes out clean.
- Let the cakes cool in the pans for 10 minutes before inverting them onto a wire rack to cool completely.
- Once cool, frost with your preferred vanilla or cherry buttercream frosting and top with the halved maraschino cherries.
Notes
- For a richer flavor, substitute almond extract for half of the vanilla extract.
- If you want a deeper pink color in the cake, add 1-2 drops of red food coloring when mixing the wet ingredients.
- This cake pairs well with a simple cream cheese frosting for a tangy contrast to the sweet cherries.
Nutrition
- Serving Size: 1 slice
- Calories: 350
- Sugar: 35
- Sodium: 250
- Fat: 16
- Saturated Fat: 9
- Unsaturated Fat: 7
- Trans Fat: 0.5
- Carbohydrates: 48
- Fiber: 1
- Protein: 5
- Cholesterol: 75