
Listen up, because there’s something supremely satisfying about a dessert made just for one. We’re talking about individual servings—no messy slicing, no fighting over the biggest piece, just pure, portable indulgence. If you’ve been watching everyone rave about cookie butter cheesecake cups, you’ve come to the right place. Forget those long, fussy recipes you see online; my goal here at Kitchen Slang is to translate that professional-level flavor into something you can whip up tonight. Since we aren’t touching the oven, these no-bake treats featuring that warm, spiced Biscoff (or Speculoos, if you’re feeling fancy!) magic are fast, easy, and guaranteed to make you feel like a pastry boss.
- Why These Cookie Butter Cheesecake Cups Are Your New Favorite No Bake Sweet Treats
- Gathering Ingredients for Your Cookie Butter Cheesecake Cups
- Step-by-Step Guide to Making No Bake Cheesecake Cups
- Pro Tips for Perfect Cookie Butter Cheesecake Cups Every Time
- Transforming Your Cookie Butter Dessert into Variations
- Serving Suggestions for Individual Cheesecake Desserts
- Storage and Make Ahead Desserts for cookie butter cheesecake cups
- Frequently Asked Questions About Cookie Butter Cheesecake Cups
- Estimated Nutritional Data for This Creamy Dessert Cup
Why These Cookie Butter Cheesecake Cups Are Your New Favorite No Bake Sweet Treats
Seriously, these little treats tick every single box, and that’s the real magic of translating good ideas for home cooks. We already know that nobody wants to fire up the oven when it’s already hot, which is why these recipes are king. They ditch the heat entirely!
Here’s the short list on why you’ll need to save this one immediately:
- Zero Oven Time: Yep, these are true no bake sweet treats. Perfect for summer months or when your oven is already full of dinner.
- Texture Play: You get that fantastic crunch from the spiced cookie crust contrasting perfectly with the smooth, creamy dessert cups filling. It’s simple but feels incredibly decadent.
- Ultimate Portability: Because they are individual desserts, they are instant party dessert recipes. Scoop, chill, and serve! No awkward slicing needed. These no bake cheesecake cups look amazing just sitting on a platter.
Gathering Ingredients for Your Cookie Butter Cheesecake Cups
Alright, time to raid the pantry! This is where we translate all that amazing flavor into actual ingredients for these incredible cookie butter cheesecake cups. The most important rule here is patience for your cream cheese; it absolutely has to be soft, or you’ll end up with tiny cream cheese pebbles in your final product. Trust me on this one!
For the Cookie Crust Base
- 1 1/2 cups crushed Biscoff cookies (I usually crush mine right in the package with a rolling pin—less mess!)
- 6 tablespoons unsalted butter, melted
For the Simple Cheesecake Filling
- 16 ounces cream cheese, softened (this is non-negotiable!)
- 1 cup powdered sugar
- 1 teaspoon vanilla extract
- 1/2 cup heavy whipping cream (this gives us lift!)
- 1/2 cup Biscoff spread (cookie butter), plus extra for that amazing drizzle on top
Step-by-Step Guide to Making No Bake Cheesecake Cups
Making these cookie butter cheesecake cups is all about setting yourself up for success efficiency, just like on a busy brunch line. Since we’re skipping the oven, structure relies entirely on cold and proper mixing. Don’t rush the chill time down below; that’s your bake time in this scenario!
Building the Cookie Crust Desserts Base
First up, you’re mixing those crushed Biscoff cookies with the melted butter. You want it to feel like wet sand—just damp enough that when you pinch it, it holds its shape. Scoop that crumb mixture into your lined muffin cups or serving glasses. Now, here’s where we steal time: press that crust down firmly using the bottom of a small glass. Get it compact! Pop this whole tray into the freezer for about fifteen minutes while you move onto the filling.
That quick freeze sets the butter and keeps the base from getting soggy later.
Whipping Up the Creamy Dessert Cups Filling
Grab your mixer! We start with the cream cheese, hitting it on medium speed until it’s perfectly smooth—no lumps, nope! Then, add your powdered sugar and vanilla. Once that’s incorporated, switch gears. In a separate, clean bowl, whip your heavy cream until you get nice, stiff peaks. This whipped cream brings the airiness! Gently fold that fluffy cream into the cream cheese mixture first. Then, finally, fold in that glorious cookie butter until everything is one uniform, creamy color. It takes a gentle touch to keep all that air you just whipped in there.
Assembling and Chilling Your cookie butter cheesecake cups
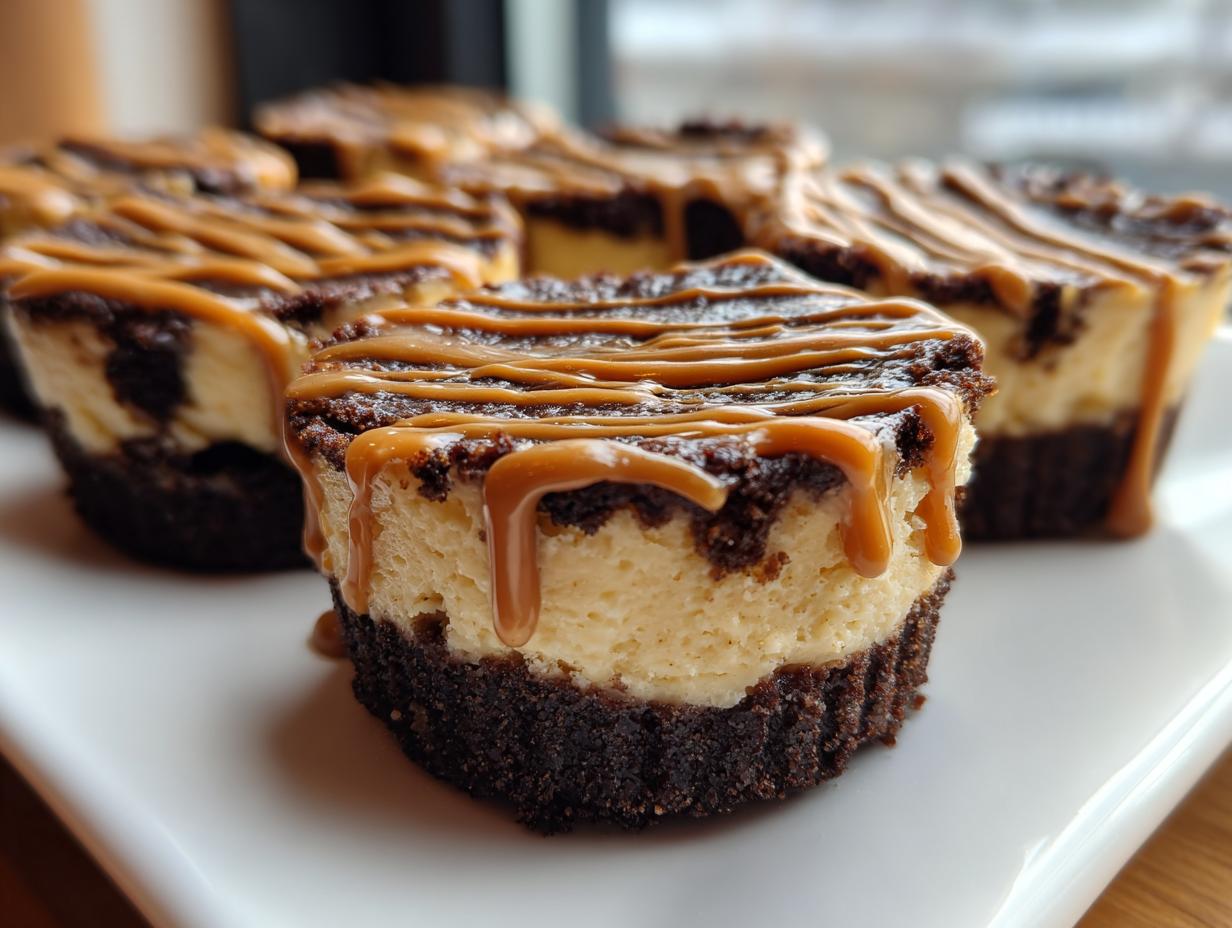
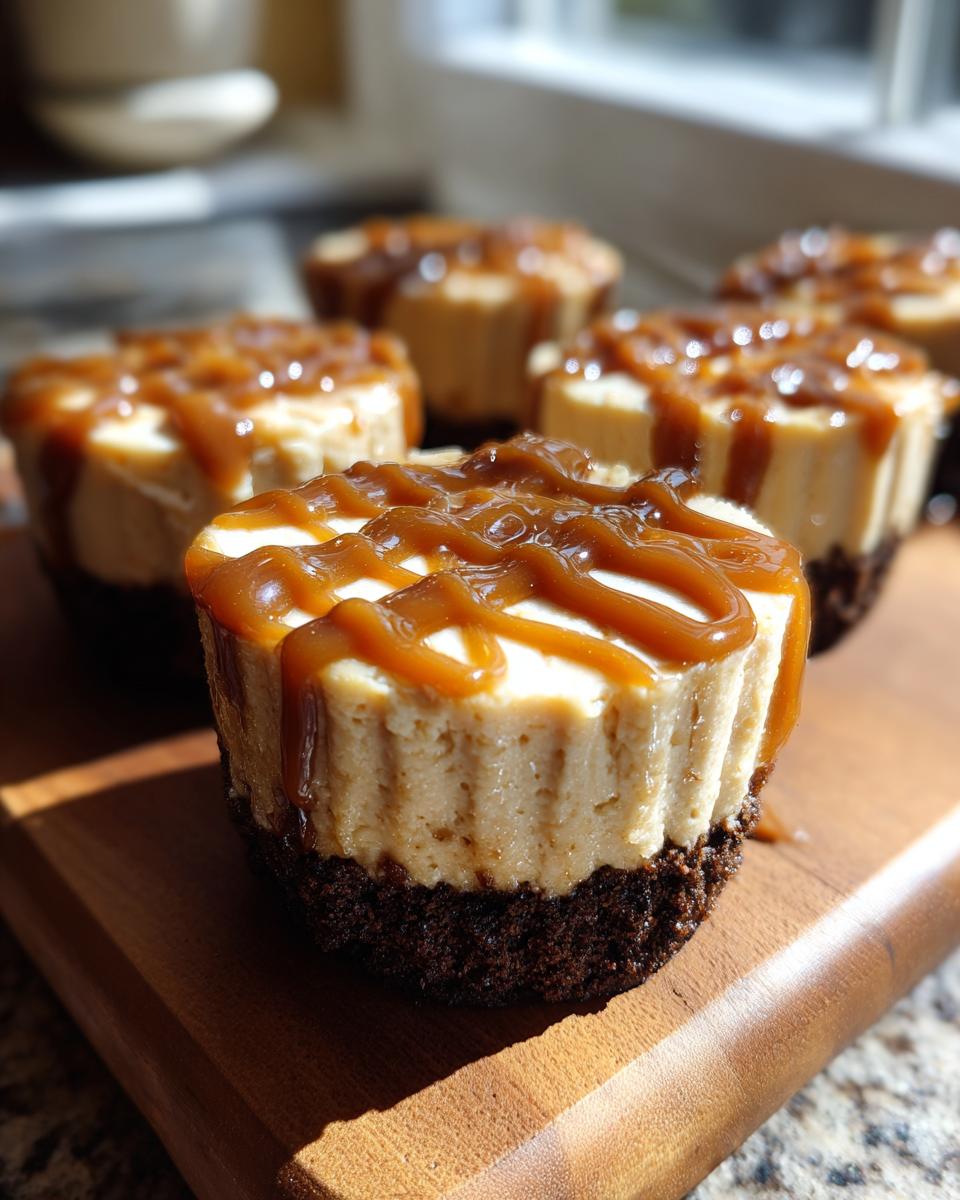
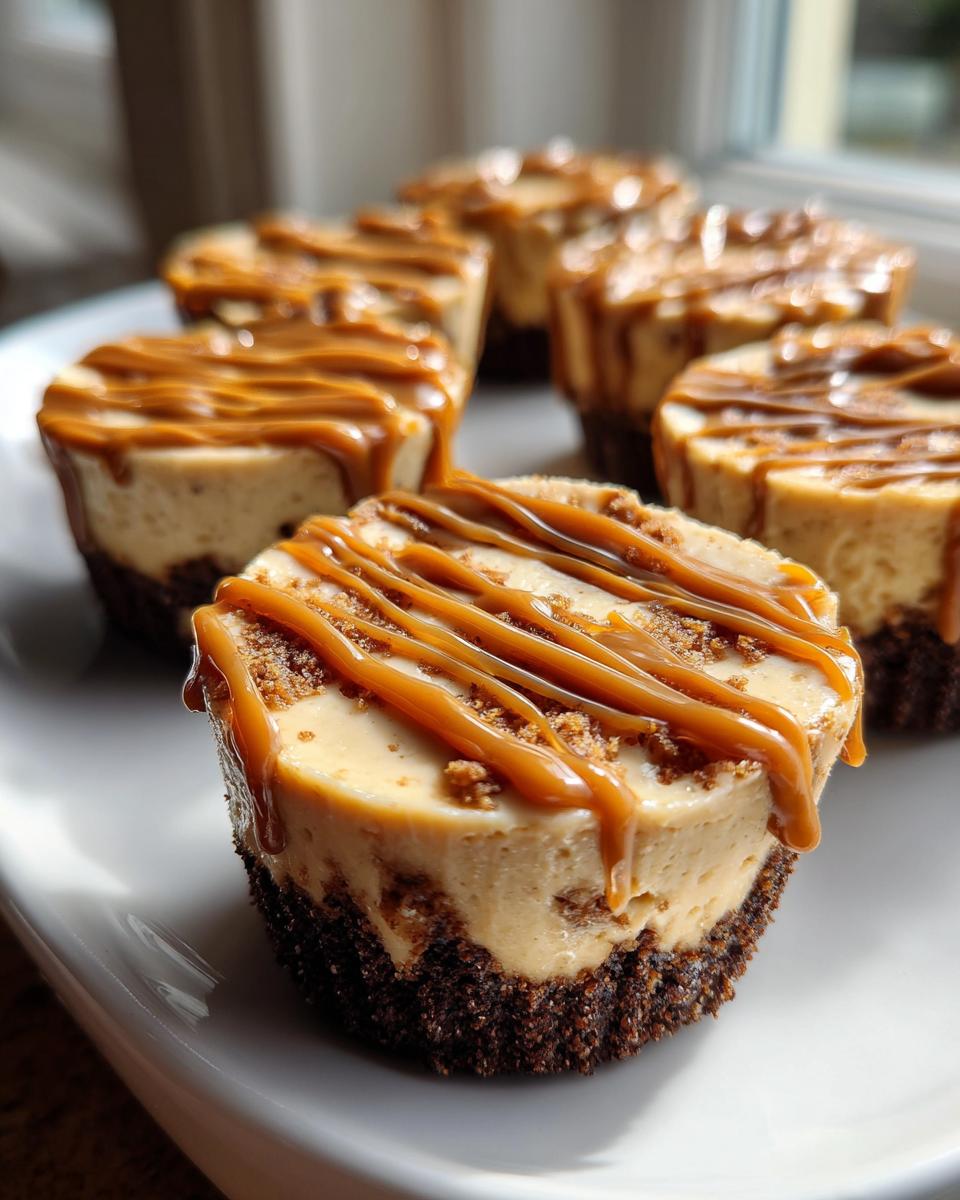
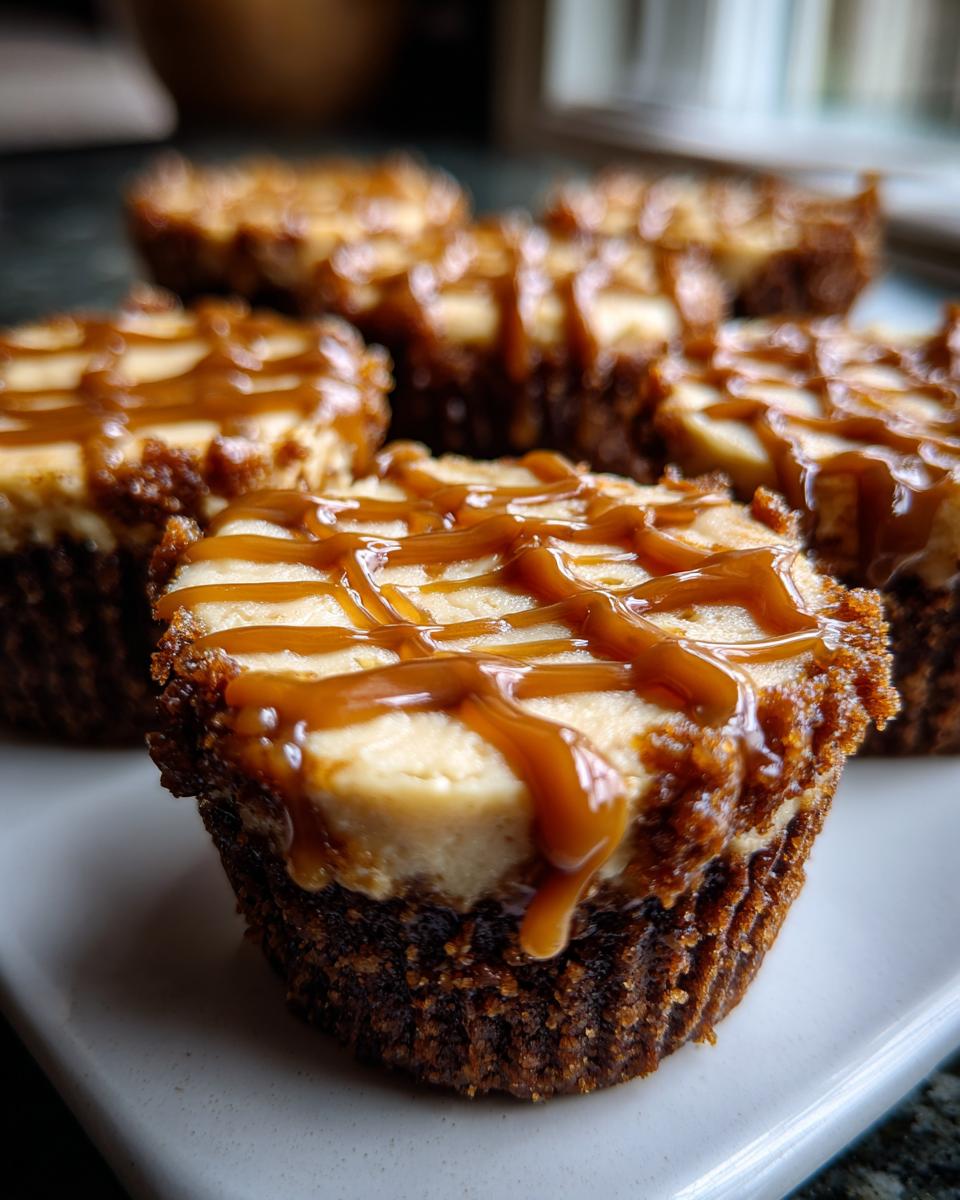
Now that your base is nice and solid from that short freeze, it’s time to assemble those stunning cookie butter cheesecake cups. Carefully spoon or pipe that beautiful filling right over the crusts. Smooth the tops off with a small offset spatula if you want them looking sharp for company. Pop the tray back into the refrigerator—and this is important—for a minimum of four hours. Seriously, set a timer. They need that long time in the cold to firm up properly so they hold their shape when you serve them.
Pro Tips for Perfect Cookie Butter Cheesecake Cups Every Time
Look, even no-bake recipes need a few insider tricks to transition from “good” to “I need the recipe right now.” For these cookie butter cheesecake cups, it all comes down to temperature management and knowing how to handle that rich spread.
First, let’s talk cream cheese again. If it’s straight from the fridge, you’re going to struggle to beat it smooth. You need it truly softened so your mixer doesn’t overwork the fat—that’s when it gets grainy. This is standard for all creamy desserts!
For that gorgeous drizzle on top? Don’t just spoon cold cookie butter over the finished cups. It’ll sit there in a thick lump. Heat a small dollop in the microwave for about ten seconds until it’s runny and drizzle-able. It should be warm, not hot, so it melts slightly into the cold cheesecake without making the whole thing messy. This tiny move elevates your creamy dessert cups immediately! I’ve also found that if you’re using paper liners, giving the tin a quick spray underneath definitely helps them pop out cleanly.
Transforming Your Cookie Butter Dessert into Variations
Just because we nailed the perfect base recipe for these cookie butter cheesecake cups doesn’t mean we stop there! This is where you start putting your own translator’s spin on things. If you love that deep, spicy flavor, you can boost the effect by stirring just a tiny pinch of ground cloves or cardamom into your filling mixture along with the cinnamon. That just amps up the whole Speculoos Dessert vibe.
Or maybe you want to change the crunch factor? Swap out half the Biscoff crumbs in the crust for finely chopped pecans or even crushed ginger snaps for a sharper counterpoint to the rich filling. Some folks sneak in a thin layer of melted dark chocolate between the crust and the filling—it sets up beautifully in the fridge and gives you an extra layer of decadence in your Cookie Butter Dessert. It’s your kitchen; make it sing!
Serving Suggestions for Individual Cheesecake Desserts
How you present these little guys makes all the difference when you’re serving them up at a party. Since the flavor profile is so warm and spiced, you want accompaniments that either cut through the richness or double down on the cozy factor. They are gorgeous all by themselves, topped with that drizzle, but sometimes we need a little extra flair!
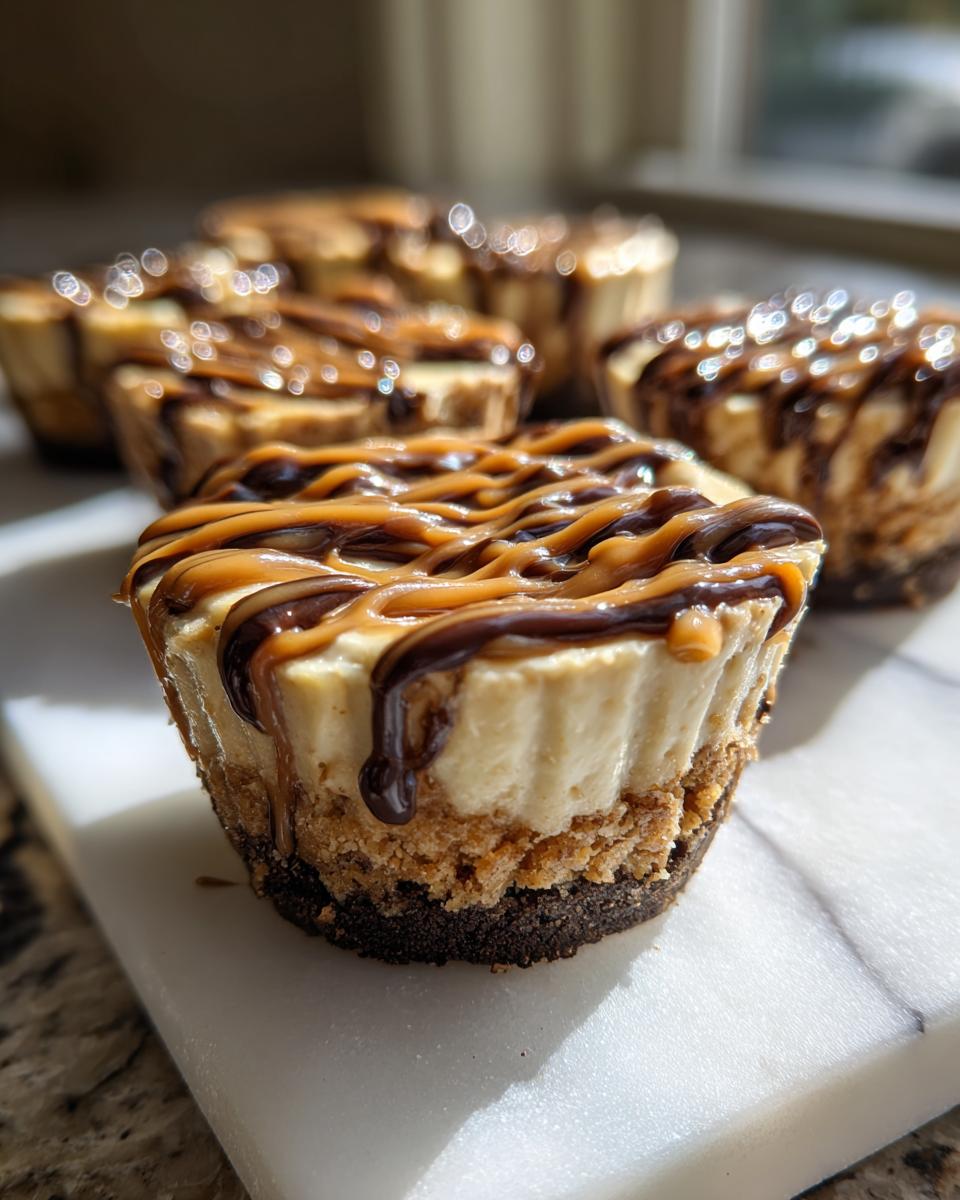
I always serve these individual cheesecake desserts alongside a strong cup of coffee; the bitterness balances the sweetness perfectly. If you’re worried about presentation, a quick sprinkle of finely grated dark chocolate over the top looks professional in two seconds flat. Or, if you want something truly fresh, a tiny cluster of raspberries or thinly sliced strawberries on the side brightens everything up beautifully.
Storage and Make Ahead Desserts for cookie butter cheesecake cups
This is the part where I love these cookie butter cheesecake cups the most—they are champions of planning ahead! Since they are no-bake, they actually get better as they sit in the fridge for a day or two. The crust absorbs a tiny bit of moisture, and the filling just solidifies into that perfect, creamy texture.
You can absolutely make these as make ahead desserts. Pop them into the refrigerator, covered tightly, and they hold up great for up to three days. Seriously, they are great for parties because you can make them Thursday night for a Saturday event! If you need longer storage, they do freeze well, but try to freeze them unfrosted, and then drizzle that warm cookie butter right before serving so it looks fresh.
Frequently Asked Questions About Cookie Butter Cheesecake Cups
Okay, I know you’re excited to make these amazing cookie butter cheesecake cups, but sometimes questions pop up when you dive away from the heat of the oven. Here are the things I get asked most often when introducing people to this recipe!
What if I don’t have Biscoff cookies? Can I use something else for the crust?
That’s a totally fair question, though I swear Biscoff makes the magic happen! If you can’t find them, you can absolutely pivot. Use standard graham crackers or vanilla wafers, but mix in about a teaspoon of ground cinnamon and a teaspoon of brown sugar with your melted butter. This helps mimic that spiced flavor profile that makes these no bake dessert cups so special.
Do I really need to whip the heavy cream separately?
Yes, please do! This is what separates a dense, solid block of cheesecake from those ethereal, light individual cheesecake desserts. Whipping the cream separately incorporates a lot of air. We fold that air into the heavier cream cheese mixture gently. If you just dumped the cold, liquid cream in all at once, you’d end up with thinner, soupy filling that struggles to set up correctly. We want that pillowy texture!
Can I turn these into tiny dessert shots?
Absolutely! If you want to serve these as the ultimate dessert in a cup for a huge spread, just swap out the muffin liners for small shot glasses or espresso cups. You’ll use less filling and crust per serving. Just keep in mind you’ll get more servings, and you might need to slightly reduce the chill time since the layers are thinner. It really makes these party dessert recipes look fancy!
Estimated Nutritional Data for This Creamy Dessert Cup
Alright, let’s translate the raw ingredients into numbers, but remember that exact readings depend on the exact brand of Biscoff and cream cheese you grab. These figures are just a general guide for one of these indulgent sweet treats based on the standard recipe quantities.
Per serving (1 cup), you’re looking at:
- Calories: 350
- Fat: 23g (with 14g saturated)
- Carbohydrates: 33g
- Sugar: 28g
- Protein: 4g
So, yes, they’re rich—we knew that! But since they are individual portions, it’s super easy to manage how much you indulge. Keep in mind these are estimates; if you go heavy on the final drizzle, nudge those numbers up just a touch!
PrintEasy No-Bake Biscoff Cheesecake Cups
Make these simple, creamy cookie butter cheesecake cups without turning on your oven. This recipe uses Lotus Biscoff cookies for the crust and filling, creating individual, indulgent desserts perfect for parties or quick treats.
- Prep Time: 20 min
- Cook Time: 0 min
- Total Time: 4 hr 20 min
- Yield: 12 servings 1x
- Category: Dessert
- Method: No Bake
- Cuisine: American
- Diet: Vegetarian
Ingredients
- 1 1/2 cups crushed Biscoff cookies (about 25 cookies)
- 6 tablespoons unsalted butter, melted
- 16 ounces cream cheese, softened
- 1 cup powdered sugar
- 1 teaspoon vanilla extract
- 1/2 cup heavy whipping cream
- 1/2 cup Biscoff spread (cookie butter), plus extra for topping
Instructions
- Prepare the crust: Combine the crushed Biscoff cookies and melted butter in a bowl. Mix until the crumbs are evenly moistened.
- Divide the crust mixture evenly among 12 standard muffin cups lined with paper liners, or into individual serving glasses. Press the mixture down firmly to form the base. Place the cups in the freezer while you make the filling.
- Make the filling: In a large bowl, beat the softened cream cheese with an electric mixer until smooth. Add the powdered sugar and vanilla extract, mixing until just combined.
- In a separate bowl, whip the heavy cream until medium peaks form. Gently fold the whipped cream into the cream cheese mixture until no streaks remain.
- Fold in 1/2 cup of Biscoff spread into the cheesecake mixture until it is uniform in color and texture.
- Spoon or pipe the cheesecake filling over the chilled crusts in each cup. Smooth the tops.
- Chill the cheesecake cups in the refrigerator for at least 4 hours, or until firm.
- Before serving, warm a small amount of extra Biscoff spread slightly so it drizzles easily. Top each cheesecake cup with a spoonful of the warm spread.
Notes
- If you do not have paper liners, lightly spray the muffin tin cups with non-stick spray for easier removal.
- For a richer flavor, you can substitute 1/4 cup of the heavy cream with 1/4 cup of softened cream cheese blended with 1 tablespoon of cookie butter for the crust layer.
- These are excellent make-ahead desserts; they hold well in the refrigerator for up to three days.
Nutrition
- Serving Size: 1 cup
- Calories: 350
- Sugar: 28g
- Sodium: 210mg
- Fat: 23g
- Saturated Fat: 14g
- Unsaturated Fat: 9g
- Trans Fat: 0g
- Carbohydrates: 33g
- Fiber: 1g
- Protein: 4g
- Cholesterol: 65mg