

Look, sometimes life just throws you a curveball, right? You promised to bring something sweet to the party in twenty minutes, or maybe you just need that warm, sugary hug of a homemade treat without dirtying half the kitchen. That’s where the real magic of kitchen slang comes in—shortcuts that feel earned, not cheats. We’re talking about transforming basic pantry staples into something genuinely impressive. And nothing screams last-minute success louder than these cool whip cookies. They’re the definition of easy cookies and the ultimate quick cookie recipes because they ditch the butter, the creaming, and all the waiting time. Trust me, this is the chef’s secret weapon for fast baking.
- Why These 3-Ingredient cool whip cookies Are a Kitchen Slang Must-Make
- Gathering Ingredients for Your quick cookie recipes: cool whip cookies Edition
- The Method: How to Make Amazing cool whip cookies Step-by-Step
- Tips for Success When Making cool whip cookies
- Variations: Customizing Your 3 ingredient dessert cool whip cookies
- Storage and Reheating Instructions for cool whip cookies
- Frequently Asked Questions About cool whip cookies
- Estimated Nutritional Snapshot for cool whip cookies
- Share Your Last Minute cool whip cookies Success
Why These 3-Ingredient cool whip cookies Are a Kitchen Slang Must-Make
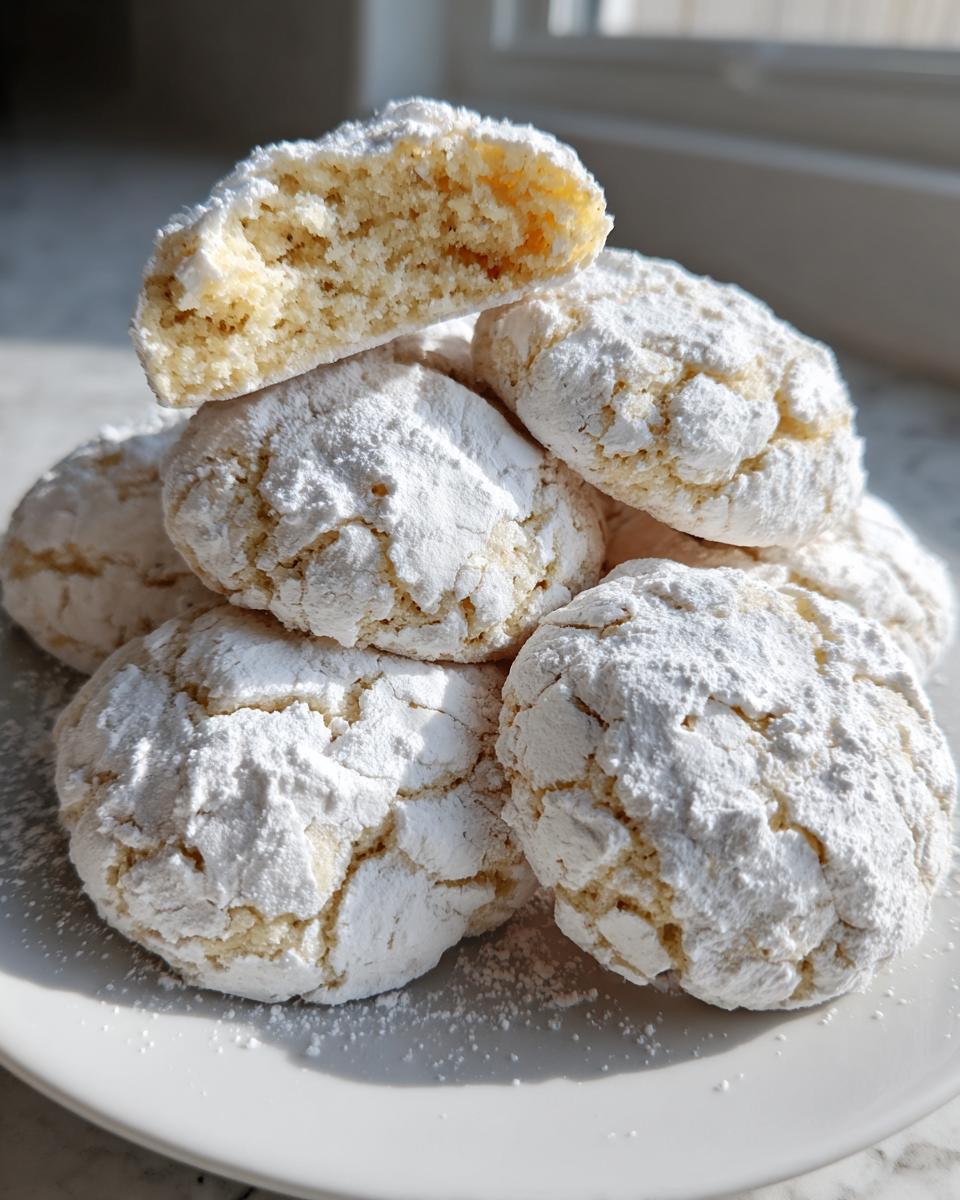
The first thing you need to know about these cookies is that they bypass all the usual fuss. We aren’t beating any butter, we aren’t chilling the dough—seriously, this is pure efficiency! Because we’re ditching the fat and using stabilized whipped topping instead, you get these wonderfully soft cookies no butter could ever give you. The texture is bouncy, light, and impossibly airy.
When they come out of the oven, they feel like those melt in your mouth cookies you only ever dreamed of ordering from a fancy bakery. That’s the power of using that whipped topping as a lift agent. It’s science, but it feels like magic when you realize you only used three main things from the cabinet!
This recipe is my gold standard for when I’m behind schedule but refuse to serve store-bought junk. It proves you don’t need ten steps or specialized gear to achieve delicious, fluffy baked goods. It’s high reward with minimal effort, which is exactly what we champion here at Kitchen Slang.
Gathering Ingredients for Your quick cookie recipes: cool whip cookies Edition
When I talk about a true 3 ingredient dessert, I mean it. You likely have two of these items staring at you from the pantry right now. The beauty of these cool whip cookies is how few moving parts there are. This minimizes guesswork, which is great news for beginner baking recipes!
Accuracy matters here, even with just three items, especially concerning temperature. I learned early on that if you just toss a frozen tub of whipped topping into the mix, you end up with weird icy lumps. We need structure, not ice chunks!
Ingredient Clarity: What You Need for Perfect cool whip cookies
Here’s the quick list. Don’t sweat complicated prep work; these ingredients are ready to go once you grab them.
- The Cake Mix: Grab one standard 15.25 ounce box. And this is crucial—use the dry mix only. You can go vanilla, chocolate, lemon, whatever strikes your fancy!
- The Whipped Topping: You need the 8-ounce container of frozen whipped topping, thawed. Thawed means soft and scoopable, not runny liquid. Just let it sit on the counter for an hour, or remember to pull it out the night before.
- The Egg: One large egg needs to be ready to go. That’s it for the main dough!
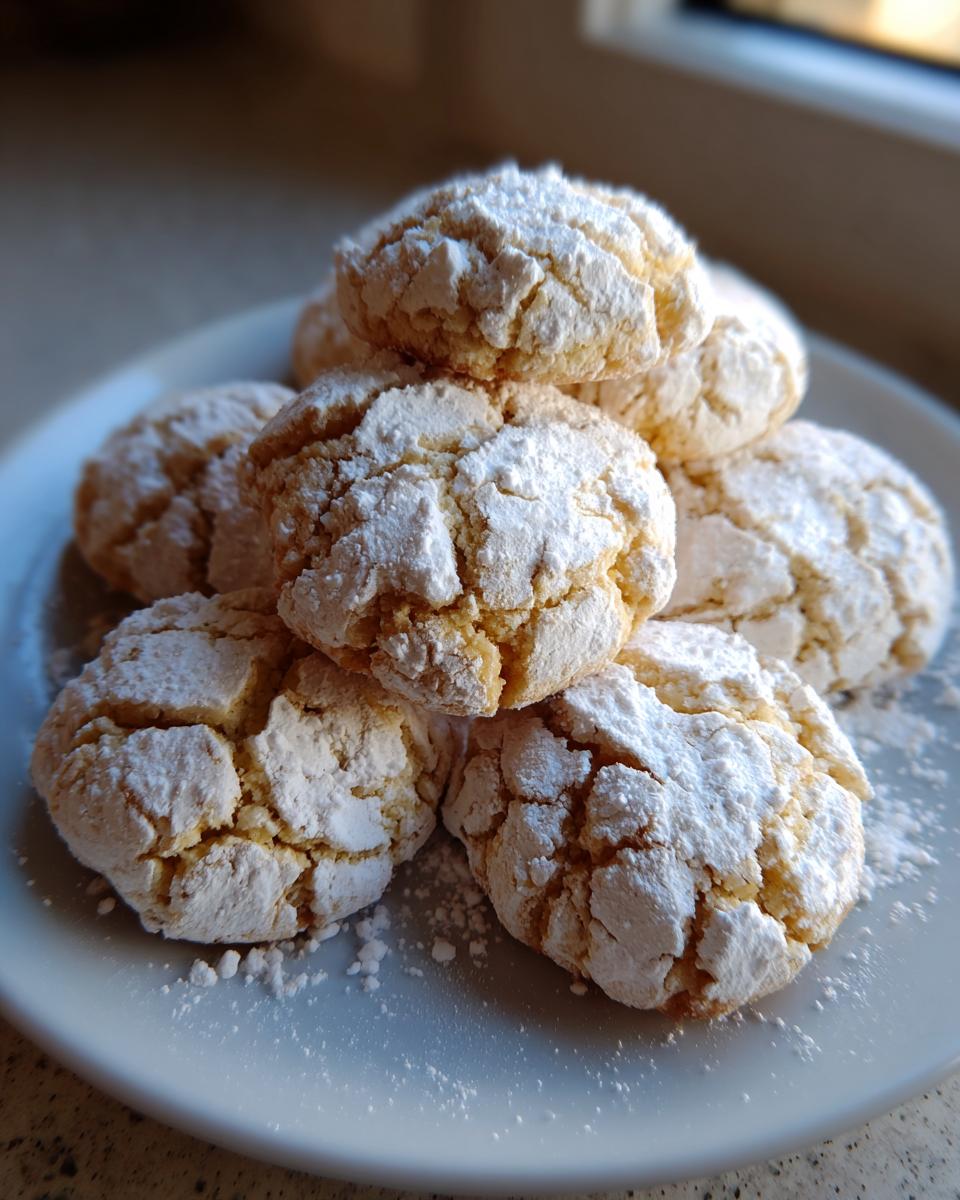
Now, the optional but highly recommended flourish: powdered sugar. If you want that classic, snow-dusted look—especially if you’re aiming for easy crinkle cookies—have a small bowl ready for rolling. It adds a touch of elegance to this super simple treat.
The Method: How to Make Amazing cool whip cookies Step-by-Step
Okay, this is where we put all those simple ingredients to work. Because we’re not using any butter or shortening, the mixing process is incredibly quick, but that also means we have to be careful not to crush the air out of our batter. Remember what I always say? Don’t overwork the dough! That delicate lift from the whipped topping is what gives you those incredible no chill cookie dough results.
I love these for quick bake recipes because the entire active time is probably under ten minutes. Let’s break it down so nothing goes awry!
Prep Work and Mixing the light airy cookies Dough
First things first, get that oven hot! We need a steady 350°F (that’s 175°C) going. Line your sheets with parchment paper—it just saves scrubbing later, period. Now, into a medium bowl goes your dry cake mix, your cup of thawed whipped topping, and that single egg. I recommend using a rubber spatula here rather than an electric mixer. Why? Because you want to stir it gently. Mix only until you see the last streak of dry powder disappear. If you mix until it looks perfectly smooth, you’ve already worked too hard, and those fluffy baked goods will deflate a bit.
Shaping and Preparing cool whip cookies for the Oven
If you opted for the powdered sugar finish, now is the time to set that up in a shallow dish. I highly recommend it if you want that classic crinkle look! Take your soft, slightly sticky dough and scoop it out using rounded tablespoons. Roll them gently between your palms into neat little balls.
If you’re making easy crinkle cookies, roll the dough thoroughly in the sugar until it’s coated completely. Place these dough babies about two inches apart on your lined baking sheets. They don’t spread much, but they need their personal space!

Baking Times and Cooling for soft cookies
Pop them into that preheated oven for 9 to 12 minutes. This is the trickiest part: you absolutely must pull these out when the edges look set but the *centers still look slightly soft or underdone*. If you wait until they look golden brown everywhere, you’ll end up with harder, chewier cookies, which isn’t what we’re chasing here. We want that signature soft cookie texture.
Once they come out, resist the urge to touch them! Let them hang out right where they are, on the hot baking sheet, for a solid five minutes. That gentle residual heat finishes setting the center without hardening the edges. Then, carefully move them to a wire rack to finish cooling completely.
Tips for Success When Making cool whip cookies
You’ve got the basic formula down, but great baking, even with pantry staples, is all about managing expectations. Since this is such a simple whipped cookie recipe, small details really do make a big difference in achieving that airy, cloud-like texture we’re aiming for. This is where a little chef instinct, which I picked up watching the line cooks back in the day, really helps.
The most critical variable, hands down, is the temperature of your whipped topping. I learned this the hard way when I was rushing a batch for a holiday party—you know, those Fluffy Christmas Cookies with Cool Whip everyone loves? I thought I could just thaw the Cool Whip for five minutes in the microwave. Big mistake. The edges got soupy, and the dough ended up more like a sticky batter than a workable ball. It still *baked*, but it spread out into thin, crisp wafers instead of those lovely, pillowy mounds we want.
For these to work perfectly, especially as one of your first beginner baking recipes, take the time to fully thaw the topping until it’s soft but definitely not melted. It should fold in easily without deflating. Think of it as being room temperature, not warm.
Another thing that trips people up is confusing this with a standard drop cookie. If you are tempted to bake them longer because they look too pale, please don’t! Remember, we are trading the structure provided by creaming butter for the lift provided by the topping. That slightly underbaked center is your insurance policy for keeping them soft and moist for days. Don’t wait for the color; watch the edges for that gentle set.
Variations: Customizing Your 3 ingredient dessert cool whip cookies
The best part about starting with a base like this is how incredibly adaptable these 3 ingredient dessert recipes are. Once you master the technique—which, let’s be honest, is just mixing three things—you get to play flavor architect! The cake mix you choose dictates the entire profile of your cool whip cookies.
If you use a standard Yellow or White cake mix, you get that classic, slightly sweet, vanilla-forward cookie that shines when rolled in powdered sugar. But why stop there? If you swap that out for Chocolate cake mix, suddenly you have a decadent, fudgy cookie that needs zero extra effort.
I absolutely love grabbing the Lemon cake mix when summer hits. It turns these into bright, zesty little drops that are unexpected! And for the holidays, which is when everyone needs simple holiday baking ideas, use the Spice cake mix. You get built-in cinnamon and nutmeg flavor without adding a single extra spice to the bowl.
If you’re feeling adventurous—and you’ve got an extra minute, which I know is rare when you’re pulling off last minute cookie ideas—throw in some mix-ins before you roll the dough. You can fold in about a quarter cup of mini chocolate chips, or toss in some festive sprinkles if you’re decorating for an event. They blend right in and give you a little extra texture boost without requiring you to start overhauling the whole system. It’s still fast, it’s still easy, but it looks like you spent way more time on it!
Storage and Reheating Instructions for cool whip cookies
Because these cool whip cookies are designed to be incredibly light and soft—thanks to that whipped topping doing all the heavy lifting—they have a different storage profile than a crunchy shortbread. Think of them less like a sturdy biscuit and more like a fresh muffin top; the moisture is key to the experience, but moisture means they need a little attention to stay perfect.
The rule around here, if I’m planning to serve them later that week, is to keep them at room temperature. Do not put them in the fridge! Putting them in the cold air will suck all that lovely fluffiness right out of them, and they’ll firm up way too fast. Nobody wants a hard whipped cookie recipe.
You absolutely must store them in an airtight container. I usually layer mine between sheets of wax paper so they don’t stick together if they’re still a little warm when you put them away. Honestly, if you’ve followed the baking instructions right and kept the centers slightly underdone, these are at their peak texture within the first 48 hours. I tell folks to plan to eat them within three days for the absolute best, melt in your mouth cookies experience.
If you’ve got a huge batch leftover, you can definitely freeze them. Just make sure they are totally cooled first. Wrap the whole batch tightly in plastic wrap, then tuck that into a freezer-safe container or zip-top bag. They should last about three months in the freezer. When you pull them out, let them thaw on the counter for about an hour still wrapped up—this helps prevent condensation from making them soggy. Reheating isn’t really necessary; just thaw and enjoy that quick, soft texture again!
Frequently Asked Questions About cool whip cookies
I get questions all the time about these little miracles because everyone wants to know the trick to keeping them so wonderfully light. Since these are such phenomenal easy cookies, folks often want to know if they can swap out the mandatory staples. Here are the big ones I hear most often!
Can I skip the egg in this recipe?
Oh, I wouldn’t recommend it, friend. That single egg is doing some real heavy lifting here, especially since we aren’t using any traditional fats like butter or shortening. That egg acts as a binder, holding the cake mix and the whipped topping together during that short bake time. Without it, the dough structure might crumble the second you try to scoop it, or you’ll end up with more of a sweet cake crumble than an actual cookie. It’s one of the few non-negotiables in these quick cookie recipes!
What if I want chewy cookies instead of fluffy baked goods?
That’s a texture preference, and I totally respect it! The nature of using thawed whipped topping is that it yields a super light, airy cookie. If you are aiming for something chewier, the best trick isn’t changing the ingredients, but changing the time. Pull those babies out of the oven when they look just barely set around the edges—maybe around the 9-minute mark—and let them cool completely on the baking sheet. If you bake them until they look 100% done in the center, they’ll dry out and become chewier due to the concentration of the cake mix powder. You can read more about the texture results on this site, but I stand by pulling them slightly underdone!
Can I use homemade whipped cream instead of Cool Whip?
This is a good question that gets right into the science of things! You can try it, but it won’t yield the same result. Store-bought whipped topping (like Cool Whip) is stabilized with hydrogenated vegetable oil, which keeps its structure incredibly rigid even after thawing and mixing. Homemade whipped cream, even if you whip it stiff, is mostly just cream and air. When it hits the heat of the oven, it tends to break down and just release its water content, which can make your dough go flat or soggy. For these cool whip cookies, stick to the containerized, stabilized stuff for consistent results!
Do these soft cookies no butter freeze well?
Yes, they actually do quite well, which makes them perfect for simple holiday baking prep! Once they are completely cooled down—and I mean totally stone cold—you can store them in a single layer in an airtight, freezer-safe container or zip-top bag. Make sure you put some wax paper between the layers so they don’t fuse together. They thaw beautifully on the counter in about an hour, and you get that fresh-baked texture back without any trouble. They’re a lifesaver when you need minimal ingredient baking done fast!
Estimated Nutritional Snapshot for cool whip cookies
So, you’ve mastered the magic, and now your kitchen smells incredible. Before you inhale the entire batch—which, hey, I get it—let’s talk a quick second about the numbers. Since these cool whip cookies rely so heavily on the dry cake mix, the nutritional facts are fairly straightforward. This isn’t the kind of recipe where we’re measuring out pounds of butter, which is fantastic news for your saturated fat intake!
Keep in mind, this breakdown is just an estimate. Why? Because if you used chocolate cake mix instead of white, or if you rolled every single one in an extra-thick layer of sugar, those numbers shift a little. We’re aiming for transparency here, translating the basics for you, the everyday cook.
This table reflects the approximate values based on using a standard white cake mix. We’re basing this all on a single serving size of one cookie—though I know you’ll probably only eat one handful.
| Nutritional Item | Amount Per Cookie |
|---|---|
| Serving Size | 1 cookie |
| Calories | 130 |
| Sugar | 15g |
| Fat | 6g |
| Saturated Fat | 3g |
| Carbohydrates | 18g |
| Protein | 2g |
| Cholesterol | 10mg |
| Sodium | 110mg |
See? Pretty lean on the protein, but that sugar content is what makes these easy cookies such a satisfying **3 ingredient dessert** when you need a fast fix! Enjoy them responsibly, or don’t—this is your kitchen, after all!
Share Your Last Minute cool whip cookies Success
So there you have it—the fastest, fluffiest treats you can whip up when you’re staring down a deadline or just a sudden, intense craving. I call these my ultimate emergency sweets because they always save the day when I need last minute cookie ideas that actually taste like you slaved for hours over them.
Now that you’ve got the lingo and the method for these simple cool whip cookies, I want to see what you created! Did you stick to the classic vanilla for that perfect cookie look, or did you go bold with chocolate or strawberry?
Don’t be shy! Head over to social media and tag me in your photos of these quick cookie recipes. Drop a rating below on how easy this process was for you, and tell me in the comments which cake mix flavor sealed the deal for your first batch!
Print
3-Ingredient Cool Whip Cookies: Quick, Soft, and Fluffy

Make these incredibly easy Cool Whip Cookies using only three pantry staples. These cookies bake up soft, light, and airy, perfect for last-minute baking or simple holiday treats.
- Prep Time: 5 min
- Cook Time: 12 min
- Total Time: 17 min
- Yield: 24 cookies 1x
- Category: Dessert
- Method: Baking
- Cuisine: American
- Diet: Vegetarian
Ingredients
- 1 box (15.25 oz) cake mix (any flavor)
- 1 container (8 oz) frozen whipped topping (Cool Whip), thawed
- 1 large egg
- Powdered sugar, for rolling (optional)
Instructions
- Preheat your oven to 350°F (175°C). Line baking sheets with parchment paper.
- In a medium bowl, combine the entire box of dry cake mix, the thawed whipped topping, and the egg. Mix just until the ingredients are combined into a soft dough. Do not overmix.
- If using, place powdered sugar in a shallow dish.
- Scoop the dough into rounded tablespoons. Roll each portion into a ball. If you want crinkle cookies, roll the dough balls completely in the powdered sugar.
- Place the dough balls about 2 inches apart on the prepared baking sheets.
- Bake for 9 to 12 minutes, or until the edges are set. The centers will look slightly underdone; this keeps them soft.
- Let the cookies cool on the baking sheet for 5 minutes before moving them to a wire rack to cool completely.
Notes
- You can use any flavor of cake mix for different cookie results, like chocolate, lemon, or strawberry.
- For a slightly chewier cookie, reduce the baking time by one minute.
- These are excellent no-chill cookie dough cookies; bake them right after mixing.
Nutrition
- Serving Size: 1 cookie
- Calories: 130
- Sugar: 15
- Sodium: 110
- Fat: 6
- Saturated Fat: 3
- Unsaturated Fat: 3
- Trans Fat: 0
- Carbohydrates: 18
- Fiber: 0
- Protein: 2
- Cholesterol: 10