
Okay, let’s talk about meringue. I know, the word itself sounds fussy, right? It sounds like something you only whip up in a pristine, grease-free environment while wearing gloves. Most recipes make meringue cookies look like impossible, fragile sculptures that will instantly collapse if you breathe too hard. Forget that noise! That’s the professional kitchen talk I’m here to translate for you. This Easy Meringue Cookies recipe is my direct counter-argument to meringue intimidation. I took the absolute non-negotiable rules I learned back in the restaurant biz—the stuff chefs know about clean bowls and slow sugar additions—and built them into a No Fail Meringue Recipe. Trust me, you can do this. We’re aiming for that beautifully crisp shell and the center that genuinely melts in your mouth every single time.
- Why This Easy Meringue Cookies Recipe Works for Beginners
- Ingredients for Your Foolproof Meringue Cookies
- How to Make Meringue Cookies: Step-by-Step Instructions
- The Secret to Perfectly Crisp Meringue Cookies: Cooling
- Tips for Success with Your Beginner Meringue Recipe
- Storage & Reheating Instructions for Homemade Meringues
- Serving Suggestions for Elegant Cookie Recipes
- Frequently Asked Questions About Meringue Cookies
- Nutritional Estimates for Homemade Meringues
Why This Easy Meringue Cookies Recipe Works for Beginners
I’ve designed this Meringue Cookie Recipe to be utterly reliable because nobody wants to waste egg whites being afraid of foam. This isn’t just a recipe; it’s a system built for success. If you follow these core guidelines, you’ll have light, airy cookies that are truly Melt In Your Mouth Cookies. It’s just as satisfying as achieving those perfect melt-in-your-mouth butter cookies we used to make!
- It uses the French meringue method, which is the most straightforward for home cooks.
- We use cream of tartar—that’s our insurance policy for stability.
- This whole process guarantees a No Fail Meringue Recipe result.
After you try this once, you’ll realize making meringue cookies is actually simpler than most drop cookies!
Achieving the Perfect Crispy Meringue Cookies Texture
The biggest trap with meringue cookies is trying to rush them. They don’t bake; they dry. We cook them low and slow, often as low as your oven will go—around 175°F. This gentle heat slowly evaporates the moisture from the sugar and egg whites. It ensures you get that fantastic, brittle, crisp exterior we all love, leaving an incredibly light center. This slow drying process is how we guarantee Perfectly Crisp Cookies that don’t turn chewy five minutes after they come out of the oven.
Ingredients for Your Foolproof Meringue Cookies
For these unbelievably light meringue cookies, you don’t need a pantry full of stuff. Seriously, this recipe is amazing because it’s built around such low ingredient cookies. The one thing you absolutely cannot skip—and this is a non-negotiable chef’s note—is using room temperature egg whites. Cold whites just don’t incorporate air the way they should, and that aeration is the whole structure!
You’ll need the following to make these beautiful low ingredient cookies work:
- 4 large egg whites, room temperature (Seriously, leave them out!)
- 1 cup granulated sugar
- 1 teaspoon pure vanilla extract
- 1/4 teaspoon cream of tartar
- Pinch of salt
Ingredient Notes and Substitutions for Meringue Cookies
The best part about this Meringue Cookie Recipe? It’s naturally gluten-free! So many people look for Gluten Free Meringue Cookies, and here it is, no special flours needed. If you want to color these pretty things—say, for a holiday look—skip the grocery store liquid food coloring. Liquid coloring adds unwanted water, which is the enemy of meringue. You must use gel food coloring; just add a tiny drop right before you pipe them for intense color without collapsing your beautiful fluff.
How to Make Meringue Cookies: Step-by-Step Instructions
This is where we put all that prep work to the test! A lot of people mess up their meringue cookies right here because they rush the mixing. Remember, the goal is to create a stable matrix that won’t fall apart when it gets warm. The chef’s secret when incorporating sugar isn’t just about being patient; it’s about making sure that sugar dissolves completely before you add the next crystal. If you skip this part, the cookies weep syrup later, which is a disaster! We are building a fortress of fluff here, using your mixer like a tiny construction crew.
If you need to know the quick fix for seasoning afterward, I covered my go-to simple sauce recipe here, but now, back to our delicate sweets!
Whipping Egg Whites to Stiff Peaks for Meringue Cookies
First things first: grab that whisk attachment. Your bowl must be spotless—I mean, surgically clean. Any trace of fat means zero volume for your meringue cookies. Throw in your room temperature egg whites, the salt, and the cream of tartar. Start beating on medium speed until you see what we call soft peaks. This is when you lift the whisk and the tip droops over slightly, like a sad little tongue sticking out.
Now, crank it up and start adding that sugar—slowly! We’re talking one tablespoon every 15 seconds. Seriously, time it! We use this slow introduction to build structure. Keep beating until the mixture is blindingly white, holds rigid, sharp peaks when you lift the whisk, and looks absolutely glossy. The true test for these meringue cookies? Take a tiny pinch and rub it between your thumb and forefinger. If you feel *any* gritty sugar crystals, you need to keep beating. If it feels totally smooth, you nailed it. That’s how you make sure these meringue cookies set up right!
Piping and Baking Your Delicate Dessert Ideas
Once you have that perfect, stiff meringue, load it into your piping bag fitted with a star tip. If you’re keeping it simple, two spoons work just fine for making little dollops—they’ll still be delicious Melt In Your Mouth Cookies! Pipe them onto parchment paper, giving them a little space to breathe. They don’t spread much, but they like their elbow room.
Here’s the second crucial step for achieving that signature crispness: extremely low heat. You are drying these out, not browning them. Set your oven to 170°F to 200°F, depending on how low it goes. Bake them for at least 90 minutes. This long, slow bake ensures that when you address the question of How to Make Meringue Cookies, you’re focusing on dehydration. They are done when they feel light and peel cleanly off the parchment paper. Don’t open that oven door until they’ve had a good long rest!
The Secret to Perfectly Crisp Meringue Cookies: Cooling
Okay, you’ve mixed perfectly, you’ve piped beautifully, and now you’re staring at your oven. Most people just shut the oven off and walk away, but that’s when cracks appear! We need to avoid rapid temperature change because that’s what causes the weeping, sticking, and cracking in your beautiful meringue cookies. This stabilization process is straight-up kitchen slang for insider knowledge.
When the baking time is up, simply turn your oven off completely. But don’t open the door yet! I want you to prop that door open just a crack—use a wooden spoon or the handle of a sturdy spatula. Leave those delicate meringue cookies inside the cooling oven for at least an hour, or honestly, let them sit there overnight if you can manage it! This slow, controlled descent in temperature lets them dry out completely without any sudden shock. You can read about some other great sweet treats here, but this cooling method is key for the crispiest cookies.
Tips for Success with Your Beginner Meringue Recipe
Look, I get it. If you’ve tried meringue cookies before and ended up with a sticky, weepy mess, you probably think this is too hard. But remember, this is Kitchen Slang—we translate the hard stuff. The biggest hurdles are always fat contamination and humidity. If there is even a speck of oil or egg yolk in your bowl, your egg whites will never hit those stiff peaks needed for this Beginner Meringue Recipe. Wipe down your metal bowl and whisk with a little vinegar or lemon juice before you start; it cuts through any lingering grease. It’s a small step, but it makes a huge difference when you’re aiming for Simple Sweet Treats.
Also, humidity is a major mood killer for meringue. If it’s raining outside, maybe save this project for a dry day, or at least make sure your kitchen isn’t steamed up from boiling water. If you are having trouble getting them crisp, try leaving them in the oven an extra hour or two. You can check out my favorite way to use apples for a simple dessert here, but for this recipe, patience with the heat is everything. If you’re unsure about the texture, peek at what the folks at Devour Dish say about achieving that perfect crispness!
Storage & Reheating Instructions for Homemade Meringues
Now that you’ve made these amazing, light-as-air meringue cookies, we have to talk about keeping them perfect. Meringue is basically a sponge for moisture, so keeping them away from humid air is everything. You *must* store them in a completely airtight container once they are totally cool—and I mean totally cool, not even warm to the touch! Don’t line the container with paper towels, because that can actually attract ambient moisture.
Usually, you don’t need to reheat meringue cookies at all, but let’s be real, sometimes the house gets humid. If you notice they’ve gone a little soft, don’t panic! Just pop them back into that super low oven—175°F is perfect—for about 30 minutes. This simple slow drying revives their crispness immediately. That’s the secret to making sure these delicate sweet treats last!
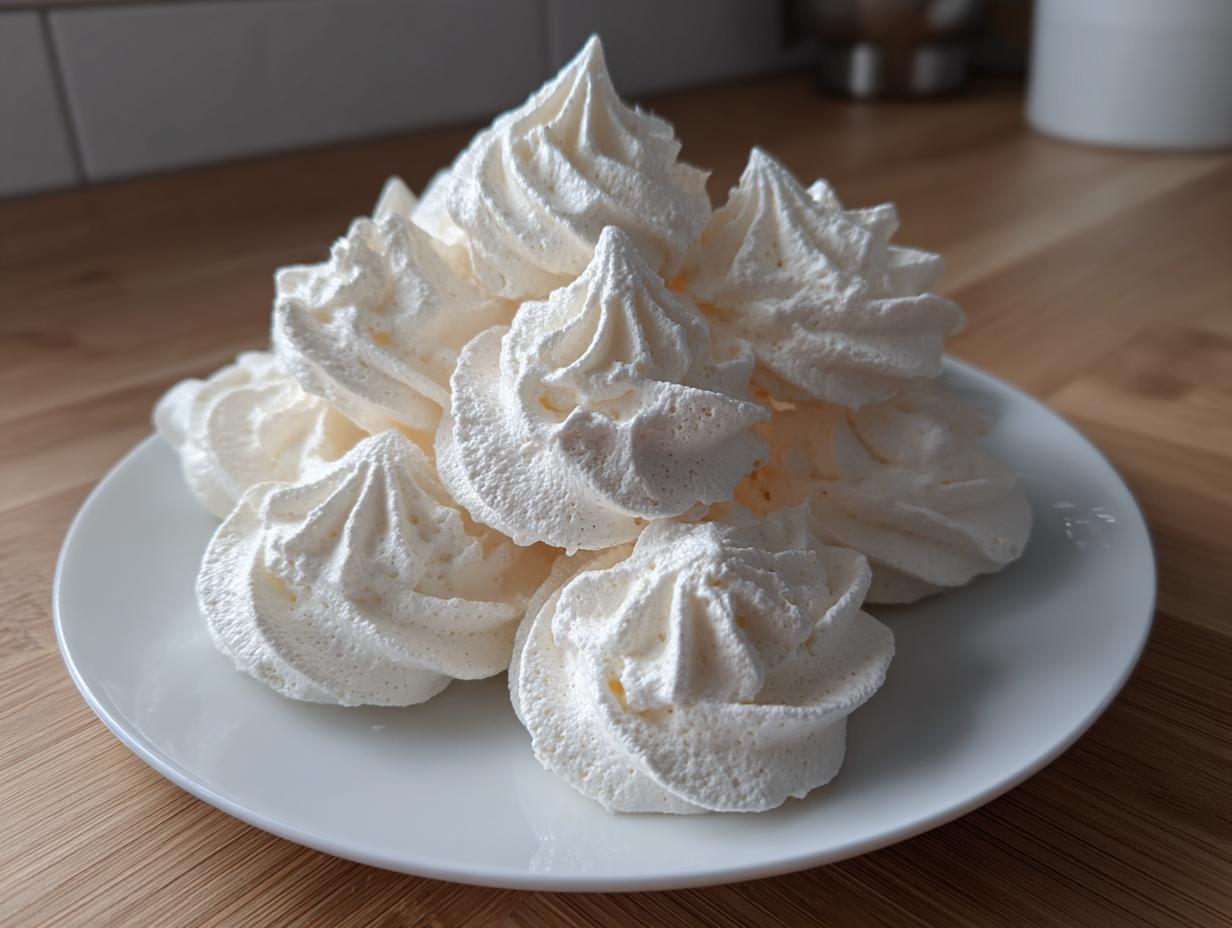
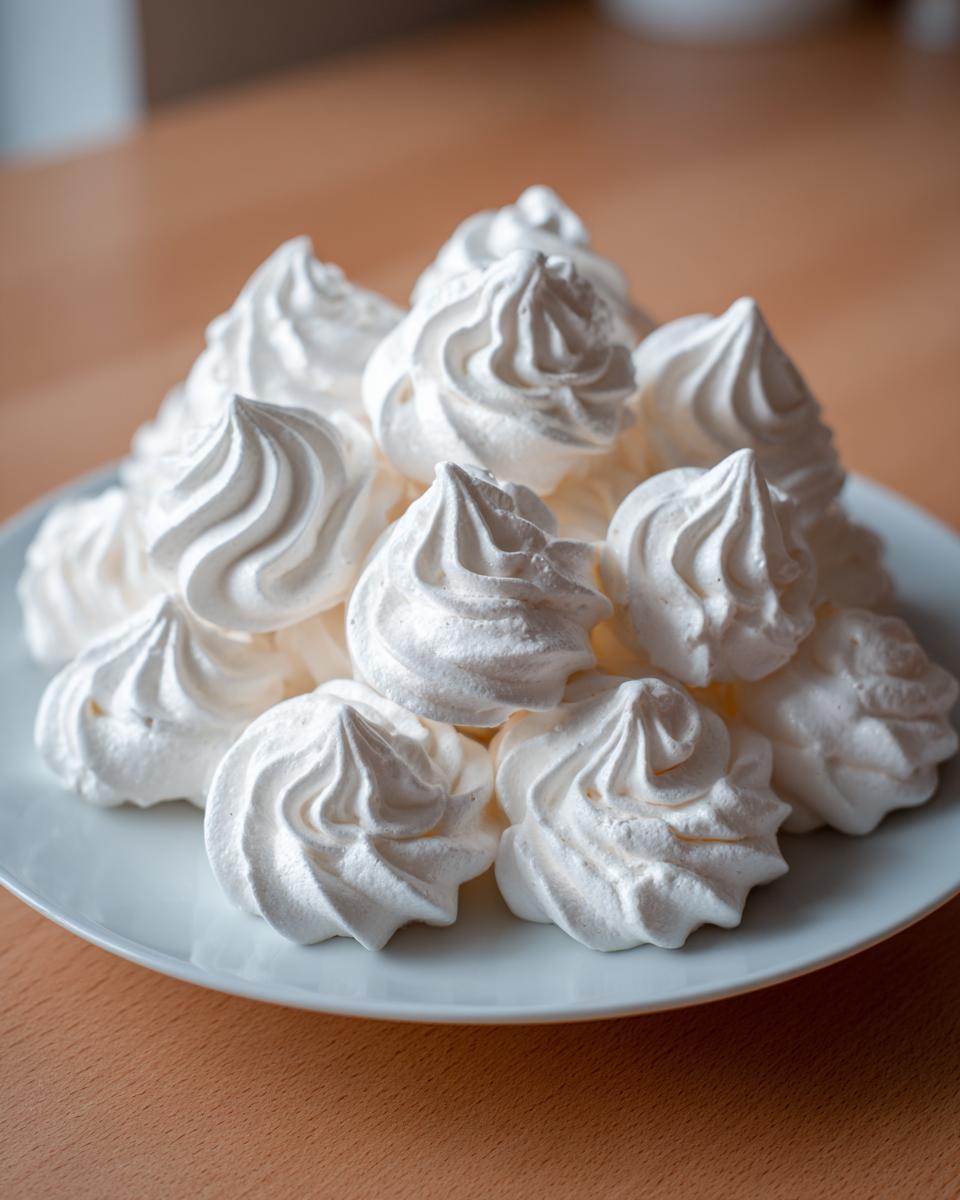
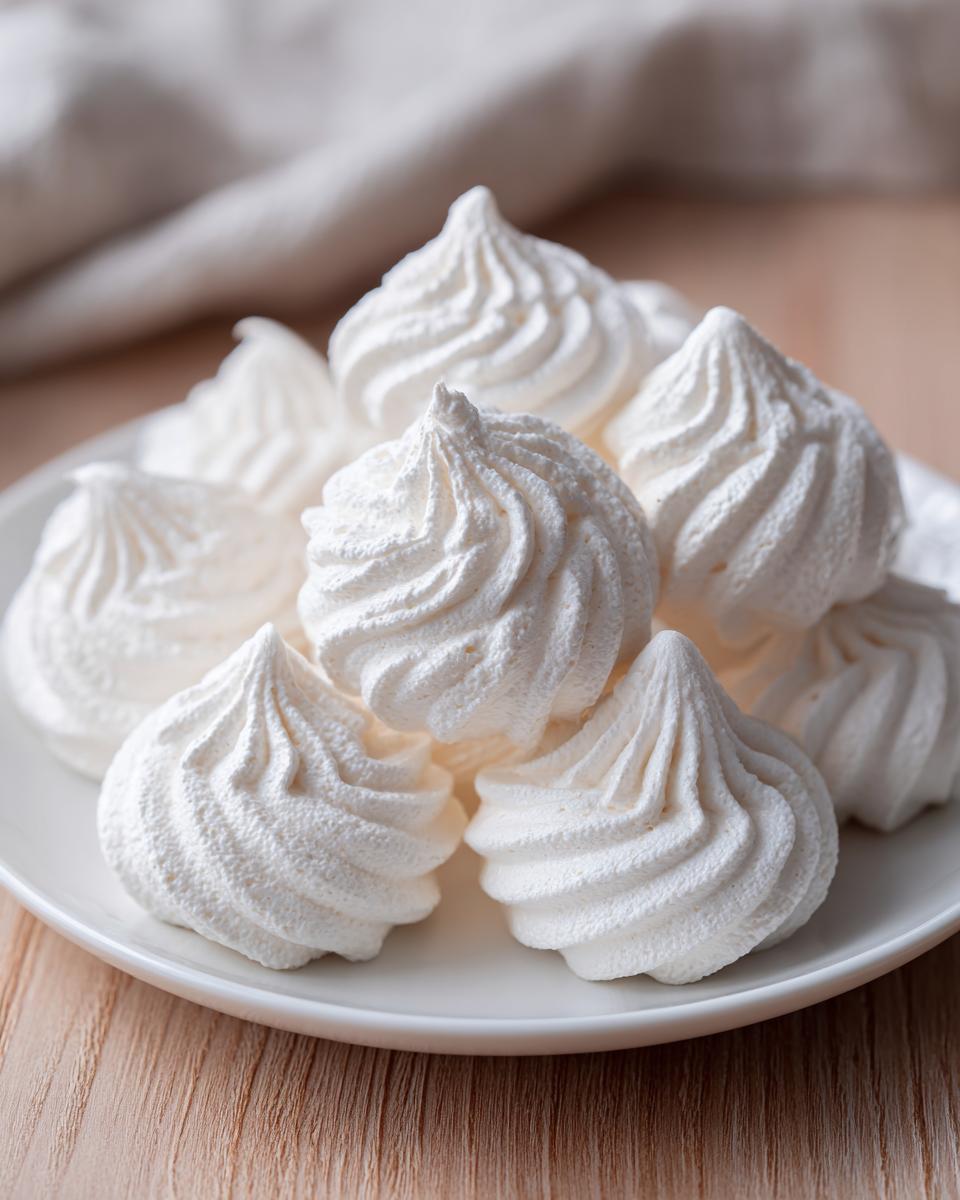
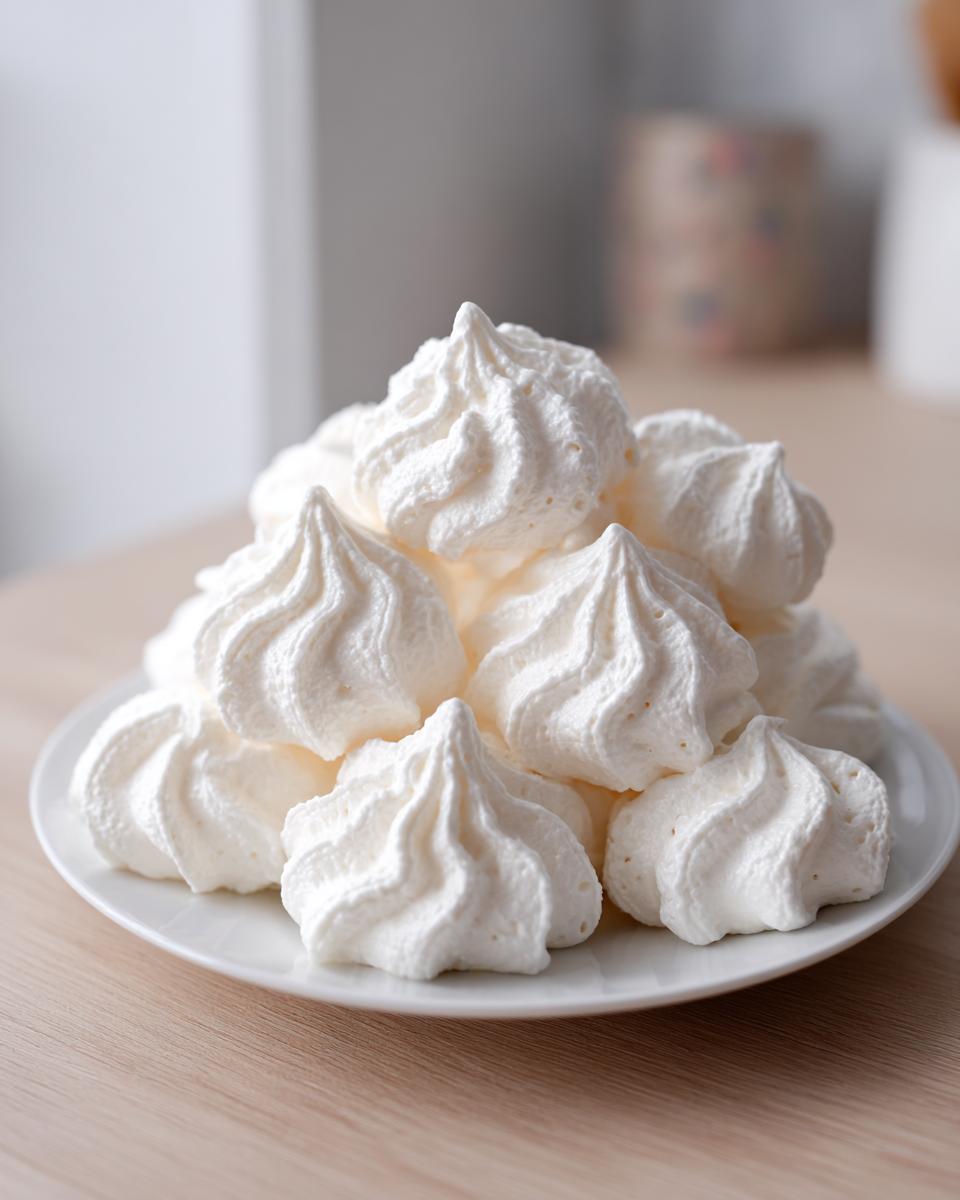
Serving Suggestions for Elegant Cookie Recipes
These meringue cookies are so delicate and light—truly the definition of Light and Airy Desserts. They’re perfect when you need something impressive but don’t want to spend hours in the kitchen. They look gorgeous piled high on a dessert platter, making them instant hits as Party Dessert Cookies.
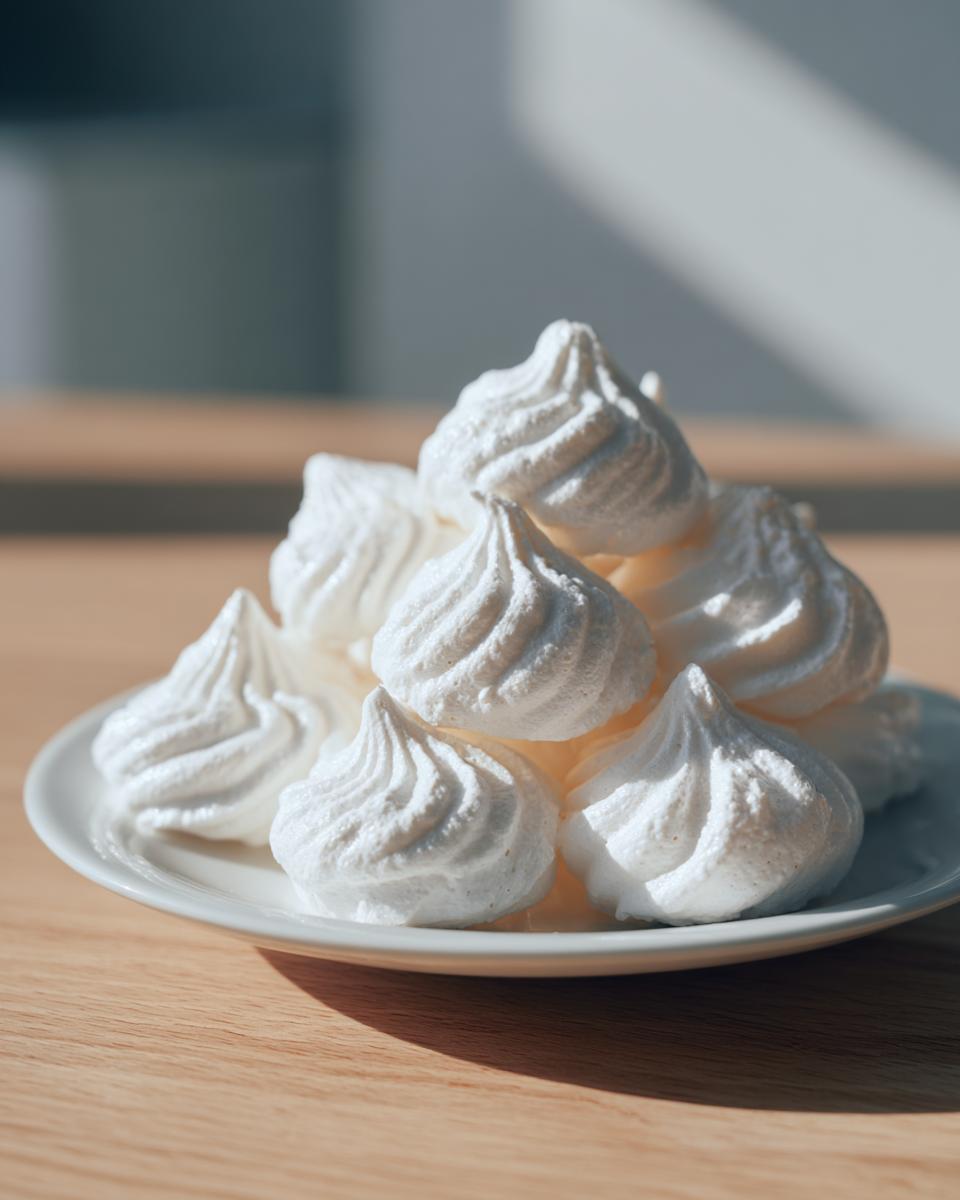
I love serving them simply alongside a strong espresso cup. If you want a little dip, a thick, dark chocolate ganache is amazing. Or, for a pop of color that complements the sweet vanilla, try serving them with fresh raspberries or strawberries. They also make an incredible, easy addition to any Holiday Meringue Recipe for Christmas displays. They look fancy, but they are so easy to execute! You can even dust them with some of that powdered sugar from my creamy white hot chocolate recipe for an extra wintery touch.
Frequently Asked Questions About Meringue Cookies
I know you’ve got questions because when I first started making these, I certainly did! Working with egg whites can feel like walking a tightrope, but the beauty of this Meringue Cookie Recipe is how forgiving it becomes once you know the tricks. These Egg White Cookies are so popular for a reason, and I want to make sure your first batch—or your hundredth batch—is perfect. We conquer all the common hurdles right here so you can feel confident serving these meringue cookies anytime.
Why are my meringue cookies weeping or sticky?
This is number one on the “Meringue Mistakes” list, and 99% of the time it comes down to two things: humidity or under-baking. If you bake them too fast, they won’t dry all the way through, leaving behind liquid sugar that seeps out later—that’s the sticky weepiness. Also, if you haven’t let them cool completely inside the turned-off oven after baking, the sudden change in air temperature can shock them. That slow cooling process we talked about is your secret weapon against stickiness!
Can I make these Vanilla Meringue Kisses ahead of time?
Absolutely! These are one of the best Simple Sweet Treats for planning ahead. Because they are totally dried out, as long as you store your finished Vanilla Meringue Kisses in a truly airtight container away from any source of moisture, they will stay perfect for a week or more. If you’re planning a big holiday spread, this is a lifesaver! If you’re interested in a related but slightly different challenge, check out my recipe for learning French almond meringue cookies!
Nutritional Estimates for Homemade Meringues
Okay, I always tell people these meringue cookies are practically air, and the numbers back me up! It’s great when a perfect party dessert is also incredibly light. Just remember, these figures are just estimates based on the ingredients listed for these very low-fuss meringue cookies, so they are a rough guide, not a guarantee.
- Serving Size: 1 cookie
- Calories: 35
- Sugar: 8g
- Fat: 0g
- Protein: 0g
Easy Meringue Cookies: The No-Fail Recipe for Crisp, Melt-In-Your-Mouth Treats
This is the simple, tested French meringue cookie recipe you need. Achieve that perfectly crisp exterior and light, airy center that truly melts in your mouth. This beginner meringue recipe is naturally gluten free and ideal for elegant party dessert cookies.
- Prep Time: 15 min
- Cook Time: 90 min
- Total Time: 1 hour 45 min
- Yield: About 3 dozen 1x
- Category: Dessert
- Method: Baking
- Cuisine: American
- Diet: Gluten Free
Ingredients
- 4 large egg whites, room temperature
- 1 cup granulated sugar
- 1 teaspoon pure vanilla extract
- 1/4 teaspoon cream of tartar
- Pinch of salt
Instructions
- Preheat your oven to the lowest setting, usually between 170°F and 200°F. Line two baking sheets with parchment paper.
- In a clean, grease-free bowl of a stand mixer fitted with the whisk attachment (or use a hand mixer), combine the egg whites, cream of tartar, and salt. Beat on medium speed until soft peaks form. This means the peaks curl over when you lift the whisk.
- Increase the mixer speed to medium-high. Begin adding the sugar, one tablespoon at a time, waiting about 15 seconds between additions. This slow addition is key for stability.
- Once all the sugar is added, continue beating until the meringue is very stiff, glossy, and holds sharp peaks. When you rub a small amount between your fingers, you should not feel any sugar granules. This takes about 7 to 10 minutes total beating time.
- Beat in the vanilla extract until just combined.
- Transfer the meringue to a piping bag fitted with a large star tip (like a Wilton 1M) or a round tip. If you do not have a piping bag, you can drop spoonfuls onto the prepared sheets.
- Pipe small kisses or swirls onto the parchment paper, leaving about one inch between each cookie.
- Bake for 1 to 1.5 hours, depending on your oven temperature. The goal is to dry them out, not brown them. They should lift easily from the parchment paper when done.
- Turn off the oven, prop the door open slightly with a wooden spoon, and let the meringue cookies cool completely inside the oven for at least one hour, or preferably overnight. This slow cooling prevents cracking and keeps them perfectly crisp.
Notes
- Use room temperature egg whites; they whip up higher and faster than cold ones.
- Ensure your mixing bowl and whisk attachment are completely free of any grease or yolk residue, as fat prevents the egg whites from reaching stiff peaks.
- For a low ingredient cookie variation, you can omit the vanilla extract.
- If you want colored or flavored meringue cookies, add a few drops of gel food coloring or 1/2 teaspoon of instant espresso powder with the vanilla.
Nutrition
- Serving Size: 1 cookie
- Calories: 35
- Sugar: 8
- Sodium: 2
- Fat: 0
- Saturated Fat: 0
- Unsaturated Fat: 0
- Trans Fat: 0
- Carbohydrates: 8
- Fiber: 0
- Protein: 0
- Cholesterol: 0