
There’s just something about that first chilly evening that makes you crave something warm, spiced, and utterly comforting, right? Forget trying to master some fussy pastry; we’re diving straight into the easiest, most delicious fall treat you can imagine. This right here is my go-to stuffed baked apples recipe that takes all the flavor of a crumble but simplifies the whole thing down to baking a perfect, tender package. My philosophy, just like Zoe taught me at Kitchen Slang, is chopping down the intimidation factor. We translate the professional know-how into kitchen slang you actually understand. Trust me when I say this is the best baked apple recipe oven method out there for getting those apples perfectly soft, swimming in a little spiced water, and topped with the crunchiest oat crumble. It’s pure autumn magic in under an hour, and honestly, you’ll want to make it every single week. When you try it, be sure to check out those simpler apple crisp variations we play with, too!
- Why This Simple Baked Apple Recipe Works So Well
- Gathering Ingredients for Your Stuffed Baked Apples Recipe
- How to Prepare Easy Baked Apples with Cinnamon
- Tips for the Best Baked Apple Recipe Oven Results
- Making This a Healthy Baked Apples Dessert Option
- Serving Suggestions for Warm Apple Dessert Ideas
- Storage and Reheating Instructions for Baked Apple
- Frequently Asked Questions About Baked Apple
- Your Next Cozy Autumn Recipes Adventure
- Nutritional Estimate for Baked Apple
Why This Simple Baked Apple Recipe Works So Well
When the air gets crisp, we all need those fall apple comfort food hits, but nobody wants a recipe that takes all day! That’s why I adore this simple baked apple recipe; it’s fast, satisfying, and delivers maximum coziness with minimum fuss. We streamline those big baking projects into one perfect package.
Quick Prep for Tender Baked Apples
You’re looking at just 15 minutes of prep time! That’s enough time to get the oven humming and whip up the filling. Coring the apple is surprisingly easy—it just creates the perfect little treasure chest for our sweet filling. This step is vital for getting those tender baked apples we all dream about.

The Secret to the Perfect Baked Apples with Crumble Topping
The technique here is what keeps things so moist. We make a standard oat crumble, yes, but the real trick is pouring that hot water into the bottom of the baking dish before it goes in. That water creates steam! It basically bathes the apples while they bake, ensuring they soften beautifully. The cold butter in our baked apples with crumble topping melts just right to bind the oats together.
Gathering Ingredients for Your Stuffed Baked Apples Recipe
Okay, before we get to the fun part of baking, we need to talk about what we’re working with. For any baked apple recipe, but especially one where the apple itself needs to hold its shape, the fruit is everything! I always reach for firm varieties like Honeycrisp or Granny Smith. They stand up to the heat beautifully, which is essential if you want those nice, structured apples instead of apple mush. Make sure your butter is genuinely cold when you make that crumble topping—it makes a huge difference in the texture.
Core Ingredients for the Perfect Baked Apple
When assembling your shopping list, you’ll need four firm apples and the elements for a simple, spiced oat crumble. Remember that brown sugar needs to be packed down tight when you measure it! Then, for the liquid base that helps steam everything tenderly, you’ll need hot water—though I sometimes cheat and use apple cider for extra oomph. If you’re already thinking about other easy comfort dishes, check out my favorite apple pie dump cake for another quick win!
How to Prepare Easy Baked Apples with Cinnamon
Alright, this is where the magic happens! These instructions will walk you through making truly amazing easy baked apples with cinnamon. We’re keeping it direct, so you can get these beauties in the oven fast. Don’t stress about perfection here; just follow the rhythm, and you’ll nail that tender texture.
Step 1: Oven Preheat and Apple Prep for Baked Apple
First things first, get your oven cranking up to 375°F (that’s 190°C for my metric friends). While it’s warming up, lightly grease whatever small baking dish you’re using—I usually use glass so I can watch the water bubble. Now for the apples: wash them up nice and good. You need to core them, but here’s the crucial bit the pros know: don’t cut all the way through the bottom! Leave about a half-inch wall of apple flesh intact. This wall holds all that lovely crumble filling inside while it bakes.
Step 2: Mixing the Cinnamon Sugar Crumble Filling
Grab a separate little bowl for the topping. Toss in your oats, brown sugar, flour, cinnamon, and nutmeg—get everything mixed evenly first. This is super important before you add fat! Next, take that cold butter, cut into tiny little cubes, and start working it into that dry mix. You want to use your fingertips, rubbing it in quickly, until it looks like coarse, clumpy sand. Don’t overwork it; we want those lovely little clumps that become crunchy when baked.

Step 3: Filling and Baking the Baked Apple
Take your prepped apples and spoon that crumble mixture right into the well you made. Pack it down gently—you want them full, but don’t smash the apple walls. Now for my favorite part that ensures they aren’t dry: pour about a quarter cup of *hot* water into the bottom of the baking dish, surrounding the apples. That steam is your best friend. Pop the whole thing in the oven and let it bake for 35 to 45 minutes. Check for tenderness by poking them with a fork; they should give easily. If they resist, give them another five minutes. Feel free to snag my recipe for easy apple crumble if you just want to spread the topping over sliced apples instead!
Tips for the Best Baked Apple Recipe Oven Results
Look, even when you follow instructions, sometimes the oven just does its own thing, right? Getting that perfect tenderness without turning your nice topping into charcoal requires a little bit of on-the-fly adjustments. I’ve learned these tricks over years of making baked apple treats, and they really help nail this best baked apple recipe oven method every time.
Adjusting Time for Different Apple Types
You absolutely need to know your apple! If you used something like a crisp Granny Smith, they are tough cookies and will take longer—maybe closer to 50 minutes. A milder, softer apple, like a McIntosh, might be perfectly done in 35 minutes. Don’t trust the clock completely; trust your fork! If you see that crumble topping getting too dark before the apple itself is soft, just take a piece of aluminum foil and loosely tent it over the top. That stops the direct heat from scorching the sugar particles. It’s a classic trick for keeping that topping golden but not burnt while letting the apple underneath finish softening up properly. If you’re looking for something different to bake next, check out my tips on making cinnamon roll casserole!
Making This a Healthy Baked Apples Dessert Option
I totally get it. Sometimes you want that cozy, warm feeling but you don’t want the sugar bomb associated with traditional desserts. The great news is that transforming this into a healthy baked apples dessert is super simple because the apple itself is the main event! We just tweak the filling a little bit.
The recipe notes mention a few great swaps you can make right in that crumble mixture. My absolute favorite modification is cutting the brown sugar way back—I usually drop it to just two tablespoons. Then, instead of using the butter to bind the oats, I swap in some pure maple syrup. It still gives you that sticky, sweet coating, but it feels a little cleaner, you know? If you’re often looking for those lighter swaps, you might also enjoy my ideas for high-protein overnight oats for breakfast!

If you want even more ideas on that healthier side of things, you should absolutely check out what my friends at The Clean Eating Couple have done with their take on this dish. But honestly, just using less sugar and adding a dollop of plain Greek yogurt instead of ice cream when you serve it makes a huge difference. It’s all about those small adjustments that keep the comfort but lighten the load!
Serving Suggestions for Warm Apple Dessert Ideas
Once your baked apple is tender and fragrant, the final step is deciding how to present this glorious warm apple dessert idea! Honestly, these apples sing on their own, but a little something cold on top just elevates the entire experience. The contrast between that hot, spicy fruit and the icy chill of vanilla ice cream or even thick Greek yogurt is just heavenly—it’s the ultimate texture play.
If you’re looking for a slightly lighter touch, a dollop of yogurt mixed with a sprinkle of cinnamon is fantastic. For richer occasions, don’t forget a drizzle of caramel sauce, which really plays up the brown sugar in the filling. If you’re done with apples for the day, check out my recipe for banana nut muffins for another easy, comforting bake.
Storage and Reheating Instructions for Baked Apple
What? You didn’t eat all four of them? I don’t blame you if you didn’t, but if you manage to have leftovers of this amazing baked apple, don’t just toss them! They are still delicious the next day, though the texture will change a little. The important thing is how you store them so they don’t get weird overnight.
You need an airtight container, no exceptions. If you just cover them loosely, they will absorb fridge smells, and nobody wants an onion-flavored baked apple! Pop them in the fridge, and they should be good for about three or four days. If you want to keep them longer, you can actually freeze the roasted apples without the topping, but let’s stick to the immediate leftovers for now.
Reheating is just as simple. If you’re aiming for that just-out-of-the-oven goodness, zap them in the oven at about 325°F for about 10 minutes. If you’re in a hurry, the microwave works fine, but it can sometimes make the apple a little too soft, so stop it as soon as it’s warm through. Don’t forget, if you made extra crumble topping, you can sprinkle that fresh on top after reheating for a bit of crunch! Speaking of granola, if you’re looking for another make-ahead staple, you have to try my homemade granola recipe.
Frequently Asked Questions About Baked Apple
I always get questions about tailoring this recipe, and that’s the joy of cooking—making it your own! It’s easy to adapt this classic baked apple approach, and I want to make sure you feel confident tweaking it for whatever apples you have on hand or how much time you’ve got. Learning the ‘why’ helps you troubleshoot!
Can I use apples other than Granny Smith or Honeycrisp for this baked apple recipe?
Oh, absolutely! I list those two because they are my go-to for structure, but if you have a bag of McIntosh or Fuji, go for it! Just keep this in mind: softer apples, like McIntosh, break down much faster in the oven. If you use those, you absolutely must check them at the 30-minute mark, otherwise, you might end up with apple soup instead of a nice, firm vessel. Firmer apples always hold their shape best for this specific baking situation.
How do I make this a quick apple dessert if I am short on time?
If you need a quick apple dessert and don’t have 40 minutes, you have to change the structure! Instead of taking the time to carefully core four whole apples, just slice them thickly—say, half an inch thick. Mix those slices right in with the crumble filling ingredients and dump everything into your baking dish. It turns more into a mini-crisp scenario, but you’ll be eating warm, spicy apples in about 20 to 25 minutes flat. It’s a great shortcut, though you definitely miss that cute presentation!
What is the difference between this and a standard apple crisp?
That’s a great question because they both use a crumble topping, which can be confusing! The main difference is presentation and physics. With a standard apple crisp, you toss thinly sliced apples with spices and spread them across the entire bottom of the pan, then cover them evenly with the oat topping before baking. Here, we are hollowing out the whole apple first! Our topping goes right inside that cavity. The apple essentially steams itself while holding the spiced filling snug inside. It’s much more elegant for serving, don’t you think?

These tips should help you tackle any baking issue! If you’re looking for more fast, sweet things to bake, you must check out my coffee cake muffins; they are perfect for grab-and-go breakfasts!
Your Next Cozy Autumn Recipes Adventure
And there you have it! After all that measuring, mixing, and waiting for that wonderful smell to fill your kitchen, you have mastered the ultimate baked apple treat. I really hope this recipe brings all those cozy, warm feelings into your day, whether you ate it for breakfast (no judgment here!) or as a perfect evening dessert.
Now the fun part begins! I absolutely live to see how you all put your own spin on things. Did you sneak some bourbon into that filling? Did you use pecans instead of oats? Please, please come back down to the comments section right below this and tell me all about it! I want to hear what fruit you chose and how you decided to serve your warm apple dessert. Better yet, if you snap a picture of your towering, crumbly apple creation, tag me! Let’s keep that community feeling going strong.
If you’re ready to keep that cozy autumn recipes vibe rolling, after you clean up, you should try whipping up a batch of my favorite fall sangria recipe. It pairs beautifully with anything baked and spiced. Happy baking, friends!
Nutritional Estimate for Baked Apple
Now, I know most of us aren’t baking these stunning stuffed baked apples with the goal of winning a marathon, but I always get asked about the numbers, so here they are! Remember, this nutrition breakdown is just an estimate based on the ingredients list I gave you—especially if you totally skip the ice cream topping! If you use the healthy swap options, those numbers will definitely change in your favor.
- Serving Size: 1 apple
- Calories: 310
- Sugar: 45g
- Fat: 12g
- Protein: 2g
I always say, treat these figures as a general guideline. If you load yours up with heavy whipped cream and caramel sauce, well, those calories are going to climb! But in its basic, wonderful form, this is a surprisingly reasonable and delicious homemade granola-style treat that delivers on comfort without completely derailing your day. Bake on!
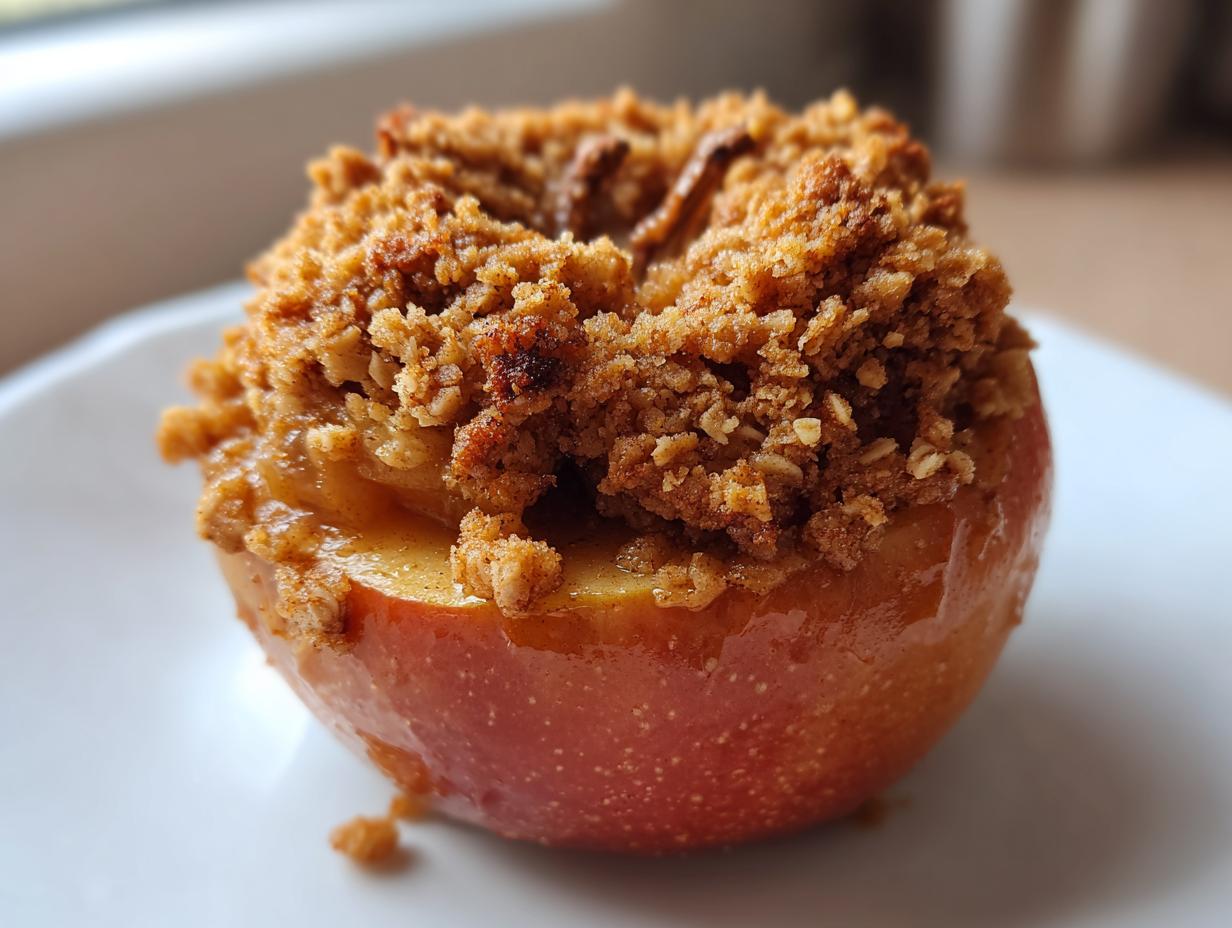
PrintSimple Stuffed Baked Apples with Cinnamon Crumble

Make tender baked apples filled with a sweet, spiced oat crumble. This easy recipe is perfect for a warm fall dessert or a cozy treat.
- Prep Time: 15 min
- Cook Time: 40 min
- Total Time: 55 min
- Yield: 4 servings 1x
- Category: Dessert
- Method: Baking
- Cuisine: American
- Diet: Vegetarian
Ingredients
- 4 large firm apples (like Honeycrisp or Granny Smith)
- 1/4 cup rolled oats
- 1/4 cup packed brown sugar
- 1 tablespoon all-purpose flour
- 1/2 teaspoon ground cinnamon
- 1/8 teaspoon ground nutmeg
- 2 tablespoons cold unsalted butter, cut into small pieces
- 1/4 cup hot water
- Optional: Vanilla ice cream or Greek yogurt for serving
Instructions
- Preheat your oven to 375°F (190°C). Lightly grease a small baking dish.
- Wash the apples. Use a small knife or melon baller to core the apples, removing the seeds and leaving about a half-inch thick wall around the center. Do not cut all the way through the bottom.
- In a small bowl, combine the rolled oats, brown sugar, flour, cinnamon, and nutmeg.
- Cut the cold butter into the dry mixture using your fingers or a pastry blender until the mixture resembles coarse crumbs.
- Place the cored apples in the prepared baking dish. Spoon the crumble mixture evenly into the center cavity of each apple. Pack it down gently.
- Pour the hot water into the bottom of the baking dish around the apples. This creates steam to help the apples soften.
- Bake for 35 to 45 minutes, or until the apples are tender when pierced with a fork. Baking time depends on the size and type of apple.
- Carefully remove the apples from the oven. Let them cool slightly before serving.
- Serve warm, topping each baked apple with a scoop of vanilla ice cream or yogurt if desired.
Notes
- For a healthier option, reduce the brown sugar to 2 tablespoons and use maple syrup instead of butter in the crumble.
- If you want a softer apple, cover the dish loosely with foil for the first 20 minutes of baking.
- You can substitute the water with apple cider for extra flavor in the bottom of the pan.
Nutrition
- Serving Size: 1 apple
- Calories: 310
- Sugar: 45g
- Sodium: 5mg
- Fat: 12g
- Saturated Fat: 7g
- Unsaturated Fat: 5g
- Trans Fat: 0g
- Carbohydrates: 52g
- Fiber: 6g
- Protein: 2g
- Cholesterol: 25mg