
You know that smell? That warm, yeasty cloud of pure comfort that instantly tells you you’re home? That’s what we’re chasing today. Forget everything you think you know about difficult baking; we are diving headfirst into **yeast bread** making, and I promise you, it’s going to be ridiculously easy. We’re talking the ultimate, foolproof, **no-knead** method that practically screams *best bread recipe ever* for anyone who is new to this. Here at Kitchen Slang, Zoe believes that the language of the kitchen belongs to everyone, and that means translating intimidating recipes into real talk you can use right now. We’re going to get that perfect, crusty loaf using minimal effort, I swear! You can read more about our mission to translate complex cooking over on our About Page.
- Why This Is the Best Yeast Bread for Beginners
- Gathering Your Ingredients for Simple Yeast Bread Recipe
- Essential Equipment for Crusty Homemade Loaf
- Step-by-Step Instructions for Perfect Yeast Bread
- Expert Tips for Baking Bread From Scratch Mastery
- Storing and Reheating Your Homemade Yeast Bread
- Frequently Asked Questions About This Simple Yeast Bread Recipe
- Serving Suggestions for Your Dinner Table Bread
- Nutritional Estimates for This Homemade Yeast Bread
- Share Your Experience Baking This Yeast Bread
- Serving Suggestions for Your Dinner Table Bread
- Nutritional Estimates for This Homemade Yeast Bread
- Share Your Experience Baking This Yeast Bread
Why This Is the Best Yeast Bread for Beginners
Honestly, if you are looking for your first taste of making glorious, real bread from scratch, this is the recipe. I know the total time looks intimidating, but I promise you, the actual work is nothing! This approach gives you that amazing flavor without making you get messy with flour everywhere. If you want to try something similar but flatter, check out my guide for easy garlic naan bread.
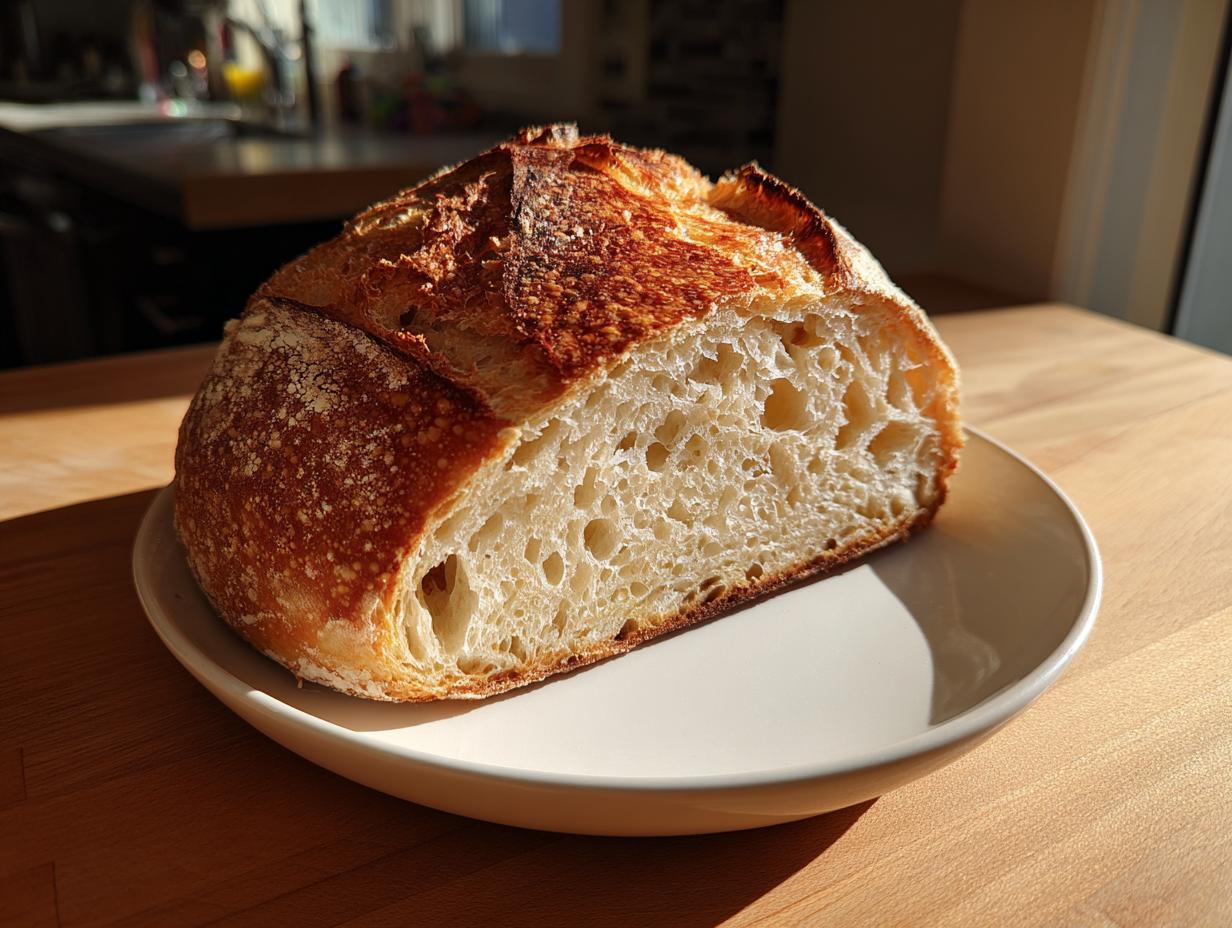
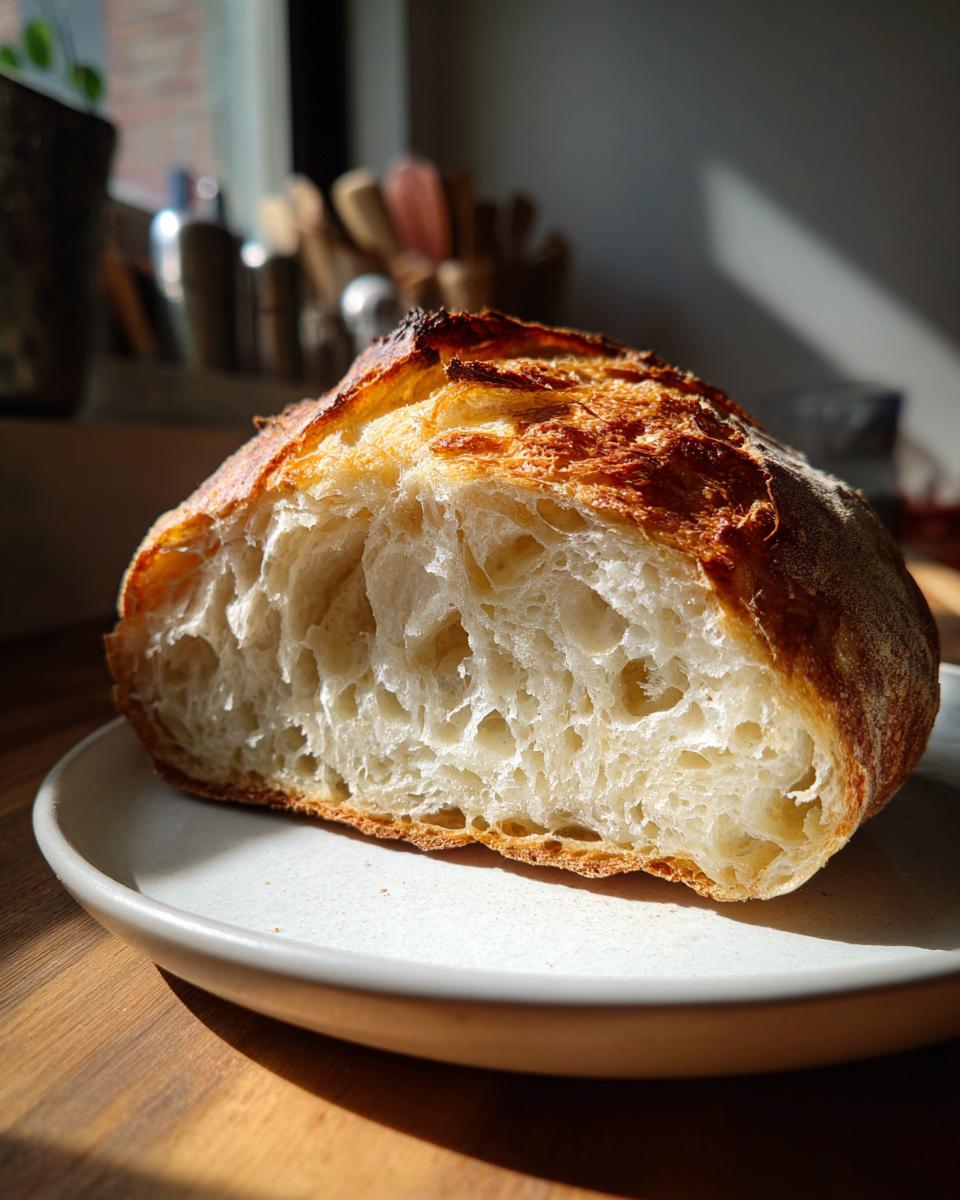
- You get a beautiful, crusty homemade loaf that rivals what you buy at the bakery.
- The active hands-on time is ridiculously short—seriously, maybe ten minutes total!
- It creates that rich flavor you expect from fermentation, but without needing a fussy starter.
It’s the definition of easy homemade bread.
The Foolproof No-Knead Yeast Bread Technique
So, why don’t we knead? That long, slow rest—we’re talking twelve hours or more—does all the hard work for us. The yeast gets its sweet little time to wake up and slowly build the gluten structure. It mimics that deep flavor you find in an artisan sourdough style bread, only we are using simple instant yeast, not the endless feeding of a starter. It’s chemistry, but it feels like magic!
Quick Results for an Everyday Yeast Bread
Don’t let the overnight rest scare you off! Your active prep time is only about 10 minutes! That means you mix it up before bed, and when you wake up, you have dough ready to go. Think of it as setting it and forgetting it until it’s time to pop it in the oven. This is what I use for everyday baking bread because my hands are free when it matters most.
Gathering Your Ingredients for Simple Yeast Bread Recipe
Okay, this is the best part about this simple yeast bread recipe: the ingredient list is super short! Seriously, these four things might already be in your pantry right now. In line with our Kitchen Slang philosophy of keeping things real and accessible, we skip the specialty flours and weird additives. We are sticking to the basics because that’s how the truly memorable comfort food baking happens.
For this loaf to come out perfectly, you need these exact things:
- 3 cups all-purpose flour
- 1 1/2 teaspoons salt
- 1/4 teaspoon instant yeast
- 1 1/2 cups cool water
That’s it! That cool water is a little trick for the slow ferment, so don’t swap it out for warm water unless you plan to skip the long rest. If you need a little accompaniment for this bread, you absolutely have to check out my easy garlic bread recipe for dipping!
Essential Equipment for Crusty Homemade Loaf
Since we aren’t kneading or doing a bunch of fussing over the dough, we need to make sure the tools we use are doing their part, especially when it comes to that gorgeous crust. If you want that truly epic, crackly, crusty homemade loaf look, you need one major piece of equipment: the Dutch oven. I know, it seems dramatic, but trust me, it creates the perfect little steamy environment for the first part of the bake.
The Dutch oven is crucial because it traps all the steam released by the dough. That steam keeps the outside of the loaf moist for those first critical 30 minutes, allowing the bread to fully expand without setting the crust too soon. Once you take the lid off, the dry heat rushes in and browns that gorgeous crust up perfectly. Without that lid action, you end up with a slightly pale, flatter bread. It’s the key to getting that bakery-style look with this low-effort yeast bread.
Here’s what you absolutely need on hand before you mix that dough:
- A large mixing bowl (big enough for the dough to quadruple in size over 18 hours!).
- Plastic wrap to cover that bowl tightly.
- A Dutch oven (5 to 7 quarts works best) with a tight-fitting lid.
- A piece of parchment paper—this is your best friend for safely moving the sticky raw dough into the hot pot!
- A rack for cooling the bread once it’s done baking. Patience pays off here; you have to let it cool!
Step-by-Step Instructions for Perfect Yeast Bread
Alright, let’s get down to business! This is where you turn that messy-looking blob of ingredients into genuine magic. I remember my first time trying this no-knead yeast bread—I thought I had messed up because the dough looked nothing like the smooth balls you see in baking shows. Don’t panic! We follow the timing exactly, and the slow rest does the work for us. While you wait for this dough to work its magic overnight, maybe whip up my easy chili recipe to serve with your fresh loaf later!
Mixing and the Long Rest for Your Yeast Bread
First, grab your big bowl. Whisk together your flour, salt, and that tiny bit of instant yeast. Don’t worry; that little bit of yeast is plenty powerful when given all that time to work! Now, pour in the cool water and mix it with a sturdy wooden spoon—just until you see no more dry flour patches. We are literally aiming for a shaggy, sticky mess. Cover that bowl *tightly* with plastic wrap. Seriously, I use two layers to lock in the moisture. Now, tuck it away on your counter for 12 to 18 hours. That’s right, almost a full day of hands-off fermentation! This slow rise is what develops the flavor in our yeast bread.
Shaping and Final Proofing the Dough
After the long rest, the dough should look bubbly and loose. Lightly flour your counter—you’ll need it! Carefully scrape the bubbly dough out onto the flour. Now, this is vital: we are not kneading. Just gently fold the dough over itself a few times to create a sort of rough ball shape to give it some surface tension. Place that round ball onto a piece of parchment paper. Cover it loosely with a clean tea towel and let it sit for just 30 minutes. This short final proof gets it ready for the heat.
Baking Your Artisan Yeast Bread in a Dutch Oven
About 20 minutes into that final 30-minute rest, you put your Dutch oven—lid and all—into the oven and crank the heat up to 450°F (232°C). That pot needs to get screaming hot! When the 30 minutes are up, stand back and carefully pull that blazing hot pot out. Use the parchment paper like handles to gently lower your dough right into the middle of the pot. Slap that lid on super quick! Bake it covered for 30 minutes. This creates the steam needed for that amazing oven spring. Then, take the lid off and bake another 15 to 20 minutes until that crust is deep brown. Let it cool completely before you cut into it, or it’ll be gummy inside!

Expert Tips for Baking Bread From Scratch Mastery
I can tell you right now that every single baker—and I mean every single one—has ruined a loaf of yeast bread in their journey. I remember Zoe trying to rush a holiday loaf once, thinking she could cut the resting time in half by putting the dough near the radiator. Big mistake! I ended up with a weirdly dense, slightly sour thing that wouldn’t rise properly when baked. It flopped! The lesson learned is that when you mess with the time, you mess with the structure. That’s why these next few pointers are what separate a decent loaf from what I call true bread baking from scratch mastery. We need to respect the process! For even more wisdom on this subject, check out my dedicated post on baking tips for yeast bread.
Achieving the Ideal Crust on Your Yeast Bread
We already talked about why that Dutch oven is the hero here, creating that gorgeous, crackly shell on your yeast bread. But what if you only have a big baking sheet and not a heavy cast iron pot? Don’t give up! You can still get a good crust. The goal is steam, remember? Before you even think about putting your dough in the oven, place an empty broiler-safe pan on the lowest rack. When you put your dough on your middle rack (on a preheated baking stone or just the sheet), quickly pour about a cup of boiling water into that hot, empty pan underneath. Whoosh! Instant steam oven. It won’t trap the steam quite as well as a lid, but it makes a huge difference compared to baking dry.
Alternatively, if you have a pizza stone, make sure that stone is in the oven while it preheats for at least 45 minutes. A super hot baking surface helps the bottom crust set fast and strong, preventing that sad, pale bottom.
How to Bake Fluffy Bread Instead of Artisan Yeast Bread
Part of translating recipes, like we do here at Kitchen Slang, means understanding that sometimes you want an artisan, chewy loaf, and sometimes you just want that soft, pillowy texture perfect for sandwiches or soaking up gravy. If the long, cool rest isn’t for you, or if you crave that specific soft crumb of a classic white bread recipe, you have to switch gears. This is where you use warmer water—not hot, just pleasantly warm to the touch—and you’ll need to knead the dough for about 8 to 10 minutes.
When you use warm water and knead, you develop the gluten quickly, which means you skip the 18-hour wait! Instead, you’ll watch the dough rise in a warm spot until it’s doubled, usually an hour or so depending on your kitchen temperature. This method creates a softer texture, less holey inside, and is excellent if you are aiming for soft bread rolls recipe style. It requires more effort, but it’s a great technique for a quick yeast bread when you need dinner rolls tonight!

Storing and Reheating Your Homemade Yeast Bread
So, you’ve just pulled this gorgeous, crusty creation out of the oven. It smells like everything good in the world. Now comes the hardest part: resisting the urge to hack into that beautiful loaf immediately! Please, trust me on this one. If you slice this fresh yeast bread when it’s piping hot, the steam trapped inside rushes out, and you end up with a dense, almost gummy interior. That cooling period on the wire rack isn’t just suggested; it’s non-negotiable for that perfect texture!
Once it has completely cooled—and I mean touch it and it feels room temperature, usually an hour or two—you can store it. If you plan to eat the whole thing in a day or two, just wrap it tightly in a clean tea towel and leave it on the counter. That keeps the crust breathable but stops it from drying out too fast. If you need it to last longer, you can wrap the whole loaf tightly in plastic wrap first, then stick it in a zip-top bag. It holds up great for three or four days that way, though the crust will soften.
Now for reheating! If your crust has gone a little soft after being stored, don’t worry. Take the loaf (or whatever piece you want to refresh) and wrap it loosely in aluminum foil. Pop it back into a 350°F oven for about 10 minutes. The foil traps moisture inside so the crumb softens up again, and when the timer goes off, peel the foil back and bake it uncovered for 2-3 more minutes. Instantaneous revival! It genuinely brings back that fresh-from-the-oven feeling, making it perfect for serving with one of my easy weeknight dinners.
Frequently Asked Questions About This Simple Yeast Bread Recipe
I know baking can bring out the questions, especially when you’re trying a new method like no-knead yeast bread. These are the things I hear most often when people are trying this recipe for the first time. Don’t sweat the small stuff; that’s why we’re here to translate the process! If you’re looking for more help or want to reach out, you can always find my contact details on the Contact Page—I love hearing about your successes!
Can I make this yeast bread faster than 12 hours?
Yes and no, that’s the honest answer! Remember how I told you about tweaking the method for that softer loaf? If you use warm water instead of cool water and you knead the dough for about 8 to 10 minutes, you drastically speed things up. By kneading, you skip the long fermentation time, and the dough will usually double in size in about an hour or so. It turns it into a much quicker simple yeast bread recipe, but you sacrifice that deep, artisan flavor we baked in during the slow rise. For this specific low-effort formula, though, you really need that long rest to get the best results.
What if my dough doesn’t bubble after the long rest?
Oh, don’t let this throw you off course! First, check your yeast. If the yeast was old and really, truly dead, you might not see bubbles, but if you used fresh yeast, it’s probably working even if you can’t see huge activity. Did you use cool water? That helps slow things down. If it was a cold day in your kitchen, the dough might ferment slower than the full 12 hours suggests. Don’t feel like you’ve ruined this foolproof bread recipe! Just aim for it to look slightly puffed and feel softer than when you mixed it. Scraping it out and letting it proof for the final 30 minutes usually sorts out any slight sluggishness.
Can I substitute the flour in this yeast bread?
For this particular no-knead method, because we rely on the long rest to magically build the gluten structure, I really, really suggest sticking with all-purpose flour. It has the perfect balance of protein to form those strong but tender strands that give us the best bread recipe ever texture here. If you try swapping in a lot of whole wheat or something non-glutenous, the dough won’t develop correctly during that long, lazy rest. You’ll end up with something dense and disappointing. Save the experiments for when you’re making a more active, kneaded loaf later on!

Serving Suggestions for Your Dinner Table Bread
This gorgeous, crusty yeast bread is honestly almost too delicious to save for toast the next morning, though it’s fantastic that way too! It’s the ultimate cozy addition to any evening meal. Because of that hearty, slightly chewy crust we worked hard to achieve, this bread is just brilliant for dipping.
I love serving thick slices alongside a steaming bowl of something savory. Think about serving it alongside my French onion soup recipe so you can really mop up every last drop of broth and cheesy goodness. It’s also absolutely wonderful when served warm with just a pat of good, quality butter melting right into the crumb. Or, if you have leftovers, slice them thin, brush with olive oil, and toast them up for spectacular homemade croutons!
Nutritional Estimates for This Homemade Yeast Bread
Since we are working with just four simple ingredients here, the nutrition is straightforward, but it’s important to remember that this is very much a treat for comfort food baking! These numbers are estimates calculated based on the ingredients listed and should be used as a general guide, as your exact serving size might shift depending on how large you slice that final loaf.
- Serving Size: 1 slice
- Calories: 180
- Sugar: 0.5g
- Sodium: 350mg
- Fat: 0.5g
- Saturated Fat: 0.1g
- Carbohydrates: 38g
- Protein: 6g
Share Your Experience Baking This Yeast Bread
Now, my favorite part! I want to see your gorgeous, homemade loaves! Did you get that incredible crackly crust we talked about? Did you manage to wait the full hour before slicing into it? When you try this yeast bread recipe and nail that crusty exterior, please come back and drop a rating below. It helps other beginners feel confident to try making their very own bread from scratch.
We are building a real community here at Kitchen Slang where everyone feels like they can tackle any recipe. Don’t be shy; share your photos and tell us what you ate it with! Your success stories are what inspire me to keep translating complex cooking into real talk for real good food. If you’re curious about how we handle your info, you can take a look at our Privacy Policy, but mostly, I just can’t wait to see your bread!
PrintBeginner’s Ultimate No-Knead Yeast Bread
Make a crusty, artisan-style loaf of yeast bread with this simple, no-knead recipe. This foolproof method is perfect for beginners and yields a flavorful loaf with minimal effort.
- Prep Time: 10 min
- Cook Time: 50 min
- Total Time: 13 hours 50 min
- Yield: 1 loaf 1x
- Category: Baking
- Method: No-Knead Baking
- Cuisine: American
- Diet: Vegetarian
Ingredients
- 3 cups all-purpose flour
- 1 1/2 teaspoons salt
- 1/4 teaspoon instant yeast
- 1 1/2 cups cool water
Instructions
- In a large bowl, whisk together the flour, salt, and instant yeast.
- Pour in the cool water and mix with a wooden spoon until just combined into a shaggy dough. Do not overmix.
- Cover the bowl tightly with plastic wrap and let the dough rest at room temperature for 12 to 18 hours. The dough will become bubbly and increase in volume.
- After the long rise, lightly flour a work surface. Scrape the dough out of the bowl.
- Gently fold the dough over itself a few times to form a rough ball. Do not knead it.
- Place the dough ball on a piece of parchment paper, cover it loosely with a clean kitchen towel, and let it rest for 30 minutes. This is the final proof.
- About 20 minutes before the final proof ends, place a Dutch oven with its lid inside your oven. Preheat the oven to 450°F (232°C).
- Carefully remove the hot Dutch oven from the oven. Lift the dough using the parchment paper and gently place it inside the hot pot.
- Cover the Dutch oven with the lid and bake for 30 minutes.
- Remove the lid and continue baking for another 15 to 20 minutes, or until the crust is deep golden brown.
- Carefully remove the bread from the Dutch oven and let it cool completely on a wire rack before slicing.
Notes
- For a crusty loaf, use a Dutch oven. If you do not have one, you can bake the bread on a baking stone or sheet pan, but the crust will be less developed.
- If you want a softer, less artisan loaf, use warm water instead of cool water and allow the dough to rise in a warm spot for 1 to 1.5 hours until doubled. This requires kneading.
- Slice the bread only after it has cooled for at least one hour to prevent a gummy interior.
Nutrition
- Serving Size: 1 slice
- Calories: 180
- Sugar: 0.5
- Sodium: 350
- Fat: 0.5
- Saturated Fat: 0.1
- Unsaturated Fat: 0.4
- Trans Fat: 0
- Carbohydrates: 38
- Fiber: 1.5
- Protein: 6
- Cholesterol: 0