

Ready to seriously elevate your party game? Forget dry dips and boring cheese boards for one second. We’re talking about appetizers that make people stop mid-sentence: crispy, creamy, utterly addictive goat cheese balls! Look, I know sometimes recipes feel intimidating, but it’s just kitchen slang! That’s what Zoe Thompson started Kitchen Slang for—taking those pro secrets and making them work right on your counter. These little bites are the perfect flavor bomb for any gathering, especially around the holidays. Get that goat cheese chilled, because trust me, these are going to be your new favorite entertaining food.
- Why You Will Love These Crispy Goat Cheese Balls
- Essential Ingredients for Perfect Goat Cheese Balls
- Step-by-Step Instructions for Making Crispy Goat Cheese Balls
- Tips for Success When Preparing Gourmet Party Snacks
- Serving Suggestions for Your Tangy Cheese Bites
- Storage and Reheating Instructions for Leftover Goat Cheese Balls
- Frequently Asked Questions About Goat Cheese Balls
- Estimated Nutritional Data for Honey Drizzle Cheese Ball
- Share Your Experience Making These Goat Cheese Balls
Why You Will Love These Crispy Goat Cheese Balls
Seriously, these aren’t just easy cheese balls; these are a total showstopper. I promise you’ll want to make these for every single get-together from now until New Year’s. Here’s the rundown on why they’re making the permanent rotation:
- Perfect Texture Contrast: You get that amazing shattered crunch from the Panko crust followed by the warm, slightly tangy, super-creamy center. It’s addictive!
- Savory Meets Sweet Magic: While the cheese itself is tangy, that drizzle of honey we use on top turns this into the ultimate savory sweet appetizer. It’s complex without trying too hard.
- Make-Ahead Champion: This is key for holiday parties! You can totally coat them ahead of time. Set them, chill them, and fry them minutes before guests arrive.
- Quick Frying Time: Since they are tiny—about one inch—they fry up lightning fast. Seriously, under two minutes until they’re golden brown. No standing over a hot fryer all night!
- Impressive But Simple: They look like something you ordered from a fancy caterer, but honestly, the ingredients list is super short. They feel gourmet, but they are so accessible.
- Holiday Party Food Ideas Gold: These little gems are robust enough for a big gathering, look fantastic on a platter, and pair perfectly with almost any cocktail or wine you open that night.
Essential Ingredients for Perfect Goat Cheese Balls
Okay, let’s talk ingredients, because using the right stuff is how we guarantee these turn out incredible, every single time. We aren’t making a big bowl for spreading; we’re making little crispy spheres, so the prep matters! You only need a few things, but pay attention to the temperature and texture cues.
- Goat Cheese: You need 8 ounces of soft goat cheese, but listen—it must be chilled. If it’s room temp, you cannot roll it into proper balls.
- Flour: Just 1/2 cup of all-purpose flour for the first dredging stage.
- Binder: Two large eggs, beaten smooth in a bowl.
- Crust: One solid cup of Panko breadcrumbs. Don’t substitute these for regular breadcrumbs unless you absolutely have to—Panko is the secret weapon for that airy, jagged crunch!
- Flavor Boost: About one teaspoon of dried thyme, plus salt and pepper.
- Finishing Touches: You need vegetable oil if you’re frying, and most importantly, that beautiful 1/4 cup of honey for drizzling at the end.
Ingredient Notes and Substitutions for Your Goat Cheese Balls
The goat cheese being chilled is not negotiable! You want it firm enough to scoop out into uniform balls, about 1 inch in diameter—that’s the size that fries perfectly without oozing out everywhere. If your kitchen is hot, work fast and put the rolled balls back in the fridge if you feel them softening up. Also, about the Panko: I mentioned it, but I’ll say it again because it’s vital for this recipe, especially if you’re trying to impress people: use Panko. It creates air pockets that get ridiculously crispy when they hit the hot oil.
Step-by-Step Instructions for Making Crispy Goat Cheese Balls
Now we get to the assembly line stage! This is where we translate those professional breading secrets into reality. You need three shallow dishes ready to go—one for flour, one for the egg wash, and one for the Panko mixture. Remember, the order is crucial for getting a nice, thick coat that actually sticks when frying. It needs to be Flour, then Egg, then Panko. After you roll each little ball, you MUST put them in the fridge. No exceptions!
I know you want to fry them right away, but chilling those coated balls for at least 30 minutes is what seals the deal. It stops the coating from falling off in the hot oil. If you skip this, you end up with weirdly bare, hot cheese blobs instead of beautiful, perfectly coated goat cheese balls. Trust me on this chilling step; it’s a major shortcut to success.

Once they are good and firm in the fridge, you are ready for the heat! If you need quick inspiration for what to make later in the week, check out my guide on easy weeknight dinners once you get these appetizers plated!
Frying Technique for Golden Goat Cheese Balls
Frying is quick, but it needs accuracy. You want about two inches of vegetable oil heated up in a heavy pot to exactly 350°F (175°C). You absolutely need a thermometer here; too cool, and they soak up oil and get greasy; too hot, and the outside burns before the inside warms up. Work in batches—don’t overload the pot, or you drop the temperature too fast! Lower the chilled, coated balls in gently. They only need 1 to 2 minutes to turn that perfect golden brown color. You’re just heating them through and crisping that crust.
Grab them out with a slotted spoon right when they look perfect and immediately set them on a wire rack lined with paper towels. That rack lets air circulate underneath, which is how you keep the bottom from getting soggy. That’s professional wisdom right there!
Alternative Cooking Methods for Goat Cheese Balls
If deep frying just isn’t your jam, I totally get it. We can absolutely adapt this! For a less messy version, you can spray the coated cheese balls generously with cooking spray and toss them in your air fryer set to about 380°F (195°C) for roughly 6 to 8 minutes, giving them a flip halfway through. They get beautifully crisp this way, though perhaps not quite as intensely golden as the fried ones—but still fantastic!
If you’re looking for a healthier route, you can try treating this as a Baked Goat Cheese Appetizer, scattering the balls on a parchment-lined sheet and baking at 400°F (200°C) until golden brown. Just know that the baked version tends to be a little less craggy on the outside and sometimes the cheese softens more internally. For the air fryer, you can even freeze them before cooking; just add an extra minute or so to the cook time!
Tips for Success When Preparing Gourmet Party Snacks
When you’re throwing a big gathering, the less you have to stress about right before everyone walks in the door, the better! These goat cheese balls are genius because they follow the golden rule of entertaining: make them ahead! I always treat these like I’m prepping for a marathon; efficiency is key.
My favorite trick here involves the freezer. After you coat those little beauties in the Panko mixture, lay them on that parchment-lined sheet, but instead of chilling them for 30 minutes, stick the whole tray in the freezer. Let them freeze solid—this usually takes an hour or so. Once they are rock solid, transfer them to a heavy-duty freezer bag. You can keep them there for weeks!
The best part? You don’t even have to thaw them when party time rolls around. When you’re ready, take out just what you need, add maybe an extra minute or two to the frying time (or air-frying time), and boom! Fresh, hot, crispy snacks appear like magic. It makes hosting so much less frantic.

Also, remember that thyme? Make sure it’s dried, not fresh, for coating. Fresh herbs tend to burn up too quickly in the hot oil. If you want that fresh herbal element, just sprinkle it on *after* drizzling the honey. If you’re looking for more recipes that scream party-ready, check out my thoughts on making Jalapeño Popper Dip—another great make-ahead winner!
Serving Suggestions for Your Tangy Cheese Bites
Alright, these goat cheese balls have come out of the fryer (or air fryer!) looking perfect—golden, crisp, and ready for their close-up. This is the moment where we turn a delicious fried snack into true restaurant-worthy serving. Don’t just dump them on a plate, we want elegance!
The absolute mandatory finish here is the honey drizzle. You have to warm that honey up just a tiny bit so it flows beautifully, rather than having to glob it on awkwardly. Use a spoon or a fork to drizzle it back and forth over the platter of warm cheese balls. It’s the sweet counterpoint the tangy, savory cheese desperately needs. It really takes these from ‘snack’ to ‘gourmet party snack’ in seconds.

Next, think about texture and color. I always have chopped pecans ready to go—they add a lovely little crunch right against that smooth honey. A sprinkle of flaky sea salt, just a pinch, helps bring out all the savoriness too. If you used fresh thyme in the coating (which you shouldn’t, remember?), you can definitely garnish with fresh, finely chopped thyme leaves now! It looks so vibrant dotted around the platter.
When it comes to pairing, these babies are versatile! Since they hit that perfect savory-sweet note, they work with nearly everything. I love serving them alongside a crisp, dry white wine like Sauvignon Blanc, which cuts through the richness of the fried coating. Of course, for a holiday feel, they are amazing next to a fruity, spiced drink. If you need a fantastic addition to your beverage lineup, you absolutely have to try my recipe for Fall Sangria. It’s the perfect companion to these rich, gourmet party snacks, making your entire spread feel cohesive for your entertaining food ideas!
Storage and Reheating Instructions for Leftover Goat Cheese Balls
What if you actually have leftovers? That’s a rare feat in my house since these goat cheese balls disappear so fast, but if you manage to stash a few away, we need to treat them right! Remember, since these are fried, reheating them needs a specific approach to bring back that beautiful crispiness we worked so hard for.
First, storage: Once they are completely cooled down—I mean totally room temperature—place them in an airtight container. You can use paper towels between layers if you’re stacking them to absorb any residual oil, but keep them in the fridge. They should be good for about three days max, but honestly, they are best eaten the day you make them, hands down.
The Golden Rule: Never Use the Microwave
Listen to me closely if you want to save these leftovers: Do NOT zap these in the microwave! I know, I know, it’s fast, but the microwave is the enemy of crispness. It heats the moisture inside the breading, turning that glorious Panko into sad, chewy rubber almost instantly. We aren’t trying to make gummy balls here; we want crunch!
Reheating for Maximum Crispness on Your Goat Cheese Balls
You have two solid options that will revive that delightful crunch. The best way, hands down, is the oven or toaster oven. Spread the cooled cheese balls out in a single layer on a baking sheet—make sure there’s space between them so the heat circulates. Pop them into a preheated oven at about 350°F (175°C) for about 6 to 8 minutes. That gentle dry heat warms the cheese inside and dries out the coating just enough to restore the crunch. Watch them closely so they don’t burn!
If you own an air fryer, that’s even better for a smaller batch! Pop them in at 375°F (190°C) for just 3 to 4 minutes. They come out unbelievably crispy. This quick reheating is why making these ahead is truly one of the best make ahead appetizers strategies out there for busy hosts!
Frequently Asked Questions About Goat Cheese Balls
I know you might have a few lingering questions, especially if you’re looking for super flexible easy cheese balls recipes that fit your schedule. Having been through this process dozens of times, I’ve heard just about everything! Here are the answers to the most common things people ask me about these little crispy bites.
Can I substitute the goat cheese for another creamy cheese in this goat cheese balls recipe?
This is a great question concerning swapping ingredients! The honest answer is that you absolutely can try it—I mean, we’re cooking, not taking vows! If you swap the tangy chèvre for something else, like all cream cheese or perhaps Boursin or even a mild feta mixed with cream cheese, you will lose that signature, slightly bright tang that makes these stand out. Goat cheese is the star here because it softens beautifully when fried but holds its shape well.
If you use only cream cheese, you might find they melt out a bit more easily, which is why I stress that the cheese must be chilled if you deviate from the recipe. Using Brie might be tasty, but it’s way too soft to hold the ball shape, so I stick to the firmer, tangier cheeses for this breading method.
What is the best way to serve these as Holiday Party Food Ideas?
Presentation is everything when you’re trying to wow people during the holidays! Since these are warm when served, you want to make grabbing them simple and elegant. Don’t make a huge pile! I suggest arranging them on a nice, attractive platter—a dark slate board or a white ceramic dish works wonders to make that golden crust pop.
My favorite way is to use small, decorative cocktail picks stuck into each one, sometimes with a tiny piece of dried apricot or a sweet olive threaded on top alongside the cheese ball itself. This turns every single piece into an individual serving, which is great for food safety and keeps people from double-dipping into a communal honey drizzle!
If you’re making a bigger spread, set them near your main cheese board and ensure that honey drizzle is ready to go right before you put them out. They look gorgeous next to greenery or surrounded by colorful festive cranberries, making them instantly recognizable as top-tier holiday party food ideas!
Estimated Nutritional Data for Honey Drizzle Cheese Ball
Okay, I know some of you hardcore cooks like to track things, and that’s totally fair! You want to know what you’re serving up, especially when we’re dipping things in oil, even briefly. Here are the estimated numbers for these irresistible fried goat cheese balls, based on the standard recipe above and a serving size of three balls.
Now, I have to give you the standard disclaimer here, the one us home cooks always have to mention: these numbers are estimates! They are guides, not gospel. The final counts are going to change a bit depending on the brand of goat cheese you buy, how much oil those crunchy Panko coatings actually soak up, and exactly how heavy-handed you are with that gorgeous honey drizzle!
- Serving Size: 3 balls
- Calories: 220
- Fat: 18g (Be careful with this one; 10g is Saturated Fat)
- Carbohydrates: 10g
- Sugar: 5g (Mostly from that wonderful honey!)
- Protein: 6g
- Sodium: 250mg
See? They’re rich, they’re decadent, but they are tiny! That’s why you eat three, not thirty! If you are tracking things closely, remember that swapping to the air fryer method mentioned earlier will probably shave off a gram or two of fat just because less surface oil is involved. Enjoy these fantastic gourmet party snacks responsibly!
Share Your Experience Making These Goat Cheese Balls
Whew! We’ve reached the finish line, and hopefully, you’re already dreaming about serving these incredible, crispy goat cheese balls at your next event. But honestly, cooking is a conversation, right? I want to hear what you think!
Did you try the fried method? Or are you an air fryer loyalist? Did you listen to me and stick with the thyme, or did you sneak in some chopped dried cranberries like I mentioned in the notes? Tell me everything! Drop a comment below and let me know how they turned out, what drinks you paired them with, and if your guests lost their minds over that honey drizzle. Seriously, the best part of running Kitchen Slang is hearing how these recipes become part of *your* family traditions.
If you snapped a glorious picture of your platter ready for dipping, I’d love to see it on social media! Just tag us so we can check out your beautiful plating skills. We’re all about building this community where great cooking advice travels faster than gossip!
If you’ve got questions about storage, substitutions, or just want to chat about food in general, don’t hesitate to reach out. You can always connect with me and the translating team directly through our contact page. Thanks so much for cooking with me today. Happy hosting!
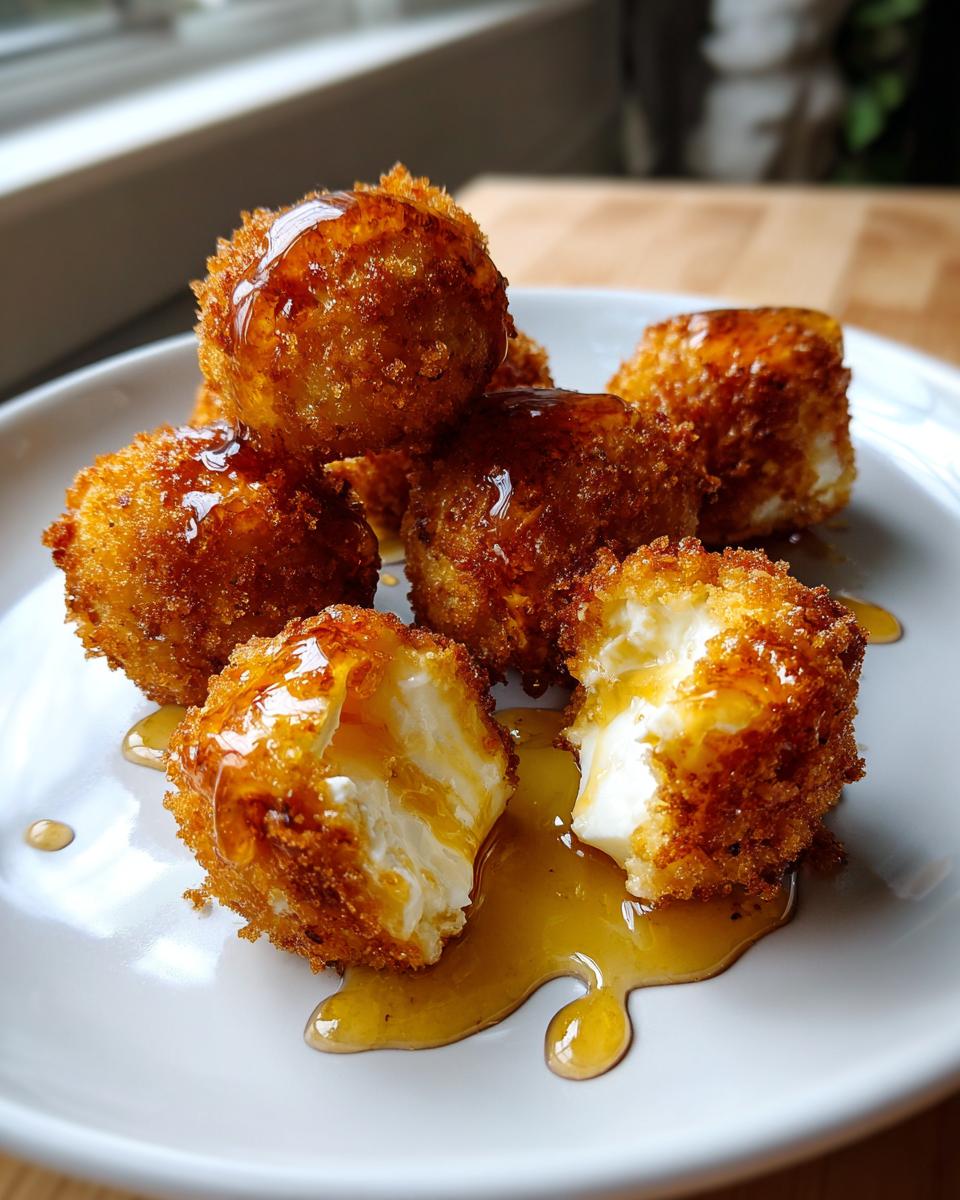
PrintCrispy Fried Goat Cheese Balls with Honey Drizzle

Make these irresistible, bite-sized goat cheese balls. They are crispy outside, creamy inside, and finished with a sweet honey drizzle, making them a perfect holiday appetizer or party snack.
- Prep Time: 20 min
- Cook Time: 10 min
- Total Time: 60 min
- Yield: 18 servings 1x
- Category: Appetizer
- Method: Frying
- Cuisine: American
- Diet: Vegetarian
Ingredients
- 8 oz soft goat cheese, chilled
- 1/2 cup all-purpose flour
- 2 large eggs, beaten
- 1 cup panko breadcrumbs
- 1 teaspoon dried thyme
- 1/2 teaspoon salt
- 1/4 teaspoon black pepper
- Vegetable oil, for frying
- 1/4 cup honey, for drizzling
- Optional: Chopped pecans or fresh thyme for garnish
Instructions
- Combine the flour, salt, and pepper in one shallow dish.
- Whisk the eggs in a second shallow dish.
- Mix the panko breadcrumbs and dried thyme in a third shallow dish.
- Scoop the chilled goat cheese into small, uniform balls (about 1 inch in diameter). You should get about 16 to 20 balls.
- Dredge each cheese ball first in the flour mixture, shaking off excess.
- Dip the floured ball into the beaten egg, letting excess drip off.
- Roll the ball thoroughly in the panko mixture, pressing gently to make sure the coating adheres completely.
- Place the coated balls on a baking sheet lined with parchment paper. Chill in the refrigerator for at least 30 minutes to set the coating.
- Heat about 2 inches of vegetable oil in a deep, heavy-bottomed pot or Dutch oven to 350°F (175°C). Use a thermometer to monitor the temperature.
- Working in small batches, carefully lower the chilled cheese balls into the hot oil using a slotted spoon. Do not overcrowd the pot.
- Fry for 1 to 2 minutes, turning occasionally, until they are golden brown and crispy. The cheese inside will soften but should not fully melt out.
- Remove the balls with a slotted spoon and place them on a wire rack set over paper towels to drain excess oil.
- Arrange the warm goat cheese balls on a serving platter. Drizzle generously with honey and garnish with chopped pecans or fresh thyme, if using. Serve immediately.
Notes
- For an air fryer option, spray the coated balls lightly with cooking spray and air fry at 380°F (195°C) for 6 to 8 minutes, flipping halfway, until golden.
- You can make these ahead. After coating, place them on the baking sheet and freeze until solid. Transfer to a freezer bag. Fry directly from frozen, adding 1 minute to the cooking time.
- If you prefer a sweet and savory mix, roll half of the cheese balls in finely chopped dried cranberries and pecans instead of plain panko.
Nutrition
- Serving Size: 3 balls
- Calories: 220
- Sugar: 5
- Sodium: 250
- Fat: 18
- Saturated Fat: 10
- Unsaturated Fat: 8
- Trans Fat: 0
- Carbohydrates: 10
- Fiber: 1
- Protein: 6
- Cholesterol: 35