

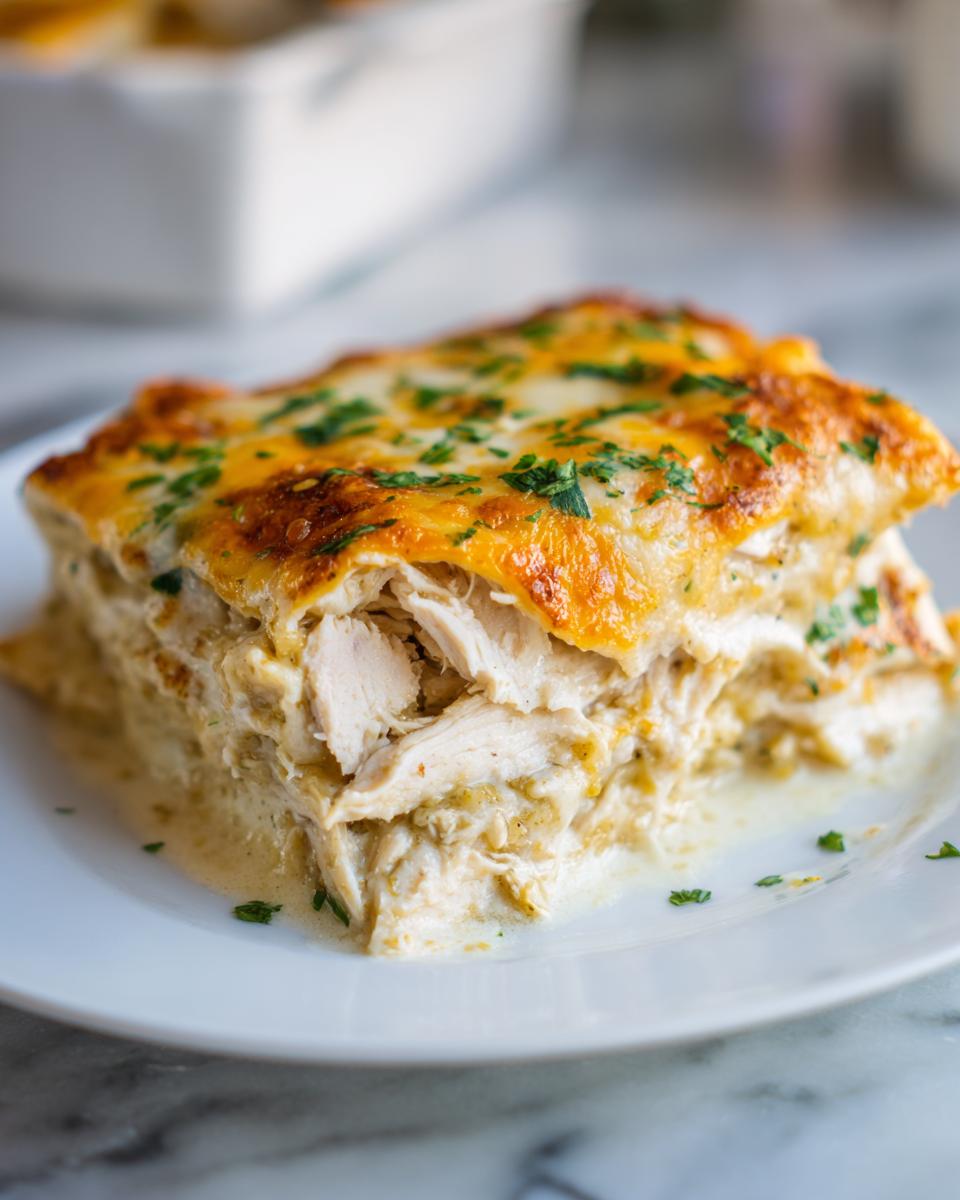
Okay, I absolutely get it. Another Tuesday night, another dinner that just tastes… fine. We’re done with fine! We need flavor that hits you right in the happy place. That’s why we’re ditching the bland and jumping headfirst into bold Southwestern flavor tonight with my Creamy Green Chile Chicken Enchiladas Casserole. Trust me, this takes the classic idea of green chile chicken enchiladas and turns it into the ultimate weeknight hero—creamy, cheesy, and packing that beautiful, zesty kick.

At Kitchen Slang, we translate the high-level techniques we picked up working the line into meals you can actually cook when you’re tired. This recipe embodies that: it’s built on professional efficiency but served up with the comforting practicality your own kitchen demands. This casserole is going to taste gourmet, but the cleanup is pure home-cook simplicity. You can find more speedy solutions like this over at my guide to Easy Weeknight Dinners.
- Why You Need This Creamy Green Chile Chicken Enchiladas Casserole Now
- Gathering Ingredients for Green Chile Chicken Enchiladas
- Mastering the Zesty Green Chile Sauce Filling
- Assembling Your Southwest Chicken Casserole
- Baking and Finishing Your Green Chile Chicken Enchiladas
- Tips for Perfect Green Chile Chicken Enchiladas Every Time
- Serving Suggestions for Your Cheesy Mexican Dinner
- Storage and Reheating Green Chile Chicken Enchiladas
- Frequently Asked Questions About Green Chile Chicken Enchiladas
- Estimated Nutrition for This Simple Enchilada Recipe
- Share Your Kitchen Slang Creations
Why You Need This Creamy Green Chile Chicken Enchiladas Casserole Now
Look, I know you’re busy, but that doesn’t mean you should settle for boring food. This casserole format is such a genius switch-up from rolling individual spicy handhelds. It’s everything you love about Southwest flavor without any of the fuss. We’re talking big flavor, super creamy texture, and it’s ready before you know it. If you’re looking for other ways to switch up your poultry game, check out my Southwest Chicken Salad Recipe—it’s got that same zesty backbone!
Weeknight Chicken Dinner Ready Fast
Seriously, you’re looking at maybe 15 minutes of hands-on time here. The total time clocks in under 40 minutes, making this an absolute shoe-in for Quick Dinner Ideas. No more staring into the fridge wondering what to make!
The Perfect Comfort Food Dinner Twist
This isn’t just eating; it’s *comfort*. By turning it into a casserole, we maximize the gooey, cheesy factor. It transforms into the ultimate Comfort Food Dinner. Forget everything you thought you knew about traditional enchiladas; this creamy version is what you crave when you need a hug in a 9×13 dish.
Gathering Ingredients for Green Chile Chicken Enchiladas
Okay, time to talk turkey—or well, chicken! You need the right cast of characters for this Southwestern production. Don’t overcomplicate it; we’re using simple stuff here, but the magic is in how we combine the chiles. Pull out your biggest bowl, because this assembly process is going to be fast. Here is exactly what you need to gather up before we start building this masterpiece:
- 2 cups cooked, shredded chicken
- 1 (10 ounce) can green chiles, diced, undrained
- 1 (4 ounce) can green chiles, diced, undrained
- 8 ounces cream cheese, softened
- 1 cup sour cream
- 1/2 cup chicken broth
- 1 teaspoon ground cumin
- 1/2 teaspoon garlic powder
- 1/4 teaspoon salt
- 1/4 teaspoon black pepper
- 12 corn or flour tortillas (6-inch)
- 2 cups shredded Monterey Jack cheese
- 1 cup shredded cheddar cheese
- Cilantro, chopped (for garnish)
Ingredient Notes and Flavor Boosters
Now, let’s geek out on a couple of key components. First, chicken: I almost always grab a rotisserie chicken for recipes like this. It’s already cooked, and honestly, that pre-cooked flavor is fantastic for these Shredded Chicken Enchiladas. Just pull it apart while it’s still warm!
The real secret for that intense, zesty punch is those green chiles. You need both cans, and you absolutely need them *undrained*. I repeat: keep that liquid! That liquid is where the flavor concentrates, and it helps thin out the cream cheese base perfectly. Watery sauce is the enemy, but flavor-packed liquid is your friend. Also, mixing the Monterey Jack and cheddar gives you the best melt—Jack for stretch and cheddar for that classic, sharp bite. If you’re feeling experimental later, check out my recipe for candied jalapeños; imagine how that sweet heat would mix into this creamy sauce!
Mastering the Zesty Green Chile Sauce Filling
Okay, now for the main event: building up that incredible creamy filling that makes this dish sing. This is where we lock in that bright, Zesty Green Chile Sauce flavor. The first crucial real-talk tip I learned working fast dinner tickets is this: your cream cheese needs to be *soft*. I mean, leave it out way ahead of time, or you can cheat it by microwaving it for about 20 seconds until it’s truly spreadable. Lumps are the enemy of a luxurious Creamy Enchilada Recipe!
Toss that soft cream cheese into a big bowl with the sour cream, broth, and all your spices—cumin, garlic powder, salt, and pepper. Mix that until it’s smooth as silk. Then, fold in your shredded chicken and those undrained cans of diced green chiles. Don’t stir it like you’re mixing cement; use a gentle folding motion so you keep that chicken texture nice. This mixture should look thick, creamy, and aggressively green. It’s the heart of the whole operation!
Prepping Tortillas for Perfect Green Chile Chicken Enchiladas
Here’s a chef’s secret that saves many a pan: you need to warm your tortillas. Seriously, don’t skip this step, even though it adds two minutes! Whether you use corn or flour, if the tortilla is cold, it will crack right down the middle when you try to roll it around that thick filling. I usually stack mine up and give them 30 seconds in the microwave, or I flash them on a dry, hot skillet one by one.
Warming them just wakes up the gluten (if flour) or makes them perfectly pliable (if corn). They should be flexible enough to fold over themselves without any resistance. This small action ensures that when we assemble this casserole, every roll holds its shape perfectly and doesn’t leak that gorgeous filling out the sides. If you want more dips and sides that fit this vibe, check out my jalapeno popper dip idea!
Assembling Your Southwest Chicken Casserole
Alright, we have our creamy, zesty filling ready to go, and our warm, happy tortillas are waiting. Now we turn this into the ultimate Southwest Chicken Casserole. This is where we move quickly, because warm tortillas wait for no one!
Take one of your pliable tortillas. You want to use about 1/4 cup of that incredible filling mixture right down the center. Don’t go crazy piling it on, or it just refuses to roll nicely. Spread it evenly down the middle, leaving about an inch clear on either end. Then, roll it up tight—firmly, but gently. Think of it as tucking a blanket around someone sleepy.
Here’s my absolute favorite shortcut for making this dish look nice and fit perfectly in that 9×13 pan: If you use flour tortillas, I often cut them in half diagonally before I even fill them. That way, you can stand the pieces up close together in the baking dish instead of laying them all in long rows that don’t fit well. When you place them in the prepared dish, always put them seam-side down! We want those seams locked tight so none of that gorgeous filling escapes while baking. It’s just one of those small pieces of kitchen lingo that makes all the difference!
Keep nesting them in there until the whole pan is full—they should be snug. If you end up with a little leftover chicken mixture, just spread that right over the top of the rolls. Before it hits the oven, it already looks amazing, right? For more simple, cozy baked dishes, you should take a look at my Chicken Broccoli Casserole recipe for another great family night option. If you’re looking for more inspiration on chicken enchiladas in general, check out what my friends are cooking over at Recipe Mom.

Baking and Finishing Your Green Chile Chicken Enchiladas
The assembly is done, and now comes the easy part: the oven handles the heavy lifting! Before they go in, make sure you remembered to preheat your oven to 375 degrees F—that consistent heat is key to getting everything bubbly at the same time. If the oven isn’t hot enough, the tortillas can get gummy before the center heats up.
Once that pan is loaded up with those rolled enchiladas, layered with any leftover filling, and absolutely buried under that two-cheese blanket, slide it in. We’re looking for about 20 to 25 minutes of baking time. You can’t just walk away, though. You need to watch for the visual cues! The goal is to see the edges of that sauce start bubbling up aggressively, and the cheese on top needs to be fully melted with just a few beautiful, light golden spots peeking through.
Now, here’s the pro tip that separates the amateurs from the confident home cook: resisting the urge to dive in the second it comes out! We need patience for structural integrity. Let those Green Chile Chicken Enchiladas rest on the counter for a solid five minutes after they exit the oven. If you try to cut into it immediately, everything—that creamy sauce, the chicken, the cheese—will just slump into a delicious puddle. Those five minutes let everything set up just enough so you can actually serve neat squares. Trust me on this resting period; it makes taking this magnificent Cheesy Mexican Dinner to the table so much easier!

If you’re looking for another oven-baked winner that requires minimal effort, you’ve got to try my Dorito Casserole Recipe next week. It’s pure, unadulterated comfort food!
Tips for Perfect Green Chile Chicken Enchiladas Every Time
Even though this is designed to be super simple—and trust me, it is!—there are always a couple of little pieces of kitchen slang I can pass along to make sure your results are absolutely knockout perfect. We want these Shredded Chicken Enchiladas to be consistently amazing, whether it’s Monday night or you’re prepping food for a big Saturday event. Getting the timing and heat level just right is what separates a good casserole from a legendary one.
I picked up these tricks watching the line cooks work; speed and consistency were everything back then. Now you get that same insider knowledge for your own family dinner. If you’re looking for a different kind of comforting meal, my Easy Chili Recipe is another great one to have in your back pocket!
Making Green Chile Chicken Enchiladas Ahead of Time
This is my absolute genius shortcut for entertaining or surviving a crazy work week. You can absolutely assemble the *entire* casserole—filling, rolls, cheese—mix it all up, cover it really tightly with plastic wrap, and stick it in the fridge. It holds beautifully uncovered for up to 24 hours. It’s a dream, right?
The only thing you gotta watch is the heat. Because that dish is cold going into a hot oven, you need to add about 10 minutes to the baking time. Plan for closer to 30–35 minutes total if baking straight from the cold fridge, but keep that eye on the cheese! You still want it bubbly and bright.
Adjusting Spice Level in Your Green Chile Chicken Enchiladas
Not everyone in my family enjoys that mouth-tingling heat, so I always have a plan for adjusting the spice level in these zesty enchiladas. Remember, the flavor comes from the *green chiles*, not necessarily intense heat.
If you want it milder, look specifically for cans labeled “mild” green chiles. If you want to crank up the fire, grab the hot variety, or even better, add a small pinch—like just 1/8 teaspoon to start—of cayenne pepper right into your spice mix with the cumin. That way, you are controlling the pure capsaicin heat separately from the earthy flavor of the chile itself. If you want a reference for managing heat, my friends over at Fit Kitchen Eats have some great balancing ideas!
Serving Suggestions for Your Cheesy Mexican Dinner
Okay, so we have this glorious, bubbly, deeply flavorful Cheesy Mexican Dinner casserole bubbling away in the oven. It’s rich, it’s creamy, and it’s absolutely packed with that bright, zesty heat from the green chiles. When the star dish is this heavy on comfort and creaminess, we need sides that offer a little counterpoint—something cool, fresh, or tart to cut through all that goodness!
I always preach balance in the kitchen. You don’t want four heavy, creamy items on one plate. We want contrast! Think about what you’d put on a spicy tag or a vibrant taco. That’s the vibe we’re aiming for here to really elevate these Green Chile Chicken Enchiladas.
For quick serving, you simply cannot go wrong with fresh toppings right at the table. A bit of chopped white onion adds a needed sharp crunch. And definitely have sour cream or plain Greek yogurt handy for drizzling—it’s instant cooling relief.
My number one recommendation to balance the richness is always fresh avocado, either sliced right on top or as part of a simple guacamole. Speaking of which, if you need a foolproof guide to making the best guac for these enchiladas, you have to check out my recipe for smashed avocado goodness over at my guide to Homemade Guacamole. It brings the perfect silky texture without adding more heat.
If you need something slightly more substantial on the side but still low-effort, stick to light, bright vegetables. Shredded iceberg lettuce tossed with a tiny squeeze of lime juice and a pinch of salt is surprisingly perfect here. Or, if you want to check out another fantastic casserole that plays well with spice, feel free to peek at what my friends are making over at The Strawberry Onion. They always have great ideas for comforting dishes!
Storage and Reheating Green Chile Chicken Enchiladas
The best part about making a big casserole of these Green Chile Chicken Enchiladas? Leftovers! Seriously, I think these taste even better the next day when the sauce has had time to fully permeate every bit of the tortilla and chicken. They are totally worth saving, but you have to know how to treat them right so you don’t turn that beautiful casserole into a dry, rubbery mess the second time around.
When you have leftovers—and you will, because this is a family-sized dish—let it cool down slightly on the counter first. Once it’s room temperature, cover the entire baking dish tightly with foil or plastic wrap. We’re locking in that moisture!
Store it in the fridge for up to four days. If you made this as a full Make Ahead Chicken Casserole instead and froze it, make sure it’s wrapped extra securely—I recommend using both foil and an outer freezer bag to prevent any freezer burn near the cheese topping.
For reheating, you have two great options, depending on how much you’re eating. If you are just nuking a single slice for a quick lunch, the microwave will do the job. Pop the portion onto a microwave-safe plate, cover it loosely with a damp paper towel (this prevents the cheese crust from hardening too much), and heat in 45-second bursts until it’s piping hot all the way through. It reheats really fast!
But if you want that ‘just baked’ flavor back, the oven is the way to go. Pop the casserole dish (or a foil-covered portion) back into a moderate oven—around 350 degrees F is perfect. If it’s coming from the fridge, give it about 15 to 20 minutes until it’s bubbly. If it’s still slightly frozen from the deep freeze, you might need 30 to 40 minutes, depending on the chunk size. Either way, you get that fantastic, comforting, zesty pull all over again!
For more incredibly simple ways to handle leftovers and prep meals, you should 100% bookmark my guide on Make Ahead Chicken Casserole recipes. It’s all about working smarter in the kitchen!
Frequently Asked Questions About Green Chile Chicken Enchiladas
Whenever I share a recipe that’s become a mainstay in my rotation, people always have great, practical questions about substitutions and timing. That’s awesome! It means you’re ready to make this your own. We’re talking about transforming a standard meal into a superstar Family Favorite Dinner Main Dish, so getting the little details right makes a huge difference in flavor and texture.
Here are the things I get asked most often about getting these creamy, zesty enchiladas perfect every time. If you want to look at another way to handle that tender meat, I have a great Crockpot Chicken Enchilada Soup recipe that also uses flavorful shredded chicken!
Can I use red enchilada sauce instead of green?
Oh, you totally can! But I have to warn you, you’re changing the whole flavor profile, right? Green chiles bring that distinctive tangy, bright, almost acidic zip—that’s what makes these truly special and zesty. If you switch to red sauce, you instantly pivot to a deeper, earthier, more traditional Mexican flavor. The filling mixture might taste a little sweeter because green chiles are often brighter. It will still be delicious, just not *this* specific bright flavor. If you prefer a red sauce version, I heard good things about the recipe from Bad Batch Baking, though they focus on a creamy red sauce style!
What is the best way to shred the chicken quickly?
If you’re starting with cooked chicken breasts or thighs and don’t have a rotisserie bird handy, you need a speed trick. The two-fork shredding method is classic, but my absolute favorite shortcut—the one the bistro cooks used when they were slammed—is the stand mixer. Seriously! Put your cooked, warm chicken right into the bowl of your stand mixer fitted with the paddle attachment. Turn it on low speed, and in about 30 seconds, you have perfectly, beautifully uniform Shredded Chicken Enchiladas meat. It’s almost embarrassingly quick! It saves your hands big time when you’re whipping up these Easy Chicken Enchiladas.
Is this recipe freezer friendly?
Yes, absolutely, which makes it an amazing candidate for bulk cooking! The best rule of thumb for any casserole: freeze *assembled* but *unbaked*. Mix everything up, roll the enchiladas, place them tightly in a disposable foil pan, top with cheese, and wrap it super tight—foil, then plastic wrap. It freezes perfectly for about two months.
When you bake from frozen, you must cover it with foil for the first part of the bake so the cheese doesn’t burn before the interior thaws. Plan on adding about 15 to 20 extra minutes to that baking time. It’s a lifesaver when you realize you have zero food but aren’t ready to stop being lazy yet!
Estimated Nutrition for This Simple Enchilada Recipe
When you’re making rich, cheesy, comforting meals like this, sometimes you just want to know generally where you stand, right? You’re getting tender chicken and bold flavor, so it’s going to be hearty! Remember, because this is a casserole and we aren’t measuring things down to the microgram, these numbers are just my best estimate based on the ingredients listed.
When I calculate nutrition for my readers, I always try to use standard pantry staples—like medium-fat Monterey Jack cheese and average flour tortillas. If you decide to swap out for low-fat sour cream or load up on extra sharp cheddar, those numbers are going to shift a little bit.
Here is the estimated breakdown per serving for this fantastic Simple Enchilada Recipe, which yields six generous adult servings:
- Serving Size: 1 serving
- Calories: 450
- Sugar: 4g
- Sodium: 650mg (This is where those canned chiles factor in, so watch your salt shaker!)
- Fat: 28g
- Saturated Fat: 16g
- Carbohydrates: 20g
- Protein: 30g
See that protein count? That’s why I love using this recipe for a Weeknight Chicken Dinner—it’s satisfying and keeps you full! Just promise me you won’t sweat the exact numbers too much. We cook for flavor and comfort, and this recipe absolutely delivers on that. If you use corn tortillas instead of flour, or lean heavy on the vegetable broth to thin it out, your final count will vary, but the joy factor stays exactly the same!
Share Your Kitchen Slang Creations
Alright, that’s it! You’ve just conquered a truly stellar, zesty, and easy-to-make meal. You took a standard concept—chicken enchiladas—and you elevated it into this magnificent, creamy, Southwest Chicken Casserole. I’m so proud of you for stepping outside the bland dinner rut!
Here at Kitchen Slang, this is my favorite part: seeing all the amazing food that comes out of your kitchens. We built this recipe together, translating professional know-how into something you can actually pull off on a Tuesday night. Now I need to hear about it!
Did those green chiles give you the perfect amount of brightness? Did the cream cheese blend smooth as silk? I really hope you loved that Authentic Green Chile Flavor just as much as I do. If you made this Creamy Green Chile Chicken Enchiladas dream come true, please do me a massive favor!
First, skip back up and leave a star rating for the recipe. Five stars if it saved your weeknight! Even just clicking those stars lets me know what’s working for you all.
Second, I always love seeing your finished plates on social media. Tag us! Show me how you garnished it. Did you add fresh avocado? Did you sneak some extra cheese on top? Use our hashtag so I can drool over your photos. It means the world when you share your successes!
If you ever have a question about the science behind the blend, or maybe you found a genius shortcut that worked even better than my instructions, don’t hesitate to reach out directly. You can always get in touch with me over at the Contact Page.
Happy cooking, everyone. Go enjoy that delicious, comforting, zesty casserole!
PrintCreamy Green Chile Chicken Enchilada Casserole

This recipe translates the bold, zesty flavor of green chiles into an easy, cheesy casserole format perfect for a weeknight dinner. You get tender shredded chicken and a rich, creamy sauce with minimal effort.
- Prep Time: 15 min
- Cook Time: 25 min
- Total Time: 40 min
- Yield: 6 servings 1x
- Category: Dinner
- Method: Baking
- Cuisine: Southwestern
- Diet: Vegetarian
Ingredients
- 2 cups cooked, shredded chicken
- 1 (10 ounce) can green chiles, diced, undrained
- 1 (4 ounce) can green chiles, diced, undrained
- 8 ounces cream cheese, softened
- 1 cup sour cream
- 1/2 cup chicken broth
- 1 teaspoon ground cumin
- 1/2 teaspoon garlic powder
- 1/4 teaspoon salt
- 1/4 teaspoon black pepper
- 12 corn or flour tortillas (6-inch)
- 2 cups shredded Monterey Jack cheese
- 1 cup shredded cheddar cheese
- Cilantro, chopped (for garnish)
Instructions
- Preheat your oven to 375 degrees F. Lightly grease a 9×13 inch baking dish.
- In a large bowl, combine the shredded chicken, both cans of diced green chiles, softened cream cheese, sour cream, chicken broth, cumin, garlic powder, salt, and pepper. Mix until everything is fully incorporated and creamy. This is your filling.
- Warm the tortillas briefly in the microwave or a dry skillet to make them pliable. This prevents tearing when you roll them.
- Dip each tortilla into a small amount of the filling mixture or a little extra sauce if you have it, then spread about 1/4 cup of the chicken mixture down the center of each tortilla. Roll the tortilla up tightly.
- Place the rolled enchiladas seam-side down in the prepared baking dish. You may need to cut some in half to fit snugly.
- Pour any remaining filling mixture evenly over the rolled tortillas.
- Combine the Monterey Jack and cheddar cheeses. Sprinkle the cheese mixture generously over the top of the enchiladas.
- Bake for 20 to 25 minutes, or until the sauce is bubbly and the cheese is melted and lightly golden brown.
- Let the casserole rest for 5 minutes before cutting and serving. Garnish with fresh cilantro.
Notes
- For a make-ahead meal, assemble the entire casserole, cover it tightly, and refrigerate for up to 24 hours before baking. Add 10 minutes to the baking time if cooking straight from the refrigerator.
- If you use rotisserie chicken, shredding it is faster and adds flavor.
- If you prefer a thinner sauce, add an extra 1/4 cup of chicken broth to the filling mixture.
Nutrition
- Serving Size: 1 serving
- Calories: 450
- Sugar: 4
- Sodium: 650
- Fat: 28
- Saturated Fat: 16
- Unsaturated Fat: 12
- Trans Fat: 1
- Carbohydrates: 20
- Fiber: 2
- Protein: 30
- Cholesterol: 90