

Oh, the summer harvest! There’s nothing quite like it, is there? All those beautiful tomatoes, peppers, and onions bursting with flavor. Now, what do you do when you have way too much to eat fresh? You preserve it, of course! And let me tell you, this homemade salsa recipe is my absolute go-to. It’s not just any recipe, either. This is a safe, tested water-bath canning recipe that I’ve relied on for years to capture that perfect garden taste. I remember one year, my garden was just overflowing with jalapeños – so many hot peppers! I was a little nervous about canning them all, but this recipe made it so straightforward and totally worry-free. Trust me, you’ll feel like a canning pro in no time with this one!
- Why You'll Love This Homemade Salsa
- Gathering Your Ingredients for Homemade Salsa
- Essential Equipment for Canning Homemade Salsa
- Step-by-Step Guide to Making Homemade Salsa
- Tips for the Best Homemade Salsa
- Ingredient Notes and Substitutions for Homemade Salsa
- Serving Suggestions for Your Homemade Salsa
- Storing and Reheating Your Preserved Salsa
- Frequently Asked Questions about Homemade Salsa
- Estimated Nutritional Information for Homemade Salsa
- Share Your Homemade Salsa Creations
Why You’ll Love This Homemade Salsa
Seriously, why is this salsa recipe a keeper? Let me count the ways!
- Super Easy Canning: It’s all done in a water bath, which is way less intimidating than you might think! We’ll walk you through every step so you feel totally confident.
- Taste of Sunshine: Using your own garden-fresh veggies means the flavor is just out of this world. Way better than anything from a store!
- So Versatile: This isn’t just for tortilla chips (though it’s amazing like that!). Think of it on tacos, eggs, grilled chicken, or even as a base for a quick chili. So many possibilities!
- The Ultimate Satisfaction: There’s just something so rewarding about opening a jar of your own homemade salsa made with love. Peak summer vibes, all year round!
Gathering Your Ingredients for Homemade Salsa
Alright, let’s talk about what you’ll need to make this amazing homemade salsa. It’s really all about fresh, good-quality ingredients, so try to get the best you can find, especially those ripe tomatoes! You’re going to want about 6 cups of chopped ripe tomatoes – that’s usually around 3 pounds. Make sure they’re chopped into nice, manageable pieces. Then, grab about 2 cups of chopped onions, which is roughly 1 pound of your favorite kind. We’ll also need 1 cup of chopped green bell peppers, which is about half a pound. For that kick, we’re using 1 cup of chopped jalapeño peppers, also about half a pound. If you like it milder, just remember to scoop out those seeds and the white pith inside – that’s where most of the heat lives!
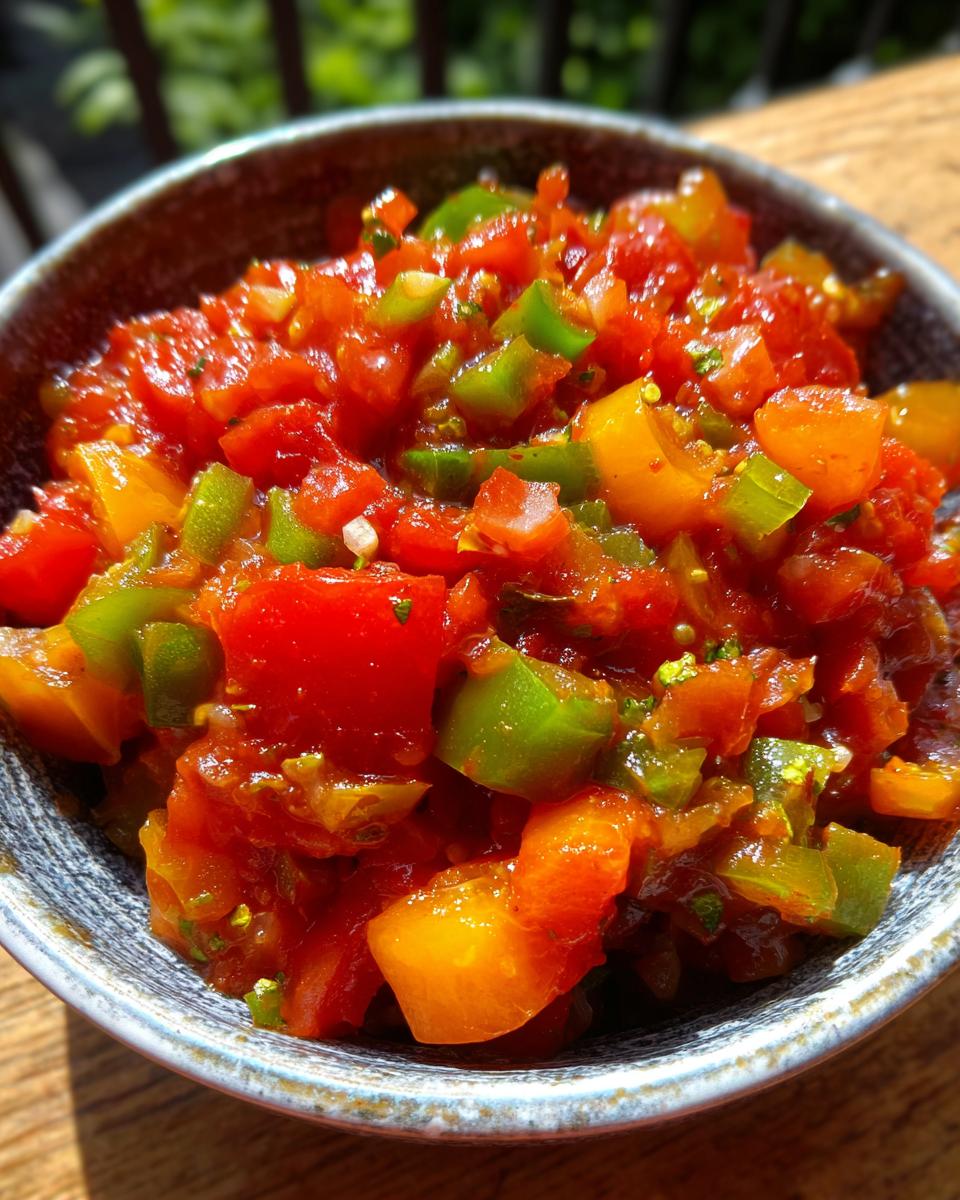
Don’t forget 4 cloves of garlic that you’ll want to mince up super fine. For that bright, zesty flavor that just screams “fresh,” we’re adding 2 tablespoons of fresh lime juice. And for our spices, we’ll use 1 teaspoon each of ground cumin and dried oregano. A little salt is a must for bringing all those flavors together; start with 1/2 teaspoon, but you can always add more later to taste. And if you’re feeling brave and want some extra heat, a pinch of cayenne pepper – about 1/4 teaspoon – will do the trick!
Essential Equipment for Canning Homemade Salsa
Okay, so having the right gear makes all the difference when you’re canning your delicious homemade salsa. No need for fancy gadgets, honest! You’ll definitely want a big pot – a water bath canner is ideal if you have one, but any large, deep pot that can hold your jars and cover them with water will work. Make sure it has a rack on the bottom so the jars aren’t sitting directly on the pot’s base. Plus, you’ll need clean canning jars (pint-sized are perfect for this recipe!), new lids, and rings. A jar lifter is super handy for safely moving those hot jars in and out of the boiling water. And of course, a ladle for getting that gorgeous salsa into the jars and a funnel can be really helpful, too.

Step-by-Step Guide to Making Homemade Salsa
Okay, team, let’s get this party started! Making your own homemade salsa and canning it might sound a little daunting at first, but trust me, it’s totally doable and so rewarding. We’ll break it down, step by step, so you can feel like a total kitchen pro. Just follow along, and you’ll have jars of deliciousness ready to go!
Preparing Your Canning Supplies for Homemade Salsa
First things first, we gotta get our canning station ready. Grab your water bath canner and fill it about halfway with water – we’ll heat this up later. Make sure all your jars, lids, and rings are sparkling clean. I like to run mine through the dishwasher or give them a good scrub with hot, soapy water. For the jars, it’s best to keep them hot so they don’t crack when we add the hot salsa. You can put them in your canner with the water or in a sink of hot water. And remember, always use new canning lids for a good seal!
Cooking the Chunky Salsa Mixture
Now for the fun part – making the salsa! In your big pot, toss in those chopped tomatoes, onions, bell peppers, jalapeños, and minced garlic. Add in the lime juice, cumin, oregano, salt, and that optional cayenne pepper if you’re feeling adventurous. Give it all a good stir to make sure everything is nicely combined. We want to bring this whole concoction to a nice, rolling boil over medium-high heat. Once it’s bubbling away, turn the heat down to low and let it simmer for a good 10 minutes. Stir it often during this time so nothing sticks to the bottom and burns. You’ll start to smell all those amazing aromas filling your kitchen – that’s the sign of good things to come!

Filling and Sealing Jars for Water Bath Tomato Salsa
Alright, time to get this yummy salsa into jars! Carefully ladle the hot salsa into your hot jars. Leave about a 1/2 inch of space at the top – this is called headspace, and it’s super important for a good seal. Now, take a chopstick or a little plastic tool and gently run it around the inside of the jar to get rid of any air bubbles. Seriously, get all those little trapped air pockets out! Wipe the rims of the jars really well with a clean, damp cloth so there’s no salsa gunk sticking to them. Then, just pop on your new lids and screw on the rings until they’re just fingertip tight. Not too tight, just snug – the lid needs a little wiggle room to let air escape during processing.
Processing and Cooling Your Homemade Salsa Jars
Here comes the actual canning part! Carefully lower your filled jars into the simmering water bath canner using your jar lifter. Make sure the water covers the jars by at least an inch or two. Pop the lid on your canner and bring the water back up to a full rolling boil. Once it’s boiling hard, start your timer for 15 minutes. If you live at a higher altitude, you’ll need to add a little extra processing time, so be sure to check those guidelines! After the 15 minutes are up, turn off the heat, carefully remove the canner lid, and let the jars sit in the hot water for another 5 minutes before you lift them out. Place the jars on a wire rack or a towel-lined counter, spaced a little apart, and let them cool undisturbed for 12 to 24 hours. You’ll start hearing those satisfying little *pop* sounds as the lids seal!

Tips for the Best Homemade Salsa
Alright, let’s talk about tweaking this homemade salsa to be absolutely perfect for *you*. When I first started canning, I was all about following the recipe to the letter, but over the years, I’ve learned a few little tricks. For starters, if you like things caliente, don’t be shy with those jalapeños and that optional cayenne pepper! You can even add a pinch more of the cayenne if you’re brave. Remember, you can always add more heat, but you can’t take it away!
Now, about texture – this recipe gives you a lovely chunky salsa, which I personally adore. But if you’re more of a smooth salsa person, give some of your chopped ingredients a quick pulse in the food processor *before* you cook them. Just a few quick whirs! You don’t want to puree it into a liquid, just break it down a bit. And always, always, always double-check those canning safety rules. It’s super important to make sure your jars seal properly, especially since this is going into your pantry. Trust me, a little extra care here means peace of mind down the road!
Ingredient Notes and Substitutions for Homemade Salsa
Let’s chat a little more about these ingredients, shall we? The tomatoes are key here! While I love a good ripe Roma or Early Girl for this homemade salsa, honestly, any ripe, flavorful tomato will do. Just make sure they’re nice and chopped. If you’re not a fan of bell peppers, you can absolutely skip them or swap them for more tomatoes if you like. And for the heat – if jalapeños are too much for you, go for a milder pepper like a poblano, or just use fewer jalapeños and remove all the seeds and membranes. You can always add that cayenne pepper for a controlled kick later!
Serving Suggestions for Your Homemade Salsa
So you’ve spent all that time making and canning your delicious homemade salsa, now what?! Oh, honey, the possibilities are endless! Of course, it’s absolutely divine with a big bowl of tortilla chips – perfect for game day or just a cozy night in. But don’t stop there! This salsa is fantastic spooned over tacos, burritos, or even scrambled eggs first thing in the morning. It adds this amazing fresh kick to grilled chicken or fish, too. Seriously, this salsa makes everything better! And if you’re using one of those handy meal delivery companies, having a jar of this homemade goodness on hand is a total game-changer for elevating your pre-portioned meals.
Storing and Reheating Your Preserved Salsa
Once your beautiful jars of homemade salsa have cooled and sealed, they’re ready for the pantry! Store them in a cool, dark place, like a cupboard or pantry shelf. They’ll stay good for at least a year, honestly, but I find the flavor is best within about 6 to 8 months. If a jar didn’t seal properly (you’ll know because the lid might flex when you press it), don’t risk it! Just pop that one in the fridge and use it up within a few weeks. And reheating? You usually don’t need to for salsa! It’s best served cold or at room temperature. Just grab a jar, pop the lid, and enjoy that taste of summer!
Frequently Asked Questions about Homemade Salsa
Got questions about whipping up this delicious homemade salsa? I get it! Canning can feel a bit technical, but that’s what I’m here for – to make it as easy peasy as possible. Let’s dive into some common things people ask:
Is this a safe canning salsa recipe?
Absolutely! We’re using a tried-and-true water-bath canning method here. It’s been tested to ensure the acidity is just right for safe preservation on your shelf. Just be sure to follow the steps exactly, especially when it comes to the processing time. You want that perfect, perfectly safe seal every time!
How can I make my homemade salsa spicier?
If you love a little fire in your salsa, you’ve come to the right place! For extra heat in this spicy garden salsa, don’t be afraid to add more jalapeños. Just remember to keep the seeds and membranes in for maximum heat! You can also bump up the cayenne pepper a bit, or even add a dash of hot sauce when you’re cooking the mixture. Taste as you go, and adjust until it’s just how you like it!
Can I make a smoother version of this chunky salsa preserve?
You sure can! While I love the satisfying chunks in this chunky salsa preserve, it’s super easy to make it a bit smoother. Before you cook the salsa, just take about half of your chopped ingredients (tomatoes, onions, peppers) and pulse them a few times in a food processor. Don’t go crazy and make it totally smooth – we still want a *little* texture! Then, just add those pulsed ingredients back into the pot with the rest of the chunky stuff before simmering and canning.
Estimated Nutritional Information for Homemade Salsa
Now, looking at the numbers for this delicious homemade salsa, a typical serving (about 1/4 cup) is pretty light! You’re looking at around 30 calories, with just a few grams of carbs and a tiny bit of fiber. There’s virtually no fat or protein to speak of, which is pretty great, right? Keep in mind, these are just estimates, because, you know, gardens vary and everyone chops things just a little bit differently! Think of it as a healthy, flavorful way to enjoy those summer veggies.
Share Your Homemade Salsa Creations
So, you’ve made it! You’ve got beautiful jars of your own homemade salsa, ready to be enjoyed. I’d absolutely LOVE to hear how it turned out for you! Did you add extra cayenne? Did you serve it with a mega batch of tacos? Did your garden totally explode with peppers this year? Drop a comment below and let me know all your salsa adventures! I’m always buzzing to hear your stories and tips. Don’t forget to check out our disclaimers and privacy policy, and if you have any questions after reading, feel free to reach out!
PrintHomemade Water-Bath Salsa
A safe and tested water-bath canning recipe for chunky, spicy garden salsa.
- Prep Time: 30 min
- Cook Time: 25 min
- Total Time: 55 min
- Yield: About 6 pints 1x
- Category: Preserves
- Method: Water Bath Canning
- Cuisine: American
- Diet: Vegetarian
Ingredients
- 6 cups chopped ripe tomatoes (about 3 lbs)
- 2 cups chopped onions (about 1 lb)
- 1 cup chopped green bell peppers (about 1/2 lb)
- 1 cup chopped jalapeño peppers (about 1/2 lb, seeds removed for less heat)
- 4 cloves garlic, minced
- 2 tablespoons fresh lime juice
- 1 teaspoon ground cumin
- 1 teaspoon dried oregano
- 1/2 teaspoon salt, or to taste
- 1/4 teaspoon cayenne pepper (optional, for extra heat)
Instructions
- Prepare your water bath canner, jars, lids, and rings. Ensure everything is clean and sterilized.
- In a large pot, combine chopped tomatoes, onions, green bell peppers, jalapeño peppers, and minced garlic.
- Add lime juice, cumin, oregano, salt, and cayenne pepper (if using). Stir well to combine.
- Bring the mixture to a boil over medium-high heat, stirring occasionally.
- Once boiling, reduce heat to low and simmer for 10 minutes, stirring frequently.
- Ladle the hot salsa into hot jars, leaving 1/2 inch headspace. Remove air bubbles.
- Wipe jar rims clean and place lids and rings on. Tighten rings fingertip tight.
- Process jars in the boiling water bath canner for 15 minutes (adjust for altitude if necessary).
- Remove jars from canner and let them cool on a wire rack for 12-24 hours. Check seals.
Notes
- For a smoother salsa, you can pulse some of the ingredients in a food processor before cooking, but do not puree.
- Adjust the amount of jalapeños and cayenne pepper to control the spice level.
- Always follow tested canning guidelines for safety.
- This recipe is great for meal planning and can be used with various meal delivery services.
Nutrition
- Serving Size: 1/4 cup
- Calories: 30
- Sugar: 4g
- Sodium: 150mg
- Fat: 0g
- Saturated Fat: 0g
- Unsaturated Fat: 0g
- Trans Fat: 0g
- Carbohydrates: 7g
- Fiber: 1g
- Protein: 1g
- Cholesterol: 0mg