
Look, I get it. You get home from a long day, you want something delicious—maybe chicken, maybe tofu—and you grab that bottle of teriyaki sauce off the shelf. It’s convenient, sure, but nine times out of ten, it tastes like overly sweet syrup with a hint of soy. That’s the gap I talk about—the gap between needing dinner fast and actually wanting it to taste incredible.
Today, we’re ditching the bottled stuff for good. I’m going to show you how to whip up the absolute best homemade teriyaki sauce right on your stovetop. This isn’t some complicated, hours-long reduction. We’re getting that rich, glossy, perfectly balanced flavor—sweet, savory, and thick enough for glazing—done in literally 15 minutes. Trust me, learning this simple technique translates your everyday cooking into something restaurant-worthy. It’s time to learn the lingo!
- Why You Need This Quick Homemade Sauce Over Bottled Options
- The Essential Ingredients for Perfect Homemade Teriyaki Sauce
- How to Make Homemade Teriyaki Sauce: A 15-Minute Stovetop Method
- Versatility: Using Your Quick Homemade Sauce as a Glaze or Marinade
- Tips for Success When Making Homemade Teriyaki Sauce
- Storage and Reheating Instructions for Your From Scratch Sauce Recipe
- Frequently Asked Questions About Homemade Teriyaki Sauce
- Estimated Nutritional Data for This Homemade Teriyaki Sauce
- Share Your Weeknight Asian Flavor Boost
Why You Need This Quick Homemade Sauce Over Bottled Options
If you’re still reaching for that bottle of generic brown glop, you are missing out! We’re talking about flavor here, and honestly, nothing beats a fresh batch of homemade teriyaki sauce. It’s my favorite little secret for making weeknight food feel special.
When you make it from scratch, you get real control, and that’s what makes it Better Than Store Bought Teriyaki. Here’s the deal:
- It’s lightning fast. Seriously, 15 minutes for a sauce you can use immediately or save for later.
- You control the sugar! Bottled versions are often way too sweet. We balance it perfectly for that undeniable Sticky Sweet and Savory Sauce quality.
- The freshness! That little bit of ginger and garlic we use jumps right out of the pan. You can’t get that from a bottle sitting on a shelf somewhere.
It’s a game-changer for upgrading everything from your veggies to your simple chicken breast. Check out how easy it is to make a better dipping sauce next, too!
The Essential Ingredients for Perfect Homemade Teriyaki Sauce
This is the core of the flavor transformation. When people ask me how to make a fantastic Easy Teriyaki Sauce Recipe, I tell them it’s all about using the right pantry staples and treating them with respect. If you have these few things on hand, you’re practically guaranteed a flawless result.
Here’s what you need to pull together about a cup of sauce:
- 1/2 cup low sodium soy sauce (Using low sodium is key! It lets the sugar and ginger really shine without making the whole thing taste like a salt lick.)
- 1/2 cup water (Just plain water to give us some volume.)
- 1/4 cup brown sugar, packed (Make sure it’s packed when you scoop it!)
- 2 tablespoons mirin (More on this in a second.)
- 1 teaspoon grated fresh ginger (Don’t skimp here. Fresh ginger is where you get that bright, authentic punch.)
- 1 clove garlic, minced (Mince it fine—we don’t want big chunks unless you’re aiming for a very rustic texture.)
- 1 tablespoon cornstarch
- 1 tablespoon cold water (This is for our magic thickener.)
See? All stuff you probably have sitting around, which makes this a great baking staple for savory meals, too!
Ingredient Notes and Substitutions
Let’s talk about those two tricky spots: the mirin and the cornstarch. If you don’t have mirin on hand, don’t panic! Mirin is essentially sweet rice wine, and you can easily swap it out with dry sherry if that’s what you’ve got. It gives you that slightly acidic sweetness we need.
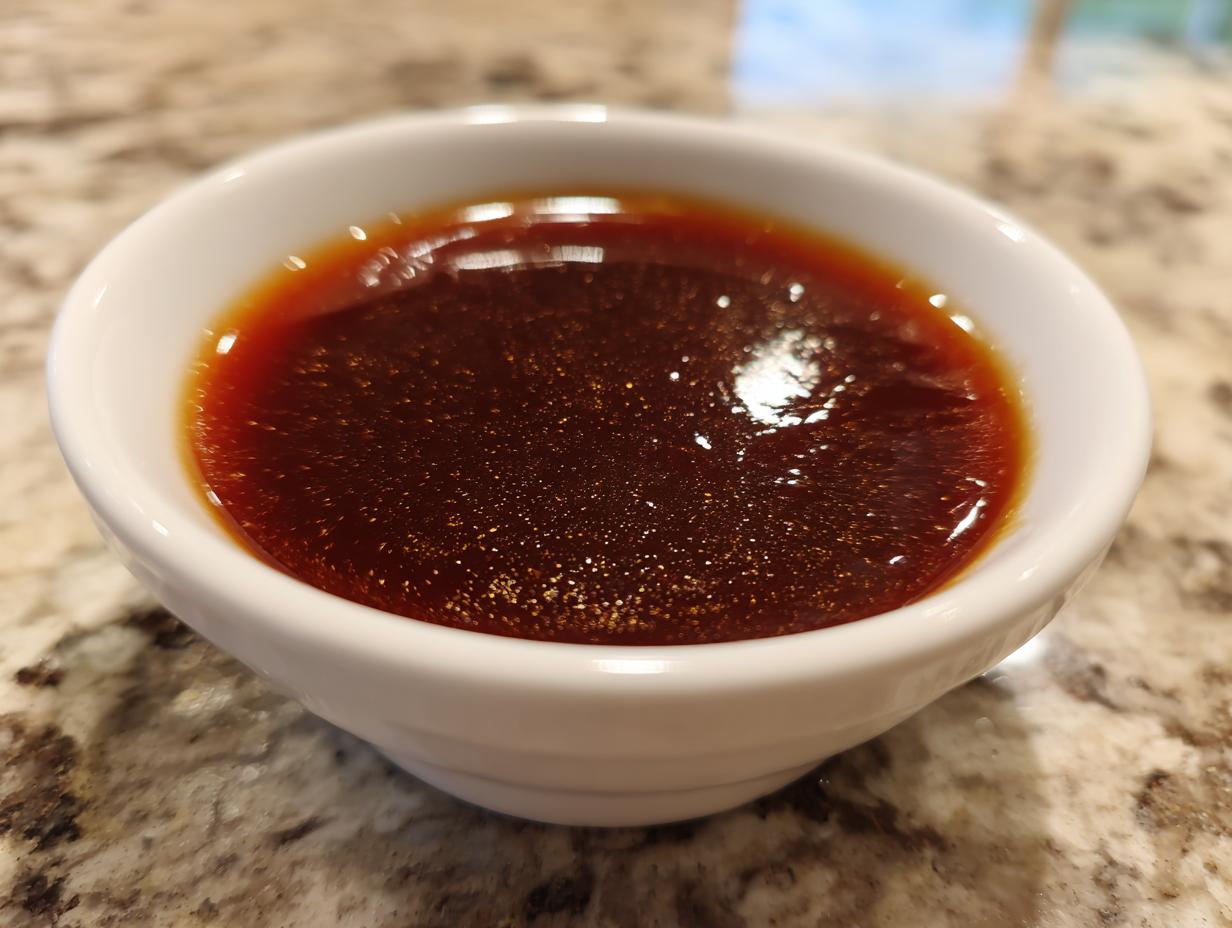
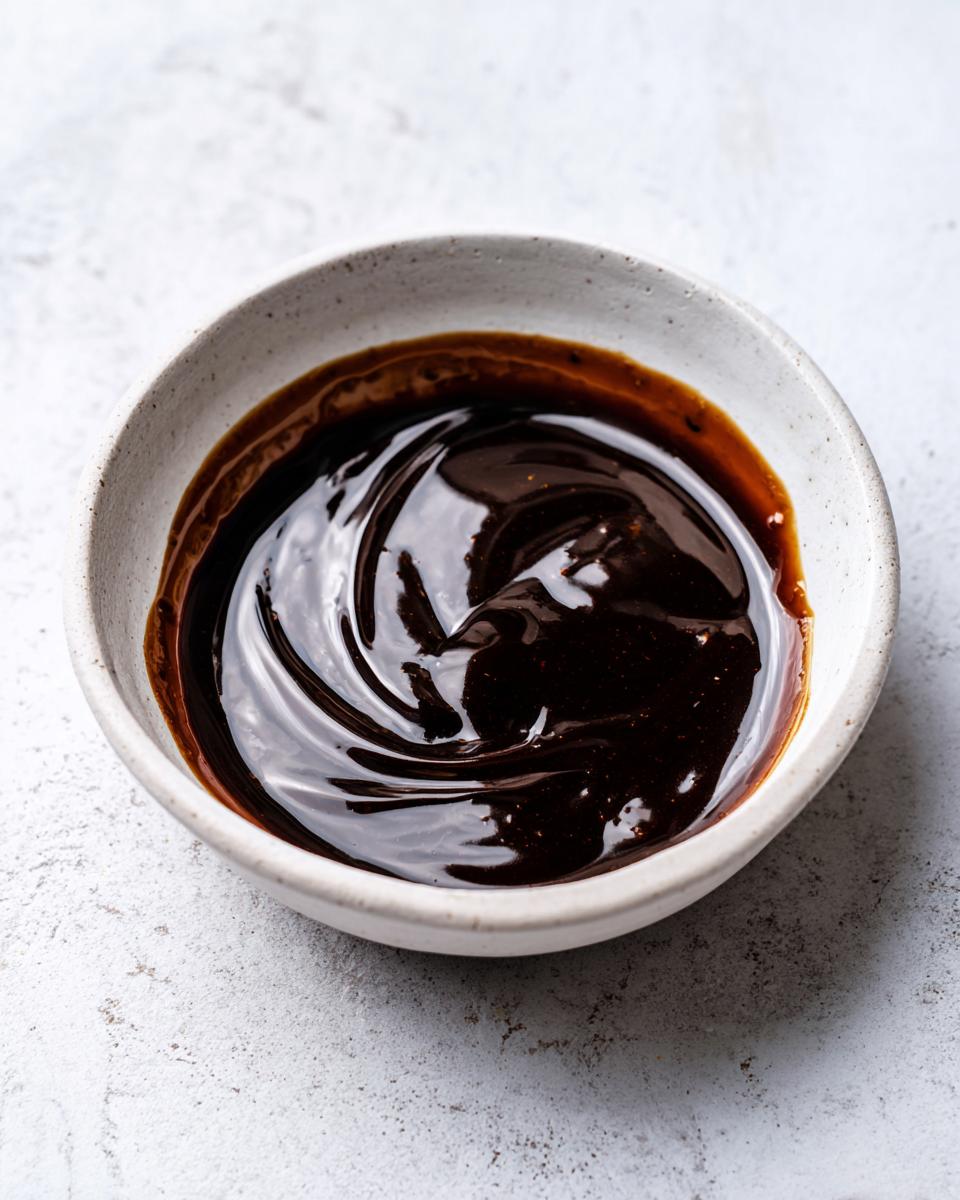
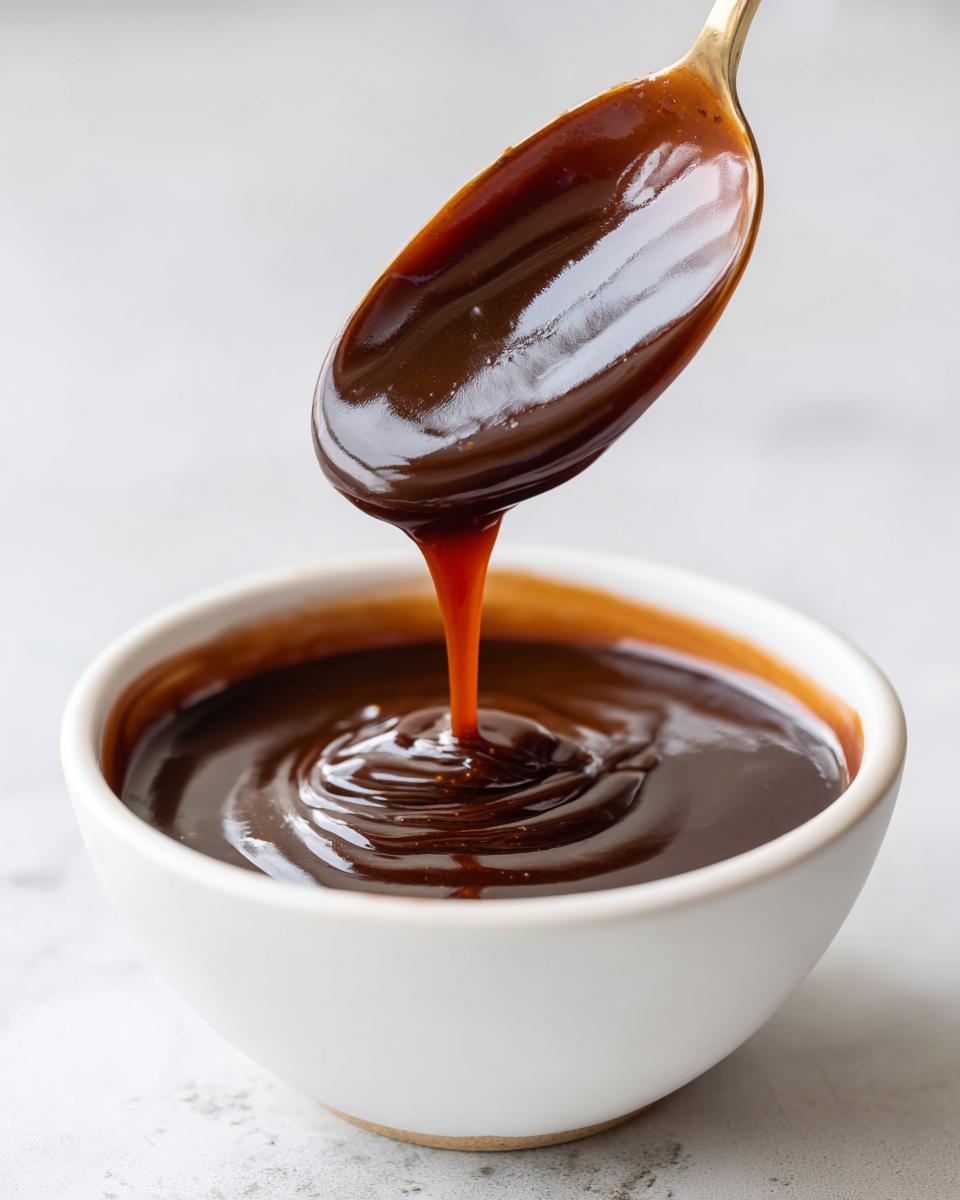
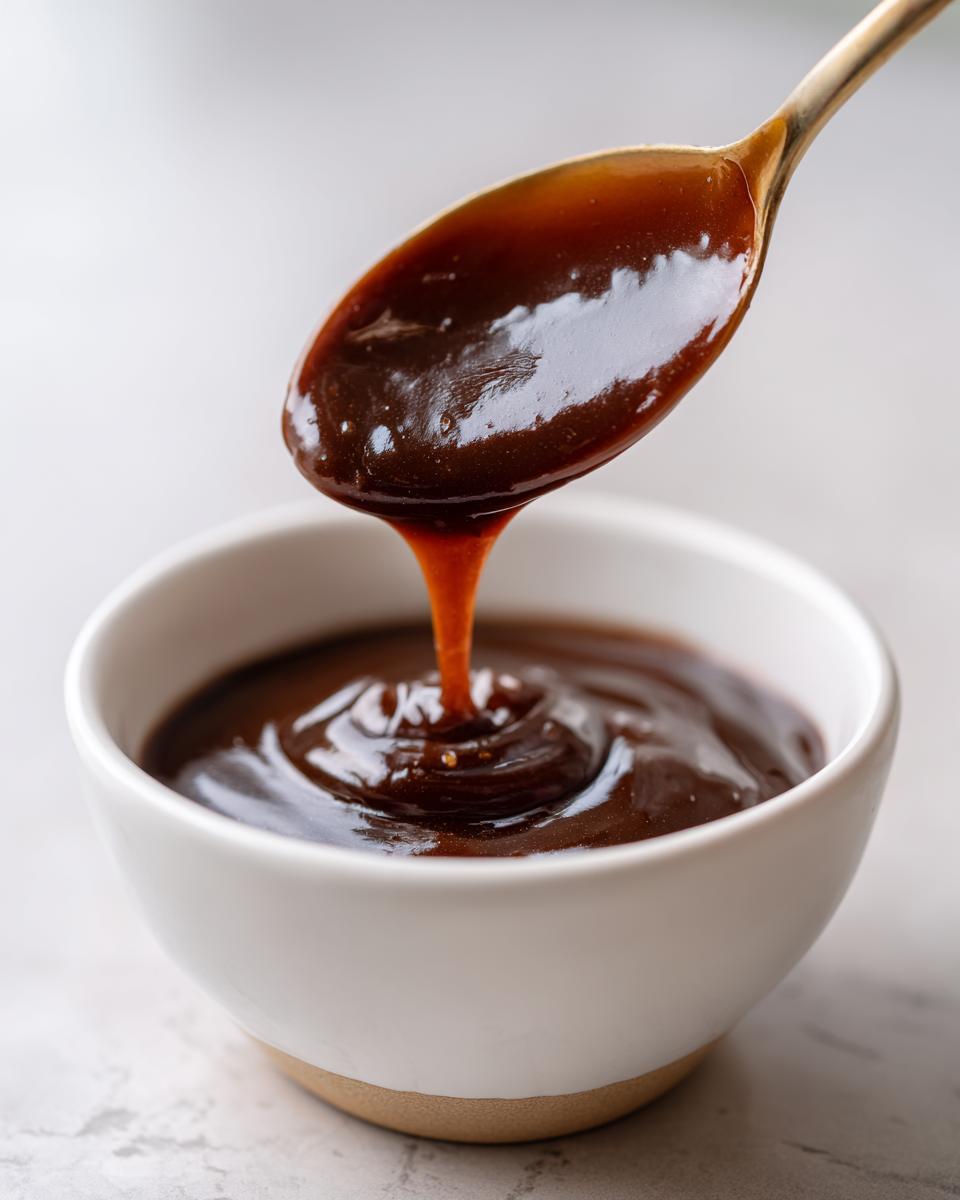
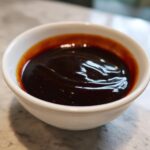
Now, for that gorgeous texture: the cornstarch. We mix it with one tablespoon of cold water *before* we add it to the simmering sauce. That mixture is called a slurry. Whisking in that slurry slowly is non-negotiable if you want that professional, glossy finish. It instantly turns our liquid mixture into a beautiful, clinging Thick Teriyaki Glaze that coats your chicken perfectly.
Remember what I said about ginger? Using pre-ground ginger powder just tastes dusty. Freshly grated ginger? That’s the flavor boost that shouts, “I made this myself!”
How to Make Homemade Teriyaki Sauce: A 15-Minute Stovetop Method
Okay, this is where the magic happens, and why I keep flashing that 15-minute window in your face. This entire process moves fast, so have your cutting board cleared and your whisk ready. Once you learn how to make homemade teriyaki sauce this quickly, you’ll never turn back. We’re getting that rich, glossy, perfectly balanced flavor—sweet, savory, and thick enough for glazing—done in literally 15 minutes. This simple technique translates your everyday cooking into something restaurant-worthy.
It’s all about layering the flavors correctly before we hit it with the thickener we talked about earlier. If you want the glossiest sauce ever, pay attention to the timing coming up. It’s shockingly efficient, just like this great family recipe I saw shared online—you should take a peek at their method, too!
Building the Base of Your Homemade Teriyaki Sauce
First things first: get all your liquids—the soy sauce, the water, the mirin—into that small saucepan. Toss in your brown sugar, that finely minced garlic, and that beautiful fresh ginger. Put it over medium heat. Now, stir it constantly until you see the sugar completely dissolve. Don’t rush this simmer! You want the sugar fully melted into the liquids before anything else happens. Once it’s simmering gently, give it a little taste test. Is it savory enough? Sweet enough? This is your last chance to adjust the core flavor profile before we lock it in with the starch.
Achieving the Perfect Thick Teriyaki Glaze Consistency
While that mixture is warming up, quickly whisk your cornstarch and that cold tablespoon of water together in a tiny side bowl—that’s your slurry. Once your sauce base is simmering nicely, we go slow. Whisk your slurry into the simmering sauce right in the pan, and I mean slowly. Pouring it in all at once guarantees you get lumps, and nobody wants a lumpy glaze! Keep stirring constantly over the heat. It only takes about one to two minutes for the sauce to go from thin to a beautiful, spoon-coating consistency that makes the perfect Thick Teriyaki Glaze. Pull it right off the heat the second it coats the back of your spoon. If you keep cooking it, the sugar can burn, and that would be a tragedy!
For more ways to master quick, flavorful cooking, you should check out my guide to making desserts in a pinch, too!
Versatility: Using Your Quick Homemade Sauce as a Glaze or Marinade
This is the part where this homemade teriyaki sauce really earns its spot in your weekly rotation. Because we made it thicker and flavor-packed, it’s not just a singular-use product like most of those bottles on the shelf. It’s three things in one, which is the kind of efficiency line cooks live for!
You can use it thick enough to cling beautifully, or thin it out a touch depending on what you’re doing. It’s the perfect DIY Teriyaki Marinade ingredient, or it can be the star of your next quick dinner.
Best Uses for Your Sticky Sweet and Savory Sauce
If you’re glazing chicken thighs or salmon, you want that sugar to grab onto the surface and caramelize without burning. That’s why we simmered it until it was just right. Let the meat cook most of the way, then brush on the sauce during the last few minutes of heat—it creates this perfect, crackly char. Seriously, try putting this on chicken wings; you won’t regret making a big batch.

For a weekday stir-fry, this works perfectly as your main Asian Sauce Glaze base. Pour it in toward the very end, toss everything quickly, and you’re done. You want to use it as a true marinading agent? Go for it! Just know that if you use it as a marinade, you need to let things sit longer—think at least an hour for chicken breasts, maybe three for a tougher cut. That longer soak ensures the flavor penetrates deeper than just sitting on the surface while cooking.
Don’t forget the veggies! Roasted broccoli or crisp tofu tossed in this sauce after they come out of the oven? Amazing flavor boost. If you want more ideas on maximizing marinades, I’ve got guides on everything from pork chops to carne asada that might inspire your next cooking session. This recipe is such a staple, I saw similar praise over at Lone Recipes.
Tips for Success When Making Homemade Teriyaki Sauce
Making this homemade teriyaki sauce is easy, but like any good stovetop recipe, a few small things can go wrong if you rush the process. I’ve learned these lessons the hard way over too many batches that stuck to the bottom of the pan! These are my insider tips to ensure you nail that flavor and that glossy texture every single time.
First, let’s talk about scorching. Brown sugar loves to burn if you leave it unattended. When you’re dissolving the sugar in the liquids, keep that heat at medium, medium-low max. You want it fully melted, but you don’t want it actively bubbling hard yet. If you smell anything remotely acrid or smoky, pull it off the heat immediately and whisk in a tiny splash of water to cool things down. Burnt sugar tastes terrible, and there’s no fixing it once it darkens!
The second major pitfall is getting that perfect thickness. Remember that cornstarch slurry? If you try to use hot water instead of cold water to mix your starch, it can instantly seize up and turn into a gummy blob right in your side bowl. Always use cold water; it keeps the cornstarch particles suspended until they hit the simmering heat. And when you add it, you *have* to stir constantly. The sauce will look thin for a split second, and then BAM—it thickens up incredibly fast. Stop stirring and pull it off the heat as soon as that spoon is coated. If you wait even 30 seconds too long, you’ll have sticky cement instead of a beautiful sauce. It’s a fine line, but trust me, you’ll feel the difference immediately!
Storage and Reheating Instructions for Your From Scratch Sauce Recipe
One of the best parts about making a big batch of homemade teriyaki sauce is that you don’t have to use it all right away! Unlike those bottled versions that go bad unless you refrigerate them immediately, this fresh stuff lasts beautifully, giving you a flavor boost ready for multiple weeknight meals.
Go ahead and cool whatever you don’t use right away completely. Then, tuck it into an airtight container. I promise, you can totally keep this in the fridge for up to two weeks. That’s two whole weeks of instant flavor for stir-fries or dipping stuff!
Now, here’s a little pro tip for when you pull that chilly sauce out to use it later: it’s going to be thick—probably *really* thick. That’s just the cornstarch setting up in the cold, which is totally normal for a good, *thick* glaze. If it’s stiff and won’t pour, don’t even stress about it.
To revive it, just take out the amount you need, plop it in a tiny saucepan, and add maybe a teaspoon or two of water per half cup of sauce. Heat it gently over low heat, whisking as it warms up. It’ll loosen right back up to that perfect consistency you loved when you first made it. Keep an eye on it so it doesn’t boil, but honestly, it’s so quick you’ll probably be drizzling your chicken before the kettle even whistles! If you love versatile dips, make sure you also check out my recipe for homemade guacamole.
It’s just another reason why making your own is superior; you get to control the quality and the storage. See how simple that is? You can find other great, easy recipes over at The Modern Proper, too!
Frequently Asked Questions About Homemade Teriyaki Sauce
I always get emails asking the same things after people try this quick recipe for the first time. Honestly, that’s a good sign! It means you’re thinking critically about your ingredients, which is exactly what we want here at Kitchen Slang. Let’s clear up any lingering questions about mastering this Easy Teriyaki Sauce Recipe.
Can I make this a Vegan Teriyaki Recipe?
Yes, you absolutely can! Most of the ingredients we use—the soy sauce, sugars, ginger, garlic, and cornstarch—are naturally vegetarian. The only thing you always want to double-check, though it’s almost never an issue unless you’re using very specialized sauces, is your soy sauce. As I mentioned in the notes, just make sure your soy sauce doesn’t have any hidden non-vegan additives. Otherwise, this whole batch is a fantastic, rich, and Healthy Homemade Asian Sauce that works perfectly for tofu or vegetable stir-fries!
How do I adjust the spice level in this Quick Homemade Sauce?
That’s my favorite question! This recipe gives you that classic savory profile, but sometimes you just need a little fire, right? If you want to turn up the heat without completely changing the flavor profile, you have two easy options. The best one, which I listed in the notes, is adding half a teaspoon of red pepper flakes right along with your soy sauce and water at the very beginning. They simmer in, infuse the sauce, and give you a pleasant background warmth. You can also drizzle in a tiny bit of sriracha right before you take the finished sauce off the heat. Taste as you go; you want heat, not pain!
If you’re looking for some great sides to scoop up any extra sauce, you absolutely must try my recipe for easy garlic naan bread—it’s perfect for mopping up every last drop!
Estimated Nutritional Data for This Homemade Teriyaki Sauce
Look, I’m a cook, not a scientist, so I always want to give you the heads-up that these numbers are estimates. We’re dealing with pantry staples here, and the exact sodium content depends heavily on the brand of soy sauce you grab. But transparency is part of that whole ‘trust’ thing we talked about, right? It helps you understand what you’re putting into your body when you skip the bottled stuff.
This data is based on the full yield of the recipe (about 1 cup) divided into 8 servings, meaning we are looking at the nutrition for a 2-tablespoon serving size. This is useful if you’re counting things out for your healthy lunch recipes later in the week!
Here’s the breakdown for two tablespoons of this glorious, freshly made sauce:
- Serving Size: 2 tablespoons
- Calories: 55
- Sugar: 9g (See? Much better than some of those syrups!)
- Sodium: Approximately 450mg (This is why we use low-sodium soy sauce!)
- Fat: 0g
- Carbohydrates: 13g
- Protein: 1g
- Cholesterol: 0mg
If you use a regular soy sauce instead of low-sodium, that sodium count is going to jump up considerably, so keep that in mind if you’re watching your salt intake. Otherwise, for a flavor-packed sauce made from scratch, I think those numbers are pretty solid!
Share Your Weeknight Asian Flavor Boost
So, that’s it! You’ve got the lingo, you’ve got the timing, and you now possess the secret to the thickest, most flavorful homemade teriyaki sauce that will make every takeout imitation taste sad. Stop letting those sad, overly sweet bottles gather dust in your fridge door—you can do better, and you just proved it!
Now I want to see what you’re doing with this magic potion! Seriously, go make a batch right now. Whether you’re using it as a killer Glazing Sauce for Chicken tonight, tossing it with rice noodles, or pouring it over crispy tofu, I want the scoop. Did you find the perfect balance of sweet and savory for your taste? Did you use it on salmon?
Don’t be shy! Leave me a rating below—tell me how many stars this recipe deserves—and drop a comment letting me know which dish you leveled up first. Knowing that you’re out there cooking with confidence and throwing down homemade flavor instead of relying on questionable store brands is all the motivation I need. Go on, get saucy!
PrintThe Best 15-Minute Homemade Teriyaki Sauce: Sweet, Savory, and Ready for Glazing
Stop buying bottled sauce. You can make this easy homemade teriyaki sauce from scratch in 15 minutes. It is better than store bought and perfect as a glaze, marinade, or stir fry sauce.
- Prep Time: 5 min
- Cook Time: 10 min
- Total Time: 15 min
- Yield: About 1 cup 1x
- Category: Condiment
- Method: Stovetop Simmering
- Cuisine: Japanese
- Diet: Vegetarian
Ingredients
- 1/2 cup low sodium soy sauce
- 1/2 cup water
- 1/4 cup brown sugar, packed
- 2 tablespoons mirin (or substitute with dry sherry)
- 1 teaspoon grated fresh ginger
- 1 clove garlic, minced
- 1 tablespoon cornstarch
- 1 tablespoon cold water (for slurry)
Instructions
- Combine the soy sauce, 1/2 cup water, brown sugar, mirin, ginger, and garlic in a small saucepan.
- Place the saucepan over medium heat and bring the mixture to a simmer, stirring until the sugar dissolves completely.
- In a small bowl, whisk together the cornstarch and 1 tablespoon of cold water to create a slurry.
- Once the sauce is simmering, slowly whisk in the cornstarch slurry.
- Continue to cook, stirring constantly, until the sauce thickens enough to coat the back of a spoon, about 1 to 2 minutes. This creates your thick teriyaki glaze.
- Remove the sauce from the heat. Use immediately as a glaze or marinade, or cool completely before storing.
Notes
- You can make this sauce vegan by ensuring your soy sauce does not contain non-vegan additives, though most standard brands are fine.
- For a spicier kick, add 1/2 teaspoon of red pepper flakes when simmering the sauce.
- Store any leftover homemade teriyaki sauce in an airtight container in the refrigerator for up to two weeks.
Nutrition
- Serving Size: 2 tablespoons
- Calories: 55
- Sugar: 9
- Sodium: 450
- Fat: 0
- Saturated Fat: 0
- Unsaturated Fat: 0
- Trans Fat: 0
- Carbohydrates: 13
- Fiber: 0
- Protein: 1
- Cholesterol: 0