

Okay, let’s talk about the holidays. Doesn’t the thought of making a full, standard-sized pecan pie sometimes feel like climbing a smooth glass wall? You have to crimp the edges perfectly, pray the filling doesn’t run everywhere when you slice it, and then there’s the *timing*. It’s just too much fuss when you’re juggling everything else. That’s why I translated this classic Southern favorite into the easiest, perfectly portioned **mini pecan pies** you’ll ever touch. We’re ditching the intimidation factor here. This recipe translates that rich, gooey, nutty flavor you crave into simple steps using store-bought dough. Trust me, these are the little moves that make you look like a total pro without breaking a sweat in the kitchen.
- Why These Are the Best Mini Pecan Pies for Your Next Gathering
- Gathering Ingredients for Your Mini Pecan Pies
- The Step-by-Step Guide to Making Easy Pecan Pie Bites
- Expert Tips for Perfect Mini Pecan Pies Every Time
- Storing and Serving Your Homemade Bite Size Pies
- Frequently Asked Questions About Mini Pecan Pies
- Nutritional Snapshot of These Quick Pecan Dessert Recipe Servings
- Share Your Kitchen Slang Success
Why These Are the Best Mini Pecan Pies for Your Next Gathering
Listen, I love a big, beautiful, traditional pie. I really do. But when you’re hosting, slicing one perfectly for a dozen people is just asking for stress. These mini pecan pies are the answer to that holiday scramble. They deliver all the buttery, gooey goodness without ever requiring a pie server. They are designed for confidence and ease, which is what Kitchen Slang is all about.

- You get that big, classic pecan pie flavor packed into a perfect, two-bite shell.
- They look incredible lined up on a dessert platter—instant showstopper.
- Cleanup is so much easier than scrubbing a sticky glass pie dish!
If you’re looking for something simpler next time, maybe check out my take on a pecan pie dump cake when you’re serving a crowd!
Perfect Portion Control and Presentation
Forget the struggle of wrestling a warm slice out of the pan. These individual treats mean everyone gets a perfect edge piece every single time. They’re stable, they travel well, and they are the ideal grab-and-go dessert for large parties. They just look neat and organized on any holiday table, don’t they?

Speed and Simplicity: The No Fuss Pecan Pies
The main translation I made here was simple: ditching homemade crust. We are using refrigerated pie crust, and there is zero shame in that. That’s professional efficiency right there—taking a component that takes ages and streamlining it so you can focus on the filling. That’s how we make **no fuss pecan pies** that still taste absolutely legendary.
Gathering Ingredients for Your Mini Pecan Pies
Alright, let’s talk about what you need to make exactly twelve of these dream **mini pecan pies**. The list is short, which is the beauty of this whole operation! Remember, our biggest shortcut—the thing that keeps this from turning into a whole project—is that refrigerated pie dough. It means we get fantastic, buttery crusts every time without dirtying a single countertop for rolling.
Ingredient Clarity and Preparation
Here’s the line-up for your sticky, nutty centers. Make sure you grab light corn syrup—that’s what gives us that classic gooey texture we’re aiming for:
- 1 package (14.1 ounces) refrigerated pie crusts (that’s two crusts total)
- 1 cup chopped pecans, plus extra for topping
- 1/2 cup packed light brown sugar
- 1/4 cup unsalted butter, melted
- 2 large eggs, lightly beaten
- 1/4 cup light corn syrup
- 1 teaspoon vanilla extract
- 1/4 teaspoon salt
That’s it! See? It’s barely a list. You’re already halfway there.
The Step-by-Step Guide to Making Easy Pecan Pie Bites
This is where the magic—and the speed—happens! Making a full pie is one thing, but assembling these little guys is incredibly fast. You’ll have these ready for the oven before you even finish brewing your coffee. Just follow these steps, and you’ll see the whole process come together quickly. For timing, get your oven ready to go at 350 degrees Fahrenheit right away.
We’re following the instructions detailed here exactly, but I’m adding my little notes—the kitchen slang—to make sure you nail that gooey center every single time.
Preparing the Crusts for Your Mini Pecan Pies
First things first: we need to tame that refrigerated pie dough. Take one package out, and don’t worry if the circles aren’t perfectly round when you unroll them. Just press the dough gently into the cups of your standard 12-cup muffin tin. You might have to cut and piece a few spots to make them fit nicely up the sides. Here’s the pro move I learned: **prick the bottom of every single crust** several times with a fork. This is super important; it lets the steam escape so your crust doesn’t balloon up like a puffy little shield underneath your filling.
Mixing the Gooey Pecan Filling Recipe
Now for the best part—the taste test! In a medium bowl, grab a whisk. We’re combining the brown sugar, melted butter, beaten eggs, corn syrup, vanilla, and salt. Whisk hard until it looks totally smooth, like liquid satin. Honestly, the smell of that brown sugar and butter mixing is pure autumn heaven, even before the pecans go in. Once it’s smooth, fold in that cup of chopped pecans. This creates the perfect gooey pecan filling recipe base that just sets beautifully.

Baking and Setting the Individual Pecan Tarts
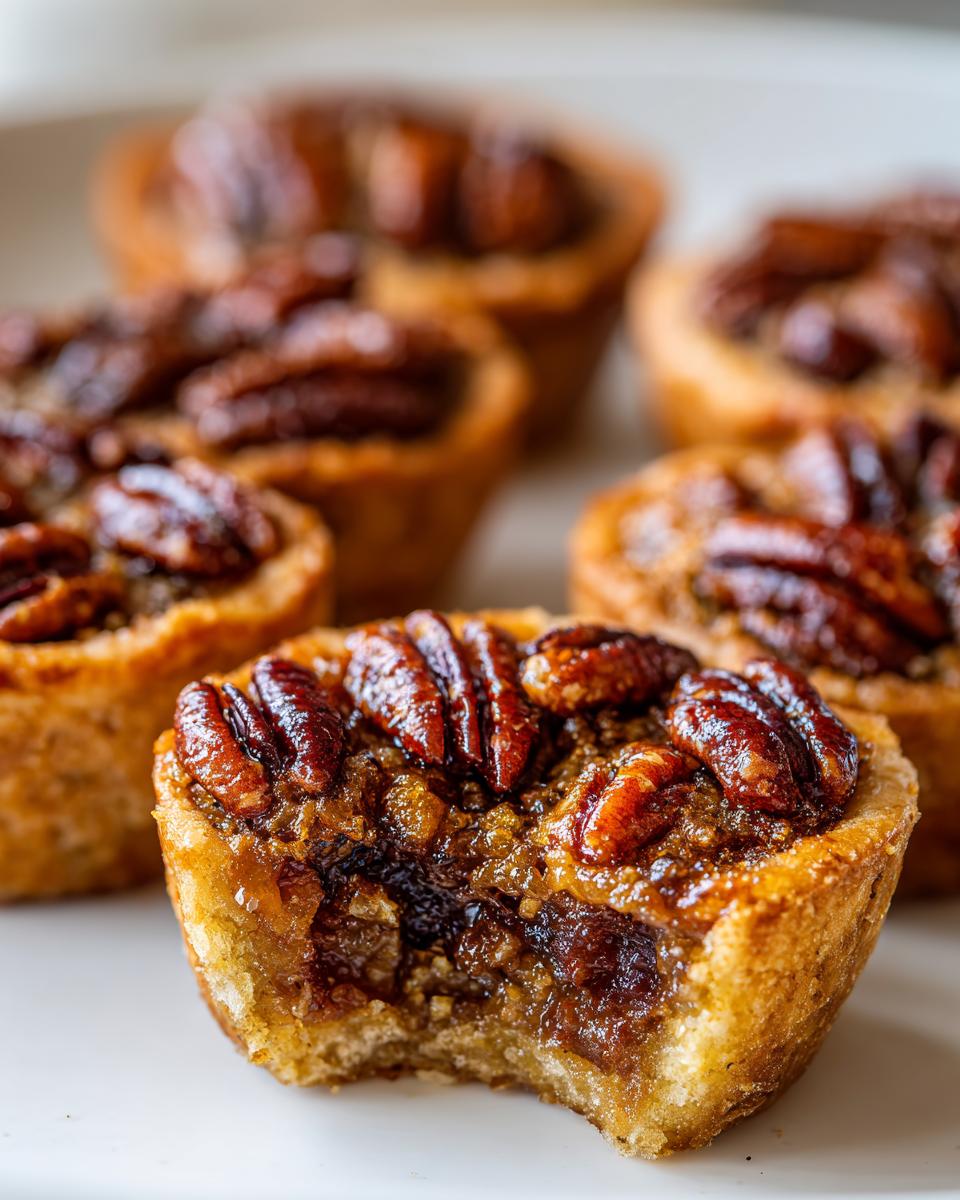
Spoon that filling right into your prepared crusts—aim to fill them about three-quarters of the way up; they puff a little! Then, top each one with a few extra pecan halves just so they look fancy. Pop them into that preheated oven for about 18 to 20 minutes. I always watch the edges of the crust; when they turn golden brown, pull them out. Remember this: you want the filling to look set but still have a tiny, almost imperceptible jiggle in the very center. If they are rock solid, you’ve gone too far! If you miss the jiggle, don’t stress; they continue baking on the hot tin after they come out. These individual pecan tarts need 10 minutes in the tin to cool before you transfer them to a wire rack. Patience for those 10 minutes means they won’t break when you move them!
Expert Tips for Perfect Mini Pecan Pies Every Time
You nailed the baking time, but now you’re staring at them cooling, thinking, ‘Are these going to be properly sticky?’ That’s where we apply a little chef instinct, translating process into perfection. It’s easy to get nervous when pulling something that looks slightly underdone, but trust me on this one, especially when making these amazing mini pecan pies.
Achieving the Ideal Gooey Texture
The biggest mistake people make with any pecan pie filling—big or small—is overbaking it to feel ‘safe.’ If you wait until that center is completely firm in the oven, what you get when it cools down is a candy, not a gooey dessert. We want that slight wobble, that movement in the middle, because of something called carry-over cooking. The residual heat trapped in that metal muffin tin is going to keep working on the filling for a solid five to ten minutes after they leave the oven. That wobble is your cue that you have achieved an absolutely perfect, rich, spoonable texture for your bite-sized beauties.
Crust Variations for Your Small Batch Pecan Pie
Okay, what if you just *love* a shortbread crust? I totally get it. It offers a richer, more crumbly base than the standard flaky pie dough, and it totally transforms the eating experience into an even fancier little treat. If you decide to pivot to a shortbread dough for your small batch pecan pie project, the key is to blind-bake it for about eight minutes first.
Pre-baking the crust prevents that dreaded soggy bottom. You want it just lightly golden before you pour in that sticky filling. It just gives you a sturdier platform, which is great when you transfer them immediately to a dessert plate. It’s just another little trick learned from watching the pros!
Storing and Serving Your Homemade Bite Size Pies
You’ve done the hard part, so now we talk about keeping these gorgeous **mini pecan pies** fabulous until it’s time to serve them. Since these little gems are so easy to assemble, planning ahead is your secret weapon against holiday chaos. We want that crust crisp and that filling perfectly set when company arrives, right?
Make-Ahead Strategy for Holiday Entertaining
The best trick I learned for holiday work schedules is baking things completely in advance. Good news: these freeze like a dream! Once they are totally cooled—and I mean cold—stack them up in an airtight container, but here’s the slang: use parchment paper layers between them. You don’t want them sticking! They last great in the freezer for about a month. When you need them, just thaw them overnight in the fridge. If you’re in a huge rush, you can reheat them straight from frozen at 300 degrees for about 10 minutes, but cooling them slowly is always better. If you need more ideas for making life easier, check out my strategy for ham and cheese sliders.
Serving Suggestions for Fall Individual Desserts
These don’t need much dressing up, but presentation always counts! You can serve them slightly warm—which brings out all that gooey flavor—with a quick dollop of fresh whipped cream or even a small scoop of vanilla bean ice cream. If you’re trying to save on fridge space, a simple dusting of powdered sugar right before serving makes them look so elegant. They are fantastic on their own too, perfect for setting out on a snack table for guests to graze on. These are truly the ultimate fall individual desserts.
Frequently Asked Questions About Mini Pecan Pies
When you’re baking something new, or even something classic in a new format, questions pop up. That’s totally normal! I’ve pulled a few things I hear most often about these little guys. Getting these details right is how you build that culinary confidence we talk about here at Kitchen Slang. If you ever need a quick fix on another recipe, check out my tips for an easy chili recipe!
Can I use real maple syrup instead of corn syrup in these mini pecan pies?
Oh, that’s a great question, especially if you’re steering away from corn syrup! Yes, you absolutely can! Using real maple syrup in these **mini pecan pies** will give you a richer, deeper flavor, which I love. But here’s the translation: maple syrup has a different sugar structure than corn syrup. This means your filling will set up slightly softer and won’t be quite as intensely gooey or firm. It’s still delicious, but expect a silkier texture, not the standard classic set. It’s a beautiful swap for someone who prefers that pure maple taste!
What size muffin tin works best for bite-sized pecan pie?
For the exact ratios in this recipe—where we are using 12 standard pie crust circles—a standard, full-sized, 12-cup muffin tin is what you want. It gives you that perfect balance of crust to filling. If you only have those tiny, mini-muffin pans, you can definitely use those! But listen up, you’ll need to cut your crusts smaller, and baking time will drop dramatically—maybe down to 12 or 14 minutes. You’ll have to watch them like a hawk because those smaller tarts cook much faster. It’s all about paying attention to the edges turning golden!
Why are my pecan pie fillings runny?
This is usually a two-fold issue, and it almost always comes down to heat. The number one reason for a runny filling is pulling them out too soon, hoping that slight wobble will firm up more than it actually can. If you see a significant pool of liquid syrup on top, it means the eggs didn’t fully set. You need that 18 to 20 minute window until the edges are golden and the center barely moves. Secondary reason? Sometimes cooks accidentally use too many eggs or not enough corn syrup according to the ratio in the recipe. Stick to the listed eggs, and trust the jiggle test—a slight jiggle is perfect; a slosh means give it two more minutes!
Nutritional Snapshot of These Quick Pecan Dessert Recipe Servings
Okay, so we’re making something delicious and easy here, but I always want you to have the full picture. These little bites are a treat, for sure! Based on the ingredients listed for this quick pecan dessert recipe, here’s what you’re looking at per single mini pie.
- Serving Size: 1 mini pie
- Calories: 250
- Sugar: 22g
- Fat: 15g
- Protein: 4g
It’s a decadent little package, but worth every single crumb, naturally. Enjoy them!
Share Your Kitchen Slang Success
Seriously, I want to know how your mini pecan pies turned out! This entire recipe is built on translating complicated ideas—like making perfect pie crusts—into simple, doable moves for your own kitchen. When you use this recipe and realize, ‘Wow, I totally made that,’ you’ve learned the lingo.
Take a second after you finish them up—maybe with a cup of coffee or a cool fall cider—and come back here. Give these easy pecan pie bites a rating from one to five stars! If you had a huge success, especially if you managed to get that perfect gooey center, leave a comment below. Snap a picture and show me how you served them up on your holiday platters. That’s how we build confidence together in the kitchen. If you’re looking for another simple win next week, check out my instructions for easy garlic naan bread, which uses a similar philosophy of speed and delicious results!
PrintThe Easiest Ever Mini Pecan Pies (Perfectly Gooey & Bite-Sized)

You get all the rich, gooey flavor of classic pecan pie in a simple, individual serving. We use refrigerated dough to cut down on fuss, making these perfect for your holiday dessert platters.
- Prep Time: 15 min
- Cook Time: 20 min
- Total Time: 35 min
- Yield: 12 servings 1x
- Category: Dessert
- Method: Baking
- Cuisine: American
- Diet: Vegetarian
Ingredients
- 1 package (14.1 ounces) refrigerated pie crusts (2 crusts total)
- 1 cup chopped pecans, plus extra for topping
- 1/2 cup packed light brown sugar
- 1/4 cup unsalted butter, melted
- 2 large eggs, lightly beaten
- 1/4 cup light corn syrup
- 1 teaspoon vanilla extract
- 1/4 teaspoon salt
Instructions
- Prepare your muffin tin. Press the refrigerated pie crusts into the bottom and up the sides of a standard 12-cup muffin tin. You may need to cut the circles slightly to fit neatly. Prick the bottom of each crust several times with a fork.
- Preheat your oven to 350 degrees Fahrenheit.
- In a medium bowl, whisk together the brown sugar, melted butter, eggs, corn syrup, vanilla extract, and salt until the mixture is smooth. This is your gooey filling base.
- Stir in the 1 cup of chopped pecans into the filling mixture.
- Spoon the pecan filling evenly into the prepared pie crusts, filling each cup about three-quarters full.
- Top each mini pie with a few extra pecan halves for presentation.
- Bake for 18 to 20 minutes, or until the crust edges are golden brown and the filling is set but still slightly jiggly in the center. Do not overbake; they will firm up as they cool.
- Let the mini pecan pies cool in the muffin tin for 10 minutes before carefully removing them to a wire rack to cool completely.
Notes
- Using refrigerated pie crust is the main shortcut here. If you prefer a shortbread crust, substitute the pie crust with your favorite shortbread dough recipe, pressing it into the muffin cups before filling.
- For the best gooey texture, do not let the filling set completely solid in the oven. A slight wobble means it will be perfect once cooled.
- These individual pecan tarts freeze well. Cool completely, then place them in an airtight container separated by parchment paper before freezing for up to one month.
Nutrition
- Serving Size: 1 mini pie
- Calories: 250
- Sugar: 22
- Sodium: 110
- Fat: 15
- Saturated Fat: 5
- Unsaturated Fat: 10
- Trans Fat: 0
- Carbohydrates: 26
- Fiber: 1
- Protein: 4
- Cholesterol: 45