
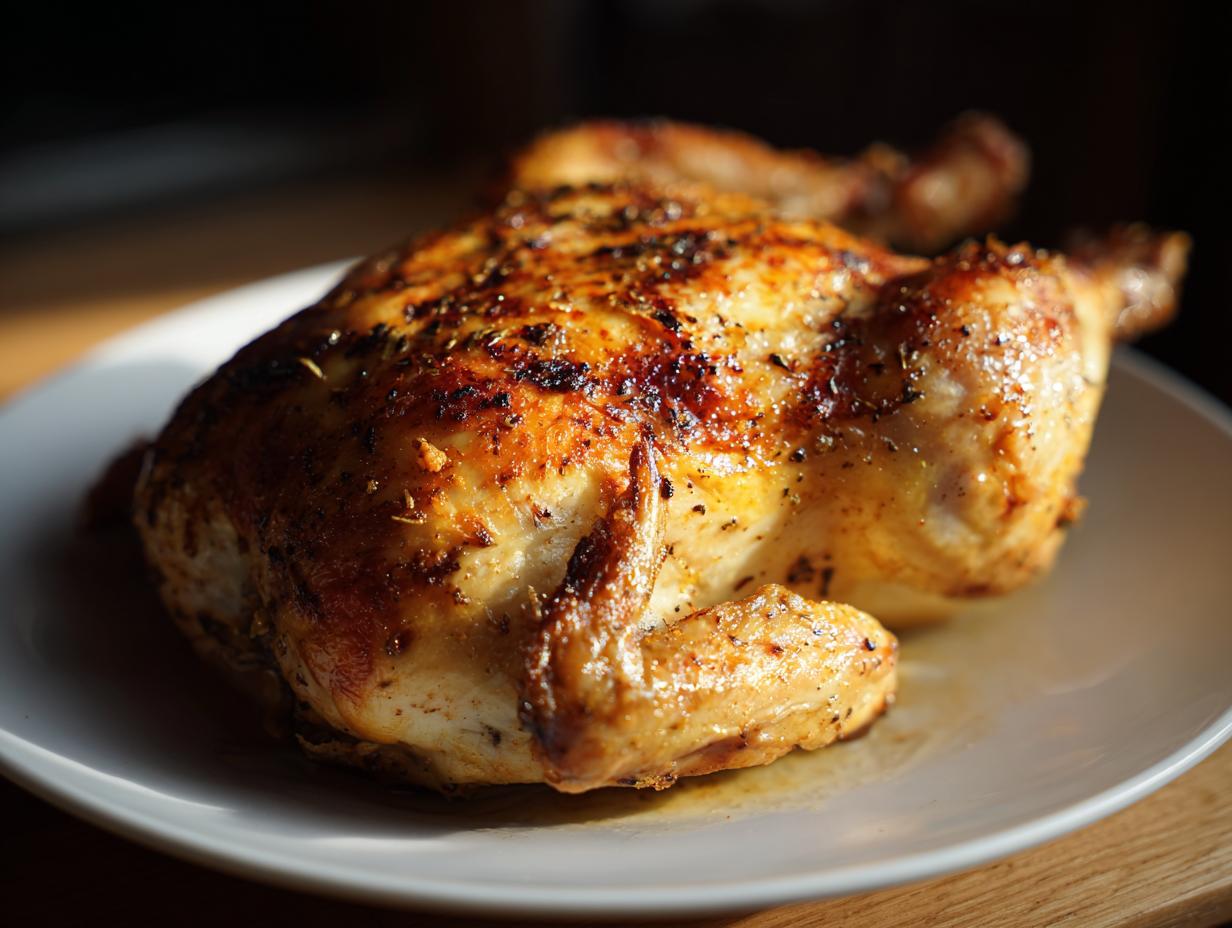
There’s just something magical about a perfectly roasted chicken, isn’t there? That golden-brown, crispy skin practically begging to be devoured, and the promise of incredibly juicy, tender meat inside. It smells like comfort, sounds like a celebration, and feels like pure culinary victory. Learning to nail this simple roast chicken can boost your kitchen confidence like nothing else. It’s the ultimate foundational recipe, the kind that makes you feel like you’ve earned your chef’s hat! At Kitchen Slang, we believe cooking should be joyful, not intimidating, just like Zoe Thompson says. This recipe is our translation for making that dream roast chicken a reality for *you*, any night of the week.
- Why You'll Love This Simple Roast Chicken
- Ingredients for the Perfect Roast Chicken
- Essential Equipment for Your Roast Chicken
- How to Prepare a Juicy Roast Chicken
- Tips for the Ultimate Crispy Skin Roast Chicken
- Resting and Carving Your Roast Chicken
- Making Pan Gravy from Roast Chicken Drippings
- Frequently Asked Questions about Roast Chicken
- Nutritional Information (Estimated)
- Storage and Reheating Your Roast Chicken
- Share Your Simple Roast Chicken Success
Why You’ll Love This Simple Roast Chicken
Seriously, who doesn’t want a fantastic roast chicken on their table? This recipe is a game-changer because:
- It’s unbelievably juicy and tender inside. No more dry chicken, ever!
- You get that perfectly crispy, golden-brown skin that’s just irresistible.
- We’re talking minimal ingredients for maximum flavor – it’s so simple.
- It’s your new go-to for cozy weeknight dinners and impressive Sunday feasts.
Ingredients for the Perfect Roast Chicken
Alright, let’s talk about what you’ll need for this amazing chicken. It’s really simple stuff, stuff you probably already have hanging out in your kitchen. Trust me, you don’t need anything fancy!
- 1 whole chicken (aim for about 3-4 pounds – that’s a good size for this recipe)
- 2 tablespoons olive oil (good old extra virgin is perfect here)
- 1 teaspoon salt (kosher salt or sea salt works best, really gets into the chicken!)
- 1/2 teaspoon black pepper (freshly ground is *always* better, if you can!)
- 1 lemon, cut in half
- 3 sprigs fresh rosemary or thyme (totally optional, but a nice little flavor boost!)
Essential Equipment for Your Roast Chicken
Okay, so you don’t need a whole fancy setup for this, but a few trusty tools make all the difference. First up, you’ll want a good **roasting pan**. It doesn’t have to be anything super special, just sturdy enough to hold your chicken. A rack inside the pan is a nice bonus for even cooking, but not a deal-breaker! Definitely grab some **paper towels** – these are your secret weapon for getting that super crispy skin. If you’re feeling fancy, some **kitchen twine** can help you truss the chicken legs together, though I honestly skip this sometimes and it still turns out great. And the *most* important thing? A **meat thermometer**. This little guy is your guarantee that your chicken is cooked through safely and perfectly juicy. No guessing required!
How to Prepare a Juicy Roast Chicken
Okay, friends, this is where the magic happens! Getting that delicious, fall-off-the-bone tender chicken with skin so crispy it practically shatters is easier than you think. We’re going to walk through it step-by-step, and I’ll share all my little secrets. Think of this as your foolproof guide, straight from my kitchen to yours!
Preheating and Prepping the Chicken
First things first, let’s get that oven nice and hot. Crank it up to 425°F (220°C). Trust me on this! That initial blast of heat is crucial for getting that skin going. Now, grab your beautiful chicken. Reach inside the cavity and pull out any little bag of giblets – save those for stock or toss ’em. Then comes the *most* important part for crispy skin: grab your paper towels and pat that bird completely dry. I mean *bone dry*, inside and out. Any moisture left on there will steam, and we want crisp, not soggy!
Seasoning and Flavoring Your Roast Chicken
Once your chicken is prepped and feeling sleek, it’s time for flavor! Drizzle it all over with that olive oil and give it a good rub down. Then, get generous with your salt and pepper. Don’t be shy! Season the inside of the cavity too. Now, take your halved lemon and those herb sprigs (if you’re using them – they add such a lovely aroma!) and stuff them right inside. It perfumes the whole chicken from the inside out. If you want to truss it, now’s the time to tie those legs together. It helps it cook a bit more evenly, but honestly, it’s not a deal-breaker if you skip it.
Roasting for Crispy Skin and Juicy Meat
Alright, into the hot oven it goes! Pop that chicken in at 425°F (220°C) for about 15 minutes. This initial high heat is a secret weapon for crispy skin. After those 15 minutes, lower the oven temp to 375°F (190°C). Now, let it roast for another hour to an hour and 15 minutes. How do you know it’s done? The BEST way is with a meat thermometer! Stick it right into the thickest part of the thigh, making sure not to touch the bone, and you’re looking for 165°F (74°C). If you like, you can baste it with those yummy pan juices while it roasts, but this simple recipe truly shines even without it!
Tips for the Ultimate Crispy Skin Roast Chicken
Okay, let’s be real: nobody wants a soggy chicken! Crispy skin is the golden ticket to roast chicken heaven, and I’ve learned a few tricks over the years to make sure it happens every single time. It all comes down to a few key things. First, remember what I said about paper towels? You can’t overstate how important it is to get that bird *bone dry*. Moisture is the enemy of crispiness! Also, give your chicken a little breathing room in the pan. Don’t crowd it with too many veggies or other things right away, because air needs to circulate around it for that skin to get nice and crackly. That initial high heat blast at the start? That’s your best friend for achieving that perfect crunch. Follow these little tips, and you’ll be rewarded with skin that’s shatteringly good!
Resting and Carving Your Roast Chicken
Okay, seriously, this is maybe the *most* important step for getting that melt-in-your-mouth juicy meat. Once your chicken is out of the oven and looks absolutely gorgeous, resist the urge to carve it right away! Let it rest. I usually aim for about 10 to 15 minutes, tented loosely with foil. This super important step lets all those delicious juices settle back into the meat. If you cut into it too soon, all that goodness just runs out onto the cutting board, and nobody wants that! For carving, it’s pretty simple: remove the legs and wings first, then slice down along the breastbone to get those lovely meaty halves.
Making Pan Gravy from Roast Chicken Drippings
So, you’ve got this beautiful, juicy roast chicken, and you’ve let it rest all its glory. Now, what about those amazing pan drippings? Don’t you dare pour those down the drain! That’s where the magic for the most incredible, simple gravy lives. Seriously, this is how you go from a great roast chicken dinner to an *unforgettable* one. It takes just a few minutes and a couple of extra pantry staples. It’s the perfect, savory finish for your chicken, and it’s amazing over mashed potatoes – or you know, anything, really! If you’re still looking for ideas, check out our easy chili recipe for another weeknight win.
Frequently Asked Questions about Roast Chicken
Got questions about making the perfect roast chicken? I’ve got answers! It’s totally normal to have a few queries when you’re aiming for that golden, juicy bird. Here are some I get asked a lot:
What is the best oven temperature for roast chicken?
For this recipe, we start hot at 425°F (220°C) for 15 minutes to get that skin going, then lower it to 375°F (190°C) to finish cooking through. That initial blast is key for crispiness!
How long does it take to roast a whole chicken?
It really depends on the size, but for a 3-4 pound chicken, expect about an hour to an hour and 15 minutes after the initial high-heat blast. Always use a thermometer for the most accurate timing!
Why is my roast chicken skin not crispy?
The number one reason is usually moisture! Make sure you’re patting that chicken *super dry* with paper towels before you season it. Also, giving it enough space in the pan helps the air circulate for maximum crispiness!
Nutritional Information (Estimated)
So, let’s talk numbers! Keep in mind these are just estimates, okay? The exact amounts can bounce around a bit depending on the size of your chicken and exactly what you used. But for a serving (that’s about a quarter of a 3-4 pound bird), you’re looking at roughly 450 calories, 25g of fat, 50g of protein, and 0g of carbs. Pretty solid, right?
Storage and Reheating Your Roast Chicken
Got leftovers? Lucky you! Properly storing your roast chicken is key. Let it completely cool, then wrap it up tight in plastic wrap or pop it into an airtight container in the fridge. It’ll be good for about 3-4 days. When you’re ready to reheat, you want to gently warm it up to keep it juicy. My favorite trick is to toss leftover pieces into a baking dish with a splash of broth or water, cover it with foil, and warm it in a 350°F (175°C) oven until heated through. You can also reheat it in the microwave, but be careful not to overdo it! It’s perfect for adding to salads, sandwiches, or making a quick meal from our easy weeknight dinners list.
Share Your Simple Roast Chicken Success
I absolutely LOVE hearing from you! Did you try this simple roast chicken recipe? Did your skin get super crispy? Did your family devour it? Please, please, please leave a comment below and tell me all about it! And if you snagged a photo of your beautiful bird, tag us on social media – we’d be thrilled to see it! You can also reach out through our contact page if you have any questions.
PrintSimple Roast Chicken

A straightforward recipe for a juicy whole roast chicken with crispy skin, perfect for a confident home cook.
- Prep Time: 15 min
- Cook Time: 1 hr 30 min
- Total Time: 1 hr 45 min
- Yield: 4 servings 1x
- Category: Dinner
- Method: Roasting
- Cuisine: American
- Diet: Vegetarian
Ingredients
- 1 whole chicken (3–4 pounds)
- 2 tablespoons olive oil
- 1 teaspoon salt
- 1/2 teaspoon black pepper
- 1 lemon, halved
- 3 sprigs fresh rosemary or thyme (optional)
Instructions
- Preheat your oven to 425°F (220°C).
- Remove giblets from the chicken cavity. Pat the chicken completely dry inside and out with paper towels. This is key for crispy skin.
- Drizzle the chicken with olive oil and rub it all over.
- Season generously inside and out with salt and pepper.
- Place the lemon halves and herb sprigs (if using) inside the chicken cavity.
- Truss the chicken legs together with kitchen twine if desired, though it’s not essential for this simple recipe.
- Place the chicken on a rack in a roasting pan or directly in a cast-iron skillet.
- Roast for 15 minutes at 425°F (220°C).
- Reduce the oven temperature to 375°F (190°C) and continue roasting for about 1 hour to 1 hour 15 minutes, or until a meat thermometer inserted into the thickest part of the thigh (without touching bone) reads 165°F (74°C). Baste occasionally with pan juices if you like.
- Let the chicken rest for 10-15 minutes before carving. This allows the juices to redistribute, making it more tender.
Notes
- For extra flavor, you can rub softened butter mixed with herbs and garlic under the chicken skin before roasting.
- Save the pan drippings to make a simple gravy.
Nutrition
- Serving Size: 1/4 chicken
- Calories: 450
- Sugar: 1
- Sodium: 300
- Fat: 25
- Saturated Fat: 8
- Unsaturated Fat: 17
- Trans Fat: 0
- Carbohydrates: 0
- Fiber: 0
- Protein: 50
- Cholesterol: 150