
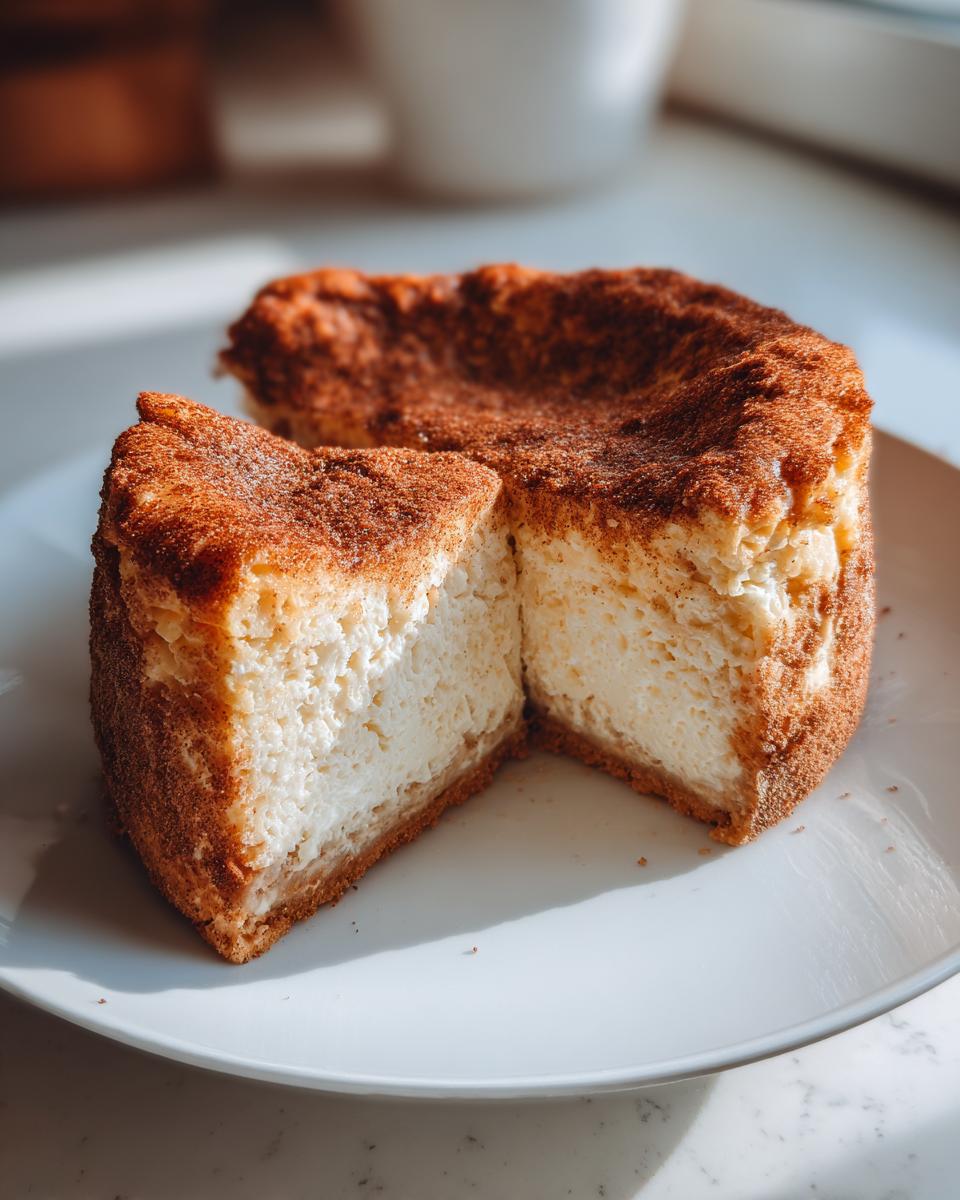
Let’s be real: Sometimes you just can’t decide, right? You’re staring down a holiday menu and your heart wants the warm, spicy hug of a snickerdoodle cheesecake, but your stomach is demanding that perfectly dense, rich texture only cheesecake delivers. That’s where the magic happens—the ultimate dessert mashup is born!
Now, don’t let the word ‘cheesecake’ scare you. This isn’t some finicky bakery contraption. I took the insider knowledge I picked up back in the restaurant world—like the absolute must-do water bath for that velvety texture—and translated it into something anyone can master on their home counter. We’re merging that crack-free, creamy center with the sweet, buttery tang of classic snickerdoodle spices. Trust me, this translation makes all the difference.
- Why This snickerdoodle cheesecake is Your Next Showstopper Dessert
- Gathering Ingredients for Your snickerdoodle cheesecake
- How to Prepare the Ultimate Creamy snickerdoodle cheesecake
- Ingredient Notes and snickerdoodle cheesecake Variations
- Serving Suggestions for Your Rich and Creamy Desserts
- Storage and Reheating Instructions for snickerdoodle cheesecake
- Frequently Asked Questions About Cinnamon Swirl Cheesecake
- Estimated Nutritional Data for Your Creamy Snickerdoodle Dessert
- Share Your snickerdoodle cheesecake Success
Why This snickerdoodle cheesecake is Your Next Showstopper Dessert
If you’re looking for the dessert that makes everyone stop talking the minute it hits the table, this is it. Forget simple cookies; we are elevating comfort! The snickerdoodle cheesecake isn’t just tasty; it’s designed to impress. It’s rich, it’s memorable, and frankly, it tastes way more complicated than it actually is to make. You can find more amazing holiday inspirations like this one over at this site!
- It hits that perfect seasonal note—warm spice without being heavy.
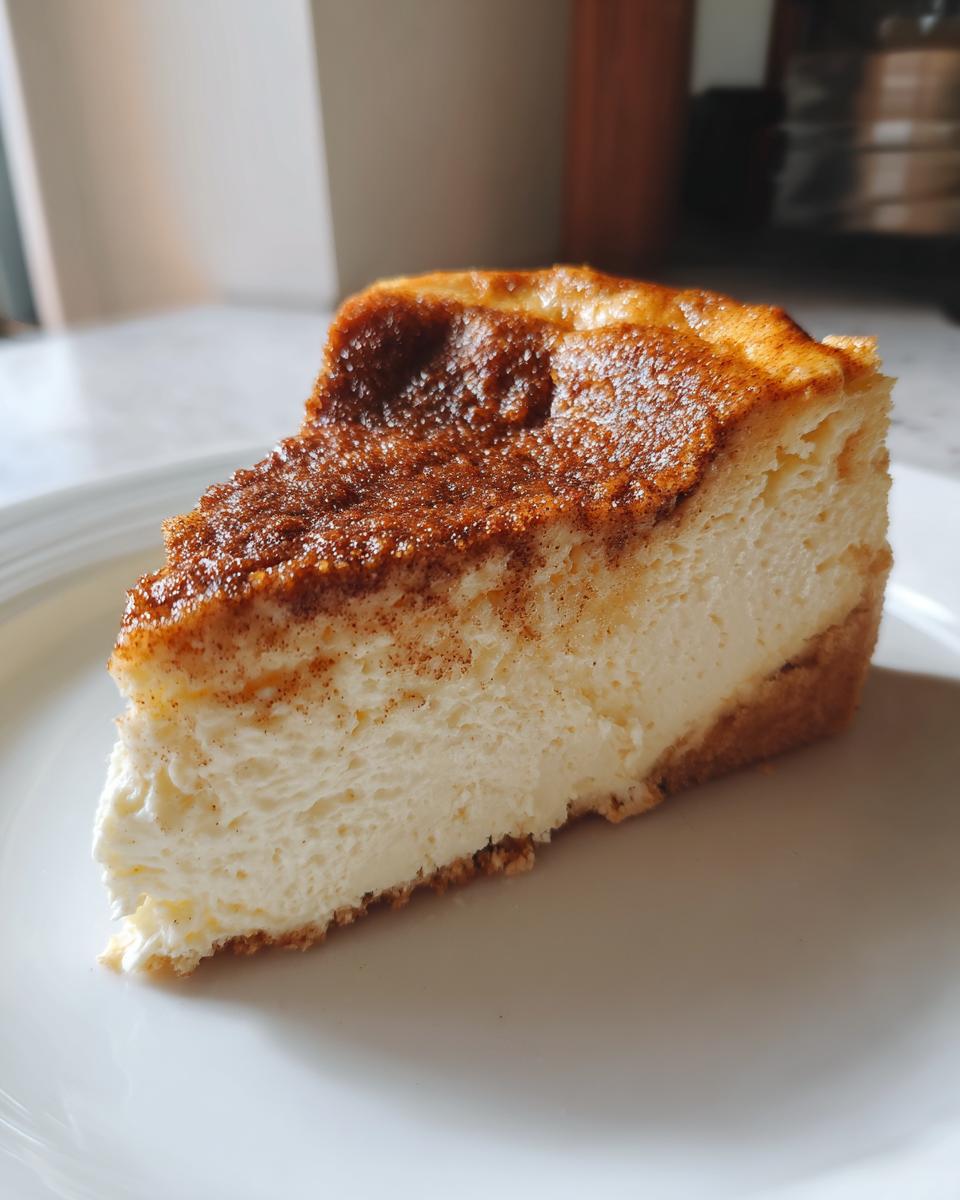
- The texture? Absolutely luxurious. We’re talking velvety smooth, not grainy or cracked.
- It works beautifully as a centerpiece for your holiday spreads, especially Thanksgiving and Christmas.
The Perfect Marriage of Cookie and Cheesecake
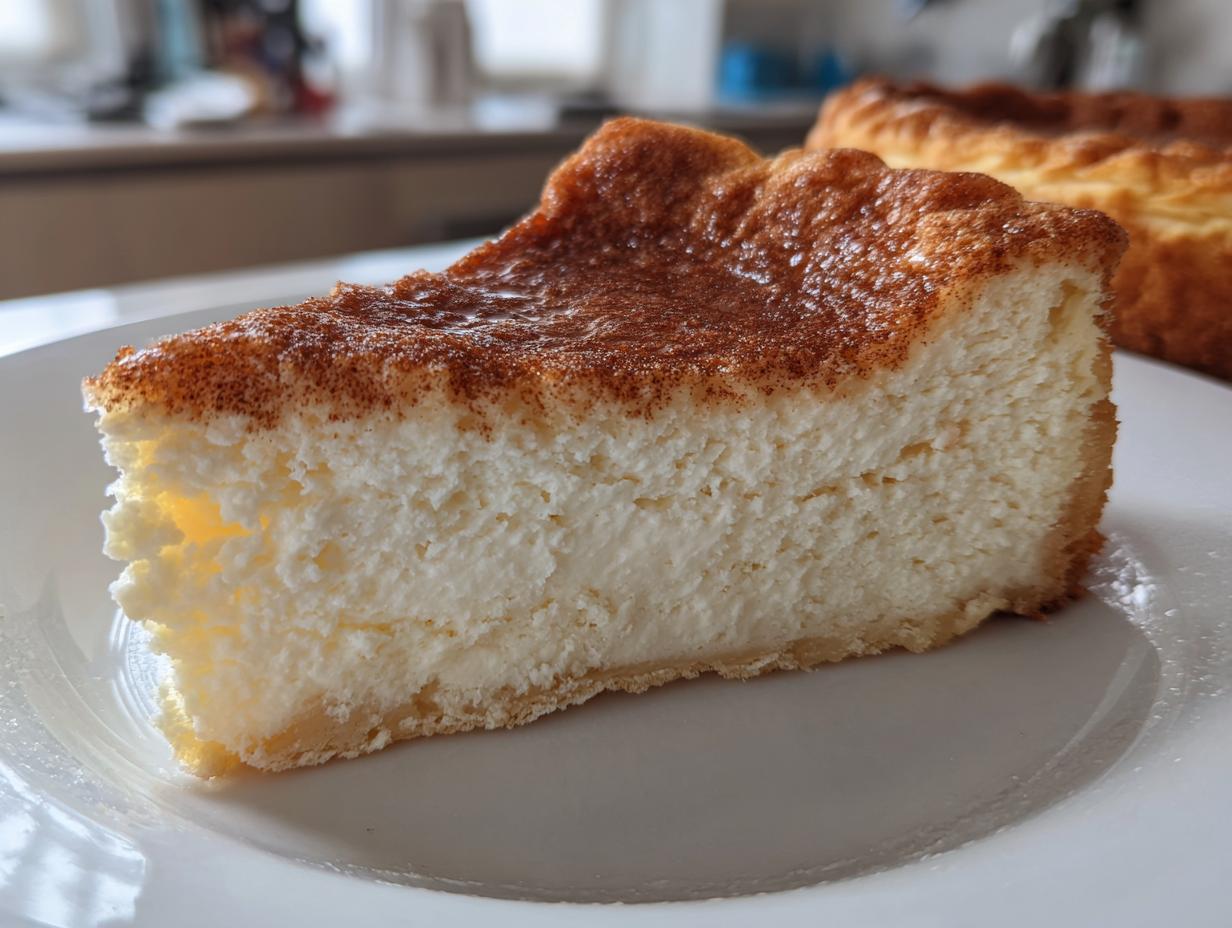
Why choose between two favorites when you can have both? This recipe takes that familiar, buttery, cinnamon-sugar goodness from a snickerdoodle cookie, and sets it on top of the silkiest, tangiest baked cheesecake you’ve ever tried. It’s the cozy flavors you crave with the elegance you need for a crowd.
Tips for Baked Cheesecake Perfection
The secret to getting that incredible, creamy texture everyone asks about isn’t hidden ingredients—it’s totally about process. You have to treat your ingredients right. That means making sure your cream cheese and eggs are at room temperature, and you absolutely have to respect the water bath process. Trust me on this one; those simple techniques produce bakery-quality results every single time.
Gathering Ingredients for Your snickerdoodle cheesecake
Okay, now that we know this snickerdoodle cheesecake is going to be legendary, we need to assemble our troops. I’ve broken the ingredients down because presentation matters, even just when you’re listing them out! Getting everything ready—especially hitting that ‘room temperature’ mark—is the single most important thing you can do to ensure a smooth, crack-free bake. You can check out another great recipe breakdown right here at this link if you want another perspective while shopping!
For the Buttery Cookie Crust Dessert
This isn’t your standard graham cracker crust; we’re infusing that snickerdoodle flavor right from the base!
- 1 1/2 cups graham cracker crumbs (Make sure they are fine, almost dusty!)
- 1/4 cup granulated sugar (Just regular white sugar here.)
- 1 teaspoon ground cinnamon (This is where the cookie flavor starts.)
- 1/2 cup (that’s one full stick) unsalted butter, melted completely.
For the Velvety Cheesecake Filling
Listen up: If your cream cheese, eggs, or sour cream are cold, stop what you are doing. They MUST be soft and room temperature. This is non-negotiable for that velvety cheesecake filling we are chasing. Cold lumps ruin everything!
- 3 (8 ounce) packages cream cheese, softened (Softened means you can press a finger into it easily, but it’s not melty.)
- 1 1/2 cups granulated sugar (For the main body of the filling.)
- 1/4 cup all-purpose flour (This helps keep it sturdy.)
- 1 tablespoon vanilla extract (Good quality, please!)
- 1 teaspoon ground cinnamon (More snickerdoodle goodness!)
- 4 large eggs, room temperature (Crack them into a separate small bowl first to check for shells.)
- 1/2 cup sour cream, room temperature (Use full-fat for the best richness.)
Cinnamon Sugar Topping
We’re separating a little bit of the cinnamon and sugar because we want a strong, crunchy finish right before serving.
- 1/2 cup cinnamon sugar mixture (This should be mixed: 1/4 cup white sugar + 1 tablespoon cinnamon. Yes, you’ll mix a little extra than needed, but trust me, you’ll want a tiny bit more later!)
How to Prepare the Ultimate Creamy snickerdoodle cheesecake
Alright, this is the main event! Making a baked cheesecake perfection that doesn’t crack is all about careful setup and respecting the slow bake. I learned early on that rushing the temperature shifts is what causes those hideous surface cracks. We’re going to follow the chef steps here—especially that water bath—so you get that amazing, rich and creamy dessert without any stress. If you need a visual reference while you work, check out the great tips over at this site!
Setting Up for Baked Cheesecake Perfection
First things first: Get that oven to 325 degrees F. While it warms up, grab your 9-inch springform pan. This is the absolute most important setup step for a water bath. You need heavy-duty aluminum foil, and I mean *heavy-duty*. Wrap the entire bottom and halfway up the sides of your pan really, really well—two or three tight layers. Water seeping into your crust is the fastest way to ruin this beautiful creation!
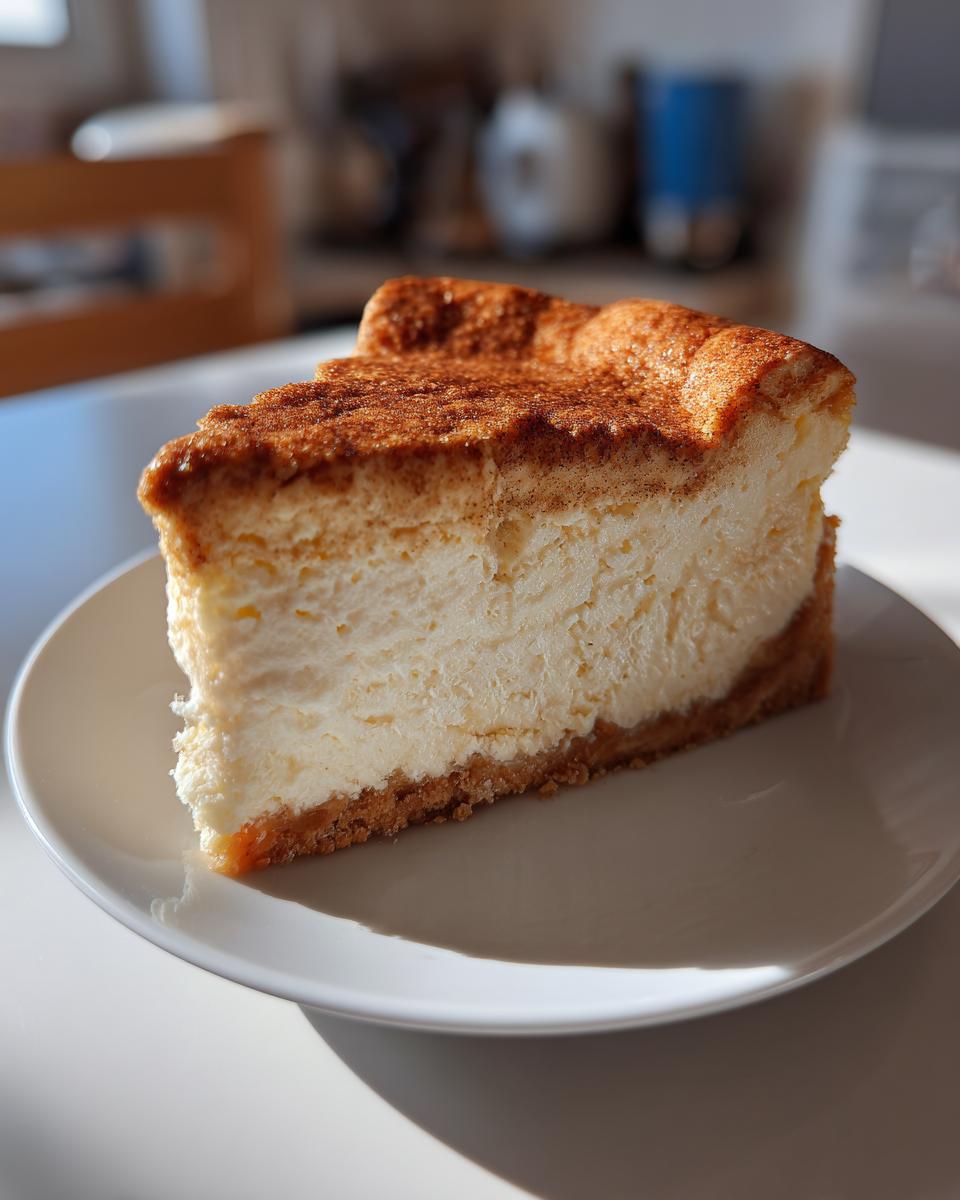
Creating the Buttery Cookie Crust Dessert Base
In a bowl, just mix your graham cracker crumbs, the 1/4 cup of sugar, the first teaspoon of cinnamon, and the melted butter. Stir it until it looks like wet sand. Then, press that mixture down, hard, into the bottom of your foil-wrapped pan. Don’t be shy; use the bottom of a measuring cup to pack it! Pop this crust into the oven for exactly 10 minutes. When it comes out, set it aside just long enough to cool down a bit while you work on the filling.
Mixing the Cinnamon Swirl Cheesecake Filling
Grab your biggest bowl and your mixer. Start by beating that beautifully softened cream cheese until it’s completely smooth—I mean zero lumps visible. Scrape the sides down. Next, gently mix in the 1 1/2 cups of sugar, the flour, the vanilla, and the second teaspoon of cinnamon. Just until it comes together. Now, the eggs come in: add them one at a time, mixing on low speed only until *just* incorporated. You want to stop mixing the second you don’t see any more streaks of yellow. Overmixing air in here causes the cracking we are trying to avoid. Finally, fold in the sour cream by hand for the last bit of mix, keeping the batter velvety. You can find more great advice on these steps at this link.
Baking and Slow Cooling Process
Pour that gorgeous batter over your slightly cooled crust. Now, the water bath: Place the foil-wrapped springform pan inside a large roasting pan. Carefully pour hot (near boiling!) water into the roasting pan until it comes about halfway up the sides of your cheesecake pan. Bake it just shy of an hour, maybe 60 to 75 minutes total. You’re looking for the edges to be firm, but the inner two inches still have a little wobble when you gently nudge the pan. When that happens, turn the oven *off*. Crack the oven door open an inch or two and just leave the cheesecake sitting inside that humid environment for a full hour. This slow temperature change is your anti-crack insurance!
Chilling and Final Cinnamon Sugar Cheesecake Topping
After that hour in the oven, take the cheesecake out of the water bath and peel off the foil wrap. Let it sit on the counter until it’s completely cooled down to room temperature. Then, you wrap it up again—this time just in plastic wrap—and send it to the fridge. It needs a minimum of six hours, but honestly, overnight is always best for the ultimate texture. When you are ready to serve this cinnamon sugar cheesecake masterpiece, dust that reserved cinnamon sugar mixture right on top. Slice it up cold and enjoy the applause!
Ingredient Notes and snickerdoodle cheesecake Variations
Okay, your snickerdoodle cheesecake is baked and chilling beautifully, but maybe you’re thinking ahead, or perhaps you realize you don’t have a springform pan. Don’t panic! This recipe is surprisingly adaptable, which is why I love it so much for my busy schedule. Also, let’s talk about ingredient handling, because even small tweaks here can totally change your result.
We want to make sure you can pull this off whether you’re planning a huge party or just need something for dessert tonight. You can check out some great ideas for swapping techniques right over at this site if you’re leaning towards bars!
Making snickerdoodle Dessert Bars
If cutting neat slices of a round cheesecake seems like too much trouble, turning this into snickerdoodle Dessert Bars is brilliant. It’s easier to serve a crowd, too! Instead of the 9-inch springform pan, you’ll want to press that buttery crust mixture into a good 9×13 inch baking pan. Then, pour that velvety filling right over the top. You’ll need to cut the bake time down a little bit—probably down to about 40 or 50 minutes—and you absolutely might not need the water bath for bars, since the thinner layer means less chance of cracking. Just keep an eye on those edges!
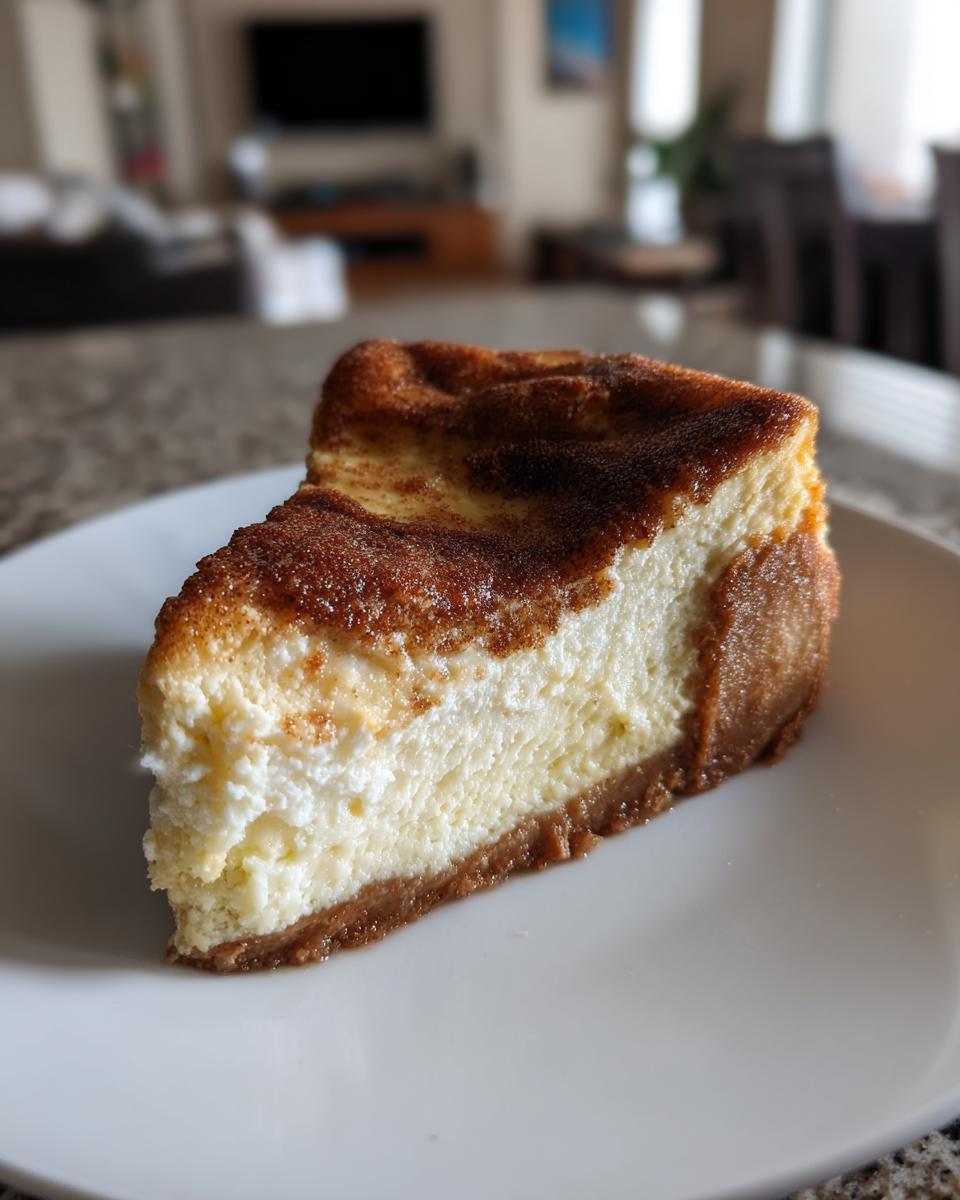
Swirl Technique for Visual Appeal
You mentioned wanting a showstopper, right? The final dusting of cinnamon sugar is great, but if you really want to make it look like you spent three days in the kitchen, you need a swirl right under the top layer. Before you bake the cheesecake, take maybe a third of that final cinnamon sugar topping mixture—the stuff you were going to save for the end—and sprinkle it lightly and evenly over the wet filling. Then, take a skewer or a thin butter knife and gently draw figure eights across the top. It melts right into the cheesecake as it bakes, giving you these gorgeous, deep brown ribbons of cinnamon flavor throughout the filling. It’s subtle, but honestly, it makes the whole dessert look professionally done. For folks who prefer something simpler, I hear zero-bake versions are super popular too; you can peek at easy options like those found here.
Serving Suggestions for Your Rich and Creamy Desserts
Okay, that big glorious snickerdoodle cheesecake has finally set, and now the fun part: serving it! Because this dessert is so rich and carries those warm holiday spices—cinnamon, vanilla, that slight tang from the cream cheese—you don’t need to hide it under a ton of toppings.
For a proper Thanksgiving or Christmas spread, I love keeping the sides simple so the main star shines. You can find some really beautiful ideas for presentation over at this source.
- A small dollop of homemade whipped cream is perfect if you want a little extra height and lightness on the plate. Don’t use the canned stuff, though; it tastes so much better when it’s real!
- A very light drizzle of pure caramel sauce works magic with the brown sugar notes in the crust. Think drizzle, not drowning.
- If you made the bars, serving them slightly chilled next to coffee or warm cider makes for a fantastic cozy evening bite. For more quick inspiration on how to serve cheesecakes, check out this link!
Honestly, though? A slice of this creamy snickerdoodle dessert on a white plate, maybe with just a dusting of extra cinnamon on the rim of the plate for color, is all you need. It’s meant to be the grand finale!
Storage and Reheating Instructions for snickerdoodle cheesecake
Alright, you successfully baked the best snickerdoodle cheesecake ever. Now we need to make sure it stays perfect until serving time! Cheesecakes are basically mandatory cold desserts—they need that time in the fridge to firm up completely after all that slow cooling we did in the oven. Don’t even think about slicing it while it’s warm; you’ll end up with cheesecake soup, and nobody wants that mess.
For refrigeration, you want to keep it covered tightly. After it has cooled completely on the counter, wrap the entire springform pan—or if you’ve removed the sides, wrap the base tightly—with plastic wrap, and then maybe a layer of foil over that. This keeps out any lingering fridge smells that could mess with that lovely cinnamon sugar aroma. This rich and creamy dessert will hang out happily in the fridge for about five days without losing any textural integrity. If you used the cinnamon sugar topping before chilling, try to add that right before you serve it, because residual moisture can make it soggy.
Can You Freeze snickerdoodle cheesecake?
Yes, you absolutely can freeze it, and this is a lifesaver when you’re prepping for major holidays like Thanksgiving or Christmas! For freezing, you want to skip the topping for now. Chill the cheesecake completely first. Then, wrap that chilled cake extremely well—plastic wrap, then foil, maybe even toss it in a Ziploc bag for good measure. You want to protect it from freezer burn. It keeps wonderfully for up to two months this way.
The Thaw: Getting It Ready to Eat
When you’re ready to serve your frozen dream, you have to use patience, which is honestly the hardest part of any great baking project. Move the frozen cheesecake (still wrapped!) to the refrigerator for a full 24 hours. Don’t try to rush it on the counter; thawing too fast often leads to condensation issues that can mess up the texture. Once it’s fully thawed in the fridge, *then* you can top it with that glorious cinnamon sugar mixture. Pro tip: Take it out of the fridge about 30 minutes before slicing for the absolute best texture.
On Reheating This Dessert
Listen, this is cheesecake, not a casserole. We do not reheat cheesecake! The entire point of this recipe is that incredibly dense, creamy mouthfeel you only get when it’s chilled. If you try to warm this up, you’ll lose that velvet texture and just end up with warm, grainy cream cheese. Stick to serving it cold or barely chilled. Trust me on this one for your Holiday Cheesecake Recipes.
Frequently Asked Questions About Cinnamon Swirl Cheesecake
I know you probably have a million questions running through your head, because I did when I first started tackling these tricky desserts! That’s the whole point of having this little corner of the internet—to translate the confusing stuff. We’re here to make sure your Cinnamon Swirl Cheesecake turns out exactly like the picture. I found some extra pointers for you guys that pop up often, especially when people are planning their Holiday Cheesecake Recipes! If you are looking for more inspiration on how to handle these festive bakes, you can check out some ideas over at this source.
What is the best way to prevent my snickerdoodle cheesecake from cracking?
This is the eternal battle, isn’t it? You did all the hard work and then BAM, a giant crack appears. Look, 90% of cracks are caused by temperature shock. You need two really key things locked down. First: your ingredients—the cream cheese, eggs, and sour cream—must be completely room temperature. If you mix cold cream cheese, you overwork the batter trying to smooth it out, which whips in too much air. Second, and this is huge: the slow cool. Never pull a cheesecake straight from the hot oven to the counter. Turn the oven off, crack the door, and leave it in there for a full hour. That gentle transition keeps everything settled and smooth. If you nail those two things, you’ll barely need the water bath!
Can I make this a No Bake Cinnamon Cheesecake?
You totally *could*, but it won’t be this exact recipe, and that’s important to know! This recipe is built around that rich, dense texture you only get from eggs and slow baking. A No Bake Cinnamon Cheesecake relies on stabilizers like powdered gelatin or having a huge amount of whipped cream folded in to set up instead of actual cooking. If you want no-bake, it’s a totally different formula, and frankly, the baked version is just so much more luxurious and worth the mild effort. Keep this recipe for the cozy baking days!
How far in advance can I bake this for the holidays?
This is the best news about cheesecake in general: it is the definition of an Easy Holiday Dessert make-ahead star! Because it *needs* to chill overnight to hit that perfect firm texture, you can bake it 100% completely, water bath and all, two days before you plan to serve it. Just keep it chilled, tightly wrapped, in the fridge. Do not add the final cinnamon sugar topping until about an hour before you plan to slice it, just to keep that topping perfectly crunchy. Honestly, I think it tastes even better the next day!
Estimated Nutritional Data for Your Creamy Snickerdoodle Dessert
Okay, deep breaths, bakers! We made something truly magnificent here—a snickerdoodle cheesecake that is rich, creamy, and utterly decadent. Now, I know some of you are focused on tracking things, so let’s talk numbers. I want to preface this by saying that because we are using real butter, full-fat sour cream, and so much delicious cream cheese, this is definitely a treat, not a diet food! You know that going in!
The following data is based on the recipe using the ingredients listed above, divided into 12 generous slices. But remember, these are just estimates based on standard ingredient guides. If you swap out butter for a lower-fat cream cheese, these numbers change wildly! This is real food, and real food varies a little bit from batch to batch, which is part of its charm, right?
- Serving Size: 1 slice
- Calories: 450
- Sugar: 35g
- Fat: 28g
- Saturated Fat: 17g
- Carbohydrates: 42g
- Protein: 7g
- Cholesterol: 110mg
See? Delicious indulgence! If you’re planning this as one of your main Fall Baking Recipes, maybe balance it out with a big green salad at dinner! Remember, the goal here is joy in the kitchen, and this creamy snickerdoodle dessert delivers that in huge spoonfuls!
Share Your snickerdoodle cheesecake Success
And just like that, you’ve done it—you’ve translated a complicated, showstopper dessert into something you whipped up right in your own kitchen! That’s the whole point of learning the lingo here at Kitchen Slang. This snickerdoodle cheesecake is proof that you don’t need fancy training to achieve bakery-quality results.
Now that it’s perfectly chilled and ready to slice, I absolutely want to hear about it! Did you manage to get that beautiful slow cool? Did the cinnamon swirl pop the way you hoped it would? Head down to the comments section below and tell me everything. Rate this recipe honestly—your feedback helps me translate and refine the next big thing for all of us.
If you snap a picture of your perfectly creamy, cinnamon-dusted creation, please tag me on social media! I love seeing your successes, especially when you tackle something as classic and celebratory as a creamy snickerdoodle dessert mashup. Let’s keep sharing these kitchen triumphs. I even found some great inspiration from fellow bakers over at this site for when you’re ready for the next baking adventure!
Thank you for cooking with me. Go enjoy that first, perfect bite!
PrintUltimate Creamy Snickerdoodle Cheesecake
This recipe merges the creamy richness of a classic baked cheesecake with the warm cinnamon-sugar flavor of snickerdoodle cookies. It features a buttery crust, a velvety filling, and a crunchy cinnamon topping, making it a showstopper holiday dessert.
- Prep Time: 25 min
- Cook Time: 75 min
- Total Time: 9 hours 40 min
- Yield: 12 servings 1x
- Category: Dessert
- Method: Baking
- Cuisine: American
- Diet: Vegetarian
Ingredients
- 1 1/2 cups graham cracker crumbs
- 1/4 cup granulated sugar (for crust)
- 1/2 cup (1 stick) unsalted butter, melted
- 1 teaspoon ground cinnamon (for crust)
- 3 (8 ounce) packages cream cheese, softened
- 1 1/2 cups granulated sugar (for filling)
- 1/4 cup all-purpose flour
- 1 tablespoon vanilla extract
- 1 teaspoon ground cinnamon (for filling)
- 4 large eggs, room temperature
- 1/2 cup sour cream, room temperature
- 1/2 cup cinnamon sugar mixture (1/4 cup sugar + 1 tablespoon cinnamon) for topping
Instructions
- Preheat your oven to 325 degrees F. Prepare a 9-inch springform pan by wrapping the outside bottom and sides tightly with heavy-duty aluminum foil. This protects the pan when using a water bath.
- Make the crust: In a medium bowl, combine graham cracker crumbs, 1/4 cup sugar, 1 teaspoon cinnamon, and melted butter. Press the mixture firmly into the bottom of the prepared springform pan. Bake for 10 minutes. Remove and let cool slightly.
- Make the filling: In a large bowl, use an electric mixer to beat the softened cream cheese until smooth. Scrape down the sides.
- Add 1 1/2 cups sugar, flour, 1 teaspoon cinnamon, and vanilla extract. Beat until just combined. Do not overmix.
- Beat in the eggs one at a time, mixing only until each egg is incorporated. Mix in the sour cream until the batter is smooth.
- Pour the cheesecake filling over the cooled crust.
- Prepare the water bath: Place the foil-wrapped springform pan inside a larger roasting pan. Carefully pour hot water into the roasting pan until the water reaches halfway up the sides of the springform pan.
- Bake for 60 to 75 minutes. The edges should look set, but the center 2 inches should still have a slight jiggle.
- Turn off the oven, crack the oven door open slightly, and let the cheesecake cool inside the oven for 1 hour. This slow cooling prevents cracking.
- Remove the cheesecake from the water bath and foil. Let it cool completely on a wire rack.
- Once cool, cover and chill in the refrigerator for at least 6 hours, or preferably overnight.
- Before serving, sprinkle the top evenly with the reserved 1/2 cup cinnamon sugar mixture. Slice and serve your creamy snickerdoodle dessert.
Notes
- For a showstopper look, you can swirl a small amount of the cinnamon sugar mixture into the top of the batter before baking, reserving most for the final topping.
- Room temperature ingredients (cream cheese, eggs, sour cream) are key for a velvety cheesecake filling.
- If you prefer snickerdoodle dessert bars, press the crust into a 9×13 inch pan and bake the filling for about 40-50 minutes.
Nutrition
- Serving Size: 1 slice
- Calories: 450
- Sugar: 35g
- Sodium: 280mg
- Fat: 28g
- Saturated Fat: 17g
- Unsaturated Fat: 11g
- Trans Fat: 0.5g
- Carbohydrates: 42g
- Fiber: 1g
- Protein: 7g
- Cholesterol: 110mg