
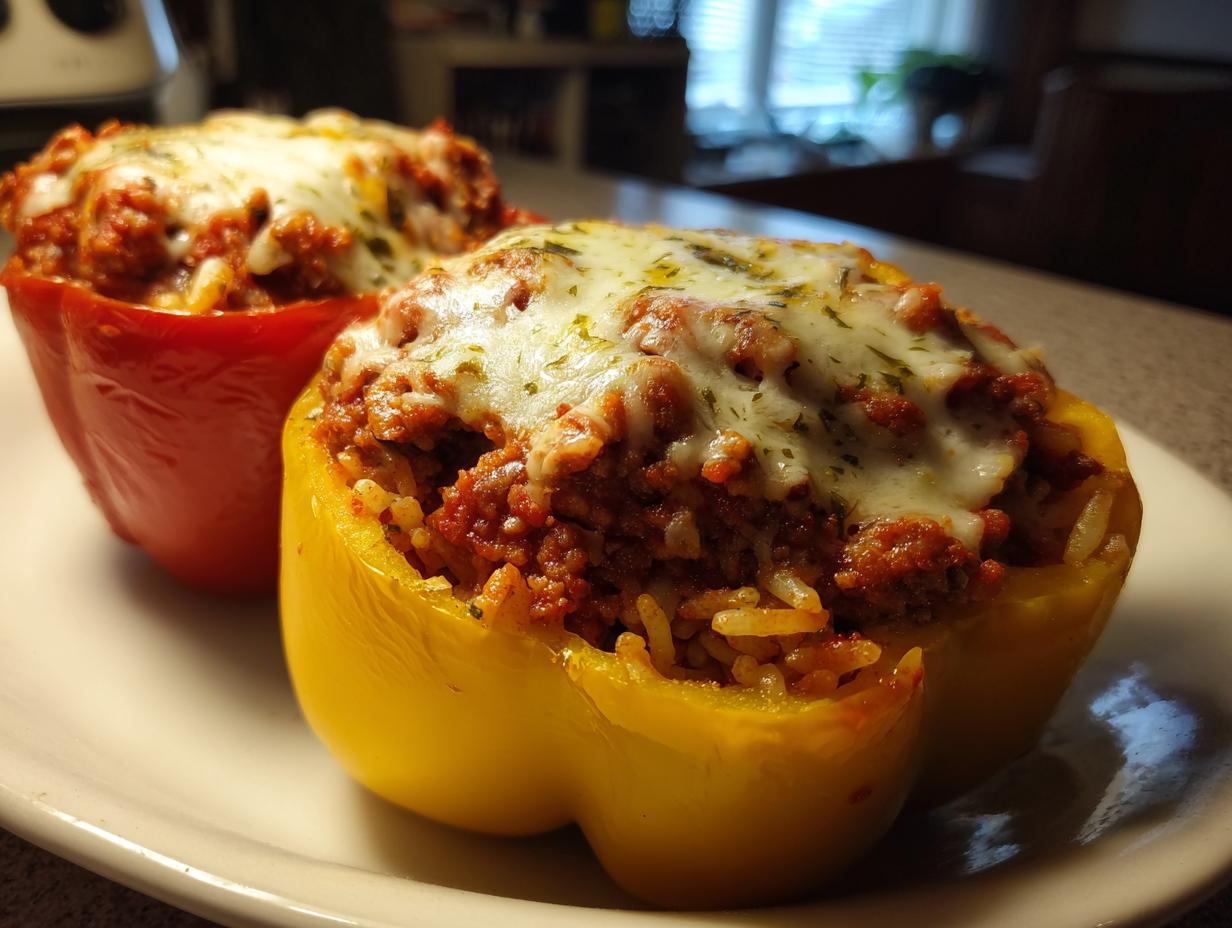
Oh, you know those dishes that just taste like a great big hug from someone you trust? That’s exactly what these stuffed peppers are! They’re the ultimate American supper—a colorful, hearty, all-in-one bowl tucked right inside its own vegetable shell. When I look at a tray of these ground beef stuffed peppers baking away, I think about simplifying the complicated stuff. That’s what we do here at Kitchen Slang: we take those insider tricks I learned working the line and translate them so you can nail a classic comfort food like this without feeling intimidated. Forget fussy cooking; we’re making your kitchen feel authentic and cozy tonight. You can read more about how we bridge that gap between professional lingo and home cooking right here on our About page.
- Why This Classic Stuffed Pepper Recipe Delivers Comfort Food Peppers
- Gathering Ingredients for Hearty Stuffed Peppers
- Step-by-Step Instructions for Classic Stuffed Pepper Recipe
- Tips for Perfect Stuffed Peppers Every Time
- Serving Suggestions for Your Baked Bell Peppers
- Storage and Reheating Instructions for Leftover Stuffed Peppers
- Frequently Asked Questions About Making Stuffed Peppers
- Estimated Nutritional Snapshot of Classic Stuffed Peppers
- Share Your Experience Making These Stuffed Peppers
Why This Classic Stuffed Pepper Recipe Delivers Comfort Food Peppers
We’re not just throwing meat and rice into a vegetable here, folks. This recipe is built on solid foundations that make it endlessly reliable and deeply satisfying—exactly what you want when you’re craving real, honest-to-goodness home cooking. These stuffed peppers are proof that simple ingredients, handled right, create the best kind of weeknight magic. You can find tons of quick recipes over on our Weeknight Dinners page, but this classic version takes just a tiny bit more love!
The Perfect Balance of Texture in Your Stuffed Peppers
The real trick here is the two-stage bake we use. We start covered, letting the peppers steam gently in that rich tomato sauce bath underneath. This is what ensures your bell peppers get tender—that soft, yielding texture that melts in your mouth—without turning into complete mush. The sauce at the bottom keeps everything moist, so the rice doesn’t dry out on you while you wait for the vegetable skin to soften up. It’s all about timing so you get structure and tenderness together.
Expert Tip for Flavorful Rice and Beef Filling in Stuffed Peppers
This is one of those little chef secrets Zoe brings to the table. You’re using pre-cooked rice, which is fast, but it can sometimes taste a little… plain. Before you mix that rice into the ground beef mixture, try tossing it into the same skillet you just browned your meat in for about 60 seconds—no oil needed. Just let it soak up any leftover fond (those yummy brown bits stuck to the pan), maybe splash in a tiny bit of beef broth if you have it. Trust me, toasting that rice slightly before stuffing your stuffed peppers deepens the flavor immensely. It gives the whole rice and beef filling an unexpected savory depth!
Gathering Ingredients for Hearty Stuffed Peppers
Okay, time to pull everything together! This recipe is all about using pantry staples you probably already have on hand, which keeps things budget-friendly and satisfying. Everything here comes together to make those colorful pepper “bowls” that everyone loves to dig into. Don’t feel locked into just green peppers either; using a mix of colors—red, yellow, orange—makes the final presentation way more exciting, like edible jewels on your dinner plate.

- 4 large bell peppers (we love a mix of colors: red, yellow, orange is best!)
- 1 tablespoon olive oil
- 1 pound ground beef (I sometimes use 90/10 if I’m skipping the drain step, but 80/20 gives more flavor!)
- 1 small yellow onion, chopped small
- 2 cloves garlic, minced super fine
- 1 teaspoon dried oregano
- 1 teaspoon dried basil
- 1/2 teaspoon salt
- 1/4 teaspoon black pepper
- 1 cup cooked white rice (make sure it’s already cooked!)
- 1 (15 ounce) can tomato sauce, and we’ll divide this up
- 1/2 cup shredded mozzarella cheese (get the low-moisture kind if you can!)
Ingredient Notes and Smart Substitutions for Baked Bell Peppers
The foundation of this amazing dish is that rich ground beef. If you’re trying to keep things a little lighter, feel free to use ground turkey or even ground chicken. Just be aware that poultry releases less fat, so you might need to add a teaspoon of oil back in during the sautéing stage so things don’t stick. For my vegetarian friends who still want that cozy vibe, swap that ground beef out entirely with about two cups of cooked brown or green lentils, or finely chopped mushrooms sautéed until just dry!
And about the peppers: use what looks best at the store! Green ones are traditional and a bit sharper, but red and yellow naturally have more sweetness to them, which is lovely when paired with the tangy tomato sauce. Whatever color you pick, just make sure they are big enough to hold a generous scoop of filling. We want hearty, remember?
Step-by-Step Instructions for Classic Stuffed Pepper Recipe
Alright, let’s get cooking! Seeing these instructions laid out might look like a checklist, but picture yourself doing it—it’s fast, and the smells starting to happen after Step 3 are going to be heavenly. Remember, we are translating that professional efficiency into your own kitchen rhythm. These stuffed peppers don’t need to be overwhelming; they just need a little structure. We’re aiming for tender peppers wrapped around that savory filling, and it’s all dependent on following these baking stages just right. If you’re looking for more ways to make your weeknights easier, go check out some other speedy recipes on our site right here: Weeknight Dinners page!
Building the Flavor Base for Your Ground Beef Stuffed Peppers
First things first: get that oven humming at 375°F, and chop your onions and peppers while it warms up. I always grease my baking dish right now, so I’m ready to go. Now, for the filling! Grab a big skillet and heat that olive oil over medium heat. Toss in your chopped onion and let it hang out until it starts getting soft—that’s usually about five minutes where it gets translucent and sweet. Then, dump in the pound of ground beef. Break it up with that spoon like you mean it!
Here’s where a great home cook shines: once the beef is nicely browned, you have to drain off the excess fat. Seriously, don’t skip this. Soggy meat makes soggy stuffed peppers! After draining, stir in the garlic, oregano, and basil. Let that sizzle for just sixty seconds until you can really smell that garlic waking up. Finally, pull the skillet off the heat, mix in your cooked rice and half of that can of tomato sauce. That mixture is the heart of our flavor!
The Crucial Baking Stages for Tender Stuffed Peppers
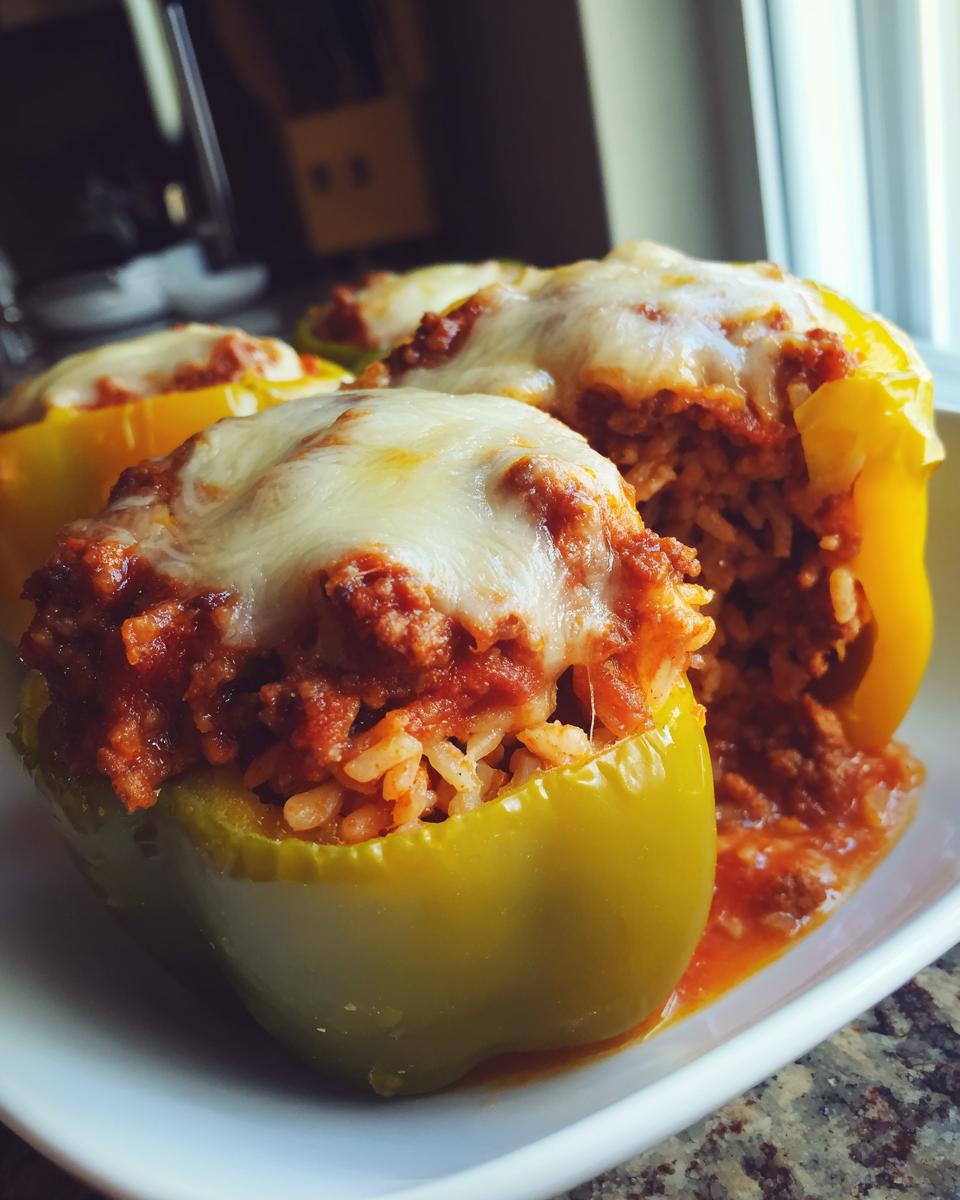
Now we stuff! Spoon that fragrant filling high into your hollowed-out peppers and tuck them snugly into your prepared dish. Before you seal everything up, pour that remaining half-cup of tomato sauce right onto the bottom of the baking dish, surrounding the peppers. This creates the steam bath we talked about.
Cover that whole dish tightly with aluminum foil—no peeking! This initial 40 minutes is non-negotiable. We are steaming them soft. After 40 minutes? Pull that foil off, gently. Sprinkle that mozzarella right across the top of each pepper. Back into the oven, *uncovered*, for just 10 to 15 more minutes. You’re looking for bubbly, golden cheese and peppers that yield easily when you poke them. That’s how you guarantee they aren’t hard!
Tips for Perfect Stuffed Peppers Every Time
You’ve nailed the cooking process, but a few extra moves—the kind you learn from making something a million times—can elevate these stuffed peppers from good to absolutely unforgettable. Trust me, these little details make all the difference, especially when you’re trying to avoid that messy leakage or uneven cooking that ruins the presentation.
First off, let’s talk about filling them up. You want to pack them firmly, but don’t mash them down like you’re packing dirt for a brick! If you compact the rice and beef mixture too much, it has nowhere to breathe, and anything needs to escape will end up seeping out the sides and into your tomato sauce bath. Overstuffing also means the top layer of meat cooks way faster than the portion near the pepper wall. Fill them right up to the brim, but keep it light and slightly fluffy.
To prevent leakage when you’re making these stuffed peppers, make sure you really drain that beef well, like I mentioned before. Fat expands! If you leave a pool of oil in the skillet, guess where it goes? Right out the bottom of your pepper when it softens up. Another trick for neatness: I always trim just a tiny sliver off the very bottom of the pepper—if it was sitting oddly flat on the cutting board—before I stand them up in the dish. That ensures a flat, stable base so they stand straight up while baking and don’t tilt and spill their delicious guts everywhere.
And about ensuring even cooking across all four peppers? Use a dish that fits them snugly but not too tightly. If they are crammed together, the steam they produce gets trapped, and the outside edges cook faster than the middle ones. Giving them just a little wiggle room ensures that the heat—and the protective foil blanket—covers them all equally, guaranteeing every single one of your stuffed peppers is perfectly tender all the way around.
Serving Suggestions for Your Baked Bell Peppers
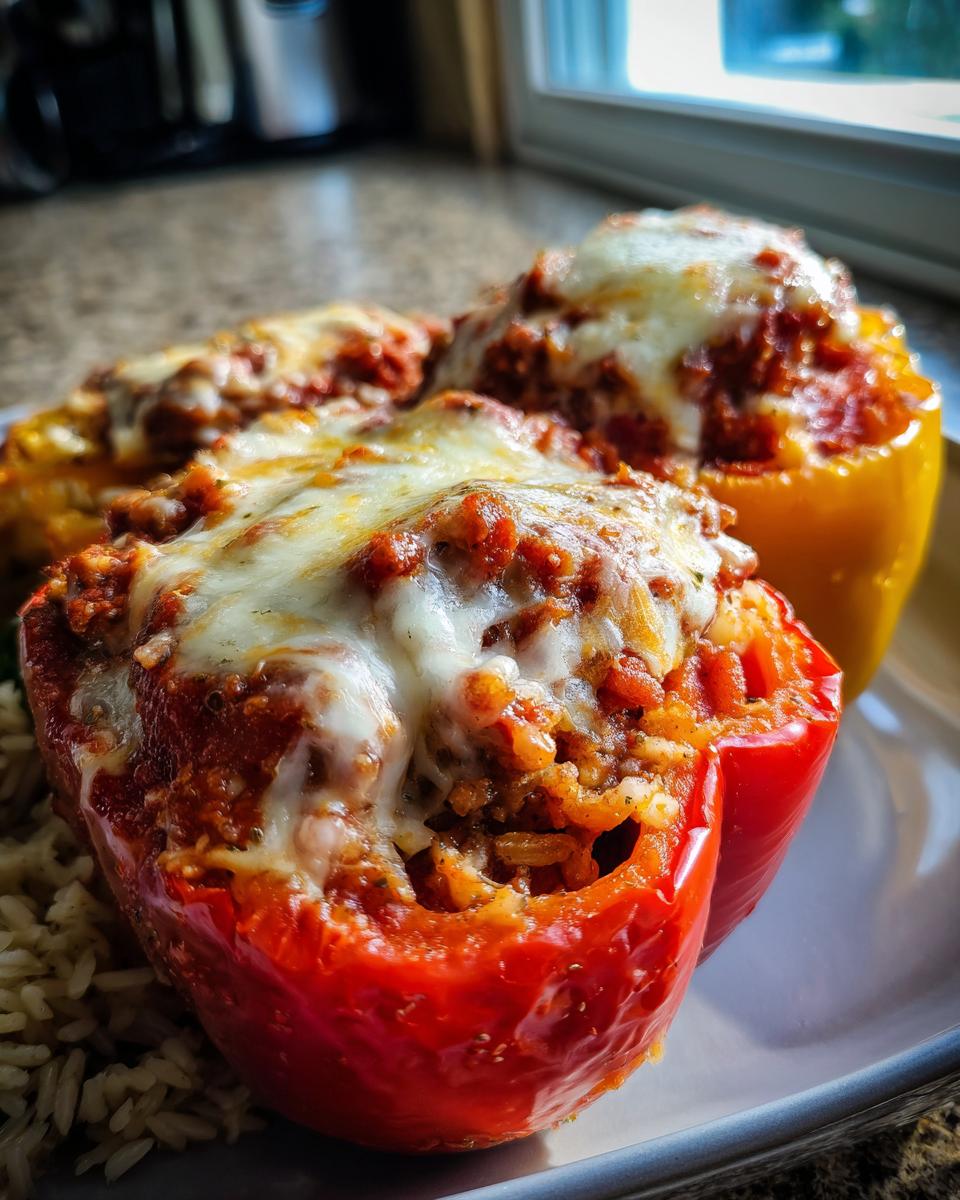
Now that you’ve pulled these beauties out of the oven, looking all golden, cheesy, and perfect, you need something to round out the meal, right? Because these baked bell peppers are so hearty and completely self-contained—they’ve got your veggies, your protein, and your starch all tucked in there—you don’t need a complicated side dish hanging around.
My favorite way to serve them is by keeping things bright and simple. A really crisp, slightly acidic green salad cuts through all that rich cheese and savory beef filling beautifully. Think mixed greens with a homemade vinaigrette that has a good punch of lemon or red wine vinegar. It wakes everything up! If you’re feeling cheesy, a simple Caesar salad is always a winner because the crunch of the romaine plays nicely against the soft pepper.
But if you need something substantial to mop up those last few delicious puddles of remaining tomato sauce in the baking dish? You absolutely need bread. I make a quick loaf of something crusty every time. Forget store-bought white bread; you deserve better! If you want a super easy, flavor-packed option that’s quicker than traditional yeast bread, you should seriously check out my recipe for easy garlic naan bread. It’s fantastic for scooping up every last bit of that tomato-beef goodness.
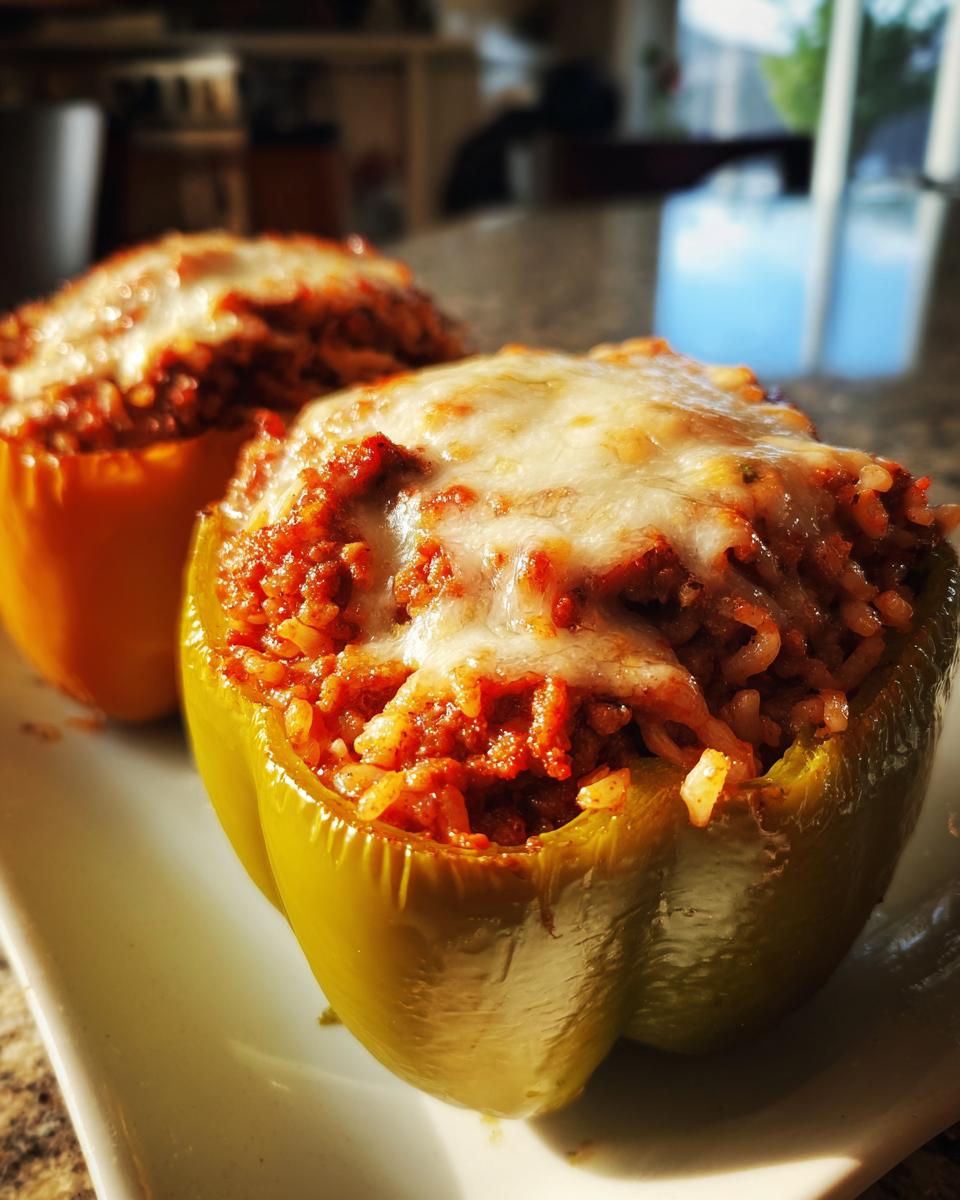
Honestly, though, sometimes the best meal is just the pepper itself, maybe with a dollop of sour cream or a sprinkle of fresh parsley on top for color. It’s comfort food taken to its satisfying conclusion. Enjoy every bite!
Storage and Reheating Instructions for Leftover Stuffed Peppers
The best part about making a gorgeous tray of these stuffed peppers is knowing you’ve got leftovers waiting for you tomorrow! These are honestly sometimes even better the next day when all those wonderful onion, herb, and beef flavors have had time to really settle into the rice and the pepper itself. But you can’t just toss them in the fridge willy-nilly; we need to protect that beautiful cheesy topping and keep that pepper tender.
First, let the dish cool down on the counter for about an hour, but don’t leave them sitting out for more than two hours—safety first, right? Once they are just warm, cover the baking dish tightly with plastic wrap or some good, sturdy foil. You can absolutely save these leftovers! They usually hold up beautifully for about three to four days tucked away in the refrigerator.
Now, for reheating those stuffed peppers—this is where folks usually mess up by grabbing the microwave first. Please, resist the urge! Microwaving the pepper makes it steam from the inside out, and that delicate structure just collapses into mush, turning your lovely baked bell peppers into something sad. The oven is your best friend here.
The Best Way to Reheat Stuffed Peppers for That Just-Made Taste
If you want them to taste like they just came out of the oven an hour ago, setting them up for success is key. Transfer one or two peppers onto a small, oven-safe ramekin or a tiny baking dish. If you want to revive that cheese topping, drizzle just a tiny bit of extra tomato sauce or maybe a teaspoon of water right in the bottom of the dish before you cover it again with foil. This traps the moisture we need!
Pop them into a moderate oven, say 350°F, for about 15 to 20 minutes while they are covered. This gentle heat warms the inside all the way through without shocking the pepper. Once they feel warm to the touch, pull the foil off and leave them uncovered for just five more minutes. If the cheese looks shriveled, a quick sprinkle of fresh mozzarella on top for the last three minutes will bring it right back to life, melty and bubbly just like you remember them!
Can I freeze extra ground beef stuffed peppers?
You can definitely freeze these, and it’s such a lifesaver when you make a double batch! The key is freezing them before you put the cheese on. Once the peppers are cooled after the first bake (the 40-minute covered stage), let them cool completely. Then, place the stuffed peppers onto a baking sheet lined with parchment paper and freeze them solid first—this prevents them from sticking together in the container. Once they are frozen hard, transfer them into an airtight, freezer-safe container or heavy-duty freezer bag. They’ll be good for up to three months!
When you’re ready to eat those frozen stuffed peppers, pull them out the night before and let them thaw in the fridge. Then, reheat them exactly as we talked about: covered in the oven at 350°F until piping hot, add the cheese, and bake uncovered until golden. It works like a charm!
Frequently Asked Questions About Making Stuffed Peppers
I get so many questions when people try this recipe because they want to make sure it tastes just like Mom used to make! Don’t hesitate if you have a question; that’s why we’re here to translate the tricky parts. You can always reach out through our Contact page if you’re stuck!
Can I prepare the filling for my rice and beef filling ahead of time?
Oh, yes, absolutely! This is a fantastic shortcut. You can cook up the entire meat and rice mixture—the savory base with the onions, garlic, and herbs—up to two days in advance. Store it sealed tight in the fridge. When you’re ready to assemble your baked bell peppers, just let the filling sit on the counter for about 30 minutes so it’s not ice-cold; this helps it stuff into the peppers easier. Then, just proceed with stuffing and baking as written!
Why are my peppers still firm or crunchy after baking?
This is the number one complaint about a less-than-perfect classic stuffed pepper recipe! It almost always comes down to steam and time. If your peppers are hard, it usually means one of two things: either your baking dish wasn’t covered tightly enough with foil, letting all the essential steam escape instead of tenderizing the vegetable, or you just needed an extra 5 or 10 minutes on that initial covered bake. Next time, press down on the foil firmly to make a tight seal. If you’re finding your comfort food peppers are resistant to your fork, just cover them back up and sneak them back into the oven for a little longer!
Do I have to use ground beef; can I use white rice?
You certainly don’t have to stick with ground beef! As we talked about, ground turkey or even a mix of sausage and ground beef works great for these ground beef stuffed peppers (even if you’re using turkey!). As for the rice, white rice is traditional because it cooks quickly inside the pepper, but short-grain brown rice works too. If you switch to brown rice, just remember it takes longer to cook, so you might need to add an extra 10 minutes to that initial covered baking time to ensure it gets tender enough for your liking.
What’s the best way to keep the cheese topping from burning?
That beautiful mozzarella topping needs a little attention! The heat source is usually too direct during the final uncovered bake. If you notice your cheese looking too dark but your peppers still aren’t fully tender, take a small square of aluminum foil and loosely tent it over the top of the cheese. It will shield it from the direct heat while still allowing the pepper underneath to finish cooking through. Pull that foil off for the very last minute if you need that extra golden color, but keeping it protected keeps your baked bell peppers looking pristine!
Estimated Nutritional Snapshot of Classic Stuffed Peppers
You know, when you’re making something this hearty and homemade, focusing too much on the numbers can sometimes take the joy out of cooking. But since we’re translating everything from the kitchen line to your home counter, keeping a rough idea of what’s in the dish doesn’t hurt! These totals are based on using the standard ingredients listed above, including 90/10 ground beef, and dividing it exactly into four hefty servings.
Remember, this is just an estimate, because adding extra herbs or swapping out the beef for turkey absolutely changes things! We made these to be satisfying comfort food, but here’s a quick rundown you can look at if you’re tracking things:
- Calories: Around 450 per pepper
- Protein: A solid 32 grams—keeps you full!
- Total Fat: About 25 grams
- Carbohydrates: Roughly 28 grams
See? It’s a really complete meal in one colorful package. The carbs are mostly coming from the rice and the natural sugars in the peppers and tomato sauce, balanced out by that great protein punch from the beef. Honestly, the best part of these stuffed peppers is the flavor, not the math, but it’s good to know you’re serving up something genuinely nourishing!
Share Your Experience Making These Stuffed Peppers
Alright, that’s the whole translation from my kitchen to yours! Now I’m genuinely excited to see what you do with this classic stuffed pepper recipe. This dish is all about tradition and memory for me, and I absolutely love hearing how you make it your own or what it reminds you of from your childhood table.
When you finish up your batch of these cheesy, savory beauties, please swing back over here and drop a star rating. Are you going 5 stars? Did the peppers come out perfectly tender? Let me know!
And don’t just leave a number! Tell me your story. Did you swap the ground beef for Italian sausage? Did you load yours up with extra mushrooms like I sometimes secretly do? Maybe this dinner instantly brought you back to your mom’s kitchen on a chilly Tuesday night. I want to hear all the details about your variations!
If you snapped a picture of those gorgeous, colorful pepper bowls straight out of the oven—especially when that mozzarella is golden brown—please tag us on social media! Seeing your kitchen successes genuinely makes my day. It proves that anyone can master these comforting classics with the right translation. If you ever have questions about what we collect or how we handle your info, that’s all laid out clearly in our Privacy Policy, but mostly, I just want to see your beautiful food!
Happy, confident cooking, friend!
PrintClassic Ground Beef Stuffed Bell Peppers

Make satisfying, home-style stuffed bell peppers filled with seasoned ground beef and rice, then bake them until tender under a layer of melted cheese.
- Prep Time: 15 min
- Cook Time: 55 min
- Total Time: 70 min
- Yield: 4 servings 1x
- Category: Dinner
- Method: Baking
- Cuisine: American
- Diet: Vegetarian
Ingredients
- 4 large bell peppers (any color)
- 1 tablespoon olive oil
- 1 pound ground beef
- 1 small yellow onion, chopped
- 2 cloves garlic, minced
- 1 teaspoon dried oregano
- 1 teaspoon dried basil
- 1/2 teaspoon salt
- 1/4 teaspoon black pepper
- 1 cup cooked white rice
- 1 (15 ounce) can tomato sauce, divided
- 1/2 cup shredded mozzarella cheese
Instructions
- Preheat your oven to 375 degrees Fahrenheit. Lightly grease a baking dish.
- Prepare the peppers: Cut the tops off the bell peppers and remove the seeds and membranes. Place the hollowed peppers cut-side up in the prepared baking dish.
- Cook the filling base: Heat the olive oil in a large skillet over medium heat. Add the chopped onion and cook until soft, about 5 minutes. Add the ground beef and cook, breaking it up with a spoon, until browned. Drain off any excess fat.
- Season the meat: Stir in the minced garlic, oregano, basil, salt, and pepper. Cook for 1 minute until fragrant.
- Combine the filling: Remove the skillet from the heat. Stir in the cooked rice and 1/2 cup of the tomato sauce. Mix well.
- Stuff the peppers: Spoon the meat and rice mixture evenly into the hollowed bell peppers.
- Bake covered: Pour the remaining 1/2 cup of tomato sauce into the bottom of the baking dish around the peppers. Cover the dish tightly with aluminum foil. Bake for 40 minutes.
- Uncover and cheese: Remove the foil. Top each stuffed pepper with shredded mozzarella cheese. Return the dish to the oven, uncovered, and bake for an additional 10 to 15 minutes, or until the peppers are tender and the cheese is melted and bubbly.
Notes
- Use a mix of ground beef and ground turkey for a slightly lighter filling.
- For extra flavor in the filling, substitute 1/4 cup of the tomato sauce with beef broth.
- If you prefer softer peppers, cover them with foil for the entire cooking time, skipping the final uncovered step.
Nutrition
- Serving Size: 1 pepper
- Calories: 450
- Sugar: 8
- Sodium: 550
- Fat: 25
- Saturated Fat: 10
- Unsaturated Fat: 15
- Trans Fat: 0.5
- Carbohydrates: 28
- Fiber: 4
- Protein: 32
- Cholesterol: 90