
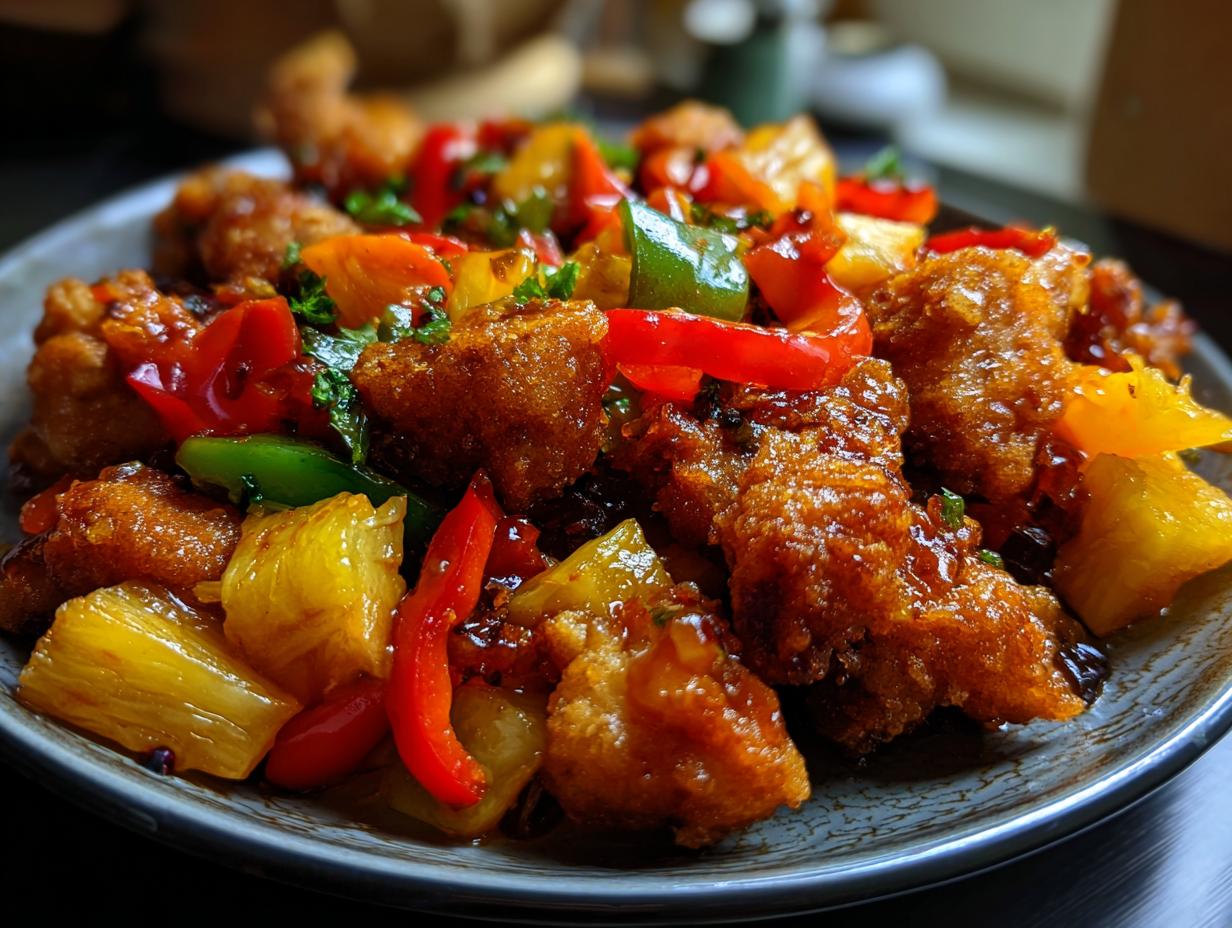
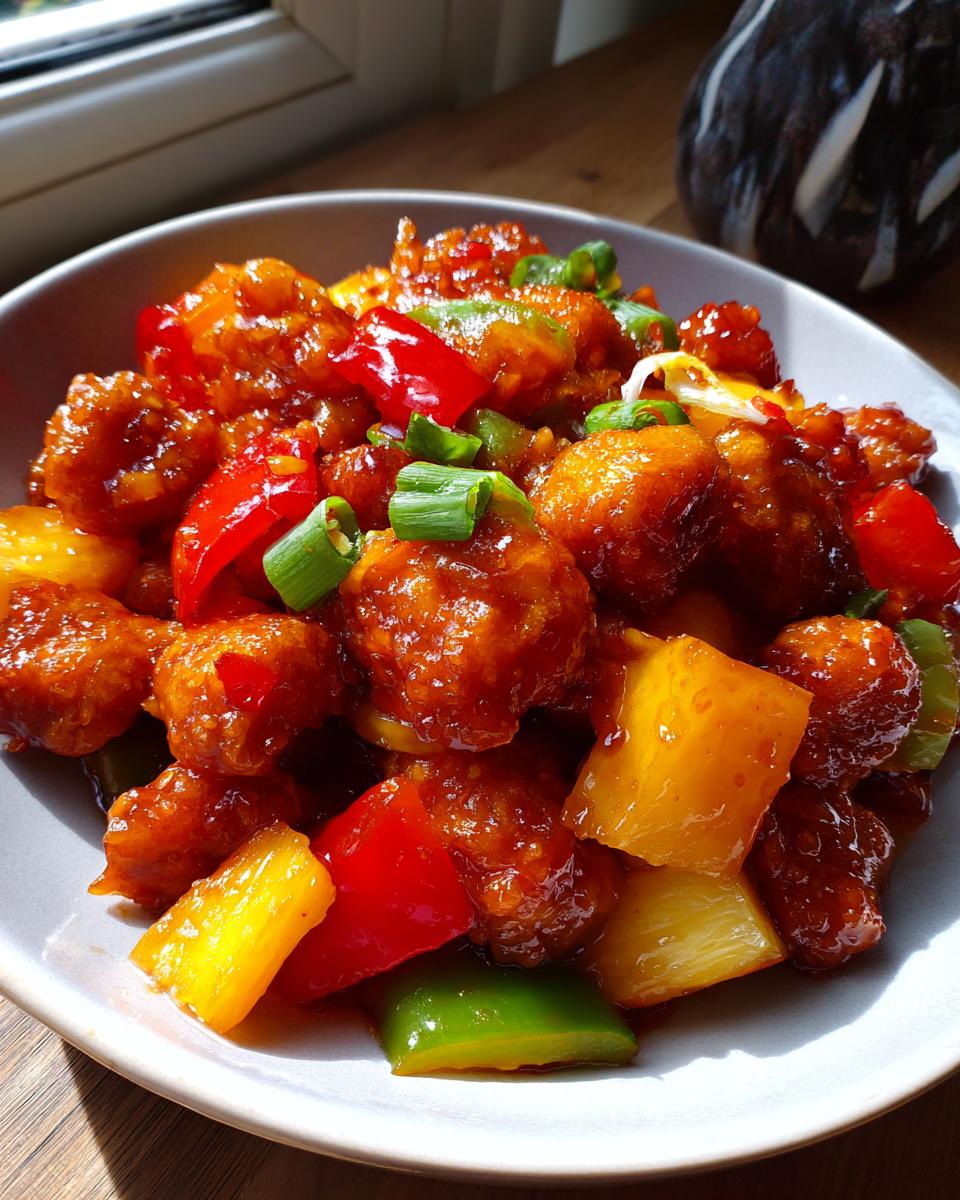
Oh, sweet and sour chicken! Just saying it out loud brings back memories of Friday nights and that unmistakable takeout box. You know the one – that glossy, orangey-red sauce coating perfectly crispy pieces of chicken, all mixed with chunks of juicy pineapple and crunchy bell peppers. For years, I tried to get that authentic takeout taste at home, especially that crunch that just doesn’t quit. Trust me, it took a few tries, but I’ve finally nailed down the secrets to making the absolute best sweet and sour chicken right here in my own kitchen, and I can’t wait to share it with you!
- Why You'll Love This Sweet and Sour Chicken Recipe
- Ingredients for Authentic Sweet and Sour Chicken
- Mastering the Crispy Chicken for Sweet and Sour Chicken
- Crafting the Perfect Sweet and Sour Sauce
- Assembling Your Sweet and Sour Chicken
- Tips for Success with Sweet and Sour Chicken
- Serving Suggestions for Sweet and Sour Chicken
- Frequently Asked Questions about Sweet and Sour Chicken
- Nutritional Information
- Share Your Sweet and Sour Chicken Creations!
Why You’ll Love This Sweet and Sour Chicken Recipe
Seriously, this recipe is a game-changer! Here’s why you’ll be making it again and again:
- It’s SO easy to make! You won’t believe how fast this comes together, even on a crazy weeknight. No fancy chef skills required, I promise!
- That CRUNCH! We’re talking perfectly crispy, golden chicken that actually *stays* crispy, even after it’s coated in that amazing sauce. No sad, soggy pieces here.
- Authentic takeout flavor, no doubt. Forget those weirdly colored sauces you sometimes get. This one is bright, tangy, and perfectly sweet, hitting all those classic notes you love.
- You’re in charge of what goes in. No weird artificial stuff, just good old-fashioned ingredients that make for a truly delicious meal everyone will gobble up.
- It’s just plain satisfying. There’s a special kind of joy in making a beloved takeout dish yourself. It’s like enjoying a delicious memory!
Ingredients for Authentic Sweet and Sour Chicken
Alright, let’s get our mise en place ready, because having everything prepped makes this dish an absolute breeze. You’ll want to grab these goodies:
For the Crispy Chicken:
- About 1.5 pounds of boneless, skinless chicken thighs – I find thighs stay juicier! Cut them into nice, bite-sized 1-inch pieces.
- 1 cup of regular all-purpose flour for that initial coating.
- A good 1/2 cup of cornstarch. This is key for that super crispy coating, trust me!
- 1 teaspoon of salt and 1/2 teaspoon of black pepper – basic but necessary, right?
- 2 large eggs, just give ’em a quick whisk.
- And 1/2 cup of water to thin out the egg mixture.
- Plenty of vegetable oil for frying – we need a good amount for that nice, even fry.
For the Sweet and Sour Sauce:
- 1 cup of fresh pineapple chunks – I love using fresh, but canned works in a pinch!
- 1 green bell pepper, cut into those same 1-inch pieces as the chicken.
- And 1 red bell pepper, just for that gorgeous color pop!
- 1/2 cup of ketchup. Yep, that’s the base of our vibrant sauce.
- 1/3 cup of white vinegar for that essential tang.
- 1/4 cup of granulated sugar – don’t skimp!
- 2 tablespoons of soy sauce for that savory depth.
- And for thickening it all up, we’ll need 1 tablespoon of cornstarch mixed with 2 tablespoons of water. This makes our beautiful glossy sauce!
Mastering the Crispy Chicken for Sweet and Sour Chicken
Okay, let’s talk about the star of the show here: the chicken! For this sweet and sour chicken, getting that super-crispy coating is non-negotiable, right? The secret weapon is a two-part process, kinda like a little baking hug for the chicken before it hits the hot oil. I’ve tried all sorts of things, and this method delivers that fantastic crunch every single time. It reminds me an awful lot of how I prep my zucchini fritters – you gotta get that coating just right!
Preparing the Chicken Coating
First things first, we need our dry coating ready to go. In a good-sized bowl, I whisk together the all-purpose flour and the cornstarch – that extra cornstarch is what gives us that amazing shatter-crisp texture. Then I toss in the salt and pepper. Easy!
The Art of Frying Chicken
Now, get your oil heated up in a big, deep skillet or a wok – about 2 inches worth, and we’re looking for that sweet spot around 350°F (175°C). You don’t want it too cool or the chicken gets greasy; too hot and it burns before it cooks through. I like to dip my chicken pieces into the whisked eggs and water, let the excess drip off, then really give them a good toss in that flour-cornstarch mix. Make sure they’re totally coated! Fry them in batches so you don’t crowd the pan – that’s super important! Give them about 4-5 minutes until they’re beautifully golden brown and crispy. If you’re feeling fancy (or just really committed to crispiness!), you can actually fry them twice. Just pull them out after the first golden stage, let them rest for a minute, then pop ’em back in for another quick fry until they’re deep golden brown. It makes a world of difference! Once they’re done bathing in the hot oil, scoop them out with a slotted spoon and let them drain on a rack or paper towels.
Crafting the Perfect Sweet and Sour Sauce
Okay, now for the magic that ties it all together – the sauce! This is where we get that signature glossy finish and that perfect balance of sweet and tangy. Making your own sweet and sour sauce from scratch is seriously so much better than any jarred stuff, and it’s surprisingly simple. Forget those overly sweet or artificial-tasting versions; we’re going for the real deal here. It’s kind of like how I whip up my go-to dumpling sauce – simple ingredients, big flavor! In a small saucepan, just whisk together the ketchup, white vinegar, sugar, and soy sauce. Give it a good stir until it’s all combined.
Now, bring that mixture to a gentle simmer over medium heat. While it’s heating up, mix your tablespoon of cornstarch with about 2 tablespoons of water until it’s smooth – that’s our thickening slurry. Pour that into the simmering sauce, whisking like crazy, and watch it work its magic! It’ll thicken up beautifully in just a minute or two. I like to taste it here and adjust the sugar or vinegar if I’m feeling it needs a little more punch. Once it’s thick and glossy, toss in your pineapple chunks and bell pepper pieces and let them warm through for just a couple of minutes. You want them tender-crisp, not mushy!
Assembling Your Sweet and Sour Chicken
Alright, the moment of truth! We’ve got our perfectly crispy chicken, our vibrant veggies, and that amazing glossy sauce. Now, for the most crucial step to keep that chicken crunchy: you absolutely, positively, want to toss everything together right before you serve it. Seriously, don’t let that gorgeous chicken swim around in the sauce for too long before it hits your plate, or you’ll lose that fantastic crunch we worked so hard for! Just have your sauce with the pineapple and peppers ready to go in the pan, then add your freshly fried chicken. Give it a quick, gentle toss to coat everything beautifully. It’s that simple, and it makes ALL the difference!
Tips for Success with Sweet and Sour Chicken
You know, making truly stellar sweet and sour chicken at home is all about a few little tricks I’ve picked up over the years. It’s not complicated, but paying attention to the details really makes it shine. If you want that perfect balance of crispy chicken and bright, tangy sauce, these are my go-to tips. It’s how I make sure my weeknight dinners feel extra special, even when I’m in a rush!
First off, use good quality ingredients. Fresh bell peppers and actual pineapple chunks make a world of difference. And for frying? Make sure your oil is at that perfect 350°F (175°C) – that’s the sweet spot for golden, crispy chicken without it getting greasy. Don’t overcrowd the pan! Fry in batches, always. It might take a few extra minutes, but it’s key to that crunch. For the sauce, keep tasting and adjusting until it’s just right for *you*. A little more vinegar? A touch more sugar? You got it!
Serving Suggestions for Sweet and Sour Chicken
This sweet and sour chicken is practically begging for some classic pairings to make it a full meal! Honestly, you can’t go wrong with a big scoop of fluffy fried rice. It’s the perfect vehicle to soak up any extra sauce. Sometimes I even like to whip up some simple steamed broccoli or serve it alongside some garlic naan for the ultimate comfort food feast!
Frequently Asked Questions about Sweet and Sour Chicken
I get asked about this sweet and sour chicken recipe a lot, and it’s usually about little tweaks to make it perfect for YOUR family. Here are some of the most common questions I get:
Can I bake the chicken instead of frying for this sweet and sour chicken recipe?
You can totally bake it if you prefer! Just toss the coated chicken with a little oil and bake at 400°F (200°C) until golden and cooked through. It won’t be *quite* as crispy as fried, but it’s still delicious, for sure!
How can I adjust the sweetness and tanginess of the sauce?
That’s the beauty of homemade! For a sweeter sauce, just add a bit more sugar, a tablespoon at a time. If you want it tangier, add a splash more white vinegar. Taste as you go until it’s just how you like it!
What are some good vegetable substitutions for this Chinese pineapple chicken?
Oh, you can get creative! Red onion, snow peas, broccoli florets, or even sliced carrots all work wonderfully in this Chinese pineapple chicken. Just make sure to chop them into roughly the same size as your chicken pieces so they cook evenly.
Nutritional Information
Alright, let’s talk numbers! These are just estimates, of course, since how much you gobble up and exactly what you use can change things a bit. But generally, one serving of this amazing sweet and sour chicken packs about 550 calories, with around 25g of fat and 30g of protein. You’re looking at about 50g of carbs and roughly 35g of sugar. Deliciousness with a side of knowing what’s fueling you!
Share Your Sweet and Sour Chicken Creations!
Now that you’ve whipped up this incredible sweet and sour chicken, I want to hear all about it! Did it bring back those takeout memories? Did the chicken stay super crispy? Drop a comment below with your feedback, and please, rate the recipe if you loved it! And if you snapped some photos (because let’s be honest, it’ll look amazing), tag us on social media! You can also reach out through my contact page if you have any questions or just want to say hi!
PrintCrispy Sweet and Sour Chicken
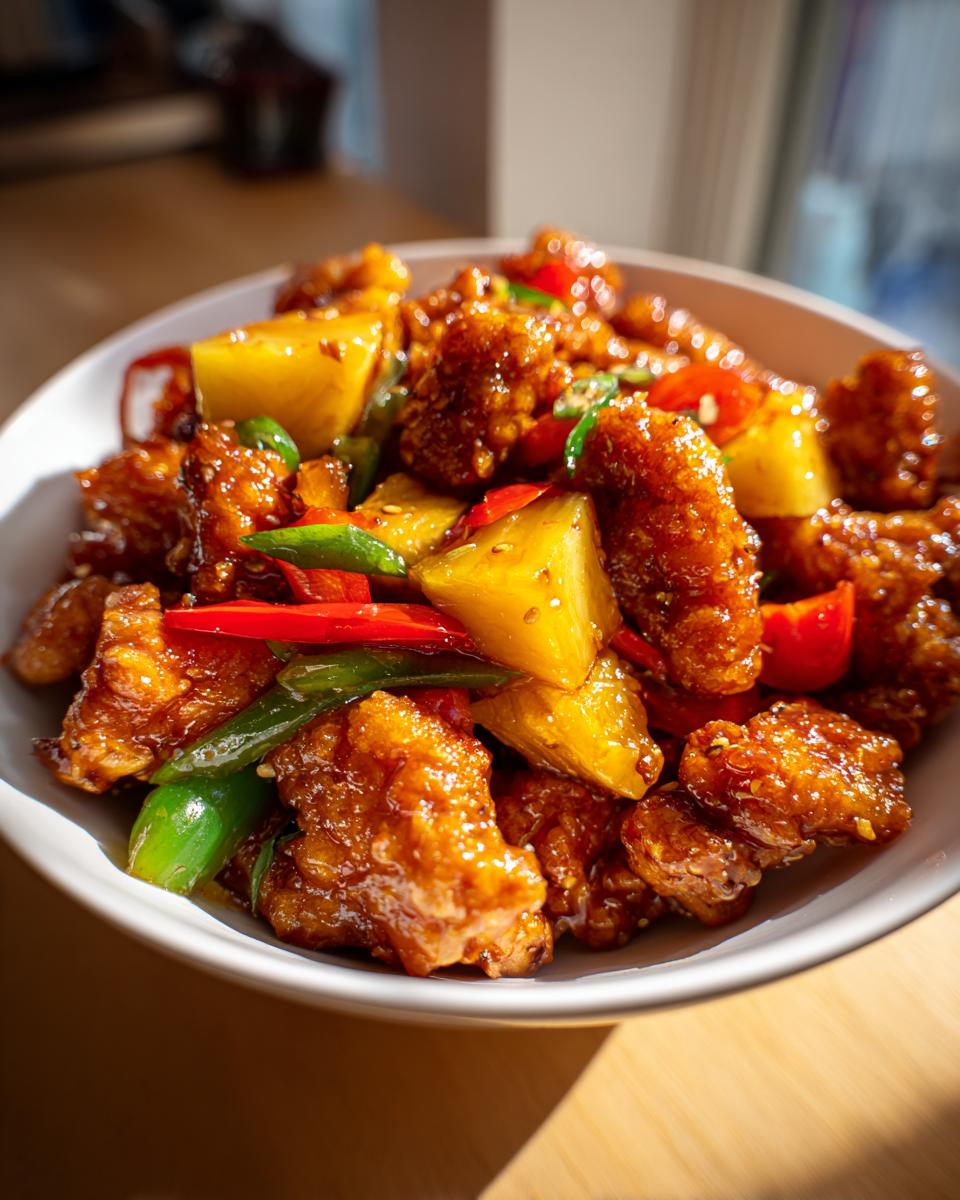
A classic Chinese-American takeout favorite made at home, featuring crispy battered chicken pieces with pineapple and bell peppers in a tangy, glossy sauce.
- Prep Time: 20 min
- Cook Time: 25 min
- Total Time: 45 min
- Yield: 4 servings 1x
- Category: Dinner
- Method: Frying
- Cuisine: Chinese-American
- Diet: Vegetarian
Ingredients
- 1.5 lbs boneless, skinless chicken thighs, cut into 1-inch pieces
- 1 cup all-purpose flour
- 1/2 cup cornstarch
- 1 teaspoon salt
- 1/2 teaspoon black pepper
- 2 large eggs, beaten
- 1/2 cup water
- Vegetable oil, for frying
- 1 cup fresh pineapple chunks
- 1 green bell pepper, cut into 1-inch pieces
- 1 red bell pepper, cut into 1-inch pieces
- 1/2 cup ketchup
- 1/3 cup white vinegar
- 1/4 cup granulated sugar
- 2 tablespoons soy sauce
- 1 tablespoon cornstarch, mixed with 2 tablespoons water (for sauce thickening)
Instructions
- In a bowl, combine flour, 1/2 cup cornstarch, salt, and pepper.
- In a separate bowl, whisk together eggs and water.
- Add the chicken pieces to the egg mixture, then toss to coat.
- Dredge the chicken pieces in the flour mixture, ensuring they are fully coated.
- Heat about 2 inches of vegetable oil in a large skillet or wok over medium-high heat to 350°F (175°C).
- Fry the chicken in batches until golden brown and crispy, about 4-5 minutes per batch. Remove with a slotted spoon and drain on paper towels. For extra crispiness, you can double fry: fry once until lightly golden, remove, let rest for 2 minutes, then fry again until deep golden brown.
- While the chicken fries, prepare the sauce. In a small saucepan, whisk together ketchup, vinegar, sugar, and soy sauce.
- Bring the sauce to a simmer over medium heat. Stir in the cornstarch slurry and cook, stirring constantly, until the sauce thickens, about 1-2 minutes.
- Add the pineapple chunks and bell pepper pieces to the sauce and cook for 2-3 minutes until slightly tender-crisp.
- Just before serving, add the fried chicken to the sauce and toss gently to coat. Serve immediately to maintain crispiness.
Notes
- Serve with fried rice for a complete meal.
- Toss the chicken in the sauce only right before serving to prevent sogginess.
- Adjust sugar and vinegar to your preference for sweetness and tanginess.
Nutrition
- Serving Size: 1 serving
- Calories: 550
- Sugar: 35g
- Sodium: 700mg
- Fat: 25g
- Saturated Fat: 5g
- Unsaturated Fat: 20g
- Trans Fat: 0g
- Carbohydrates: 50g
- Fiber: 3g
- Protein: 30g
- Cholesterol: 150mg