
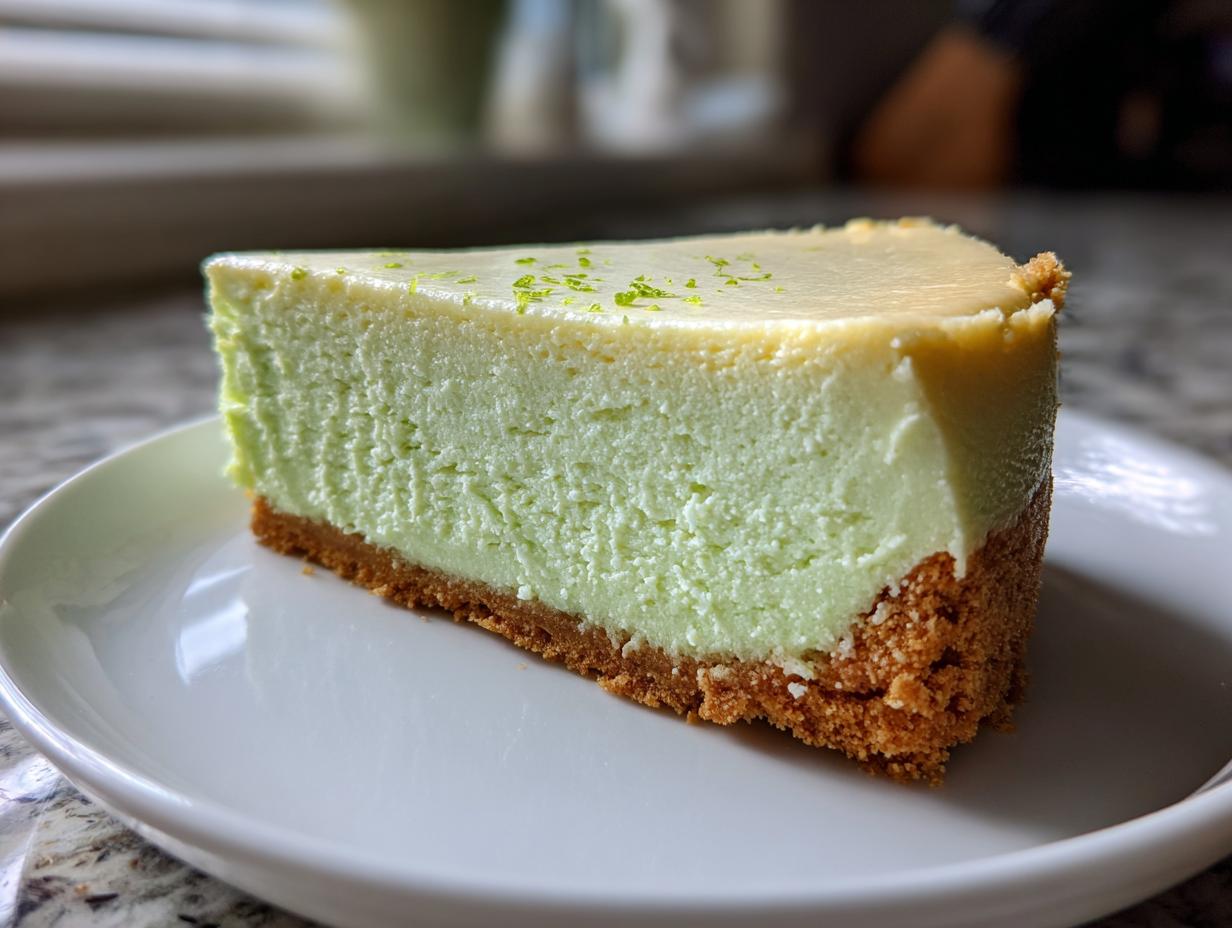
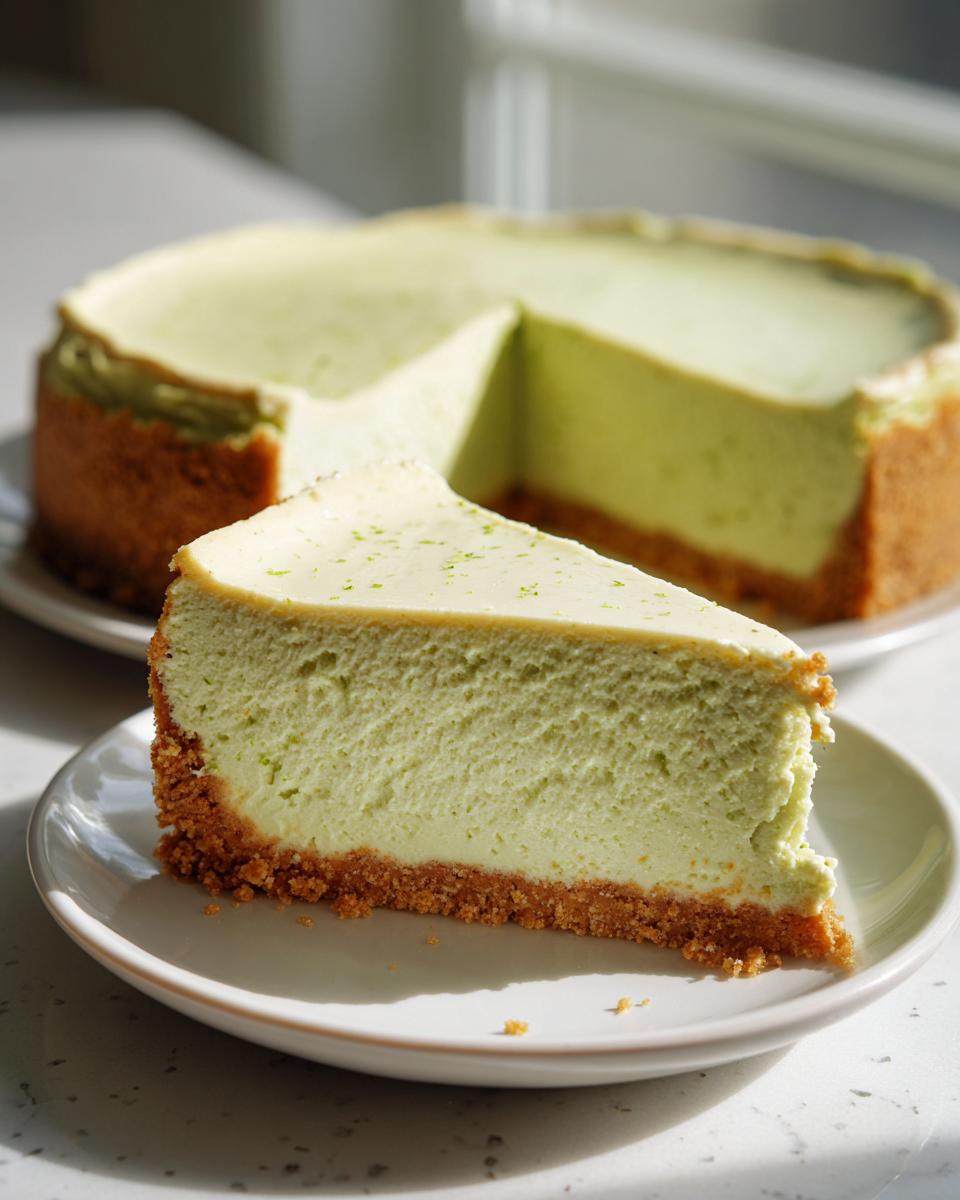
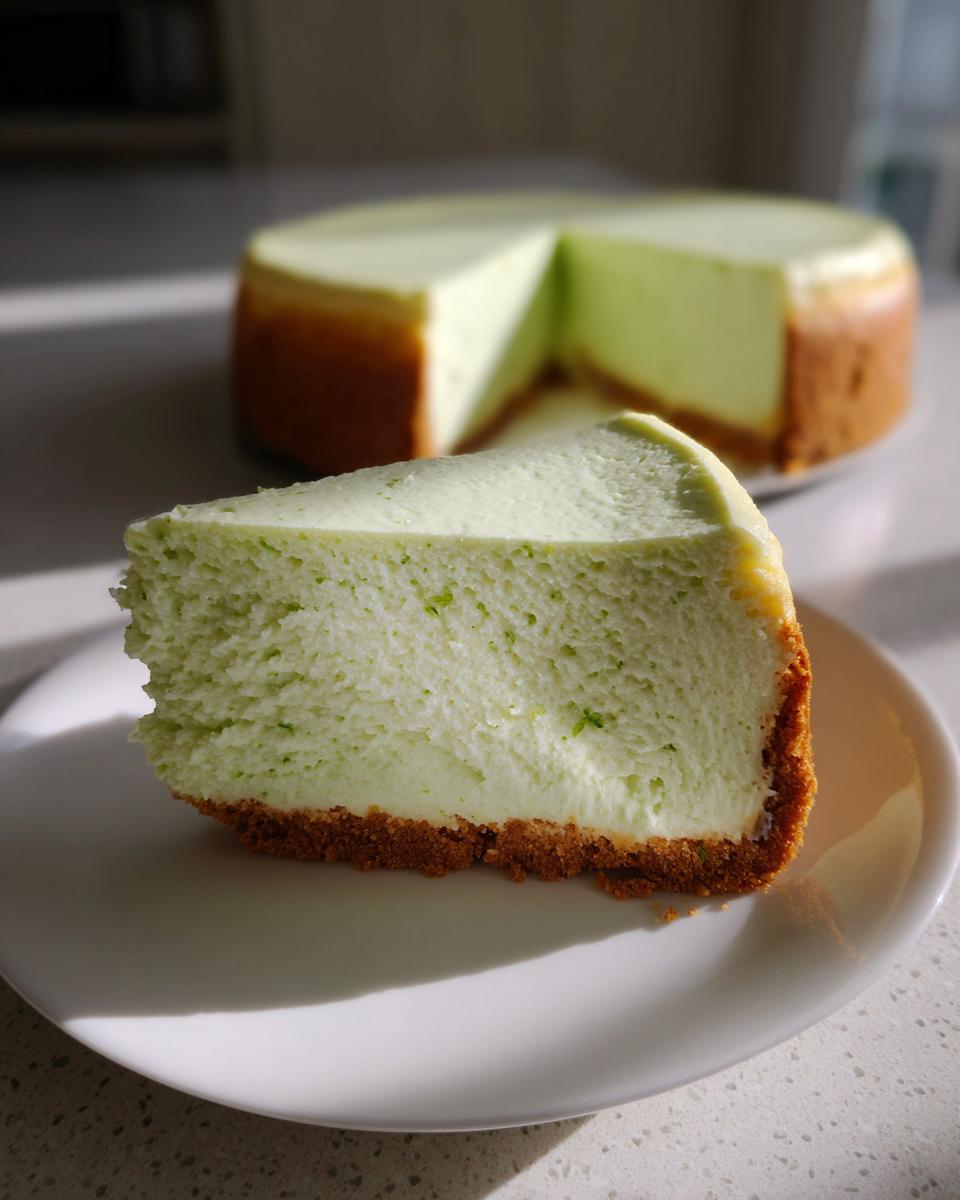
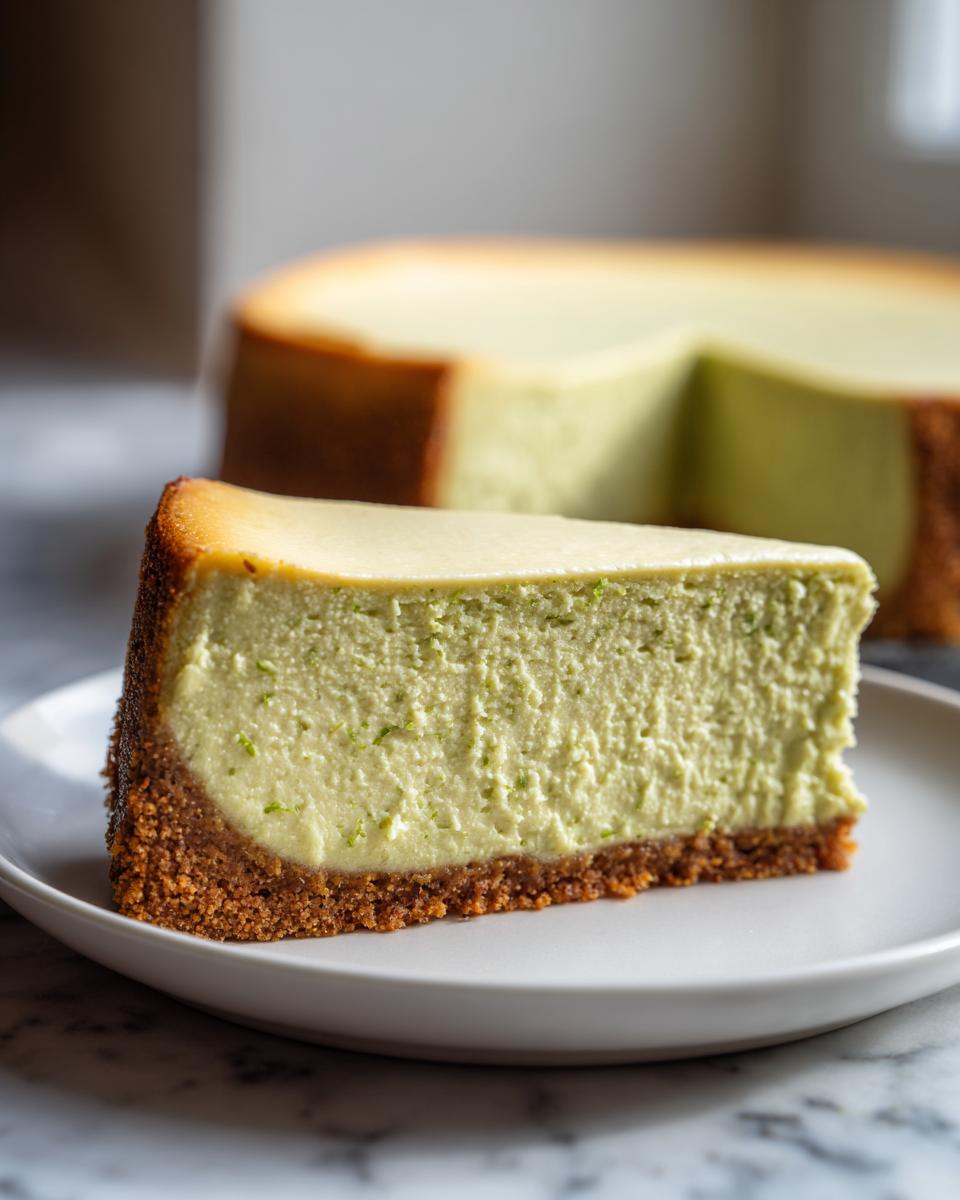
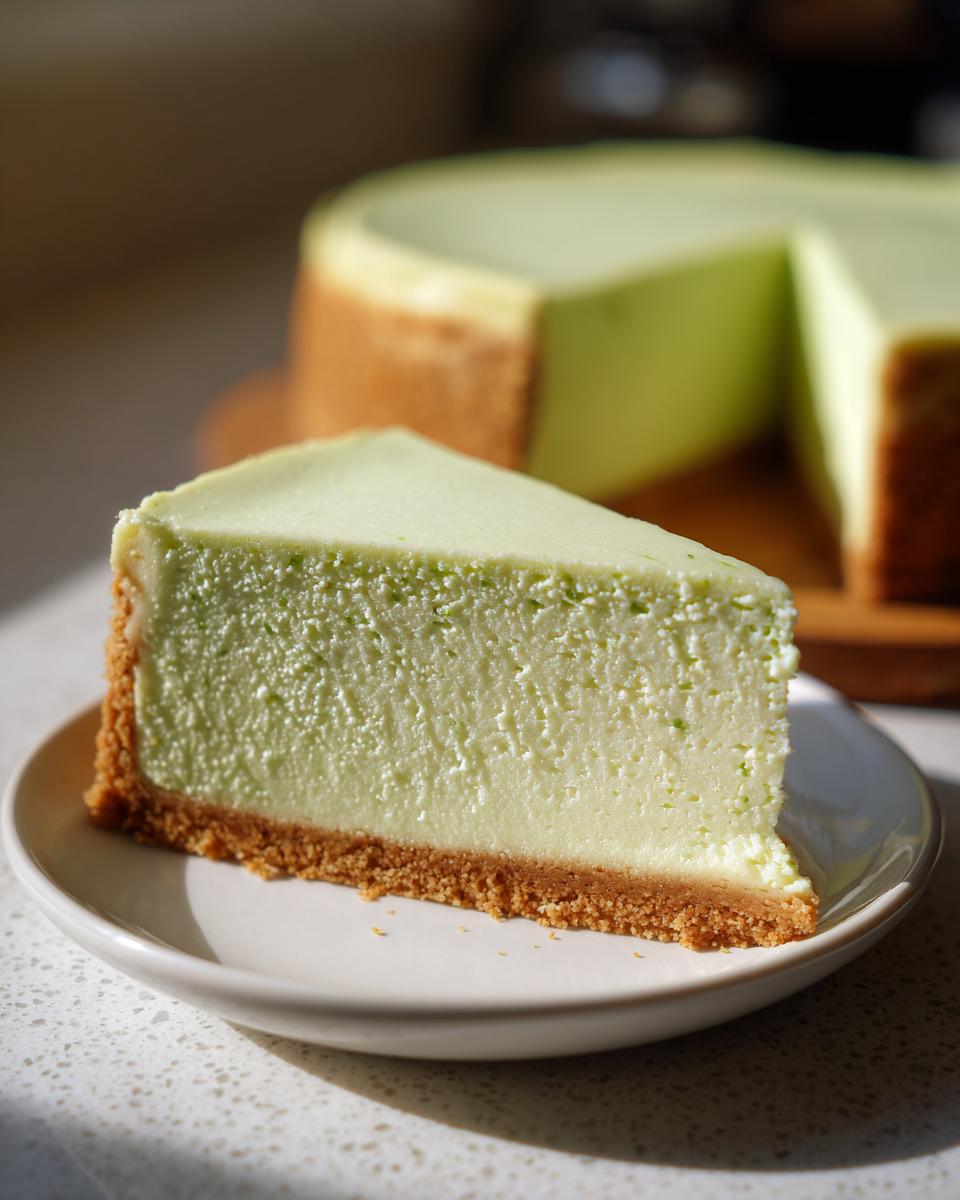
When that intense craving for something bright and refreshing hits, forget the usual suspects. We’re talking about pure, unadulterated sunshine in dessert form, and that means only one thing: the definitive, creamy, tangy key lime cheesecake. This isn’t some imitation; this recipe brings that sharp, tropical citrus punch you want, wrapped up in that glorious, silky texture. I struggled so much early on with cracks you could sail a tiny boat in, but trust me, mastering the water bath technique was the game changer. Once you nail that bath, you lock in the moisture and get that perfect, smooth foundation layer that makes this dessert legendary. Get ready for the best slice of your summer!
- Why This Creamy Key Lime Cheesecake is Your New Favorite Tangy Lime Dessert
- Gathering Ingredients for the Ultimate Key Lime Cheesecake Recipe
- How to Make Key Lime Cheesecake: The Baked Cheesecake Tutorial
- Expert Tips for Your Best Key Lime Cheesecake Ever
- Variations: Easy Cheesecake Recipes for Different Needs
- Serving Suggestions for Your Tropical Citrus Dessert
- Storage and Reheating Instructions for Key Lime Cheesecake
- Frequently Asked Questions About Making Key Lime Cheesecake
- Sharing Your Bright Lime Flavor Desserts
Why This Creamy Key Lime Cheesecake is Your New Favorite Tangy Lime Dessert
Look, there are a hundred ways to get lime into a dessert, but only a few nail the texture and the flavor bomb all at once. This isn’t just any lime treat; this is the real deal. We promise you the following:
- The most unbelievably creamy Key Lime Cheesecake filling you’ll ever spoon—no gritty business here!
- An intense, zesty punch, because we respect the lime way too much to go mild.
- That gorgeous, classic baked texture that sets it apart from the quick no-bake versions. It’s a true tangy lime dessert superstar for any gathering.
If you want to see the magic behind this incredible zing, check out the technique they use over at this stunning creamy recipe!
Gathering Ingredients for the Ultimate Key Lime Cheesecake Recipe
Alright, let’s talk about what you need to gather. Remember that kitchen slang rule about respecting your ingredients? This is where that really matters, especially for that tart flavor! Don’t even think about swapping out the fresh juice for the bottled stuff; for this key lime cheesecake, you need that beautiful, sharp brightness that only fresh limes give you. And heads up: we need the cream cheese chilling-out time. It absolutely must be fully softened to room temperature, otherwise, you end up with lumps, and we are shooting for smooth perfection here.
For the Graham Cracker Crust Cheesecake Base
The crust has to be sturdy enough to hold up that creamy filling, so we are keeping it classic and buttery:
- 1 1/2 cups graham cracker crumbs (that’s the standard box, crushed nice and fine)
- 1/4 cup granulated sugar (just to sweeten it up a bit)
- 6 tablespoons unsalted butter, melted (make sure it’s totally melted, not just soft!)
For the Bright and Tangy Key Lime Cheesecake Filling
This is where the magic happens, giving you that gorgeous texture. Pay close attention to the cream cheese temp here:
- 3 (8 ounce) packages cream cheese, softened (I mean *really* soft, no chunks!)
- 1 1/2 cups granulated sugar (we need a good amount for structure)
- 1/4 cup all-purpose flour (this helps keep things stable)
- 1 teaspoon vanilla extract
- 1/2 teaspoon lime zest (this is pure flavor power, don’t skip grating it!)
- 1/2 cup fresh key lime juice (yes, fresh is non-negotiable for that authentic tang)
- 4 large eggs (they must be room temperature, so they mix in without stressing the batter)
How to Make Key Lime Cheesecake: The Baked Cheesecake Tutorial
Okay, this is where we get down to business—the actual steps for our incredible key lime cheesecake. This entire process focuses on building that silkiness you crave, so don’t rush the crucial moments, especially when it comes to the water bath. If you want to see another amazing baked texture, I broke down the methods for my white chocolate version over here: white chocolate cheesecake recipe. But for now, let’s conquer this citrus beauty!
Crust Preparation and Pre-Bake
First thing’s first: get that oven warmed up to 325 degrees F! Grab your 9-inch springform pan and wrap the outside tightly, like a little present, with heavy-duty foil—this is bath armor. Mix your graham crumbs, the crust sugar, and that melted butter until it looks like wet sand. Press that firmly into the bottom of the pan. Don’t be shy; really pack it down! Pop that crust into the oven to bake for exactly 10 minutes. Let it cool while you tackle the main event.
Mixing the Creamy Key Lime Cheesecake Filling
We build this filling carefully. In a big bowl, beat that room-temperature cream cheese until it’s ridiculously smooth. Then, mix in the 1 1/2 cups of sugar and the flour just until they disappear. Next, lightly swirl in your vanilla and that potent lime zest. Now, the juice goes in. Finally, we add the eggs, but here’s my expert tip: add them ONE at a time, mixing on the lowest speed until *just* incorporated. I mean it—stop as soon as the yellow disappears. Overmixing the eggs is how you introduce air, and air equals cracks. We want dense, ultra-creamy Key Lime Cheesecake, not an airy sponge!
Executing the Water Bath for Perfect Key Lime Cheesecake
This step is the secret sauce for any professional-level baked cheesecake tutorial. Place your foil-wrapped springform pan inside a larger roasting pan—the bigger, the better! Pour the filling over your cooled crust. Then, very gently, pour hot water into the *roasting pan* until it comes halfway up the sides of the springform. This water bath insulates the cheesecake, giving you that super even temperature for a smooth bake. It’s the best defense against a cracked top, I promise.
Cooling and Chilling: Secrets to Homemade Cheesecake Perfection
Baking is only half the battle; cooling is where you earn that title of homemade cheesecake perfection. Once the edges look set and the center has a slight wiggle (that’s 50 to 60 minutes at 325°F), turn the oven completely off. Crack the door open slightly—prop it with a wooden spoon if you have to—and leave the cheesecake inside that warm environment for a full hour. This slow cool-down prevents the sudden temperature shock that makes them shrink and split. Once it’s down to room temp, unwrap it and stick it in the fridge for a minimum of 6 hours, but seriously, overnight is when it gets truly spectacular!
For even more insight on avoiding bake disasters, check out the techniques shared over at this wonderfully bright and creamy recipe!
Expert Tips for Your Best Key Lime Cheesecake Ever
So, you’ve mastered the bake, but you want that extra professional edge on your key lime cheesecake? I’ve got a couple of chef-level pro-tips pulled straight from my notes section. First, let’s talk juice. If you try to fake it with bottled juice, guess what? It tastes bottled. You have to use fresh key lime juice for that explosive, authentic tang. Also, that cream cheese? It needs to be truly pliable. If it’s cold, you’re fighting chemistry, and you’ll end up with a lumpy texture instead of creamy bliss.
Now, for the indulgence factor! If you want that thick, rich topping that those fancier chain restaurants sometimes feature, try this: before the final hour of slow cooling, gently spread a thin layer of sour cream mixed with just a sprinkle of sugar over the top. Bake it for five more minutes, then proceed with the slow cooling. It gives you that slightly tangy, super-smooth topcoat that people rave about. Check out the inspiration for that beautiful finish over at this amazing recipe!
Variations: Easy Cheesecake Recipes for Different Needs
I get it—sometimes you need that bright lime flavor, but you just don’t have an oven day planned. That’s why we always keep a couple of backup plans in the vault. If you’re craving an easy cheesecake recipe that sets up fast, you absolutely *have* to look into the No-Bake version. Seriously, it’s a lifesaver for last-minute desserts!
For those no-bake versions, you usually swap the eggs for stabilized whipped cream or gelatin, which works brilliantly for a lighter, more mousse-like texture. I’ve got a fantastic guide for mixing up a luscious no-bake pumpkin cheesecake that you can easily adapt just by swapping pumpkin puree for key lime juice and zest. It’s unbelievably quick!
And if you want to serve elegant little bites at your next party? Stop messing with slicing and make individual cheesecakes. You can bake this recipe right in a muffin tin (just line it with muffin liners!) or use the no-bake method for speedy assembly. Check out my tips for whip-up-and-go mini cheesecake recipe adaptation too. Trust me, seeing the gorgeous results from that no-bake key lime cheesecake online makes your mouth water!
Serving Suggestions for Your Tropical Citrus Dessert
Once this gorgeous, tangy creation is chilled and set, it’s time to dress it up! This bright lime flavor is just begging for contrast. Forget heavy sauces; we want light and fresh elements. A simple dollop of fresh, slightly sweetened whipped cream is mandatory. It perfectly balances that tartness. I also love scattering some fresh raspberries or even thinly sliced kiwi around the edges—it just screams summer parties!
If you’re going decadent for your cheesecake for parties, a very thin drizzle of salted caramel works surprisingly well, cutting the citrus with that salty-sweet note. For an easy side, I sometimes whip up a batch of my strawberry cupcakes recipe to have something else on the table for guests who want fruit but prefer chocolate base.
Storage and Reheating Instructions for Key Lime Cheesecake
So, you went through all that work (especially that water bath!) and you have the most beautiful, creamy key lime cheesecake sitting there. Congrats! Now, how do we keep it perfect until dessert time? The most important thing I can stress here is patience. Even though it *looks* ready after six hours, that overnight chill is critical. Seriously, don’t skip it if you can help it. The texture firms up beautifully, and that tangy flavor really marries into the cream cheese mixture when it sits.
Once it’s fully chilled, cover that springform pan tightly with plastic wrap—make sure the wrap isn’t touching the surface of the cheesecake, or you might have to scrape off bits when you uncover it for company. In the fridge, this dense beauty will hold up great for about four to five days. It’s actually one of the best desserts to make ahead of time because it holds its moisture so well throughout the week.
Can you freeze it? Yes, absolutely! If you need longer storage, freezing is a great option, especially if you made it for a future gathering. You have to chill it completely first, then wrap that whole pan (or individual slices) extra securely in a few layers of plastic wrap, followed by aluminum foil to block any freezer burn. When you’re ready to eat it, the absolute best way is to just move it thawed to the fridge overnight. Do not try to bring it back to room temp quickly on the counter, or you risk that dreaded “weeping” or sudden texture breakdown. Slow and slow wins the race for cheesecake preservation!
Frequently Asked Questions About Making Key Lime Cheesecake
I totally get it. Even with the best instructions, sometimes you just have a quick question pop up before you dive in. Making a baked cheesecake feels intimidating, but trust me, once you know the *why* behind the steps, you ask fewer questions next time! Here are the ones I hear most often about getting that perfect, creamy Key Lime Cheesecake texture.
What is the difference between Key Lime and regular lime in a cheesecake?
This is a big one! Key limes are smaller and have thinner skin, but their main thing is the flavor—they are noticeably more floral and tart than standard Persian limes. Using fresh key lime juice gives you that sharp, unforgettable zing that makes this dessert shine. Using regular lime juice is okay if you are desperate (and it brings you into the realm of refreshing lime desserts), but the aroma profile is just different. Keep searching for those key limes!
Can I skip the water bath when making this key lime cheesecake?
Oh, honey, please don’t! Think of the water bath as your insurance policy for achieving that truly creamy Key Lime Cheesecake filling. If you skip it, the heat is too direct and aggressive on the egg proteins. That usually results in two things: the edges cooking way before the center, and, yep, cracks. If you want the smoothest possible result for your homemade cheesecake perfection, you need that cozy, steamy environment the water bath provides. It keeps the structure gentle while it bakes.
If you’re looking for something super simple that doesn’t require all this fuss, you should check out my super easy easy apple crumble recipe—it’s foolproof!
Sharing Your Bright Lime Flavor Desserts
Now comes my favorite part: seeing what you all create! Honestly, when you make something this bright and zesty, you have to show it off. This key lime cheesecake is total eye candy, so snap a picture once it’s all chilled and looking gorgeous on your serving platter for your next gathering.
Once you’ve taken that first perfect, tangy bite, do me a huge favor and come back here! Let me know what you thought! Did you stick to the water bath? Did you try the sour cream topping? Drop your rating and your comments below—I read every single one!
If you’re looking for another guaranteed crowd-pleaser for your party menu, you absolutely have to check out my recipe for an easy creamy Mexican corn dip recipe. It’s savory, it’s cheesy, and it keeps everyone happy while you wait for the cheesecake to set up properly!
PrintCreamy Baked Key Lime Cheesecake with Graham Cracker Crust
Make this creamy, tangy Key Lime Cheesecake. This recipe delivers bright citrus flavor and a smooth texture, perfect for any gathering.
- Prep Time: 25 min
- Cook Time: 60 min
- Total Time: 7 hours 25 min
- Yield: 12 servings 1x
- Category: Dessert
- Method: Baking
- Cuisine: American
- Diet: Vegetarian
Ingredients
- 1 1/2 cups graham cracker crumbs
- 1/4 cup granulated sugar (for crust)
- 6 tablespoons unsalted butter, melted
- 3 (8 ounce) packages cream cheese, softened
- 1 1/2 cups granulated sugar (for filling)
- 1/4 cup all-purpose flour
- 1 teaspoon vanilla extract
- 1/2 teaspoon lime zest
- 1/2 cup fresh key lime juice
- 4 large eggs
Instructions
- Preheat your oven to 325 degrees F. Wrap the outside of a 9-inch springform pan tightly with heavy-duty aluminum foil.
- Make the crust: Mix graham cracker crumbs, 1/4 cup sugar, and melted butter until combined. Press the mixture firmly into the bottom of the prepared springform pan. Bake for 10 minutes. Let cool.
- Prepare the filling: In a large bowl, beat the softened cream cheese until smooth. Add 1 1/2 cups sugar and flour; beat until just combined. Mix in vanilla extract and lime zest.
- Slowly beat in the key lime juice. Add the eggs one at a time, mixing on low speed after each addition until just incorporated. Do not overmix.
- Pour the filling over the cooled crust. Place the springform pan inside a larger roasting pan. Carefully pour hot water into the roasting pan until it reaches halfway up the sides of the springform pan (this is a water bath).
- Bake for 50 to 60 minutes, or until the edges are set but the center still jiggles slightly.
- Turn off the oven, crack the door open, and let the cheesecake cool inside the oven for 1 hour. This prevents cracking.
- Remove the cheesecake from the water bath and let it cool completely on a wire rack.
- Chill the cheesecake in the refrigerator for at least 6 hours, or preferably overnight, before serving.
Notes
- For the best tangy flavor, use fresh key lime juice. Bottled juice changes the taste profile.
- To get a truly creamy key lime cheesecake texture, make sure your cream cheese is fully at room temperature before mixing.
- If you want a copycat Cheesecake Factory style, top with a thin layer of sour cream mixed with a little sugar before the final bake, or use a simple whipped cream topping after chilling.
Nutrition
- Serving Size: 1 slice
- Calories: 420
- Sugar: 35g
- Sodium: 280mg
- Fat: 27g
- Saturated Fat: 16g
- Unsaturated Fat: 11g
- Trans Fat: 0.5g
- Carbohydrates: 40g
- Fiber: 1g
- Protein: 7g
- Cholesterol: 135mg