

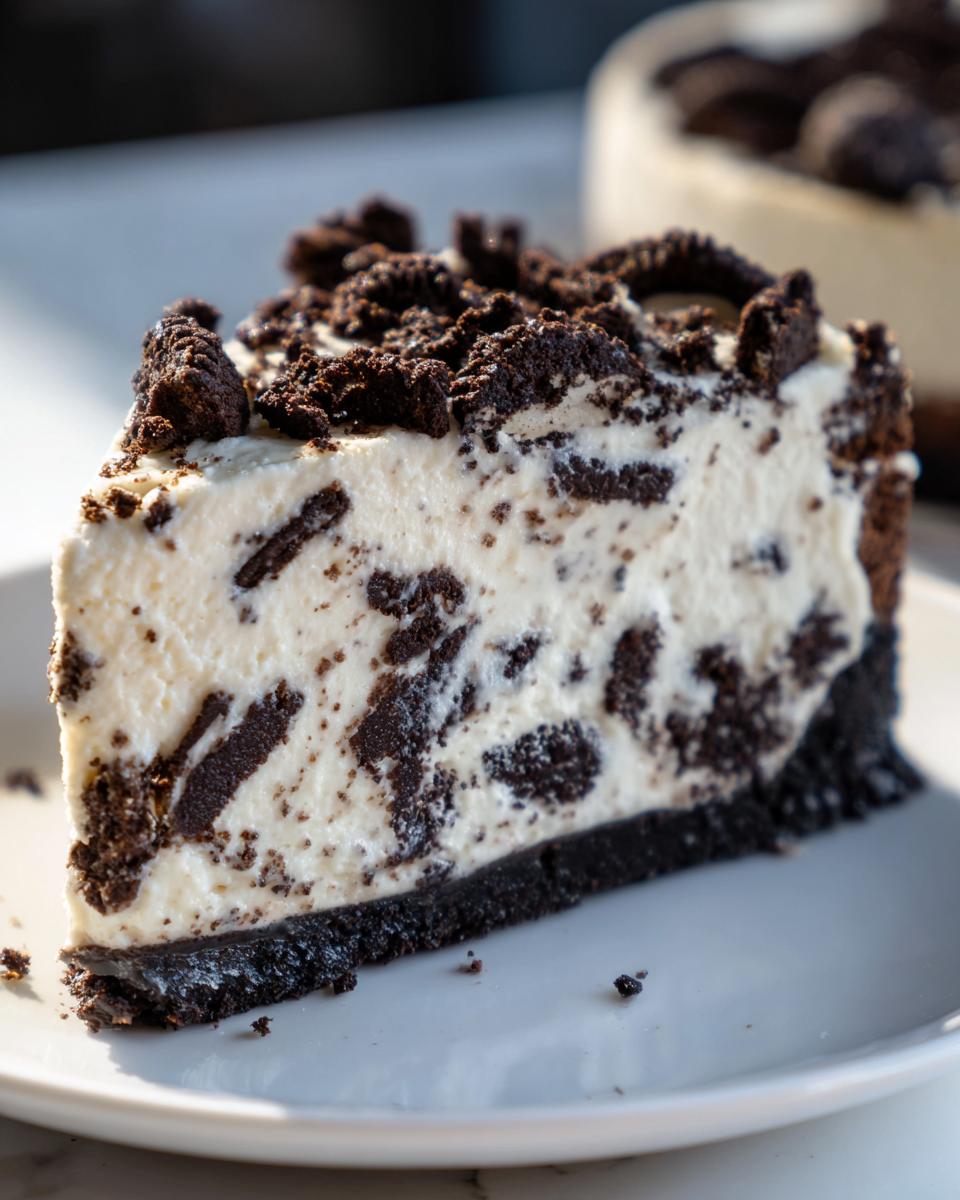
Oh my goodness, doesn’t that late-night craving for something packed with chocolate sandwich cookies and smooth, tangy cream cheese just hit you out of nowhere? I know the feeling! That’s why I have this absolute winner stashed away: the best No-Bake Oreo cheesecake you’ll ever meet. Forget turning on your oven; this is pure indulgence with zero fuss. It’s rich, it’s fast, and it delivers that perfect cookies and cream punch every single time. This is exactly the kind of insider knowledge Zoe talks about here on Kitchen Slang—taking professional know-how and making it so simple you can whip it up after dinner. Trust me, this recipe speaks the language of homemade joy.
If you’re looking for some quick inspiration for dinner tonight that leaves you more time to chill later, check out some easy weeknight dinners first!
- Why This No-Bake oreo cheesecake is a Family Favorite Dessert
- Gathering Ingredients for Your Ultimate oreo dessert
- Step-by-Step Instructions for No-Bake oreo cheesecake
- Tips for the Best Homemade oreo cheesecake
- Ingredient Notes and Substitutions for Your oreo cheesecake
- Serving Suggestions for this Cookies and Cream Dessert
- Storage and Reheating Instructions for oreo cheesecake
- Frequently Asked Questions About oreo cheesecake
- Estimated Nutritional Data for This oreo cheesecake
Why This No-Bake oreo cheesecake is a Family Favorite Dessert
What makes this the absolute go-to dessert in my house? It’s all about delivering maximal flavor with minimal effort. As we talk about here on Kitchen Slang, cooking should be joyful, not a chore, and this recipe proves it!
- It’s shockingly speedy—we’re talking about 20 minutes of active work.
- Zero oven required! This is perfect for those hot summer holidays or when you just don’t want the house heated up.
- The texture is just unreal—so velvety and loaded with those crunchy cookie bits you crave.
If you need more simple indulgences, I have tons of other delicious dessert recipes that skip the oven, and you should definitely browse my list of easy dessert recipes while you are here!
Quick Prep Time for Your oreo cheesecake
Seriously, this is a champion among Quick Dessert Recipes. Your hands-on time is only about 20 minutes. Set that timer! The rest of the time is hands-off chilling—you just let the fridge do the heavy lifting. That means you can start this thing after dinner and still be eating a slice before bedtime (if you can wait for it to set).
Gathering Ingredients for Your Ultimate oreo dessert
Okay, let’s talk about what you need to grab. Since this is a no-bake recipe, the ingredients are really the stars of the show, especially the cream cheese. You absolutely need full-fat cream cheese, softened. I know some recipes let you cheat with low-fat, but trust me, if you want that unbelievably Velvety Cheesecake Filling that looks like it came from a bakery, go for the full block. It’s a total pro move for texture!
We’ll keep things super organized here, breaking down the list into three simple sections: the crust, that gorgeous filling, and the little bits we save for the top. Get your measuring cups ready!
For the Crushed Oreo Crust
This is the crunchy, dark foundation, and you want it to pack down nicely. Here’s what you need to make that crunchy base:
- 1 3/4 cups crushed Oreo cookies (that’s about 25 cookies, give or take a few for quality control!)
- 1/4 cup unsalted butter, melted
For the Creamy Cheesecake Filling
This is where all the magic happens—the smooth, cool, and creamy heart of your oreo cheesecake. Make sure your cream cheese is actually soft, not just standing on the counter for five minutes.
- 3 (8 ounce) packages cream cheese, softened
- 1 cup granulated sugar
- 1 teaspoon vanilla extract
- 1 1/2 cups heavy whipping cream, cold (and I mean cold! We need it stiff.)
- 1 cup crushed Oreo cookies, for mixing into the filling
For the Topping
We save the prettiest (and easiest!) part for last. You just need a little something extra to signal ‘Indulgent Sweet Treats’ when you pull this beauty out of the fridge.
- 1/2 cup mini Oreo cookies, for topping
Step-by-Step Instructions for No-Bake oreo cheesecake
Alright, let’s get down to business! Since we aren’t baking anything, we need to treat the assembly process with a little professional respect so we get that perfect, firm texture. My philosophy here is about building structure right from the first step. Pay attention to the chilling times—they are non-negotiable if you want a slice that holds its shape!
If you’re looking for other chilled delights, make sure you check out my guide on making no-bake pumpkin cheesecake for holiday versatility!
Creating the Crushed Oreo Crust
First things first: the base! Grab that bowl with your 1 3/4 cups of crushed Oreos and pour in the melted butter. You need to mix this until it looks like wet sand. Then, take your 9-inch springform pan and press that mixture down firmly across the bottom. I mean firmly! Use the base of a flat measuring cup to really pack it in there tight. That compression equals stability. Once it’s rock solid, pop it into the freezer for 15 minutes while we handle the filling.
Whipping the Velvety Cheesecake Filling
Time to tackle the cream cheese! Plop those three softened blocks into your mixer bowl. Beat them solo until they are completely smooth—scrape down the sides once or twice because we do not want any lumps in this oreo cheesecake. Now, add your sugar and vanilla and beat until it looks lighter and fluffier, what the pros call ribbon stage! While that’s happening, grab a separate, clean bowl and whip that cold heavy whipping cream until you see stiff peaks. That means when you pull the whisk out, the cream stands straight up—that’s crucial for that light, airy lift.
Folding and Assembling the oreo cheesecake
This is where you need a light hand! Take about a third of that beautiful whipped cream and gently fold it into the cream cheese mixture. Don’t stir or mix vigorously, you’ll deflate all that lovely air! Once that’s incorporated, gently fold in the remaining whipped cream. Finally, fold in that extra cup of crushed Oreos you set aside for the filling. Once everything is just combined, pull that chilled crust out and spread that creamy filling evenly over the top. Make it nice and smooth for a beautiful finish!
Chilling and Serving Your oreo cheesecake
Listen, this step is the hardest because it requires patience! You have to cover the pan loosely with plastic wrap and get this baby into the refrigerator to chill for a minimum of 6 hours. Honestly? Overnight is always better for the firmest final product. When you’re finally ready to serve, run a thin, sharp knife around the edge before you spring open the pan sides. Then, sprinkle those gorgeous mini Oreo cookies right on top for the perfect presentation. Slice it cold, and take a bow!

Tips for the Best Homemade oreo cheesecake
Even though this oreo cheesecake recipe is miraculously easy because it’s no-bake, a couple of little chef secrets can take it from good to legendary. I’ve picked up these tricks over the years, and they make sure you get that beautiful, bakery-style finish without needing an oven. If you want truly Rich Cream Cheese Desserts, these details truly matter!
For more speedy recipe ideas that don’t require much kitchen fuss, you have to explore my collection of easy treats.
Achieving a Perfect Crushed Oreo Crust
Remember how I told you to press the crust mixture down firmly? Don’t just use your fingers! Grab the flat bottom of a dry, straight-sided measuring cup. Push down, really put your weight into it, until that crust is dense and tight. This stops it from crumbling apart when you try to lift out that first slice. Also, for the best texture, your Oreos should be crushed until they are fine crumbs—not big chunks floating around in the butter.
Cream Cheese Temperature Matters
This is a huge one, especially for the ultimate Creamy Cheesecake Ideas. If your cream cheese seems cold or even slightly firm, you’re going to end up with painful little lumps, no matter how long you mix it. It needs to be truly soft—like room temperature soft. This allows the fat molecules to emulsify beautifully with the sugar and the whipped cream, giving you that smooth, velvety mouthfeel we’re aiming for. Don’t rush this prep step!
Ingredient Notes and Substitutions for Your oreo cheesecake
So, people always ask me, “Zoe, what if I don’t have heavy whipping cream? It’s not in my fridge!” Honestly, I get it. Life happens. The recipe calls for 1 1/2 cups of cold heavy whipping cream because that’s what gives us that beautiful structure and that light, airy lift when we whip it up. It creates those strong little air pockets that hold the whole oreo cheesecake together.
If you absolutely have to swap it out—maybe you’re making this last minute—you can use 1 1/2 cups of frozen whipped topping, like Cool Whip, but you need to thaw it first. Here’s the deal, though: the texture will change. When you fold in thawed whipped topping, it won’t give you that same sturdy, cloud-like filling that true heavy cream offers. It will still be delicious, of course, because it’s an Oreo Dessert Recipe, but it will probably be a little softer and maybe less structured when you slice it. For the ultimate Velvety Cheesecake Filling, stick to the heavy cream, but the frozen topper is a decent backup plan for quick fixes!
Serving Suggestions for this Cookies and Cream Dessert
An oreo cheesecake this decadent really doesn’t need much help, but how you serve it can make it feel extra special. Since this is already a show-stopping, Party Ready Cheesecake, keep the sides simple. I love slicing it up and drizzling just a tiny bit of chocolate syrup or maybe some raspberry puree over the plate—the tartness of a berry cuts through the richness perfectly.
Honestly, my favorite pairing? A strong, slightly bitter cup of coffee. It cleanses the palate between bites of that cookie crunch. Speaking of coffee, if you need a morning treat that follows this flavor profile, you have to check out my amazing coffee cake muffins!
Storage and Reheating Instructions for oreo cheesecake
Okay, this is the wonderful part about making an oreo cheesecake that skips the oven—it stores like a dream! Since there’s no baking involved, we are focusing entirely on refrigeration to keep that filling perfectly firm and cool. You definitely don’t need to reheat this, unless you accidentally leave it out on the counter too long while watching TV!
The main rule here is containment. You want to keep this beauty protected from any strange fridge odors, and you certainly don’t want to accidentally smudge that perfectly placed topping. When you aren’t planning on devouring the whole thing immediately, you need to treat the leftovers right.
For the freshest texture—that incredibly smooth, creamy cheesecake feel—you need to cover it tightly. Use plastic wrap, making sure it doesn’t actually touch the surface of the cookies on top. If you used a springform pan and removed the sides, transfer the cheesecake onto a serving plate, cover the whole thing lightly with plastic wrap, and then tuck a piece of aluminum foil tightly around the base and the sides. This keeps air out, which is what makes things go stale or dry!
How long does it last? As long as you keep it cold, this Homemade Oreo Cheesecake usually stays wonderfully fresh for about 4 to 5 days in the refrigerator. Because the filling sets up so nicely, it often tastes even better on day two once it’s had a full night to firm up completely. Just remember to pull it out about 15 minutes before you plan to slice it so it softens just barely—that makes for the cleanest cut and the best bite!
Frequently Asked Questions About oreo cheesecake
I know when you’re baking something this exciting, a few little questions always pop up! Trust me, I’ve heard them all. This No-Bake Oreo Cheesecake is pretty straightforward, but sometimes the smallest details make the biggest difference between a good treat and a truly Decadent Chocolate Cheesecake experience.
Can I use a different cookie instead of Oreos in this oreo cheesecake?
That’s a great question! You certainly *can* substitute the cookies. If you use chocolate wafers or maybe some chocolate chip cookies, you’ll still end up with a fantastic Cookies and Cream Dessert, but it won’t have that iconic flavor. Oreos are what give that crust and filling that specific dark color and slightly familiar flavor. If you switch them out, you’re going to get a different vibe entirely. For the *best* result that matches what we’re making here, stick to the originals!
How do I get perfectly clean slices of my no-bake oreo cheesecake?
Oh, the presentation perfection question! This is where home cooks often get frustrated, but I learned the best trick from the bistro days. You need a very sharp, thin knife—metal is best. Don’t just start hacking away! Here’s the secret handshake: Dip your knife into a tall glass of very hot water for about 30 seconds. Wipe the knife completely dry with a paper towel so no water gets on the cake itself. Then, make your cut. Dip, wipe, cut. Repeat this process for every single slice. The hot knife glides through the cold, creamy filling like butter and leaves you with those bakery-perfect edges. It works like magic every time!
If you are curious about how a baked version handles slicing compared to this one, you might enjoy reading up on how to achieve that dense structure in a New York-Style cheesecake recipe!
Estimated Nutritional Data for This oreo cheesecake
Now, I hate to bring up science when we’re talking about pure hedonism, but I know some of you are curious about what you’re diving into with this glorious oreo cheesecake. Since this is a no-bake recipe using full-fat cream cheese and plenty of delicious Oreos, it’s definitely an indulgent sweet treat! We measure things out ingredient by ingredient, but remember this is just an estimate based on my recipe quantities and a standard serving size.
These numbers are calculated for one generous slice (Yield: 10 servings). If you cut smaller slices—maybe you’re being super disciplined—the numbers will obviously go down. But who are we kidding?
- Serving Size: 1 slice
- Calories: Around 450
- Fat: Approximately 30g (Yes, that’s where the flavor lives!)
- Carbohydrates: Roughly 42g
- Protein: About 5g
I have to give you the official disclaimer here, just like a real professional would: these figures are just estimates based on the ingredients I listed and standard nutritional databases. They don’t account for brands, specific cookie sizes, or how heavy your hand is with the topping! So enjoy every bite of this Simple Cheesecake Recipe guilt-free, knowing that you made something incredible with your own two hands!
PrintThe Best No-Bake Oreo Cheesecake
Make this easy, creamy, no-bake Oreo cheesecake featuring a crunchy cookie crust and a filling loaded with crushed Oreos. It is a simple, decadent dessert perfect for any occasion.
- Prep Time: 20 min
- Cook Time: 0 min
- Total Time: 6 hr 20 min
- Yield: 10 servings 1x
- Category: Dessert
- Method: No Bake
- Cuisine: American
- Diet: Vegetarian
Ingredients
- 1 3/4 cups crushed Oreo cookies (about 25 cookies)
- 1/4 cup unsalted butter, melted
- 3 (8 ounce) packages cream cheese, softened
- 1 cup granulated sugar
- 1 teaspoon vanilla extract
- 1 1/2 cups heavy whipping cream, cold
- 1 cup crushed Oreo cookies, for filling
- 1/2 cup mini Oreo cookies, for topping
Instructions
- Prepare the crust: Mix the 1 3/4 cups of crushed Oreos with the melted butter until fully combined. Press the mixture firmly into the bottom of a 9-inch springform pan. Chill the crust in the freezer for 15 minutes while you prepare the filling.
- Beat the cream cheese: In a large bowl, use an electric mixer to beat the softened cream cheese until it is smooth. Scrape down the sides of the bowl.
- Add sugar and vanilla: Add the granulated sugar and vanilla extract to the cream cheese. Beat until the mixture is light and creamy.
- Whip the cream: In a separate, clean bowl, whip the cold heavy whipping cream until stiff peaks form.
- Fold together: Gently fold the whipped cream into the cream cheese mixture until just combined. Be careful not to deflate the cream.
- Add cookies: Fold in the 1 cup of crushed Oreos for the filling.
- Assemble the cheesecake: Spread the filling evenly over the chilled Oreo crust.
- Chill: Cover the pan loosely with plastic wrap and refrigerate for at least 6 hours, or preferably overnight, until the cheesecake is firm.
- Garnish and serve: Before serving, carefully remove the sides of the springform pan. Top the cheesecake with mini Oreo cookies. Slice and serve cold.
Notes
- For a firmer crust, press the mixture into the pan using the bottom of a measuring cup.
- If you do not have heavy whipping cream, you can substitute with 1 1/2 cups of frozen whipped topping (like Cool Whip), thawed, folding it in at the end.
- Crush the Oreos finely for the crust to ensure it packs well.
Nutrition
- Serving Size: 1 slice
- Calories: 450
- Sugar: 35g
- Sodium: 320mg
- Fat: 30g
- Saturated Fat: 18g
- Unsaturated Fat: 12g
- Trans Fat: 0.5g
- Carbohydrates: 42g
- Fiber: 1g
- Protein: 5g
- Cholesterol: 95mg