
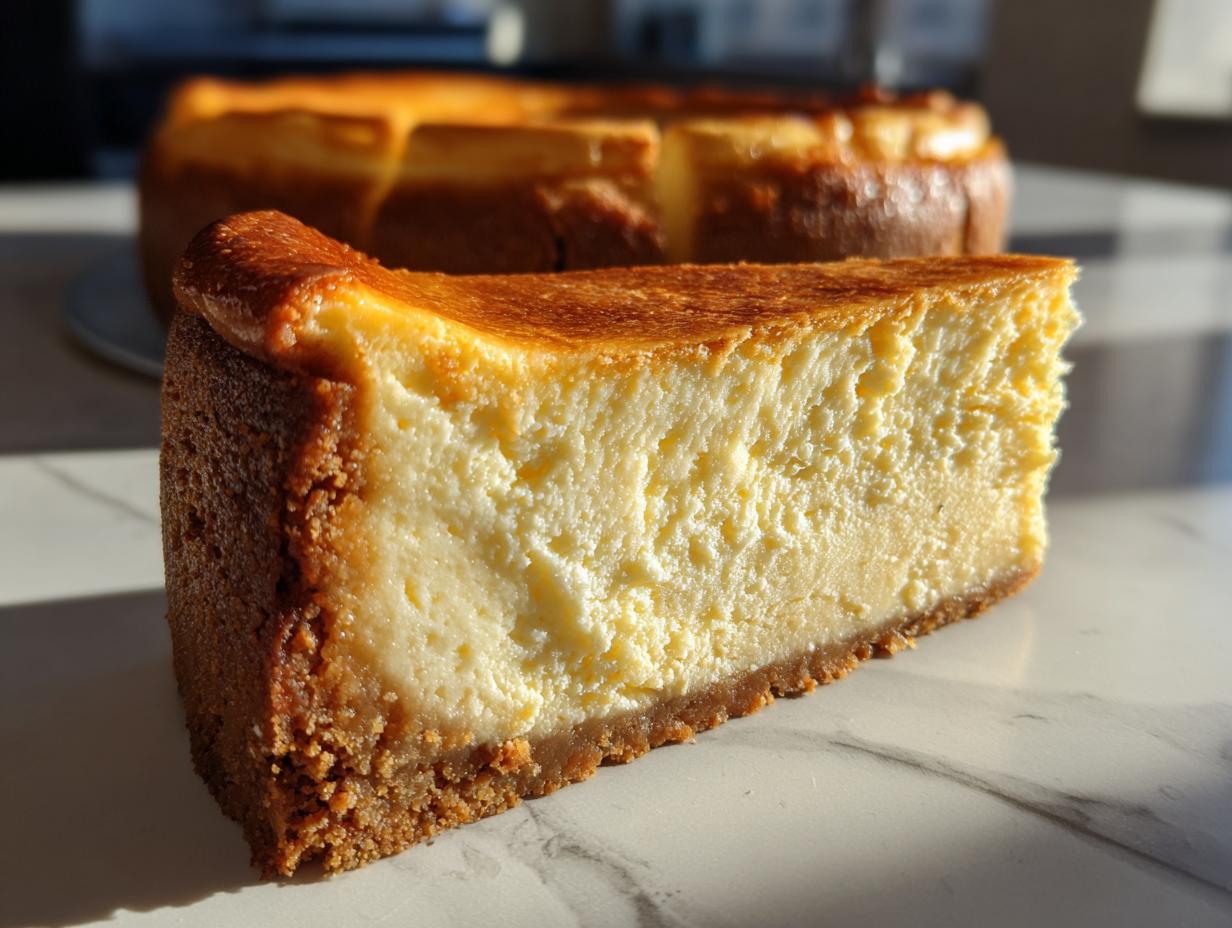
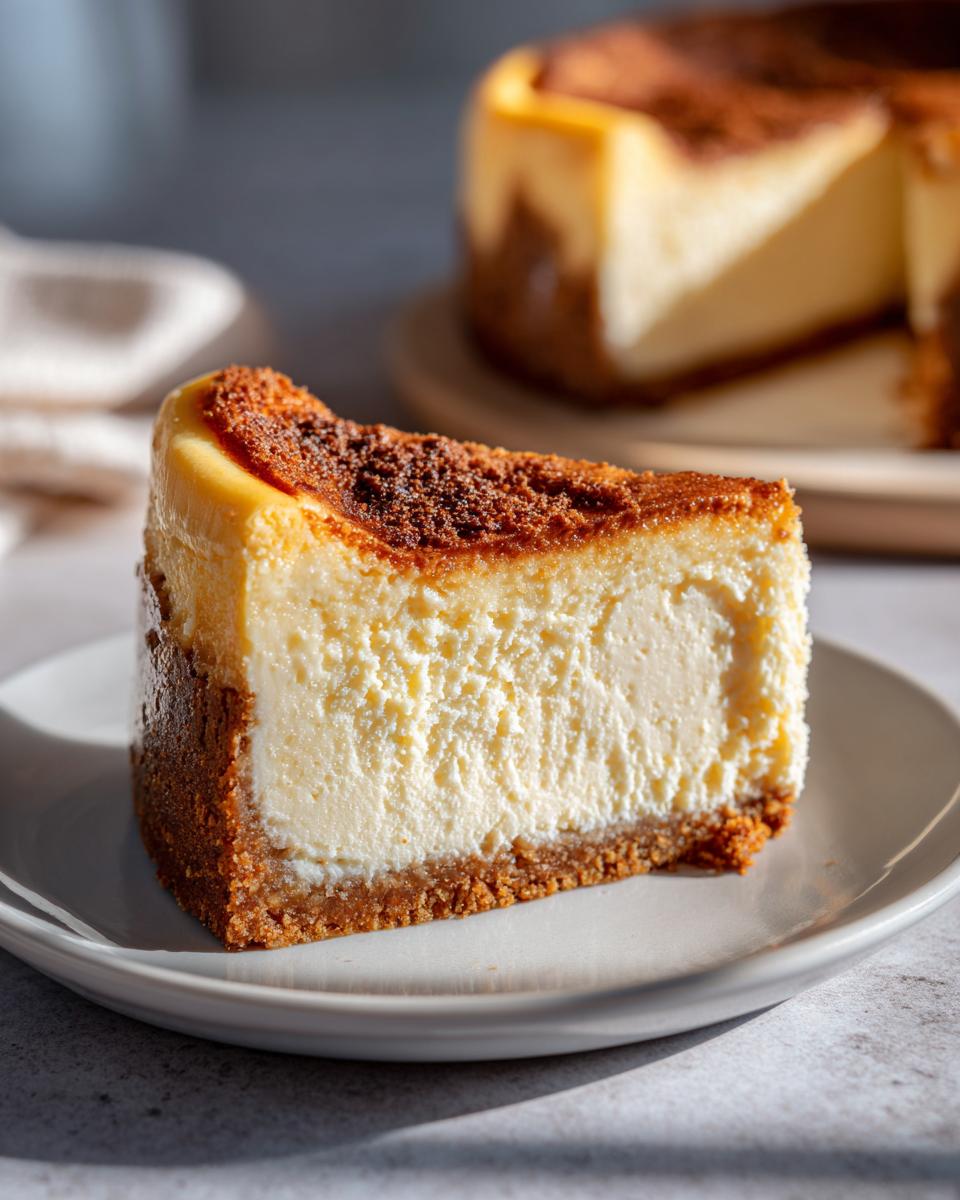
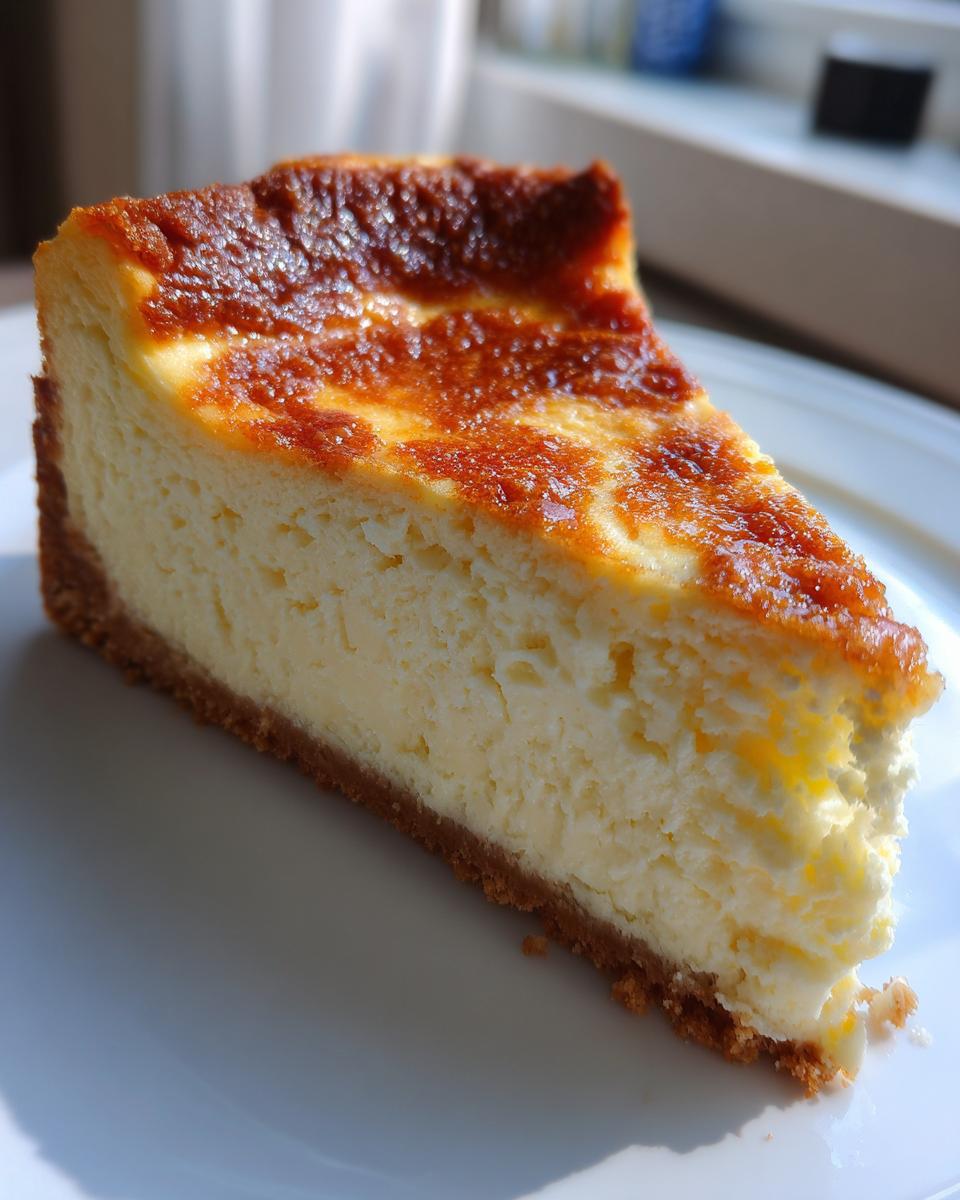
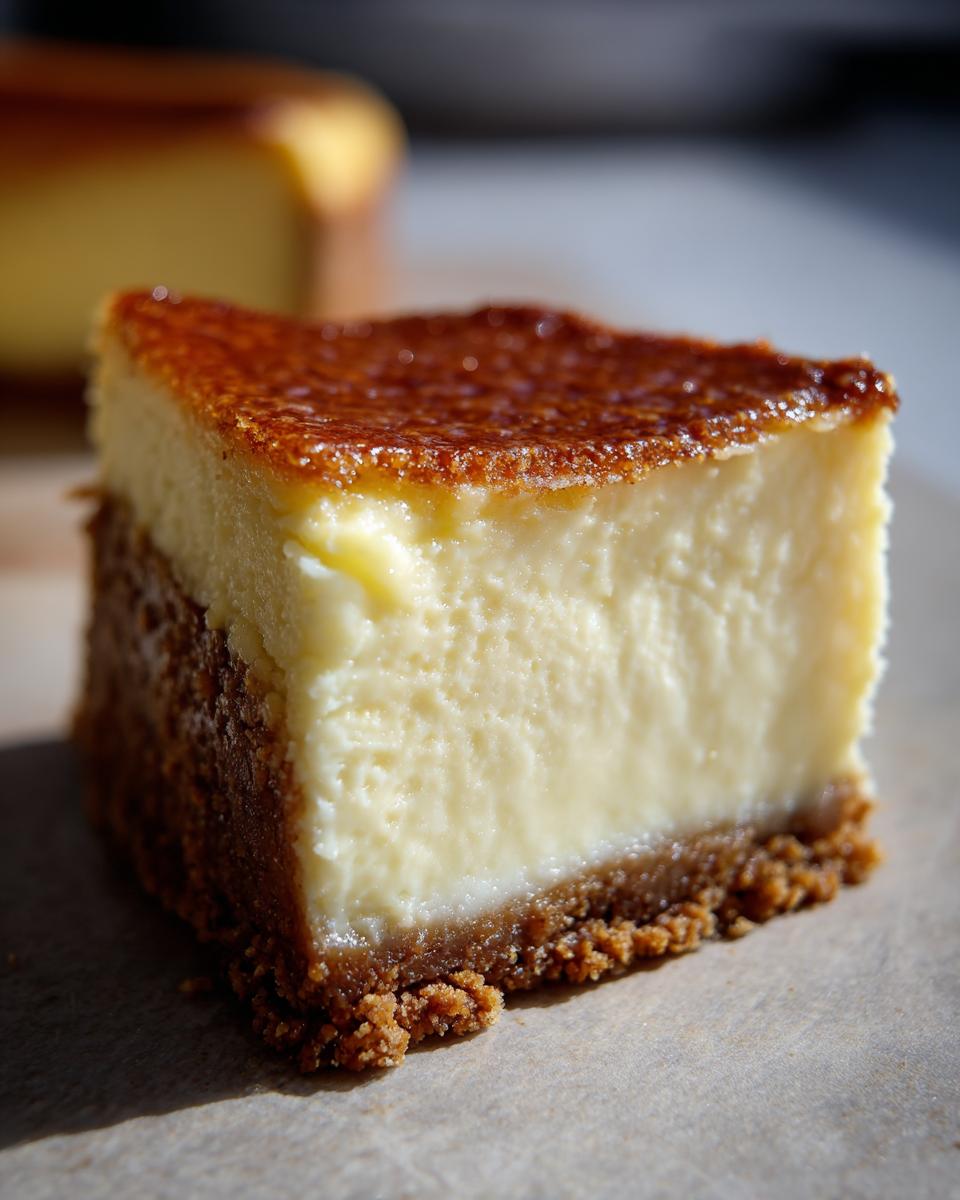
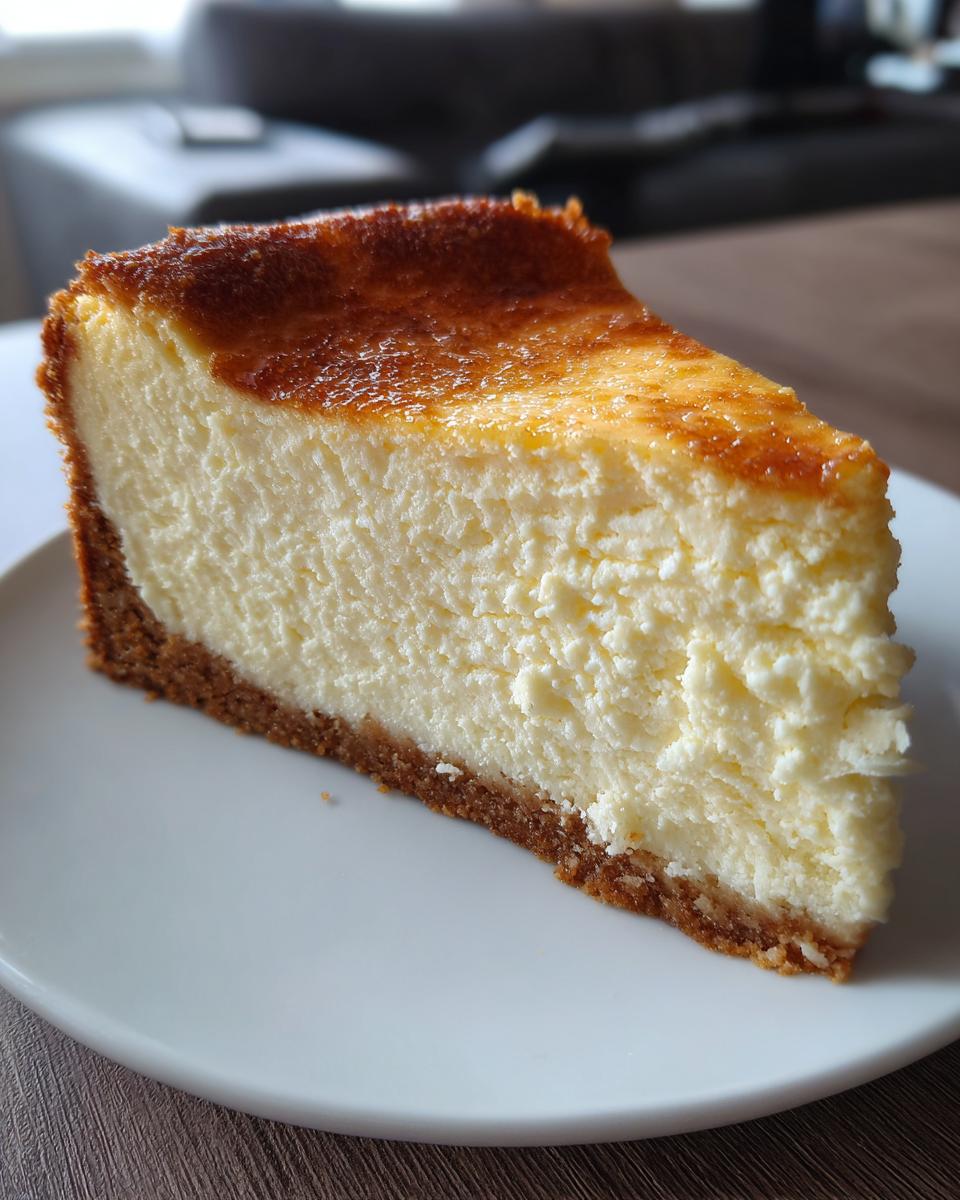
Okay, let’s talk about the REAL deal: a proper New York cheesecake. Not that fluffy, jiggly stuff. I’m talking about that dense, unbelievably creamy slice of heaven that makes you feel like you’re sitting in a cozy NYC diner, even if you’re hundreds of miles away. For years, I was so intimidated by making it. All those stories about cracks and sinkholes felt like a big food joke aimed right at home cooks like me. But don’t worry, I finally cracked the code (pun intended!) to get that perfectly smooth, crack-free finish every single time. This New York cheesecake recipe is my absolute go-to, and trust me, it’s worth every moment.
- Why You'll Love This New York Cheesecake
- Ingredients for Classic New York Cheesecake
- Essential Equipment for Your New York Cheesecake
- How to Make the Perfect New York Cheesecake
- Tips for a Crack-Free New York Cheesecake
- Serving and Storing Your Classic Cheesecake
- Frequently Asked Questions About New York Cheesecake
- Nutritional Information
- Share Your New York Cheesecake Creation!
Why You’ll Love This New York Cheesecake
Seriously, this cheesecake is a game-changer. Here’s why:
- It’s unbelievably dense and creamy – the way a New York cheesecake should be!
- That classic graham cracker crust is just *chef’s kiss*.
- We’ve got all the tricks to keep it from cracking, so it looks as amazing as it tastes.
- It’s surprisingly straightforward for such a showstopper dessert.
- Perfect plain, or waiting for your favorite cherry topping.
- It’s the ultimate crowd-pleaser for birthdays, holidays, or, you know, Tuesday.
Ingredients for Classic New York Cheesecake
Alright, let’s gather our goodies! For this absolutely stellar New York cheesecake, you’ll need:
- 1 1/2 cups graham cracker crumbs (from about 10-12 full graham crackers)
- 1/4 cup granulated sugar
- 6 tablespoons unsalted butter, melted (don’t skimp on the good stuff!)
- 4 (8-ounce) packages full-fat cream cheese, softened (this is key, seriously!)
- 1 1/2 cups granulated sugar
- 1/4 cup full-fat sour cream (adds that signature tang and creaminess)
- 1 teaspoon pure vanilla extract
- 4 large eggs, room temperature
Make sure your cream cheese and eggs are truly at room temperature—it makes a world of difference for a super smooth filling.
Essential Equipment for Your New York Cheesecake
To get that perfect New York cheesecake, you’ll want a few trusty tools handy. First up, definitely grab a 9-inch springform pan; it’s a must for easy removal. You’ll also need a large roasting pan that’s big enough to hold your springform pan for the water bath. Don’t forget some heavy-duty aluminum foil to wrap the springform pan, a sturdy mixing bowl (or two!), and of course, your trusty electric mixer (handheld or stand mixer will work!) to get that filling super smooth.
How to Make the Perfect New York Cheesecake
Alright, deep breaths! Making this New York cheesecake isn’t as scary as it sounds, I promise. It’s all about a few key steps and a little bit of patience. Follow along, and you’ll have a showstopper. Let’s get this party started!
Preparing the Graham Cracker Crust
First things first, we need a killer crust. Combine your graham cracker crumbs and ¼ cup of sugar in a bowl. Pour in that melted butter and give it a good stir until everything is nicely moistened, like damp sand. Press this mixture firmly and evenly into the bottom of your springform pan. I like to use the flat bottom of a measuring cup to get it nice and compact. You could even use a base of homemade granola if you’re feeling adventurous! Pop the pan into a 350°F (175°C) oven for about 8-10 minutes until it’s lightly golden. Then, let it cool while you work on the good stuff.
Creating the Dense, Creamy Cheesecake Filling
Now for the star of the show! Make sure your cream cheese is truly soft – you really don’t want any lumps. Beat it solo for a minute or two until it’s super smooth. Then, gradually add the 1 ½ cups of sugar and beat again until it’s well combined and fluffy. This is where the magic starts. Stir in the sour cream and that pure vanilla extract. Now, add the eggs, one at a time, on low speed. Mix each one in *just* until it disappears. Seriously, do NOT overbeat here; it’s the quickest way to cracks! We want a luscious, dense creamy cheesecake, not a fluffy meringue.
Mastering the Water Bath Technique
Okay, this step is NON-NEGOTIABLE for a truly perfect New York cheesecake, and it’s one of the best no-crack cheesecake tips. It’s called a water bath for a reason! Get your oven temp down to 325°F (160°C). Wrap the OUTSIDE of your springform pan *really* well with a couple of layers of heavy-duty foil. You don’t want any water seeping in! Then, carefully place the foil-wrapped pan into a larger roasting pan. Pour hot water into the roasting pan, so it comes about halfway up the sides of your springform. Trust me, this creates a moist, gentle baking environment that prevents those dreaded cracks and ensures even cooking.
The Crucial Cooling Process
This is where most people mess up and end up with cracks! You CANNOT just yank this baby out of the oven. Once the baking time is up (edges set, center slightly jiggly), turn off the oven. Leave the door cracked open just a smidge – a wooden spoon works perfectly for this. Let the cheesecake hang out in the cooling oven for a full hour. This gradual cool-down is super important. After that, carefully remove it from the water bath and let it cool *completely* on a wire rack at room temperature before you even THINK about chilling it. Patience, remember?
Tips for a Crack-Free New York Cheesecake
Alright, let’s talk about the Everest of cheesecake making: avoiding cracks! It’s the number one thing everyone worries about, and honestly, I used to be right there with you. But with this New York cheesecake recipe, you’ve already got the best defense: that water bath and the slow cooling process. Besides those crucial steps, here are my absolute top no-crack cheesecake tips. First off, room temperature ingredients are your best friend. Softened cream cheese and room-temp eggs blend much more smoothly, which means less beating needed later, and less beating equals fewer cracks. Speaking of beating, when you add those eggs, do it gently and just until combined. Overmixing whips too much air into the batter, and that expanding air is a major cause of those dreaded cracks later on. Also, don’t be tempted to crank your oven higher thinking it’ll bake faster. A moderate 325°F (160°C) is key for gentle, even cooking. And the cooling process? Seriously, do not skip that hour in the turned-off oven with the door ajar. It’s the final, gentle nudge your New York cheesecake needs to set beautifully without any drama.
Serving and Storing Your Classic Cheesecake
This New York cheesecake is all about patience, especially when it comes to serving! You MUST let it chill in the fridge for at least 4 hours, but overnight is even better for that perfect, dense texture. Seriously, resist the temptation! When it’s ready, run a thin knife around the edge before releasing the springform pan. It’s fantastic just as it is, but a dollop of homemade whipped cream or some classic fresh berries are always winners. Leftovers? Lucky you! Wrap any remaining cheesecake tightly in plastic wrap and keep it in the fridge for up to 3-4 days. Enjoy every single bite!
Frequently Asked Questions About New York Cheesecake
Got questions about baking the ultimate New York cheesecake? I get it! It can seem tricky, but most issues have super simple fixes. Here are a few things folks often ask me.
Troubleshooting Common Cheesecake Issues
So, your cheesecake cracked? Don’t sweat it! That usually happens from overmixing the batter once the eggs are in, or from sudden temperature changes during baking or cooling. Just remember the gentle mixing and slow cooling tips we talked about. A sunken center? That’s often a sign it wasn’t baked quite long enough, or it cooled too quickly. Resist the urge to pull it out early! If your cheesecake has a grainy texture, it usually means the cream cheese wasn’t soft enough to begin with. Making sure everything is at room temperature really is the secret handshake for a smooth, perfect texture. You’ve got this!
Why is my New York cheesecake cracking? The big culprits are overmixing the eggs, or drastic temperature changes. Overmixing whips too much air into the batter, and as it bakes and cools, that air expands and contracts, causing cracks. Sudden cooling (like taking it straight from a hot oven to the counter) does the same thing. That slow cool-down in the oven is your best friend here.
Can I make this New York cheesecake without a water bath? Honestly, I really don’t recommend it if you want that classic, dense, creamy texture and a crack-free top. The water bath creates a humid environment that bakes the cheesecake gently and evenly, preventing hot spots and those dreaded cracks. It’s a game-changer, trust me! It’s like the secret sauce to perfect baking, sort of like the perfect dipping sauce to complement your food.
How do I know when my cheesecake is done? When the edges look set and the center still has a slight wobble, it’s usually good to go. It might look a little underdone in the middle, but that’s exactly what you want! It will continue to set up as it cools. You can also gently insert a thin knife near the center – if it comes out mostly clean, you’re on the right track. Aim for moist crumbs, not wet batter.
Nutritional Information
Just a heads-up, these numbers are estimates based on the ingredients listed. Your exact New York cheesecake’s nutritional info might vary a bit depending on the brands you use! Each serving rings in at about 450 calories, with around 30g of fat, 40g of carbs, and 8g of protein. Enjoy your decadent slice!
Share Your New York Cheesecake Creation!
Okay, you’ve done it! You’ve baked an absolutely incredible New York cheesecake. I’d LOVE to hear all about it! Did it turn out perfectly crack-free? What did you serve it with? Drop a comment below and tell me everything – and if you snapped a pic, tag me on social media! You can read more about my own kitchen adventures (here). Happy baking!
PrintClassic New York Cheesecake
A dense, creamy, and rich New York-style cheesecake with a classic graham cracker crust. This recipe includes tips for a smooth, crack-free finish.
- Prep Time: 25 min
- Cook Time: 75 min
- Total Time: 90 min
- Yield: 12 servings 1x
- Category: Dessert
- Method: Baking
- Cuisine: American
- Diet: Vegetarian
Ingredients
- 1 1/2 cups graham cracker crumbs
- 1/4 cup granulated sugar
- 6 tablespoons unsalted butter, melted
- 4 (8-ounce) packages cream cheese, softened
- 1 1/2 cups granulated sugar
- 1/4 cup sour cream
- 1 teaspoon vanilla extract
- 4 large eggs
Instructions
- Preheat your oven to 350°F (175°C).
- In a medium bowl, combine graham cracker crumbs and 1/4 cup sugar. Pour in melted butter and stir until combined. Press mixture evenly into the bottom of a 9-inch springform pan.
- Bake the crust for 8-10 minutes, then let it cool.
- Reduce oven temperature to 325°F (160°C).
- In a large bowl, beat the softened cream cheese until smooth. Gradually add 1 1/2 cups sugar and beat until well combined.
- Stir in sour cream and vanilla extract.
- Add eggs one at a time, beating on low speed just until each egg is incorporated. Do not overmix.
- Pour the filling over the prepared crust.
- Wrap the bottom of the springform pan tightly with heavy-duty aluminum foil. Place the pan in a larger roasting pan.
- Carefully pour hot water into the roasting pan, reaching about halfway up the sides of the springform pan. This is your water bath.
- Bake for 60-75 minutes, or until the edges are set and the center is slightly jiggly.
- Turn off the oven, crack the oven door open slightly, and let the cheesecake cool in the oven for 1 hour.
- Remove the cheesecake from the water bath and let it cool completely on a wire rack.
- Refrigerate for at least 4 hours, or preferably overnight, before serving.
Notes
- For a smoother filling, ensure your cream cheese is fully softened.
- Avoid overmixing the batter once the eggs are added to prevent cracks.
- The water bath is crucial for even baking and preventing cracks.
- Cooling the cheesecake slowly in the oven helps it set without cracking.
- Serving this cheesecake with a cherry topping is a classic choice.
Nutrition
- Serving Size: 1 slice
- Calories: 450
- Sugar: 35g
- Sodium: 300mg
- Fat: 30g
- Saturated Fat: 18g
- Unsaturated Fat: 12g
- Trans Fat: 0g
- Carbohydrates: 40g
- Fiber: 1g
- Protein: 8g
- Cholesterol: 120mg