
Oh, Boston cream pie! Just saying the name makes me think of those old-school diners and special occasions. It’s one of those classic American desserts that just feels… right. That perfect combination of a light, fluffy yellow cake, a luscious, creamy custard filling, and that shiny, decadent chocolate topping? Pure magic! I remember the first time I *really* mastered making one, getting that perfect slice with all the layers showing—it was such a moment! This recipe is my go-to, and I promise, it’s totally foolproof. You’ll get that picture-perfect cross-section every single time. Get ready to bake up some serious nostalgia!
- Why You'll Love This Classic Boston Cream Pie
- Gather Your Ingredients for Boston Cream Pie
- How to Make a Perfect Boston Cream Pie: Step-by-Step
- Tips for Boston Cream Pie Success
- Ingredient Notes and Substitutions for Your Boston Cream Pie
- Frequently Asked Questions about Boston Cream Pie
- Estimated Nutritional Information
- Share Your Classic American Dessert Creations!
Why You’ll Love This Classic Boston Cream Pie
Seriously, this cake is a winner on so many levels!
- It’s surprisingly easy to put together.
- The flavors are just out of this world – tender cake, creamy filling, rich chocolate!
- It’s pure comfort food with a big dose of nostalgia.
- You get that beautiful, perfect cross-section that looks like it came straight from a bakery.
Gather Your Ingredients for Boston Cream Pie
Okay, let’s get our ducks in a row! To make this amazing Boston cream pie, we’re going to break down the ingredients. Don’t worry, it’s all simple stuff you probably have or can grab easily. We’ll group everything by what it’s for: the cake, the creamy filling, and that gorgeous chocolate topping. This way, you can just pull out what you need for each step. Trust me, having everything ready makes the whole process so much smoother!
For the Tender Yellow Cake
We need:
- 2 cups all-purpose flour
- 1.5 cups granulated sugar
- 2.5 teaspoons baking powder
- 0.5 teaspoon salt
- 0.5 cup unsalted butter, softened
- 1 cup milk
- 2 large eggs
- 1 teaspoon vanilla extract
For the Silky Pastry Cream Filling
For this luscious filling, grab:
- 2 cups whole milk
- 0.5 cup granulated sugar
- 4 large egg yolks
- 0.25 cup cornstarch
- 2 tablespoons unsalted butter
- 1 teaspoon vanilla extract
For the Rich Chocolate Ganache
And for that perfect glaze layer:
- 1 cup semi-sweet chocolate chips
- 0.5 cup heavy cream
How to Make a Perfect Boston Cream Pie: Step-by-Step
Alright, deep breaths! Making a classic Boston cream pie is totally doable, and honestly, the most rewarding part. We’ll take it step-by-step so you can nail it. First things first, let’s get that oven preheated to 350°F (175°C) and your two 8-inch round cake pans greased and floured. If you want to be extra fancy, you can even line the bottoms with parchment paper – makes getting them out a breeze! Just like how we prep for something like easy chili, getting your pans ready is key. And once the cake is done, you’ll want to let it cool completely, just like you would with a batch of homemade granola before tucking in.
Baking the Tender Yellow Cake Layers
Now, for the cake itself. In a big ol’ bowl, whisk together your flour, sugar, baking powder, and salt. Toss in that softened butter and mix it up until it looks like coarse crumbs. Trust me, this is where the magic starts! In another bowl, give your milk, eggs, and vanilla a good whisk. Slowly pour those wet ingredients into the dry stuff, mixing until it’s *just* combined. Seriously, don’t go crazy overmixing here. A few lumps are okay! Divide that lovely batter evenly between your prepared pans and pop them into the oven for about 30-35 minutes. You’ll know they’re ready when a wooden skewer or toothpick comes out clean. Let them cool in the pans for about 10 minutes, then carefully flip them onto a wire rack to cool completely. Patience is key here – warm cake and creamy filling just don’t mix!
Crafting the Silky Pastry Cream
This is where that luscious filling comes in! Grab a medium saucepan and heat up your milk until it’s just simmering – watch it so it doesn’t boil over! While that’s happening, in a separate bowl, whisk together the sugar, egg yolks, and cornstarch until it’s super smooth. Now, this part is important: we need to temper those eggs, which sounds fancy but just means we’re slowly warming them up so they don’t scramble. Slowly drizzle about half of that hot milk into the egg mixture while whisking like crazy. Once it’s all mixed, pour that back into the saucepan with the rest of the milk. Keep whisking constantly over medium heat. You’ll feel it start to thicken up, and then it’ll come to a boil. Let it bubble for just a minute while you keep whisking. Take it off the heat, stir in that butter and vanilla until everything is smooth and dreamy. Pour it into a clean bowl and press plastic wrap right onto the surface. This stops that weird skin from forming. Pop it in the fridge for at least two hours until it’s nice and firm.
Creating the Glossy Chocolate Ganache
Okay, for the topping – this is the easy part! Put your semi-sweet chocolate chips into a heatproof bowl. Heat up your heavy cream in a small saucepan until it’s just starting to simmer around the edges. Pour that hot cream right over the chocolate chips. Let it sit for about 5 minutes – resist the urge to stir too soon! Then, gently whisk it until it’s perfectly smooth and glossy. See? That was simple!
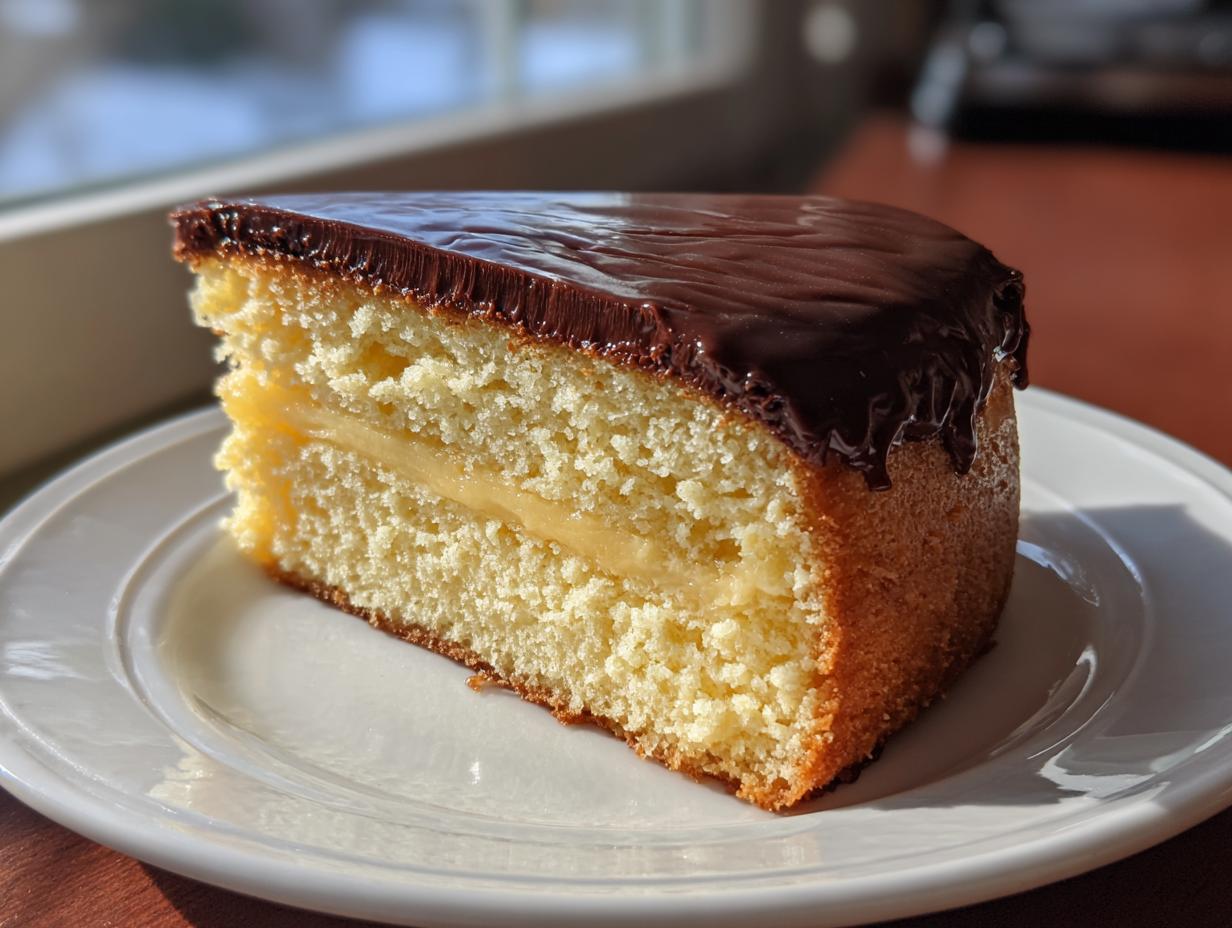
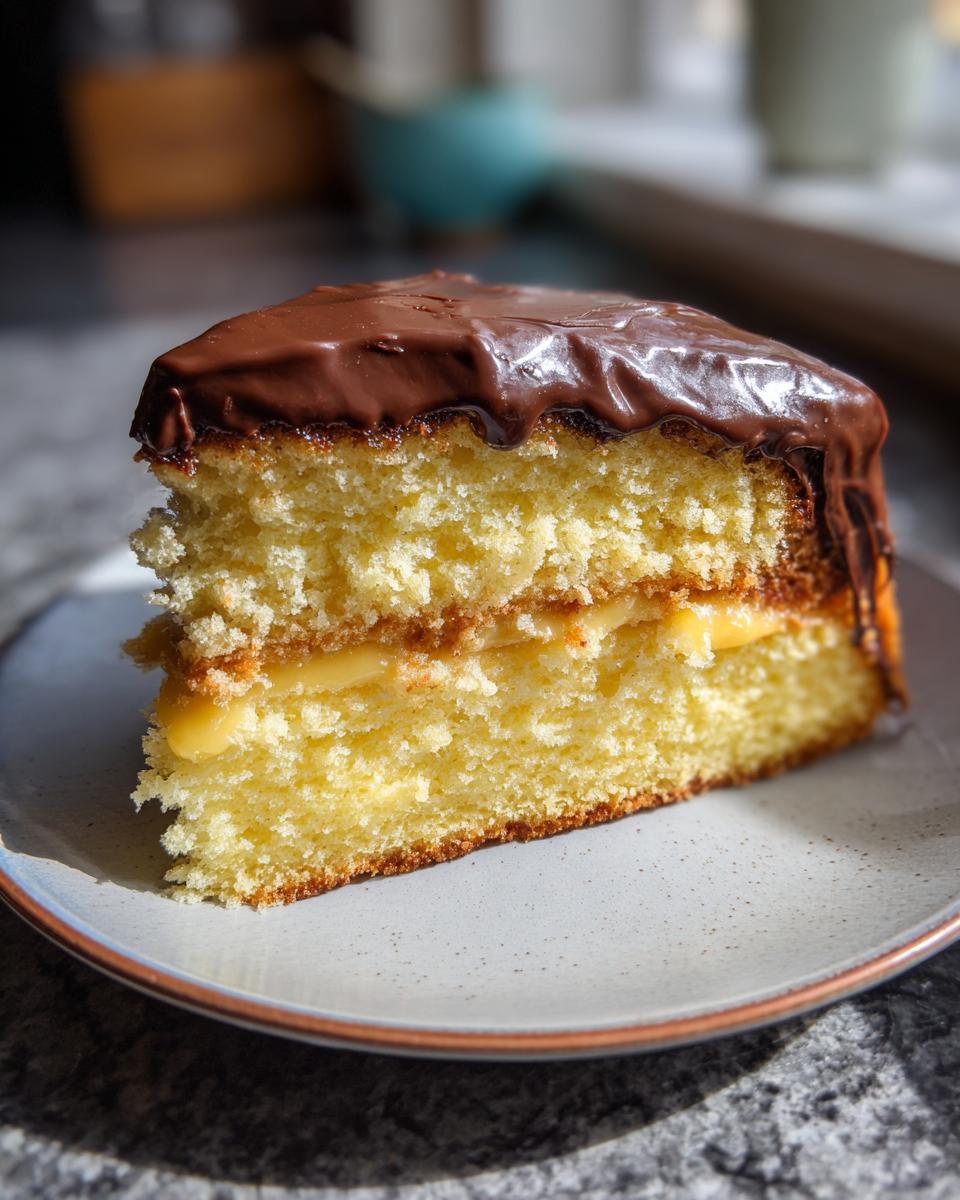
Assembling Your Classic American Dessert
Alright, assembly time! Grab your first completely cooled cake layer and put it on your serving plate. Spoon all that lovely, chilled pastry cream over the top and spread it out evenly. Then, place the second cake layer right on top. Finally, pour that glossy chocolate ganache over everything, letting it cascade down those sides beautifully.
This makes it look like a real showstopper, kind of like how a fancy apple snickerdoodle dump cake can impress. Give it at least 30 minutes to set up before you slice into this masterpiece. You’ve earned it!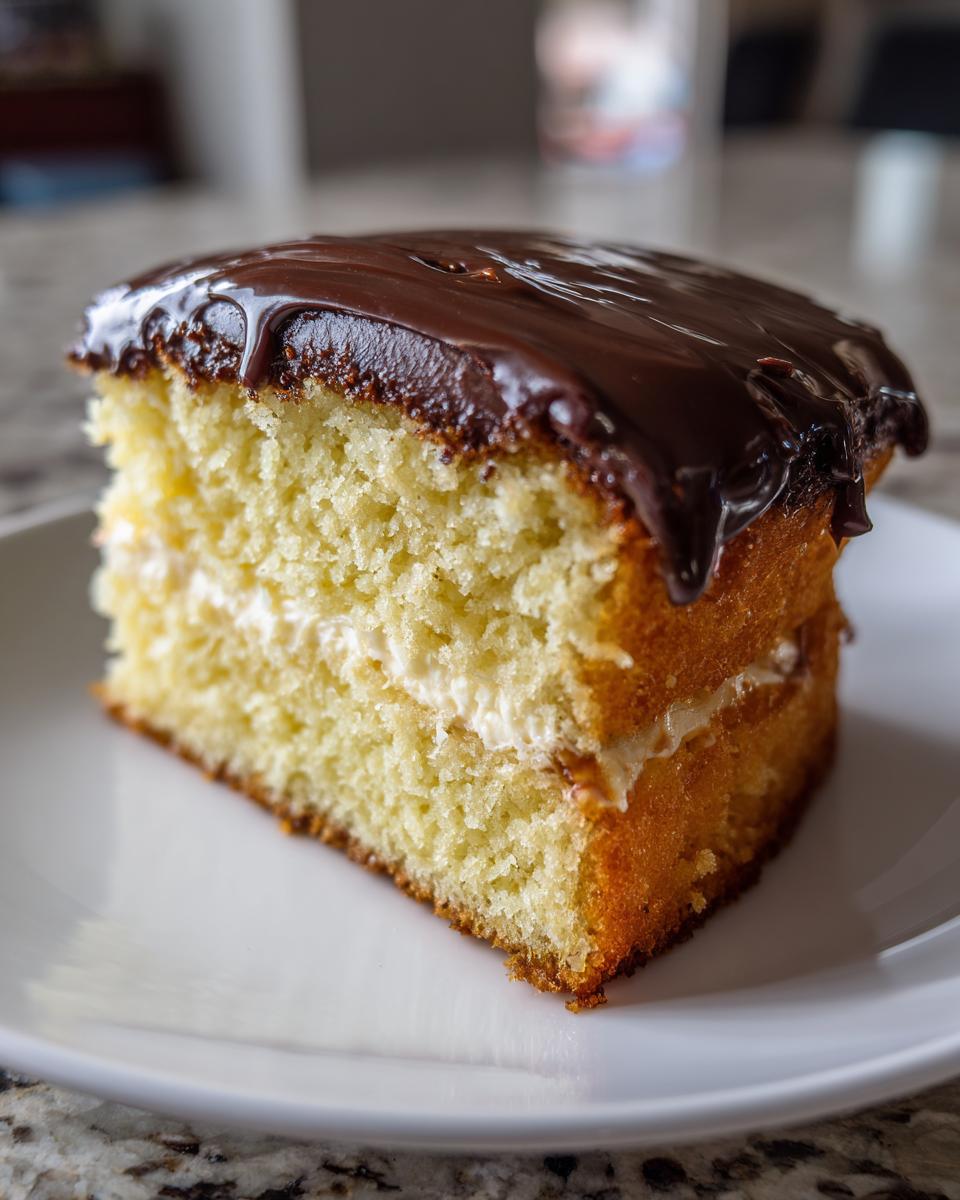
Tips for Boston Cream Pie Success
You’ve put in the work, and now you want that perfect slice every time! Here are a few little tricks I swear by. First off, make sure those cake layers are completely cool before you even think about adding the pastry cream. A warm cake can melt your custard, and nobody wants a soupy filling! Speaking of filling, if yours seems a little thin after chilling, don’t panic! Just give it a good whisk. Sometimes it just needs a little encouragement, kind of like getting your easy garlic naan bread perfectly fluffy. And for that chocolate ganache? If it looks a bit thick, a few extra seconds over the double boiler or a tiny splash more cream can do wonders.
Just like with easy dumpling sauce, a little adjustment goes a long way!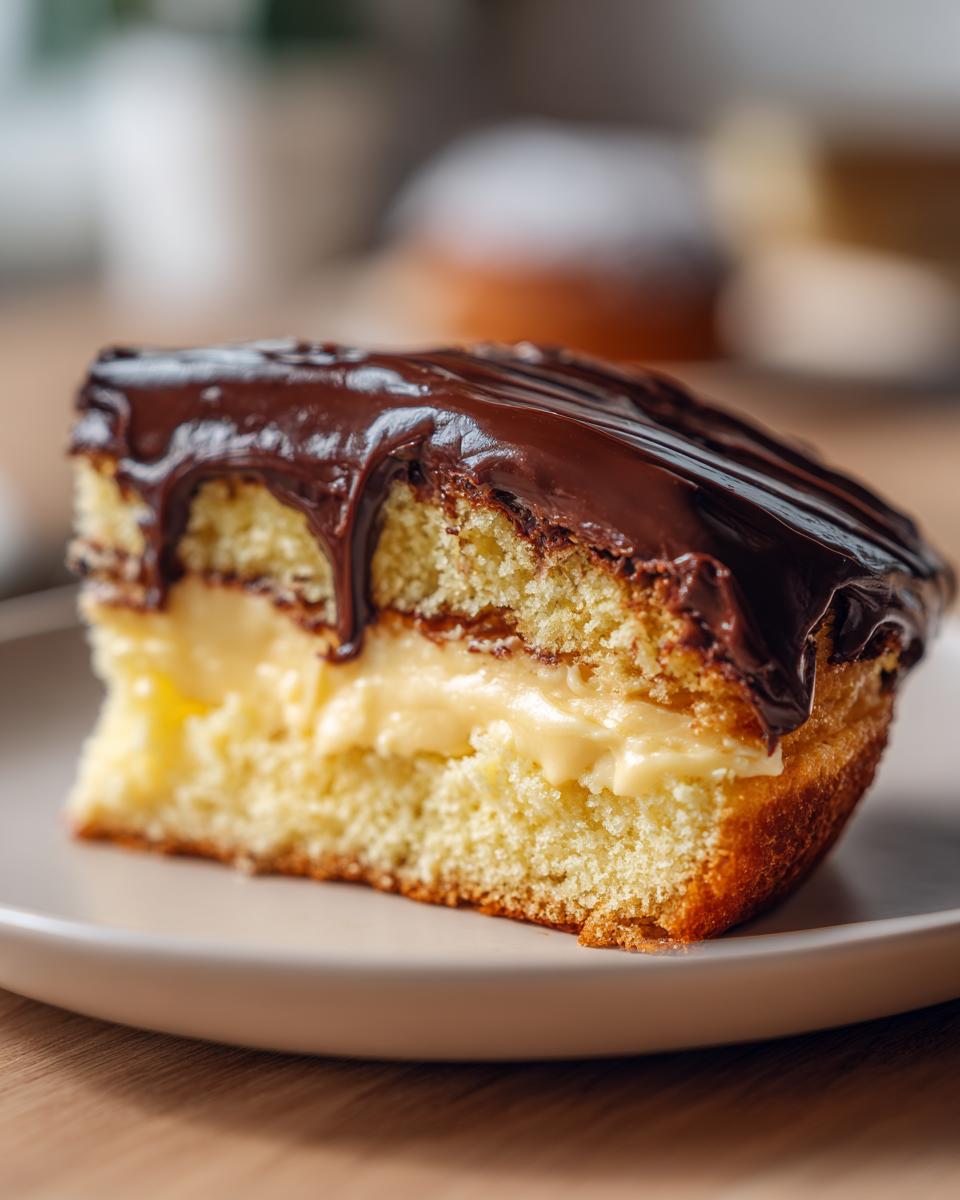
Ingredient Notes and Substitutions for Your Boston Cream Pie
Sometimes a recipe needs a little tweak, right? For this Boston cream pie, I’ve got a few notes. If you don’t have semi-sweet chocolate chips for the ganache, dark chocolate works too, just maybe add a touch more cream if it feels too stiff. And for the pastry cream? Whole milk really gives it that classic richness, but you *could* try 2% if that’s all you have, though it might be a little less creamy. Some folks even add a splash of rum to the filling for an adult twist, which is delish! Just remember, I always say make it yours. For more ideas on boosting flavors, check out my favorite marinade for pork chops – it’s all about playing around!
Frequently Asked Questions about Boston Cream Pie
Got questions about whipping up this classic Boston cream pie? I’ve got answers! It’s a bit of a process, but totally worth it.
Can I make this Boston cream pie ahead of time?
Oh, absolutely! This is actually one of my favorite make-ahead desserts. You can bake your cake layers the day before and let them cool completely, then whip up the pastry cream and ganache. Assemble the whole thing a few hours before you plan to serve it, or even the day before! It actually gives the flavors a chance to meld together even more beautifully. It’s perfect for when you’re planning easy weeknight dinners or a big weekend gathering.
Why is my pastry cream not thickening?
This happens sometimes, but don’t sweat it! The most common culprit is not cooking it long enough or hot enough, or sometimes the eggs don’t get tempered quite right. Make sure you’re whisking constantly and that it comes to a full boil for at least a minute. If it’s still too thin after cooling, you can try gently reheating it with a teaspoon of cornstarch mixed with a tiny bit of cold milk to help it thicken up. It’s a little like getting your simple breakfast ideas just right – sometimes you need a small tweak.
What’s the best way to store leftover Boston cream pie?
Because of that lovely pastry cream filling, you’ll want to store any leftover Boston cream pie in the refrigerator. Just cover it loosely with plastic wrap or pop it into an airtight container. It’s best enjoyed within two days, but honestly, it’s so good, you probably won’t have any leftovers!
Can I use store-bought cake mix or pudding for a shortcut?
I mean, you *could*, but it just won’t be the same amazing classic Boston cream pie! The beauty of this recipe is that tender, homemade yellow cake and the silky, rich pastry cream made from scratch. It makes such a difference in flavor and texture. Trust me, the effort is totally worth it for that authentic, from-scratch taste. Stick with this and you’ll be golden!
Estimated Nutritional Information
Now, I always like to give you a heads-up on what you’re looking at nutritionally, because, well, it’s a treat! Keep in mind these are just estimates and can totally change depending on the brands you use and how you measure. But for a generous slice of this classic Boston cream pie, you’re looking at roughly:
- Calories: around 450
- Fat: 25g (about 15g of that is saturated fat)
- Protein: 6g
- Carbohydrates: 55g
- Sugar: 45g
Share Your Classic American Dessert Creations!
Okay, you did it! You tackled a classic and probably made an incredible Boston cream pie. Now tell me all about it! Did it turn out perfectly? Share your thoughts in the comments below, or better yet, snap a photo and tag me on social media! I absolutely love seeing your creations. If you enjoyed this recipe, please give it a rating – it really helps other bakers find their way to dessert heaven! You can also reach out with any questions through my contact page.
Print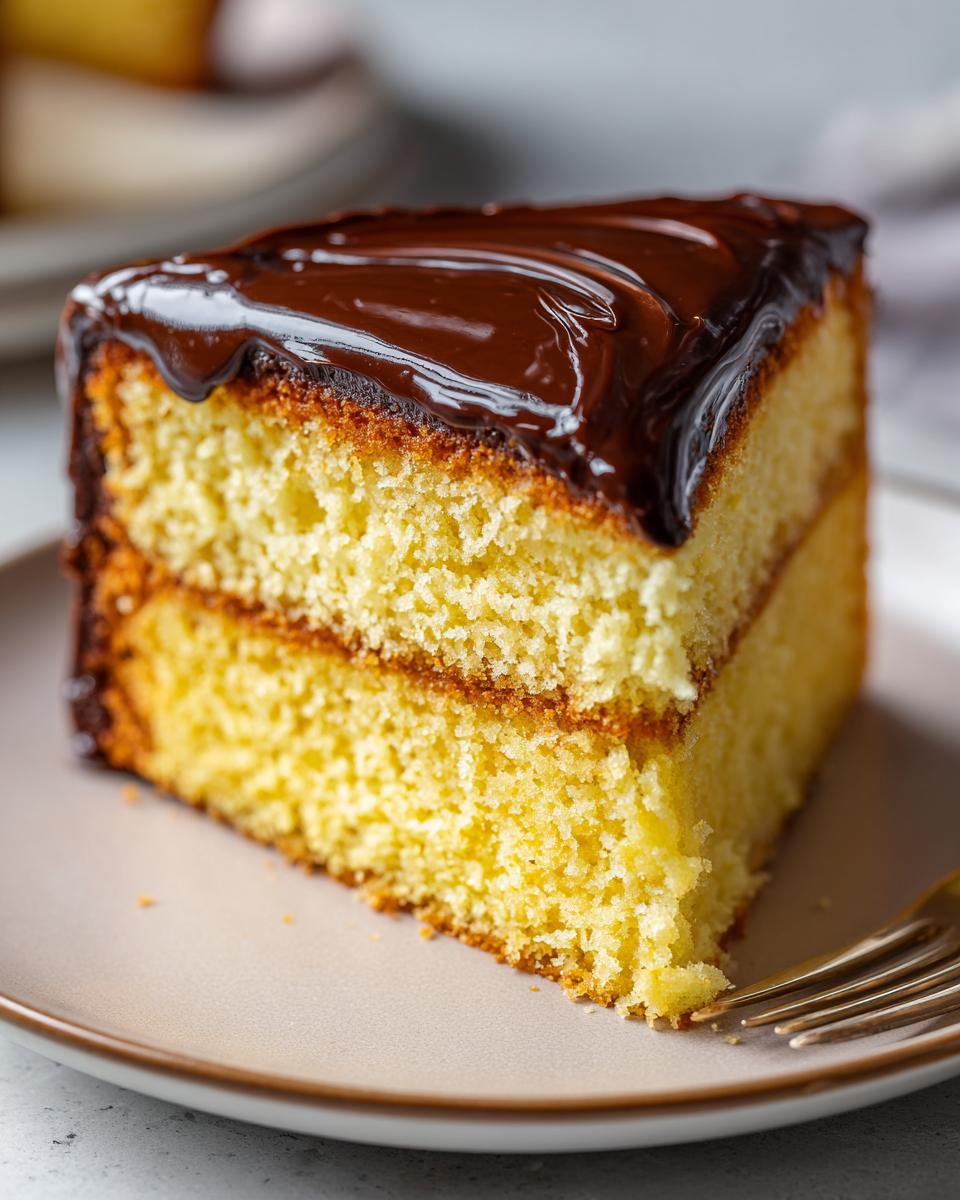
Classic Boston Cream Pie

A beloved vintage American dessert featuring a tender yellow cake, silky pastry cream, and a rich chocolate ganache topping. This recipe provides clear steps for each component, ensuring a delicious and nostalgic treat.
- Prep Time: 45 min
- Cook Time: 40 min
- Total Time: 3 hr 25 min
- Yield: 10 servings
- Category: Dessert
- Method: Baking
- Cuisine: American
- Diet: Vegetarian
Ingredients
- For the Cake: 2 cups all-purpose flour, 1.5 cups granulated sugar, 2.5 tsp baking powder, 0.5 tsp salt, 0.5 cup unsalted butter (softened), 1 cup milk, 2 large eggs, 1 tsp vanilla extract
- For the Pastry Cream: 2 cups whole milk, 0.5 cup granulated sugar, 4 large egg yolks, 0.25 cup cornstarch, 2 tbsp unsalted butter, 1 tsp vanilla extract
- For the Chocolate Ganache: 1 cup semi-sweet chocolate chips, 0.5 cup heavy cream
Instructions
- Preheat your oven to 350°F (175°C). Grease and flour two 8-inch round cake pans.
- For the cake: In a large bowl, whisk together flour, sugar, baking powder, and salt. Add softened butter and mix until crumbly.
- In a separate bowl, whisk together milk, eggs, and vanilla extract. Gradually add the wet ingredients to the dry ingredients, mixing until just combined. Do not overmix.
- Divide the batter evenly between the prepared pans. Bake for 30-35 minutes, or until a wooden skewer inserted into the center comes out clean. Let cool in pans for 10 minutes before inverting onto a wire rack to cool completely.
- For the pastry cream: In a medium saucepan, heat milk until simmering. In a separate bowl, whisk together sugar, egg yolks, and cornstarch until smooth.
- Gradually temper the egg yolk mixture by slowly whisking in about half of the hot milk. Pour the tempered mixture back into the saucepan with the remaining milk.
- Cook over medium heat, whisking constantly, until the cream thickens and comes to a boil. Boil for 1 minute, then remove from heat. Stir in butter and vanilla extract until smooth.
- Pour the pastry cream into a clean bowl. Press plastic wrap directly onto the surface to prevent a skin from forming. Chill for at least 2 hours, or until firm.
- For the chocolate ganache: Place chocolate chips in a heatproof bowl. Heat heavy cream in a small saucepan until simmering. Pour the hot cream over the chocolate chips and let sit for 5 minutes. Whisk until smooth and glossy.
- Assemble the cake: Place one cake layer on a serving plate. Spread the chilled pastry cream evenly over the cake layer. Top with the second cake layer.
- Pour the chocolate ganache over the top of the cake, allowing it to drip down the sides. Let set for at least 30 minutes before slicing and serving.
Notes
- Ensure your cake layers are completely cool before assembling to prevent the pastry cream from melting.
- For a smoother ganache, you can strain it before pouring over the cake.
- This cake is best served the day it is made, but can be stored in the refrigerator for up to 2 days.
Nutrition
- Serving Size: 1 slice
- Calories: 450
- Sugar: 45g
- Sodium: 200mg
- Fat: 25g
- Saturated Fat: 15g
- Unsaturated Fat: 10g
- Trans Fat: 0g
- Carbohydrates: 55g
- Fiber: 2g
- Protein: 6g
- Cholesterol: 150mg