

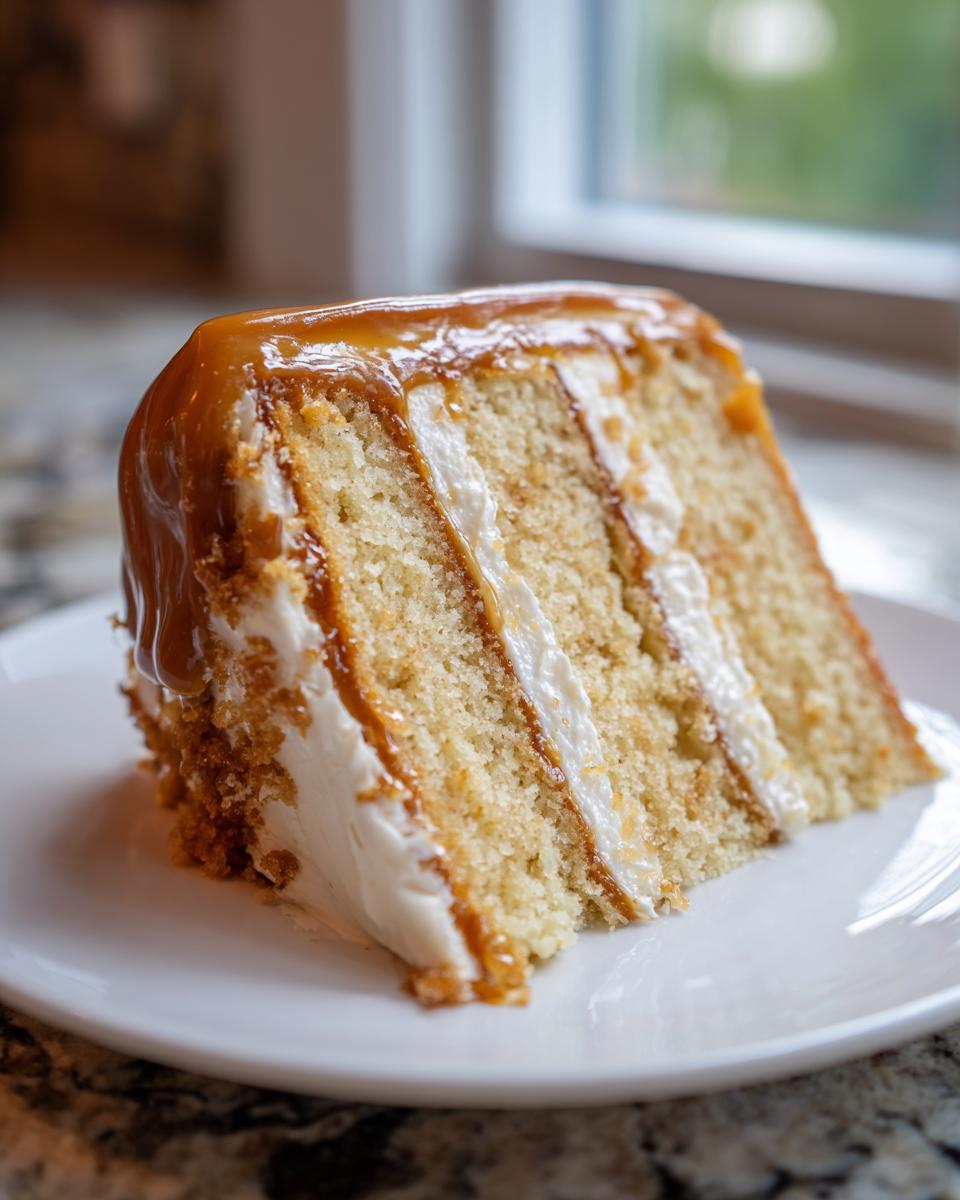
There’s this particular kind of magic that lives in old Southern kitchens, right? It’s not just the smell of butter; it’s the promise of something truly decadent waiting for you. Forget those thin, overly sweet versions you see sometimes—we’re making the Real Deal Old-Fashioned Southern caramel cake here. I’m talking about unbelievably moist vanilla layers cradling a rich, deeply flavorful caramel icing that melts in your mouth instead of sticking to your teeth. That’s the goal. At Kitchen Slang, my job, as Zoe Thompson, is to translate all that high-end technique I picked up in professional kitchens and give it to you, the home cook, so you can whip this showstopper out like it’s nothing. Trust me, this caramel cake is about to become your new signature dessert.
- Why This Old-Fashioned caramel cake is Your New Favorite Comfort Food Desserts
- Ingredients for the Best caramel cake Layers and Homemade Caramel Icing
- Step-by-Step Instructions to Master Your caramel cake
- Tips for a Bakery Style caramel cake Every Time
- Ingredient Notes and Substitutions for Your caramel cake
- Storage and Reheating Instructions for Your Classic Caramel Dessert
- Frequently Asked Questions About This Southern Caramel Cake Recipe
- Estimated Nutrition for Your Indulgent caramel cake
- Share Your Baking Success
Why This Old-Fashioned caramel cake is Your New Favorite Comfort Food Desserts
Listen, baking should feel like getting a warm hug, and this is the cake that delivers that every single time. This isn’t just a cake; it’s a piece of nostalgic baking history that tastes better than anything you’ll find boxed up.
Here’s the line-cook wisdom on why this Classic Caramel Dessert stands above the rest:
- The layers are unbelievably moist because we’re using the right fat ratios and temperature control in the batter.
- The authentic Southern flavor profile comes straight from tradition, nothing artificial here.
- My homemade caramel icing technique stops it from becoming that rock-hard, sugary mess. It’s rich, but perfectly balanced.
When you serve this up, you aren’t just serving dessert; you’re making a memory. It’s indulgent without being fussy. You owe yourself a slice of this comfort!
If you want to see another fantastic take on the real deal, check out this inspiration: Real Deal Caramel Cake.
Ingredients for the Best caramel cake Layers and Homemade Caramel Icing
Alright, let’s talk mise en place. This is where the magic starts. If you want that Moist Caramel Cake texture, you can’t skip the temperature rules here. Think of these ingredients like your line crew—everyone needs to be prepped and ready to go before the rush hits. I divided everything out so you know exactly what goes where when you mix it up. If you ever want to perfect just the sauce part, I have a detailed recipe for easy homemade salted caramel sauce that you can look at later, but for now, keep these together!
For the Moist caramel cake Layers
The key to a good structure is room temperature everything. I mean it! Let your butter sit out for an hour. Your eggs shouldn’t be cold shocks to the system. Same goes for that beautiful buttermilk—it blends so much better when it’s relaxed.
- 1 1/2 cups unsalted butter, softened
- 3 cups granulated sugar
- 4 large eggs, room temperature—don’t cheat on this!
- 1 tablespoon vanilla extract
- 3 cups all-purpose flour
- 1 teaspoon baking soda
- 1/2 teaspoon salt
- 1 cup buttermilk, room temperature
- 1/2 cup whole milk
For the Rich Homemade Caramel Icing
This is that cooked, caramelized goodness. We’re using brown sugar here because it gives us that deep, less aggressive sweetness that makes people ask for the recipe later. Don’t use plain white sugar in the sauce—it changes the texture completely.
- 1 cup packed light brown sugar (for caramel sauce)
- 1/2 cup heavy cream (the heavy stuff works best for richness)
- 1/2 cup unsalted butter
- 1/4 cup light corn syrup (this helps stabilize the sauce)
- 1/4 teaspoon salt (for the caramel sauce)
Step-by-Step Instructions to Master Your caramel cake
Okay, we’ve got our ingredients lined up, so now we get to the actual rhythm of baking. This is where you channel your inner bistro cook—efficiency is everything! Don’t hover, but don’t rush the foundation steps, especially that creaming part, because that’s what keeps this cake fluffy.
If you want a deep dive into a different but equally moist cake process, check out how I handle flour combinations in my applesauce cake recipe later on!
Preparing the Cake Batter and Baking
First thing: Preheat that oven to 350°F (175°C). Grease and flour three perfect 8-inch rounds now so you aren’t scrambling later. Now, the batter structure. In a big bowl, you need to cream that softened butter and granulated sugar until it’s genuinely light and looks pale. That takes a good few minutes—you’re whipping air into it, so don’t stop early!
Beat in the eggs one by one, scraping down the sides like a pro, followed by the vanilla. In another bowl, just whisk your dry stuff (flour, soda, salt). Then, alternate adding the dry ingredients with the buttermilk/milk mixture. Start and end with the dry. Mix only until they just disappear. Seriously, don’t go overboard! Divide it evenly and get those lovely layers into the oven for about 25 to 30 minutes. You’ll know they’re done when that toothpick comes out clean. Let them chill in the pans for 10 minutes before turning them out to cool completely. That cooling time is mandatory for a Buttery Caramel Cake that holds its shape.
Making the Spreadable Homemade Caramel Icing
This is where most people panic, but I promise this is manageable. Grab a saucepan. Toss in your brown sugar, heavy cream, butter, corn syrup, and that dash of salt. Set the heat to medium and stir constantly until that sugar dissolves. Let it hit a boil, then drop the heat to low and let it simmer, undisturbed, for exactly 5 minutes. That constant simmer develops the Rich Caramel Flavor.
Pull it off the heat and let it cool down for about 10 minutes. It needs to be warm, but not scorching hot. Now comes the secret to proper Caramel Frosting Techniques: Beat it! Use your mixer on medium speed, and watch it transform from a thin sauce into a lighter, thicker, spreadable icing right before your eyes. If it gets too stiff while you’re frosting, warm it *very* gently for 10 seconds.
Assembling Your Showstopper caramel cake
Patience pays off here! Once those cake layers are fully cool—and I mean fully, or the icing melts—it’s time to stack. Start with one layer, spread a thick, generous coat of that beautiful icing, and top it with the next. Repeat. Slather the rest of the icing all over the top and sides. Don’t worry about making it look too perfect; a slightly rustic, homemade spread looks better on this Classic Caramel Dessert anyway. If you have any thin caramel sauce left over from when it was cooling, drizzle it over the top layer just before serving for that extra glossy, professional touch.
Tips for a Bakery Style caramel cake Every Time
If you want this caramel cake to feel truly professional, it comes down to a few non-negotiables I picked up slinging desserts in a busy kitchen. First, go back and check your temperatures! If your butter, eggs, or buttermilk are cold, you’re going to end up with a curdled batter, and that kills the chance for a truly Moist Caramel Cake.
My biggest line-cook tip? Never, ever overmix once the flour is in—that develops gluten, and gluten makes cakes tough, not tender. If you see a tiny streak of flour left, stop mixing, fold it in with a spatula quickly, and move it to the pans. That’s the professional shortcut for perfect texture.
And for the icing—if it’s too runny when you start icing, stop! Give the bowl 15 minutes on the counter to firm up naturally. For more advice on building great layers, take a look at my secrets for a rich chocolate cake.
Ingredient Notes and Substitutions for Your caramel cake
I always get questions about the supporting cast in this recipe, especially when people are running to the store and realize they are missing one tiny thing. We need to talk about the buttermilk first because it’s not optional for structure, but I understand not everyone keeps a carton on hand!
We use buttermilk because it’s acidic. That acid reacts beautifully with the baking soda we add, which is one of the main leaveners we are using. This reaction creates lift, but more importantly, it helps tenderize the gluten in the flour, making your cake layers incredibly soft. If you don’t have buttermilk, don’t panic—it’s an easy fix. Just take one cup of regular milk (whole milk is best here), stir in one tablespoon of white vinegar or lemon juice, let it sit on the counter for five minutes until it looks slightly curdled? That’s your buttermilk substitute, ready for action!
Next up is the caramel sauce itself. See how I specified light brown sugar? That’s intentional. While white sugar caramelizes, brown sugar already has that molasses built-in. When we cook that brown sugar down, we get a much deeper, richer, almost toffee-like base flavor for the icing. Using only white sugar results in a sharper, sweeter caramel taste that can easily become too much, which is why I stick to brown for this authentic Southern style.
Storage and Reheating Instructions for Your Classic Caramel Dessert
So, you’ve made the most incredible Classic Caramel Dessert and you have leftovers—which, let’s be honest, is a miracle in itself! Because this cake relies on a cooked caramel icing, storage is a little different than your standard birthday cake. You can’t just leave it out on the counter forever, especially if your kitchen gets warm.
For the best results, you absolutely need to refrigerate this cake. The humidity control in the fridge keeps that beautiful icing firm and prevents it from melting into a sloppy puddle. Store it in an airtight container or cover it tightly with plastic wrap. It should keep beautifully in the fridge for a solid four to five days. I’ve found that the icing actually sets up even nicer the day after baking.
Now, when it comes time to serve those leftovers, you can’t just slice into a refrigerated cake—it’ll be too firm! Take the slice you want out about 30 to 45 minutes before you plan on eating it. Let it come up to room temperature on the counter. This slight warming reactivates the moisture in the cake layers and softens that rich icing back to that perfect, melt-in-your-mouth consistency we worked so hard to achieve. Trust me, waiting those few extra minutes makes all the difference!
Frequently Asked Questions About This Southern Caramel Cake Recipe
I know you’ve got questions buzzing after reading about this Buttery Caramel Cake. That’s great! It means you’re thinking critically about how to make it your own—that’s the Kitchen Slang way! We need to tackle some of the most common stumbling blocks right here so you can confidently make this Layer Cake Recipe.
If you ever need more dessert troubleshooting, I talk about handling temperature and structure a lot, even in my cinnamon roll casserole recipe—it’s all about the same foundational science!
Can I easily adapt this caramel cake for a Salted Caramel Cake?
Absolutely! That’s probably the most popular request I get. If you want that trendy contrast, wait until the Homemade Caramel Icing has completely cooled down after beating it (Step 3 of the icing process). Then, fold in about 1/2 teaspoon of flaky sea salt. If you want to be extra fancy, reserve a tiny pinch for sprinkling right on top of the finished cake for visual appeal. It makes it look instantly like a spectacular Indulgent Caramel Dessert.
What makes this a true Southern Caramel Cake Recipe?
This is key to understanding the tradition! A true Southern Caramel Cake Recipe uses a cooked icing. Most modern recipes rely on standard American buttercream, which is just butter, powdered sugar, and milk/cream mixed cold. Our recipe uses brown sugar, cream, and butter cooked on the stovetop until it boils, which changes its chemical structure. When you beat that *cooked* syrup, it thickens into something that tastes deeper and melts differently in your mouth. That cooked caramel is what defines this nostalgia trip!
Why is my icing runny?
If your icing is runny right after the beating stage, it means one of three things: you didn’t cook it long enough for the boil time, you beat it too aggressively when it was still too hot, or your kitchen is way too warm! If it’s runny, just pop the bowl into the fridge for 10-minute intervals, stirring gently between chilling sessions, until it thickens up enough to hold a soft peak.
Can I skip the corn syrup?
You can technically skip it, but I really don’t recommend it if you want that glossy sheen and guaranteed smooth texture. Corn syrup is a sugar invert, which stabilizes the cooked sugar so it doesn’t crystallize or become grainy on you. Without it, you risk getting a gritty icing, which means you have to start the sauce over!
Estimated Nutrition for Your Indulgent caramel cake
Alright, let’s talk the numbers for this incredible Indulgent Caramel Dessert. Listen, when you’re making a cake this rich, you know it’s going to be a treat, not an everyday snack. I always use a standard calculator based on the exact brands I prefer, but remember that where you shop—and what kind of butter you use—can shift these values a little. That said, this gives you a solid baseline for what you’re working with per slice.
Here is the breakdown for one serving of this Classic Caramel Dessert, based on yielding 12 generous slices:
- Serving Size: 1 slice
- Calories: 550
- Total Fat: 32g (with 19g saturated)
- Carbohydrates: 68g
- Sugar: 65g
- Protein: 5g
- Cholesterol: 110mg
Now, for the official disclaimer that I have to put in here so everyone stays honest: These figures are just estimates based on my component calculations. If you’re using extra-rich heavy cream or substituting ingredients, your final count could look a little different. But honestly? When you bite into that Rich Caramel Flavor, you’re not thinking about the macros, you’re thinking about seconds!
Share Your Baking Success
Whew! You did it. You cracked the code on the Old-Fashioned Southern caramel cake, and I bet it smells incredible wafting from your kitchen right now. I truly hope you loved every single step, from making sure the ingredients were room temperature to wrestling that perfect, glossy icing onto the layers.
Now, here’s where you get to join the Kitchen Slang crew! I absolutely live to see your results. Did it set up perfectly? Did your family devour it in five minutes flat? Tell me everything!
If you followed along and it all worked out beautifully, please do me a huge favor and head back up to the top of the recipe card and give it a solid 5-star rating. Those stars are how I know I’ve translated the technique correctly for you. And if you snapped a picture of your finished caramel cake, tag me on social media! I want to celebrate your success.
Don’t forget, we’re all learning together here. If you ran into a hitch, drop a comment below—maybe I can offer a quick tip, or maybe another baker has a great save to share. We’re building culinary confidence together. Want to learn more about what Chef Zoe is up to? You can always check out the About Page!
PrintOld-Fashioned Southern Caramel Cake
Make the classic Southern Caramel Cake, featuring moist vanilla layers and rich, homemade caramel icing that melts in your mouth. This recipe delivers a showstopper dessert with deep caramel flavor.
- Prep Time: 35 min
- Cook Time: 30 min
- Total Time: 65 min
- Yield: 12 servings 1x
- Category: Dessert
- Method: Baking
- Cuisine: American
- Diet: Vegetarian
Ingredients
- 1 1/2 cups unsalted butter, softened
- 3 cups granulated sugar
- 4 large eggs, room temperature
- 1 tablespoon vanilla extract
- 3 cups all-purpose flour
- 1 teaspoon baking soda
- 1/2 teaspoon salt
- 1 cup buttermilk, room temperature
- 1/2 cup whole milk
- 1 cup packed light brown sugar (for caramel sauce)
- 1/2 cup heavy cream (for caramel sauce)
- 1/2 cup unsalted butter (for caramel sauce)
- 1/4 cup light corn syrup (for caramel sauce)
- 1/4 teaspoon salt (for caramel sauce)
Instructions
- Preheat your oven to 350°F (175°C). Grease and flour three 8-inch round cake pans.
- In a large bowl, cream together the softened butter and granulated sugar until light and fluffy. This builds the cake’s structure.
- Beat in the eggs one at a time, mixing well after each addition. Stir in the vanilla extract.
- In a separate bowl, whisk together the flour, baking soda, and salt.
- In a small bowl, whisk the buttermilk and milk together.
- Gradually add the dry ingredients to the wet ingredients, alternating with the milk mixture, beginning and ending with the dry ingredients. Mix until just combined; do not overmix.
- Divide the batter evenly among the prepared pans. Bake for 25 to 30 minutes, or until a toothpick inserted into the center comes out clean.
- Let the cakes cool in the pans for 10 minutes before inverting them onto a wire rack to cool completely.
- While the cakes cool, make the caramel icing. In a medium saucepan, combine the brown sugar, heavy cream, 1/2 cup butter, corn syrup, and 1/4 teaspoon salt.
- Cook over medium heat, stirring constantly, until the sugar dissolves and the mixture comes to a boil. Reduce heat to low and simmer for 5 minutes without stirring. Remove from heat and let it cool slightly, about 10 minutes. The sauce will thicken as it cools.
- Once the sauce has cooled slightly but is still pourable, beat it with an electric mixer on medium speed until it becomes lighter in color and thickens to a spreadable icing consistency. If it gets too stiff, warm it briefly.
- Assemble the cake: Place one layer on a serving plate. Spread a generous amount of caramel icing over the top. Repeat with the second layer. Place the final layer on top and frost the top and sides of the entire cake. Drizzle any remaining thin caramel sauce over the top for a glossy finish.
Notes
- For the moistest cake, ensure your buttermilk and eggs are at true room temperature before mixing.
- If you prefer a salted caramel cake, add 1/2 teaspoon of flaky sea salt to the finished icing.
- This homemade caramel icing sets up firm but remains soft. If your kitchen is very warm, you may need to chill the cake briefly before slicing.
Nutrition
- Serving Size: 1 slice
- Calories: 550
- Sugar: 65g
- Sodium: 280mg
- Fat: 32g
- Saturated Fat: 19g
- Unsaturated Fat: 13g
- Trans Fat: 0.5g
- Carbohydrates: 68g
- Fiber: 1g
- Protein: 5g
- Cholesterol: 110mg