

You know that moment when you’re trying to eat a traditional taco, and everything immediately falls apart? It’s a universal tragedy, right? That mess is exactly why I translate techniques from the professional kitchens where efficiency is everything into recipes you can crush on a Tuesday night. Forget the drip, the spill, and the chaos. We are moving to handheld perfection with these incredible, gooey, golden cheesy pocket tacos right here on Kitchen Slang. This recipe isn’t just good; it’s the definition of a Taco Night Game Changer because it’s fast, deeply satisfying, and barely requires a napkin. If you’re looking for more simple wins, check out my guide on easy weeknight dinners. Trust me; once you nail this simple assembly, you’ll wonder how you ever tolerated a messy shell again. Let’s get cooking!
- Why These Loaded Cheesy Pocket Tacos Are Your New Weeknight Winner
- The Essential Ingredients for Perfect Cheesy Pocket Tacos
- How to Prepare These Loaded Pocket Tacos Step-by-Step
- Achieving the Golden Finish: Baking Crispy Tortilla Pockets
- Tips for Making the Best Cheesy Pocket Tacos Every Time
- Serving Suggestions for Your Loaded Pocket Tacos
- Storage and Reheating Cheesy Dinner Recipes
- Frequently Asked Questions About Cheesy Taco Pockets
- Estimated Nutritional Snapshot for Cheesy Pocket Tacos
Why These Loaded Cheesy Pocket Tacos Are Your New Weeknight Winner
Why am I obsessed with these things? Because they hit every single requirement for a busy weeknight meal without sacrificing that deep, savory flavor we crave. These aren’t just convenient; they deliver serious comfort food satisfaction.
- Handheld Portability: Mess-free eating means you can enjoy these anywhere.
- Major Flavor, Zero Fuss: That perfect blend of seasoned beef and creamy cheese is instantly recognizable.
- They’re Fast: We’re talking 30 minutes total, from start to finish!
Speed and Simplicity: The Kitchen Slang Approach
In my professional translation world, we cut corners that involve time, not taste. That’s why using a standard taco seasoning packet here is totally acceptable. It’s a proven flavor base delivered in seconds, which is core to making these Quick Weeknight Tacos work. We focus on the assembly and the bake time, keeping your active cooking well under 20 minutes. It’s efficient food genius, pure and simple.
The Essential Ingredients for Perfect Cheesy Pocket Tacos
Listen, the flavor in these cheesy pocket tacos comes because we’re building layers. You need quality components, and the prep notes are just as important as the ingredient itself. Don’t just toss things in; we want that smooth, creamy center and that golden crust. Here’s what you have to have on hand for maximum deliciousness.
- 1 tablespoon cooking oil (whatever standard oil you have is fine)
- 1 pound ground beef (I use 80/20 for the best flavor)
- 1 packet (1 ounce) taco seasoning mix (the ultimate shortcut!)
- 1/2 cup water
- 4 ounces cream cheese, softened (must be soft, seriously!)
- 1/2 cup salsa (I like one with a little kick)
- 1 cup shredded cheddar cheese, divided (you need this for the inside AND the outside)
- 8 large flour tortillas (burrito size—these are sturdy enough)
- 1/2 cup shredded Monterey Jack cheese (for extra gooey factor)
Ingredient Notes and Substitutions for Cheesy Pocket Tacos
If you’re not feeling beef, don’t sweat it. You can absolutely pivot this recipe into other fantastic stuffed tortilla bites. Try using ground turkey or even some shredded rotisserie chicken mixed with the seasoning. That keeps the flavor profile but changes the meat base. And about the cheese? Cheddar and Jack are classic, but feel free to swap them out. Mozzarella melts beautifully, or if you have a Mexican blend you love, use that instead. The goal is maximum melt!
How to Prepare These Loaded Pocket Tacos Step-by-Step
Alright, this is where we start translating that professional line-cook efficiency right onto your stovetop. Remember, we’re baking these soon, so let’s get that oven preheated to 400 degrees F right now. We want those tortillas golden and crisp when they come out!
Cooking the Seasoned Ground Beef Pockets Filling
Grab a big skillet—we need room to maneuver. Get your oil hot over medium heat. Toss in the pound of ground beef and break it up aggressively with a spoon or spatula. You want it fully browned, not just gray. Now, here’s the pro move I learned washing dishes in the bistro: Drain off every drop of excess grease before you add anything else. Nobody wants a soggy pocket from melted beef fat!
Once drained, stir in your taco seasoning packet and that half-cup of water. Let this simmer down for about five to seven minutes. The mixture needs to thicken up; you want the moisture absorbed, not dripping. When it’s done, pull that pan right off the heat. Use this time to mix your creamy spread!
Assembling and Sealing Your Cheesy Pocket Tacos
In a small bowl, just whip together that soft cream cheese, your salsa, and half of that cheddar cheese until it’s nice and smooth. This is the glue that holds everything together and adds that amazing tang. Take your large flour tortillas and spread that creamy mix evenly over one side of each one.
Now, layer it up: Spoon about a quarter cup of that seasoned beef right onto the cream cheese layer. Then, generously sprinkle the rest of the cheddar and all of that Monterey Jack over the beef. This is your cheesy moment! Next up is the most important step for travel-friendly ground beef pockets: Fold the tortilla in half to make that neat pocket shape. Seriously press those edges together! Use your fingers to crimp them shut. If you don’t seal them tight, the cheese might try to escape during baking, and we can’t have that! Transfer these carefully to your baking sheet. And, if you’re looking for more hearty beef dishes, you should check out my easy beef taco casserole recipe next time!
Achieving the Golden Finish: Baking Crispy Tortilla Pockets
Okay, we have assembled our beautiful, overflowing cheesy pocket tacos. They are sealed up tight, sitting seam-side down on parchment paper—which is a non-negotiable step, trust me, you don’t want cheese searing directly onto your pan! Now for the magic: we bake them until they are perfectly golden. Preheat that oven to 400 degrees Fahrenheit, as we discussed. Time it to bake for about 10 to 12 minutes. You’re looking not just for melted cheese but for the tortilla itself to turn into these sturdy, crispy tortilla pockets.

Watch them closely near the end! If they are baked perfectly, they’ll look visibly golden brown on top, like a perfect little grilled cheese but in a pocket shape. If you are looking for the *absolute* crispiest version, you can absolutely pivot to the air fryer. I love using the air fryer for these because it dries out the exterior perfectly without overcooking the creamy filling inside. Set it to 375 degrees F and run them for just 6 to 8 minutes, flipping halfway through. You can see why others love this method when looking up quick and delicious pocket taco ideas!
Pro kitchen slang tip here: If you want to dip these amazing handhelds later, you should definitely pull together a side like my incredible jalapeño popper dip. The warm, crispy pocket against a cool, creamy dip? Unbeatable combination, friend.
Tips for Making the Best Cheesy Pocket Tacos Every Time
Okay, now that you have the blueprint, let me give you the real insider knowledge—the stuff I picked up when trying to get a massive order of these out the door fast without wasting product. Following the steps is great, but these tiny adjustments guarantee you these are a total Taco Night Game Changer and not just a one-hit wonder.
First thing: Tortilla Talk. Flour tortillas are non-negotiable here because they have elasticity. Corn tortillas? They crack the second you try to fold them over a heavy filling. Always use the largest burrito-size flour tortillas you can find. If your tortillas are feeling a little stiff when you take them out of the package, microwave them for about 15 seconds. A little warmth gives them the flexibility you need to fold them over without tearing when pressing them shut.
My second major tip is about that filling moisture. Remember how I told you to drain all the grease off the beef? That was step one. Step two, which is just as vital, is making sure your meat mix isn’t soupy once the water evaporates down. If you think it still looks a bit wet, just throw it back on low heat for another minute or two until it looks thick and sticky, not loose. If the filling is wet, it steams the tortilla instead of letting it bake crispy, and then you don’t get those perfect crispy tortilla pockets we are aiming for.

Finally, think about your cheese spots. You definitely want the cream cheese spread as your base layer—that’s the cement. But when you sprinkle the cheddar and Jack on top, try to keep it centered over the meat. If you pile the cheese all the way to the edge where you are sealing it, it melts out and just glues the pocket shut with hard, crunchy cheese instead of a nice folding seal. Leave about a half-inch border empty around the edge when you sprinkle the cheese!
Serve these right away with something fresh to cut through that richness, like a homemade salsa or, honestly, my favorite homemade guacamole. That cool, fresh flavor against the hot, salty, cheesy shell? Absolute perfection.
Serving Suggestions for Your Loaded Pocket Tacos
So, you’ve got these gorgeous, golden, supremely cheesy pocket tacos coming out of the oven. They are rich, they are savory, and they are pure comfort food contained perfectly in a tortilla. But what do you do now? You can’t just eat them plain, right? Well, you *could*, but we want balance on the plate!
Because these things are so decadent with the ground beef and double cheese, we need to hit back with something cooling and fresh. Think of it as balancing the flavor profile—we need that acidic pop to make the richness really shine. My go-to? If you made them ahead of time, you absolutely must serve them with a batch of my homemade salsa. That bright, fresh tomato flavor is exactly what keeps you coming back for bite number two, three, and probably four.
If you need something creamy to dip into, you can’t go wrong with basic sour cream, maybe spiked with a squeeze of lime juice—that cuts the fat beautifully. Shredded iceberg lettuce is an underrated partner here. It adds this unbelievable cold, light crunch that feels great against the hot, soft center of the pocket.
For a full meal, instead of heavy sides like rice or beans, I usually keep it light. Think a simple side salad dressed with a sharp vinaigrette, or maybe some fresh-cut avocado slices sprinkled with a little salt and chili powder. They are hearty enough on their own; sides should just enhance the handheld party!
Storage and Reheating Cheesy Dinner Recipes
So, you made a huge batch? Good call! These are fantastic leftovers, but we have to treat them right, or you’ll end up with sad, floppy pockets the next day. If you have any leftover cheesy dinner recipes, stash them in an airtight container in the fridge. They’ll last happily for about three days.

Now, for reheating: skip the microwave completely! It melts the cheese back into liquid form and turns the tortilla totally soggy. For the best results, you need to bring back that snap you loved straight from the oven. Pop them back onto a baking sheet in a 350-degree oven for about 8 minutes. If you’re in a hurry, the air fryer works even better at 350 for about 4 minutes. That little blast of dry heat reactivates the crispiness. You can find another great take on these handhelds over at this crispy delight, but the reheating rule is the same wherever you go!
Frequently Asked Questions About Cheesy Taco Pockets
When you’re bringing a new recipe into your regular rotation, it’s natural to have questions. Since these cheesy taco pockets are such a fun twist, people often ask how to tweak them for family schedules or different ingredients. I’ve compiled the most common things I hear from folks trying these for the first time to make sure your experience is seamless. If you’re looking for an even heartier option for a cold night, you might want to check out my easy chili recipe, but for now, let’s nail these pockets!
Can I make these cheesy pocket tacos ahead of time?
Great question for meal preppers! Yes, you absolutely can assemble these ahead of time, but here’s the line-cook secret: Do not bake them until you’re ready to eat. You can mix the meat filling, you can spread the cream cheese mixture, and you can even fold and seal all the pockets and lay them out on the baking sheet. Just cover that whole tray tightly with plastic wrap and stick it in the fridge. When dinner time hits, just pop that cold tray right into the hot oven (you might need to add 3 or 4 minutes to the bake time since they are starting cold). Baking them fresh ensures you get that perfect, crispy exterior!
What is the best tortilla type for these handheld taco ideas?
Look, if you try to use corn tortillas, you are setting yourself up for frustration. Corn tortillas are fantastic for authentic street tacos or tostadas, but they just don’t have the stretch needed to fold around a heavy, cheesy filling without cracking apart during folding or baking. For these specific handheld taco ideas, you must use large, soft flour tortillas—the bigger the better, the burrito size works perfectly. They are pliable, which allows you to fold them over neatly and press a strong seal around the edge to keep all that good stuff inside the pocket.
Can I make these baked taco pockets vegetarian?
Of course! These pockets are all about the savory filling and the cheese so they adapt really well to going meatless. You’ll want to replace the ground beef with something that still offers a good texture and holds onto the seasoning well. My favorite substitution for these baked taco pockets is a can of black beans, rinsed and mashed almost completely, mixed with about a half cup of cooked lentils. Make sure you cook down the beans a bit with the water so they aren’t too wet, and then proceed with seasoning them the same way you would the beef. They soak up the taco flavor beautifully and give you a great, hearty bite!
Estimated Nutritional Snapshot for Cheesy Pocket Tacos
Now, before you dive headfirst into that cheesy goodness, let’s talk quickly about what’s inside. We’re making comfort food tacos here, so these aren’t exactly diet food, but knowing the macros helps when trying to build a balanced meal plan for the week. We’re yielding 8 hefty pockets from this batch, so these numbers are per serving—one pocket.
Keep in mind this is just an estimate, right? We used specific brands of cheese and a standard seasoning packet, so your numbers will shift based on how much extra salsa you squirt in or what kind of ground beef you grab. But this gives you a solid baseline for your cheesy dinner recipes!
- Serving Size: 1 pocket
- Calories: 420
- Fat: 22g
- Carbohydrates: 35g
- Protein: 22g
See? Plenty of protein to keep you full, which is great for a weeknight meal. Just be mindful of the sodium count, especially if you use a high-sodium seasoning mix. If you’re tracking things like that, this is a good place to check your numbers!
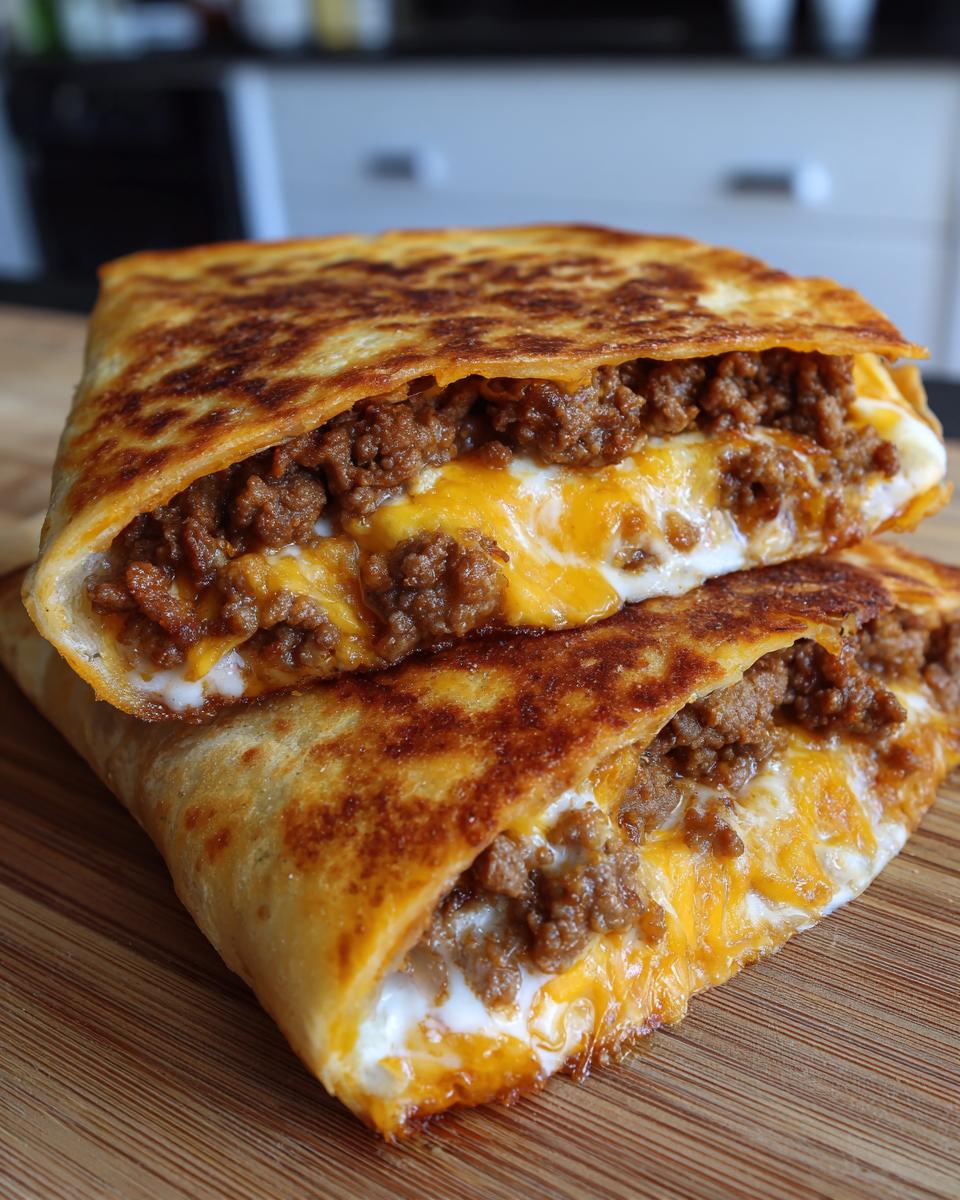
PrintLoaded Cheesy Pocket Tacos: Your Weeknight Game-Changer

Make these handheld, crispy cheesy pocket tacos stuffed with seasoned ground beef and a creamy cheese filling. They are a satisfying twist on taco night, perfect for quick dinners.
- Prep Time: 15 min
- Cook Time: 15 min
- Total Time: 30 min
- Yield: 8 servings 1x
- Category: Dinner
- Method: Baking
- Cuisine: Tex-Mex
- Diet: Vegetarian
Ingredients
- 1 tablespoon cooking oil
- 1 pound ground beef
- 1 packet (1 ounce) taco seasoning mix
- 1/2 cup water
- 4 ounces cream cheese, softened
- 1/2 cup salsa
- 1 cup shredded cheddar cheese, divided
- 8 large flour tortillas (burrito size)
- 1/2 cup shredded Monterey Jack cheese
Instructions
- Heat the oil in a large skillet over medium heat. Add the ground beef and cook until browned, breaking it up as it cooks. Drain off any excess grease.
- Stir in the taco seasoning mix and water. Bring the mixture to a simmer and cook for 5 to 7 minutes, or until most of the liquid has evaporated. Remove from heat.
- In a small bowl, combine the softened cream cheese, salsa, and half of the shredded cheddar cheese. Mix until smooth.
- Spread the cream cheese mixture evenly over one side of each flour tortilla.
- Spoon about 1/4 cup of the seasoned ground beef mixture onto the center of the cream cheese side of each tortilla.
- Sprinkle the remaining cheddar cheese and the Monterey Jack cheese over the beef filling.
- Fold each tortilla in half to create a pocket shape. Press the edges firmly to seal the filling inside.
- Place the sealed pockets seam-side down on a baking sheet lined with parchment paper.
- Bake at 400 degrees Fahrenheit for 10 to 12 minutes, or until the tortillas are golden brown and the cheese is melted.
- Serve these handheld taco ideas immediately for a satisfying meal.
Notes
- For extra crispiness, you can air fry these pockets at 375 degrees Fahrenheit for 6 to 8 minutes, flipping halfway through.
- Use your favorite taco meat recipe if you prefer not to use a pre-made seasoning packet.
- You can substitute the ground beef with ground turkey or shredded chicken for different stuffed tortilla bites.
Nutrition
- Serving Size: 1 pocket
- Calories: 420
- Sugar: 3
- Sodium: 650
- Fat: 22
- Saturated Fat: 10
- Unsaturated Fat: 12
- Trans Fat: 0.5
- Carbohydrates: 35
- Fiber: 2
- Protein: 22
- Cholesterol: 65