
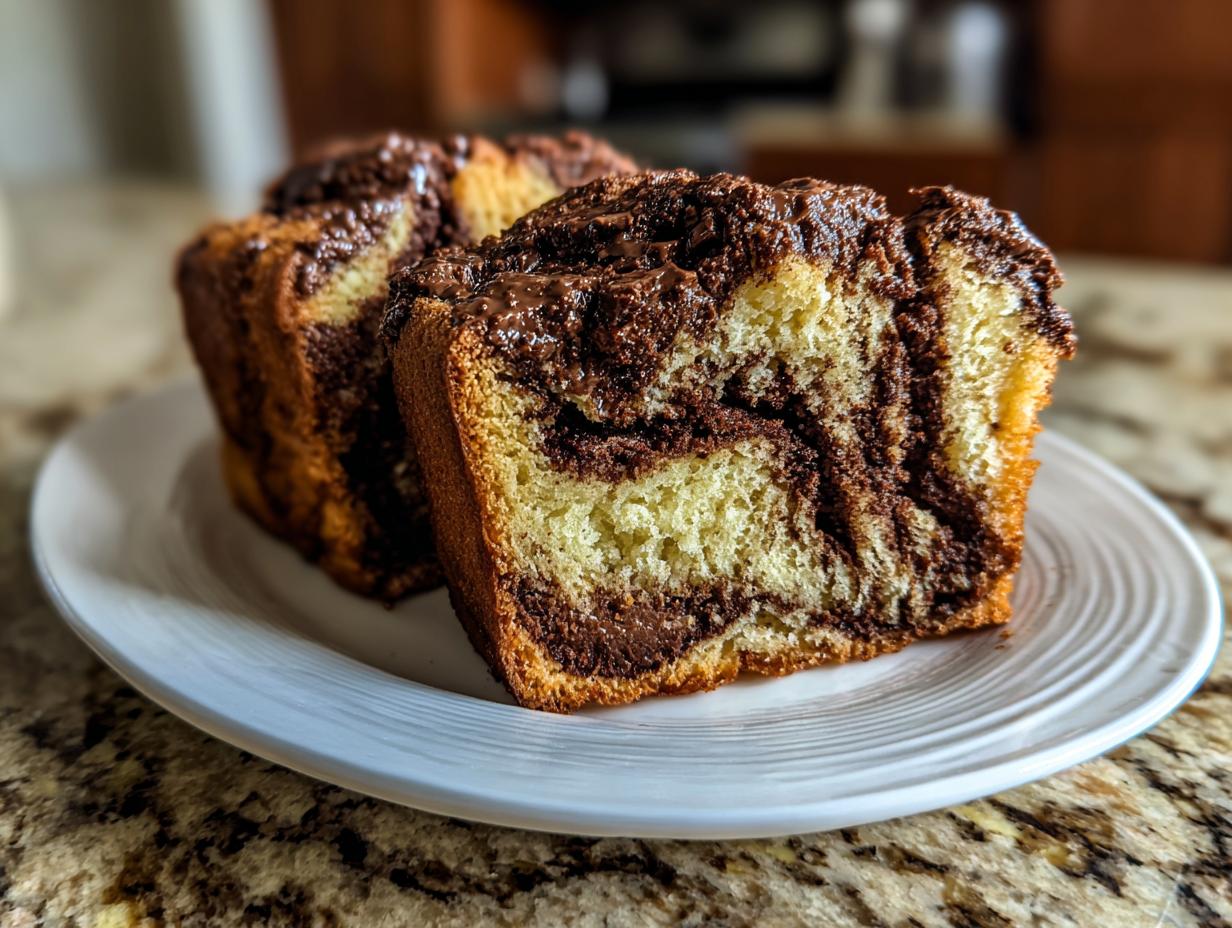
Look, you can buy a babka, sure. But have you ever pulled one out of your own oven? Store-bought loaves are always a little sad, right? Dry edges, flat swirls—they just don’t have the soul of the real thing. Trust me, making your own chocolate babka is a game-changer, and it’s surprisingly easy once we translate the method.
This isn’t just bread; it’s that sweet, buttery brioche texture hugging a mountain of dark chocolate. I’m giving you the secrets to guarantee a perfectly soft dough and those beautiful, dramatic swirls. You might think this is too much for a Tuesday, but honestly? It’s the best kind of Weekend Baking Project, and I’m going to walk you through every single step so you sound like you’ve been braiding pastries professionally for years. No intimidation here—just real, delicious results.
- Why This Homemade Chocolate Babka Recipe Works (The Kitchen Slang Translation)
- Gathering Ingredients for Your Chocolate Babka
- From Scratch Babka Instructions: Making the Soft Brioche Babka Dough
- Assembling the Decadent Chocolate Swirl Bread
- Baking and Finishing the Glossy Glazed Babka
- Tips for Success with Your Chocolate Babka
- Make-Ahead and Storage for Your Yeast Bread Dessert
- Frequently Asked Questions About Chocolate Babka
- Estimated Nutrition for This Decadent Chocolate Babka
Why This Homemade Chocolate Babka Recipe Works (The Kitchen Slang Translation)
Most recipes just tell you what to do, but we’re talking about the *why*—that’s the insider knowledge that skips the guesswork. For this Best Chocolate Babka Recipe to really shine, we need things handled just right from the start. See, we’re making a brioche here, which means fat equals fluffiness, but you can’t just dump the butter in!
The biggest secret to that pillowy interior is ingredient temperature. If your eggs and those four cups of flour aren’t room temp, the yeast throws a fit, and the smooth dough you need never forms. We want the dough to embrace the butter slowly, not fight it. It takes longer, sure, but that slow integration is what gives you bakery-level tenderness. If you want to see how we handle tricky enriching doughs, check out my take on achieving that incredible structure in a Japanese milk bread tutorial.
Achieving the Soft Brioche Babka Dough
When you’re kneading in that softened butter, you’re not just mixing—you’re building structure. Think about it: the gluten network tightens up around those little fat pockets. If you add the butter too fast, it breaks that network, and you end up with a tough pastry. Take your time folding it in piece by piece; that slow integration is how you get that incredibly Soft Brioche Babka Dough that melts in your mouth. Stick with me on this kneading part, and you’ve won half the battle.
Building the Rich Chocolate Filling Recipe
If your filling slides right out when you roll the dough, you know you’ve got a problem. We want a filling that’s more like a thick paste than a ganache. That’s why we melt the butter but add cocoa powder and powdered sugar right in there. Using good quality bittersweet chocolate makes a huge difference—it cuts the sweetness and gives you that deep, grown-up flavor. This Rich Chocolate Filling Recipe needs to be spreadable but stiff enough to stay put when you twist it up later.
Gathering Ingredients for Your Chocolate Babka
Okay, let’s get organized. Baking something this spectacular requires having all your pieces lined up, which is basically the kitchen slang for “mise en place.” Since this is a Yeast Bread Dessert, we have three main players here: the dough, which needs time to get happy; the rich chocolate filling; and the simple syrup that gives us that beautiful shine.
For the dough, remember what I said about temperature—everything needs to be friendly! Make sure that milk is warm, not hot, so you don’t kill the yeast. For the eggs, just pull them out an hour before you start mixing. It makes that brioche dough come together so much smoother. When you’re ready to stock up, planning for this bread is almost as fun as eating it!
If you want to see how I organize my ingredients for other big holiday bakes, check out my tips for casserole-style treats, like my cinnamon roll casserole. It’s all about grouping components together!
Here’s the breakdown of exactly what you need:
For the Soft Brioche Babka Dough:
- 1 cup whole milk, warmed so it feels like a pleasant bath (about 105-115°F)
- 2 1/4 teaspoons active dry yeast
- 1/4 cup granulated sugar, plus 1 teaspoon to wake up that yeast
- 3 large eggs, room temperature—no exceptions!
- 1 teaspoon vanilla extract
- 1 teaspoon salt
- 4 cups all-purpose flour, plus a little extra dust for the counter
- 1/2 cup (1 stick) unsalted butter, softened nicely and cut into small pieces
For the Rich Chocolate Filling Recipe:
- 1 cup powdered sugar
- 1/2 cup unsweetened cocoa powder
- 1/2 cup (1 stick) unsalted butter, melted smooth
- 4 ounces bittersweet chocolate, chopped as finely as you dare
For the Glossy Syrup Glaze:
- 1/4 cup water
- 1/4 cup granulated sugar
From Scratch Babka Instructions: Making the Soft Brioche Babka Dough
Now we get down to the actual magic of making chocolate babka from scratch. Don’t let the word ‘brioche’ scare you; we’re just being methodical with our fat. We start by waking up the yeast—that’s step one. Warm milk, a tiny pinch of sugar, and the yeast. If it gets foamy in about ten minutes, great! That means your yeast is alive and ready to give your bread lift.
Next, we mix the wet stuff and slowly bring in the flour until it looks like a shaggy mess. Then comes the hard part, which is actually the most rewarding: kneading in the butter. We add those softened chunks one by agonizingly delicious piece at a time. You have to fully work in one piece before adding the next one. This is the core technique for that tender crumb, just like in my homemade dinner rolls recipe!
The First Rise: Patience for the Chocolate Babka Dough
Once you’ve got that smooth, elastic dough, we let it rest. This is where the yeast does all the heavy lifting. Find a snug, warm corner for it—like on top of your fridge or near a slightly warm oven. You’re looking for it to look puffy, like a giant, beautiful cloud, and visibly double its original size. Don’t rush this! A happy first rise equals a light final loaf.
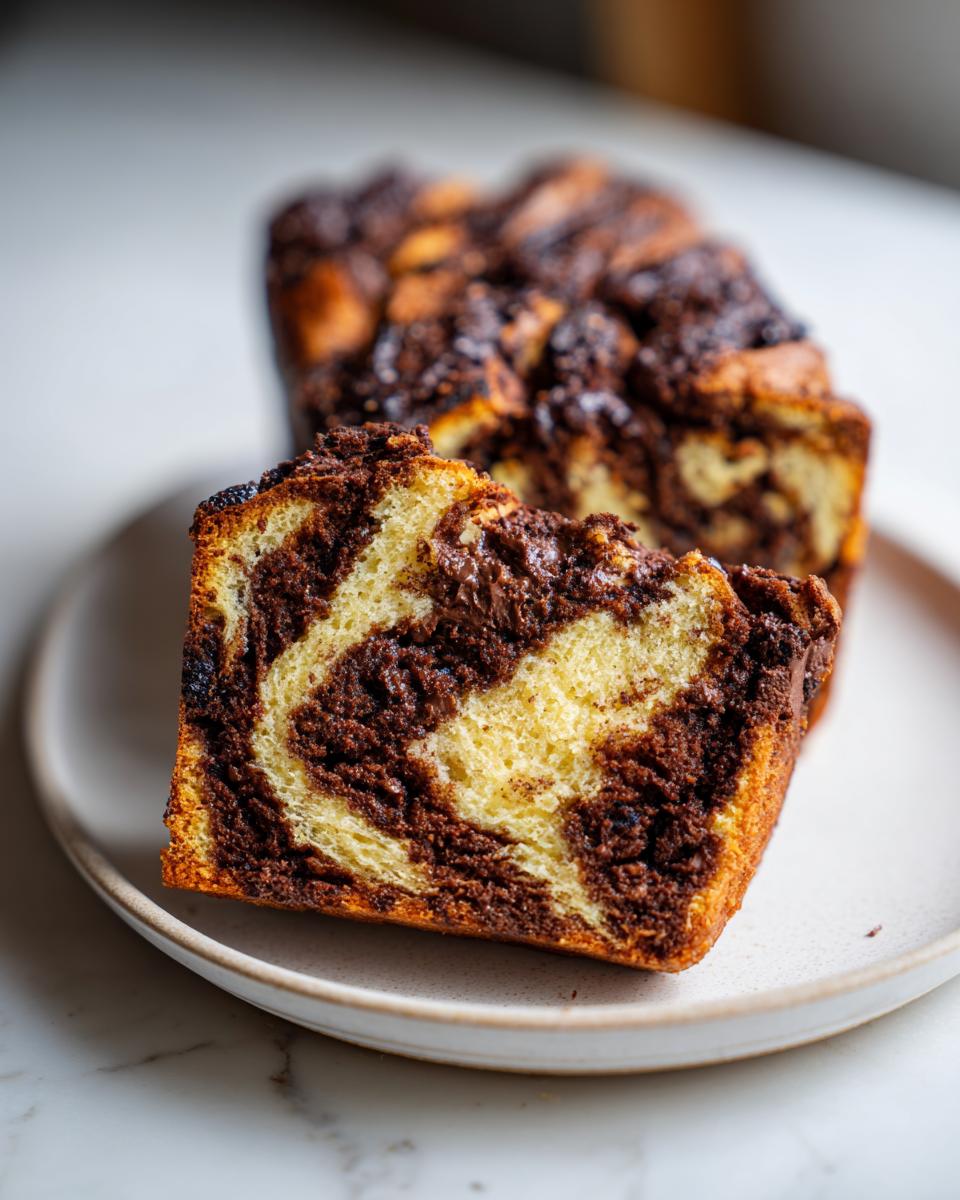
Assembling the Decadent Chocolate Swirl Bread
Okay, the dough has risen and smelled amazing, so now we move into the assembly phase to create that signature look of our chocolate babka. Punch that air out gently and roll the dough into a big 12×18 inch canvas. It needs to be pretty thin because we’re loading it up! If you need inspiration for handling layered doughs before this, take a look at my tips for monkey bread—it’s a similar principle!
Spread that thick, glorious chocolate filling all the way to the edges, but leave about a half-inch border on one long side—that’s your seal! Once covered, starting from the opposite long side, roll it up tightly like you’re rolling up a fancy sleeping bag. Pinch that seam hard so it doesn’t burst open later. We want all that goodness trapped inside.
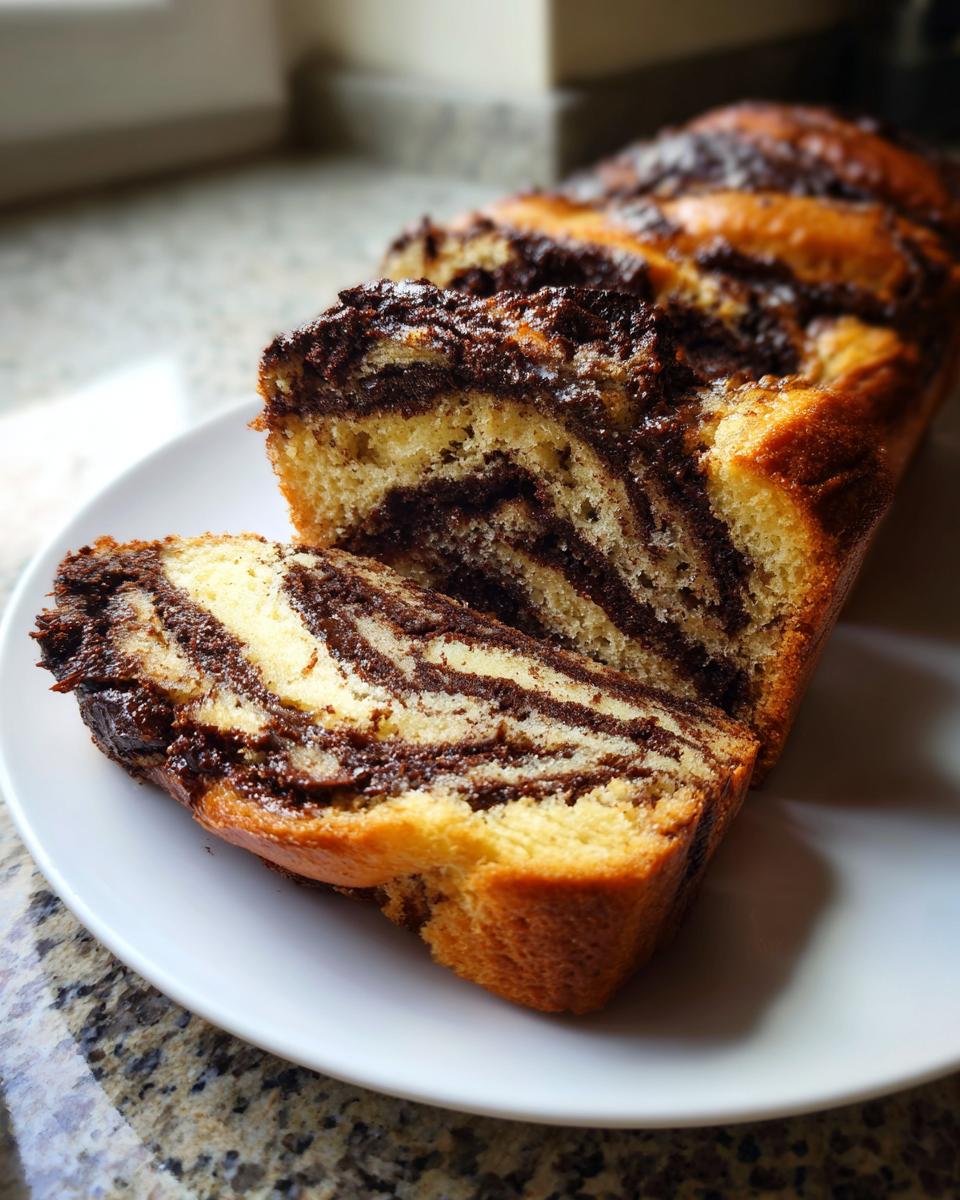
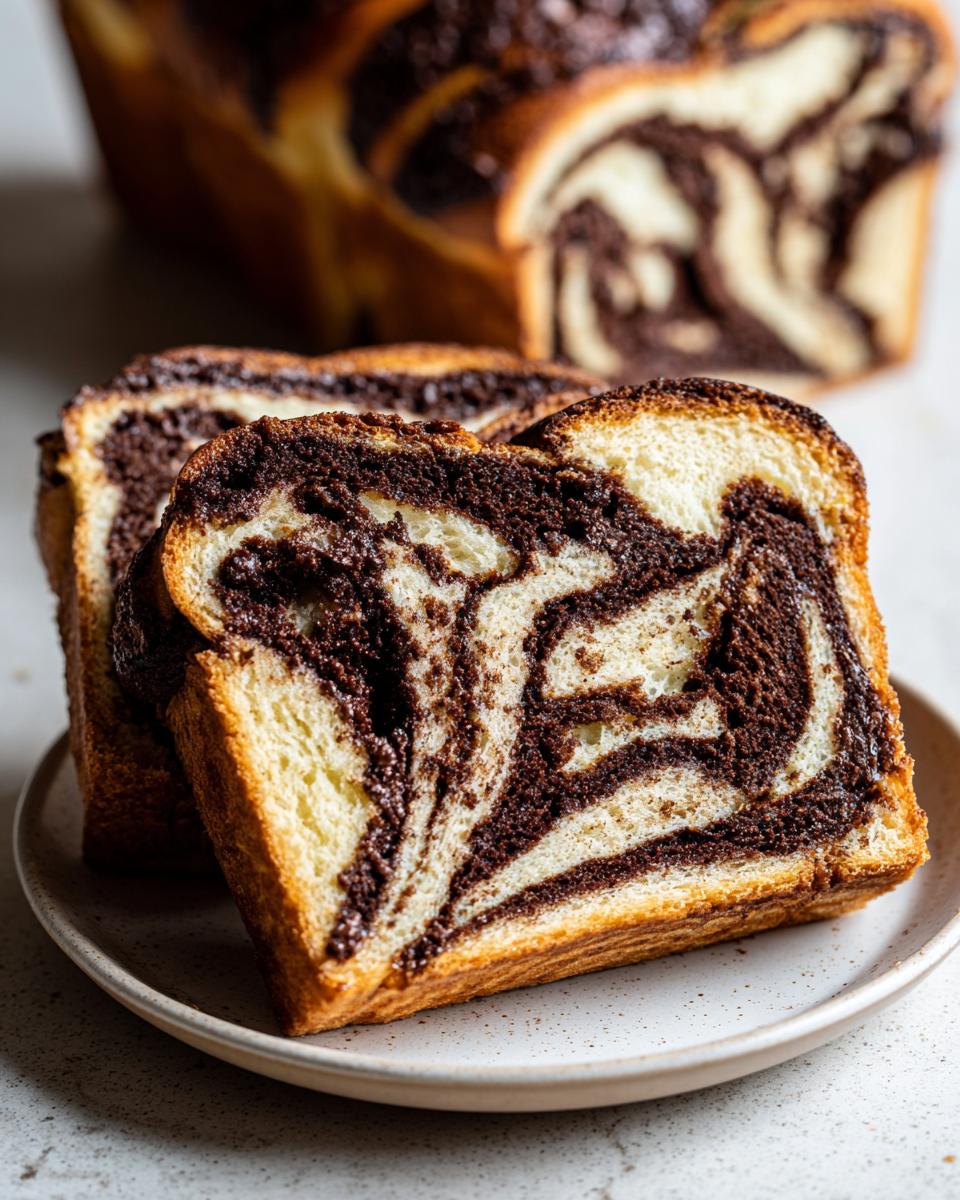
Now for the fun part that determines if you get that stunning cross-section—the slicing. Check out this visual guide if you need a peek, but we slice that whole log right down the middle, exposing all those beautiful layers from the Rich Chocolate Filling Recipe. This is the secret to an impressive Decadent Chocolate Swirl Bread.
Mastering How to Braid Chocolate Babka for Perfect Swirls
Lay those two halves side-by-side with the cut sides facing the ceiling. This is crucial! Now, twist them around each other. Keep twisting so those chocolate ribbons stay on top, begging to be seen. Seriously, constantly check that the layers are visible as you twist. Pinch the ends together so the whole structure is secure before gently transferring it to your greased loaf pan.
Baking and Finishing the Glossy Glazed Babka
We’ve put in the hard work with the dough and the swirl, so now our chocolate babka just needs a little bake time! Before it goes in, give it that final rest—the second rise—for about 45 minutes until it looks nice and puffy in the loaf pan. Preheat that oven to 350°F while it’s puffing up.
When it goes in, keep an eye on it. Thirty-five to forty-five minutes is usually the magic window for a 9×5 loaf. Here’s a key trick: if the top of your glorious swirl starts getting too dark before the center is cooked through—and this happens fast with that sugar content—just loosely tent a piece of foil over it. That stops the burn marks and lets the inside finish baking.
While it bakes, whip up the simple syrup. It’s just sugar and water heated until clear. That’s the secret to a truly Glossy Glazed Babka! As soon as that loaf comes out, still piping hot, you have to brush that sugar syrup all over the top. Don’t be shy! The heat pulls that syrup right in, keeping the bread unbelievably moist. If you want to see another recipe that uses simple syrup to lock in moisture, take a look at my apple pie dump cake.
Let it cool in the pan for just fifteen minutes—no longer!—before moving it to a wire rack to chill completely. Trust me, this final step locks in all that flavor and shine.
Tips for Success with Your Chocolate Babka
You’ve done the hard work, now let me give you the quick translation checklist so your chocolate babka comes out perfect every single time. This is the stuff I learned working those weekend brunch shifts!
First, that dough needs soft butter, not melted butter, and room-temperature eggs before you even start kneading. It seems tedious, but this convinces the dough to be super tender, like in my easy apple crumble recipe—texture management is everything!
Second, when you make that chocolate filling? You can actually get a head start. Make the filling two or three days ahead and store it covered in the fridge. Just let it sit out on the counter for maybe 30 minutes before you plan to spread it; you need it soft, not rock hard when rolling!
Finally, remember the syrup rule! I know you’ll be eager to dig in, but wait until it’s fresh out of the oven to hit it with that glaze. Brushing it on hot makes that Glossy Glazed Babka happen. If you want to see how another baker tackles this masterpiece, check out this method for reference!
Make-Ahead and Storage for Your Yeast Bread Dessert
Since this beautiful Yeast Bread Dessert takes a little time to shine, you absolutely can make parts of it ahead. That’s smart planning right there, especially if you’re pulling this out for Holiday Brunch Baking Ideas!
The actual chocolate filling? That’s your best friend for make-ahead work. Mix it up, pop it in the fridge, and keep it covered for up to three days. Just remember my previous translation: let it soften up a bit on the counter before you try to spread it onto the dough.
Once the whole babka is baked and cooled, it keeps really well on the counter, wrapped tightly, for a good couple of days. If you really want to save it for later—and you totally should, because it’s great the next day—wrap it well and pop it in the freezer. Thaw it overnight on the counter, and maybe hit it with a quick splash of water and a few minutes in a warm oven. It’ll taste freshly baked, I promise! For other great make-ahead morning treats, take a peek at my banana nut muffins.
Frequently Asked Questions About Chocolate Babka
I always get a ton of questions when folks tackle their first loaf. It’s a fancy thing, but we’re making this Easy Babka Bread Tutorial accessible. Let’s get those last few sticking points cleared up so you can bake with total confidence!
How do I stop my chocolate babka from drying out?
That’s the perennial question! The number one answer involves two things covered earlier: the brioche dough structure gives you a good start, but the absolute savior is the sugar syrup glaze applied right when it exits the oven. That syrup soaks in and basically traps moisture inside. Follow my instructions for proper syrup application for truly Moist Chocolate Babka Tips.
Is the braiding actually hard? I’m nervous about the swirl.
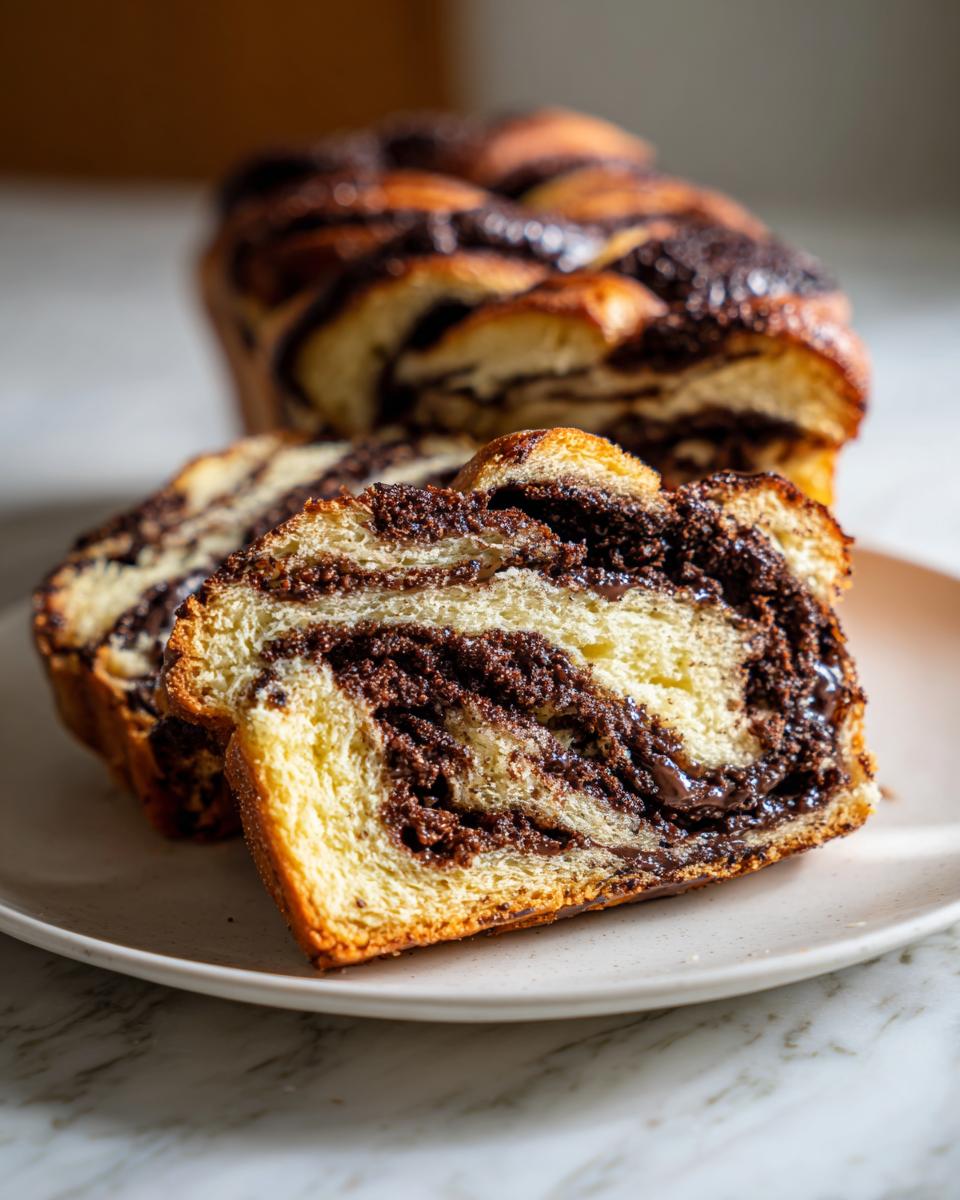
It looks way harder than it is, I swear! Once you slice the log lengthwise, you just lay the halves next to each other, cut-side up, and twist. It’s more about intuition than precision. If you keep the cut sides visible during the twist—just like on this example—you’ll get those killer layers even if your twisting technique isn’t perfect. Don’t overthink it!
Can I use store-bought dough or substitute the butter in the dough?
Look, I want this to be easy for you, but for the true texture of this recipe? No shortcuts on the dough, please! You need the fat content in that specific Soft Brioche Babka Dough to achieve the fluffiness. Store-bought dough won’t build the right gluten structure. And please, stick to real unsalted butter for the dough; margarine just doesn’t have the right milk solids to make the brioche creamy.
If you want to practice basic sweet dough skills without the chocolate commitment, try out my coffee cake muffins first!
Estimated Nutrition for This Decadent Chocolate Babka
Alright, let’s talk numbers, because this is a rich bread, no doubt about it! Remember this is just an estimate based on the ingredients listed in the full recipe. It’s not a science, it’s just based on what goes in versus how many slices you get out. If you cut bigger pieces, the numbers go up, simple as that!
Because we’re dealing with a brioche-style dough packed with butter and that decadent chocolate filling, you’re looking at a real treat here. It’s less about a light snack and more about a celebration on a plate (or a slice!). For a slightly lighter, but still satisfying, morning option, you might want to check out my recipe for high-protein overnight oats.
Here is the breakdown per slice, assuming you get 10 to 12 servings out of that gorgeous loaf:
- Serving Size: 1 slice
- Calories: Approximately 450
- Sugar: Around 30g (That’s the chocolate and the syrup winning!)
- Sodium: About 250mg
- Fat: Roughly 25g
- Saturated Fat: About 15g (Thank you, butter!)
- Unsaturated Fat: About 10g
- Trans Fat: 0g (We definitely don’t want that in our kitchen!)
- Carbohydrates: 50g
- Fiber: 3g (From the cocoa!)
- Protein: 8g
- Cholesterol: 75mg
So, yeah, it’s luxurious! Save this for brunch or a holiday gathering because you deserve this rich indulgence!
PrintThe Best Homemade Chocolate Babka Recipe
Make a bakery classic at home. This recipe gives you a soft brioche-style dough, a rich chocolate filling, and simple braiding steps for perfect swirls in your homemade chocolate babka.
- Prep Time: 45 min
- Cook Time: 45 min
- Total Time: 3 hours 15 min
- Yield: 1 loaf (10-12 servings) 1x
- Category: Dessert
- Method: Baking
- Cuisine: Jewish/American
- Diet: Vegetarian
Ingredients
- 1 cup whole milk, warmed to 105-115°F
- 2 1/4 teaspoons active dry yeast
- 1/4 cup granulated sugar, plus 1 teaspoon for yeast
- 3 large eggs, room temperature
- 1 teaspoon vanilla extract
- 1 teaspoon salt
- 4 cups all-purpose flour, plus more for dusting
- 1/2 cup (1 stick) unsalted butter, softened and cut into pieces
- 1 cup powdered sugar, for the filling
- 1/2 cup unsweetened cocoa powder, for the filling
- 1/2 cup (1 stick) unsalted butter, melted, for the filling
- 4 ounces bittersweet chocolate, finely chopped, for the filling
- 1/4 cup water, for the syrup
- 1/4 cup granulated sugar, for the syrup
Instructions
- Activate the yeast: In a large bowl, combine the warm milk, 1 teaspoon sugar, and yeast. Let stand for 5 to 10 minutes until foamy.
- Make the dough: Whisk in the 1/4 cup sugar, eggs, vanilla, and salt into the yeast mixture. Gradually add the flour until a shaggy dough forms.
- Knead the dough: Turn the dough onto a lightly floured surface. Knead for 5 minutes. Add the softened butter pieces one at a time, kneading until each piece is fully incorporated before adding the next. Continue kneading until the dough is smooth and elastic, about 10 to 15 minutes total.
- First rise: Place the dough in a lightly oiled bowl, turning to coat. Cover and let rise in a warm place for 1 to 1.5 hours, or until doubled in size.
- Prepare the filling: While the dough rises, mix the powdered sugar, cocoa powder, melted butter, and chopped chocolate in a bowl until combined into a thick paste. This is your rich chocolate filling.
- Shape the dough: Punch down the risen dough. On a lightly floured surface, roll the dough into a large rectangle, about 12×18 inches.
- Spread the filling: Spread the chocolate filling evenly over the entire surface of the dough, leaving a small 1/2-inch border on one long edge.
- Roll and slice: Starting from the long edge opposite the border, roll the dough tightly into a log. Pinch the seam to seal. Using a sharp knife or bench scraper, slice the log in half lengthwise, exposing the layers.
- Braid the babka: Lay the two halves side-by-side, cut sides facing up. Twist the two halves around each other, keeping the cut sides facing up to expose the swirl. Pinch the ends together securely.
- Second rise: Carefully transfer the braided dough to a greased 9×5 inch loaf pan. Cover loosely and let rise again for 45 to 60 minutes, or until puffy. Preheat your oven to 350°F during the last 20 minutes of the rise.
- Bake: Bake for 35 to 45 minutes. If the top browns too quickly, loosely tent it with foil. The internal temperature should reach 200°F.
- Make the syrup: While the babka bakes, combine the water and 1/4 cup sugar in a small saucepan. Heat until the sugar dissolves.
- Glaze: Immediately upon removing the babka from the oven, brush the hot sugar syrup generously over the entire top surface. Let the babka cool in the pan for 15 minutes before transferring it to a wire rack to cool completely.
Notes
- For the softest brioche babka dough, ensure your butter and eggs are at room temperature before starting.
- If you want a glossy glazed babka, brush the syrup on while the bread is still hot from the oven.
- You can make the chocolate filling ahead of time and store it in the refrigerator for up to three days. Let it soften slightly before spreading.
Nutrition
- Serving Size: 1 slice
- Calories: 450
- Sugar: 30g
- Sodium: 250mg
- Fat: 25g
- Saturated Fat: 15g
- Unsaturated Fat: 10g
- Trans Fat: 0g
- Carbohydrates: 50g
- Fiber: 3g
- Protein: 8g
- Cholesterol: 75mg