

If your mornings feel like a whirlwind and you’re tired of skipping breakfast or grabbing something that leaves you crashing by ten a.m., I have something that completely changed my weekday routine. Seriously, this recipe became my secret weapon when I was juggling college work and those chaotic bistro shifts. We’re talking about **coconut chia pudding**, and trust me, it’s your new best friend when you need something incredibly healthy that does all the hard work while you sleep. Forget complicated cooking; this stuff is naturally vegan, totally dairy-free, and whips up into the creamiest, most satisfying texture you can imagine. It’s packed with fiber and nutrients, making it the ultimate fuss-free, nutrient-dense breakfast where the longest step is literally just waiting for it to chill. Head over to my simple breakfast ideas for more quick wins!
- Why This Creamy Coconut Chia Pudding Recipe Works for You
- Gathering Your Simple Chia Pudding Ingredients
- Expert Tips for Perfect Creamy Coconut Chia Pudding
- How to Prepare Your Overnight Chia Pudding
- Serving Suggestions for Your Coconut Chia Pudding
- Storing Your Make Ahead Breakfast Coconut Chia Pudding
- Frequently Asked Questions About Coconut Chia Pudding
- Nutritional Estimate for This Coconut Chia Pudding Recipe
- Share Your Creamy Coconut Chia Pudding Success
Why This Creamy Coconut Chia Pudding Recipe Works for You
I know you need recipes that actually fit into a busy life, not ones that require four extra trips to the specialty store. That’s why I love this approach to **coconut chia pudding**. It hits every mark we talk about here at Kitchen Slang: real food, real results, zero unnecessary complexity.
This little jar of goodness is perfect because it’s built for speed and health.
- It’s a true overnight chia pudding—you make it tonight, you eat it tomorrow.
- The texture is genuinely creamy, not weirdly gelatinous, which is the biggest hurdle for most people.
- It’s naturally dairy-free and vegan, making it easy to fit almost any diet.
- Plus, it keeps you full way longer than that sugary yogurt cup you grabbed last week. If you need more midday fuel ideas, check out my healthy lunch recipes!

Simple Chia Pudding Ingredients for Maximum Flavor
We are keeping this super tight here. Honestly, this entire **coconut chia pudding** recipe is based on just five core ingredients that you probably already have or can grab easily. No weird powders or obscure stabilizers needed, just the good stuff that makes it taste like a treat.
Gathering Your Simple Chia Pudding Ingredients
Okay, let’s talk ingredients. This is where people try to cut corners, and that’s a mistake, especially with something this simple! Since there are only five things going into this **coconut chia pudding**, each one has to pull its weight. You want this to be creamy, not watery, and trust me, the type of coconut milk you use is everything.
Here is what you absolutely need for two servings. Don’t even think about substituting the key players here!
- 1/4 cup chia seeds (the standard kind), uncooked
- 1 cup full-fat canned coconut milk (shake that can *really* well before opening, or you’ll get separated water and cream!)
- 1 tablespoon maple syrup or preferred sweetener (adjust this to how sweet you like things)
- 1/2 teaspoon vanilla extract (use the real stuff if you can—it makes a difference!)
- Pinch of salt (This seems small but it brightens up all the coconut flavor, don’t skip it!)
See? It’s nothing scary. But the magic is in the quality of that canned coconut milk. That’s the foundation of the creaminess we are chasing!
Expert Tips for Perfect Creamy Coconut Chia Pudding
Everyone wants that restaurant-level creamy texture, right? Nobody wants grainy or watery sludge. The secret to hitting that velvety sweet spot in your **coconut chia pudding** is all about the ratio and using the right kind of fat. Seriously, don’t reach for that skinny carton of coconut beverage in the fridge; that won’t cut it.
For foolproof creaminess, you absolutely must use the full-fat canned coconut milk. Better yet, try this trick I learned: substitute half of that milk with the thick cream spooned right off the top of a can of refrigerated coconut cream. Wow, does that make a difference! It’s rich, decadent, and gives you that luxurious mouthfeel that makes this feel like a true dessert.

Also, listen to me on this: the second whisking is non-negotiable. Chia seeds clump up fast! Whisk right after you pour everything together, wait five minutes until you see the seeds start to open up, and then whisk *hard* again. That traps the air and prevents a sticky, seedy bottom layer from forming. It’s the professional line cook move I stole for this lazy weeknight dinner helper!
Achieving the Ideal Coconut Milk Chia Texture
The reason the ratio matters so much is simple physics. Chia seeds are little sponges, soaking up every bit of liquid you give them. If you use too much water or thin milk, they’ll swell up and get firm very quickly, leaving you with a dry brick instead of smooth pudding. Full-fat milk has the necessary fat content to coat the tiny seeds slightly as they absorb liquid, which keeps the final product flowing smoothly.
Once you hit that perfect 1-part seed to 4-parts liquid ratio (as in our recipe), the seeds hydrate, their outer coating softens, and they form that gelatinous layer that gels everything together. That’s your creamy consistency! Adjusting the liquid only after it’s set is the safe bet for your **coconut chia pudding**.
How to Prepare Your Overnight Chia Pudding
This part is so easy, it almost feels wrong calling it a recipe step. It’s practically assembling ingredients in a jar! Remember how I stressed the importance of that second whisk? That’s the key to making sure this **coconut chia pudding** isn’t a solid block of seeds cemented to the bottom of your container. You want smooth sailing here for your make ahead breakfast!
First, grab your jar or whatever container you plan to use for setting. Toss the chia seeds, all that lovely full-fat coconut milk, your sweetener, vanilla, and that tiny pinch of salt right in there.
- Whisk it immediately and vigorously for a full minute. Get those seeds separated!
- Set it on the counter. Seriously, forget about it for just five minutes. This is important!
- Come back and whisk it again, really thoroughly this time. This stops any rogue seeds that floated to the top from sticking together up there.
- Cover it up good and slide it into the fridge.
That’s it for the active work! Now we let the magic of science (and sitting) do the rest.
The Essential Resting Time for Coconut Chia Pudding
The resting time is absolutely critical. You can technically get away with a four-hour minimum nap time in the fridge, but honestly, I would never bother for **coconut chia pudding** if I wasn’t leaving it overnight. If you pull it out too early, it will be thin and gritty. That overnight soak—or at least six to eight hours—is what lets those tiny seeds fully bloat and transform the liquid into that thick, substantial, dessert-like texture we are really after.
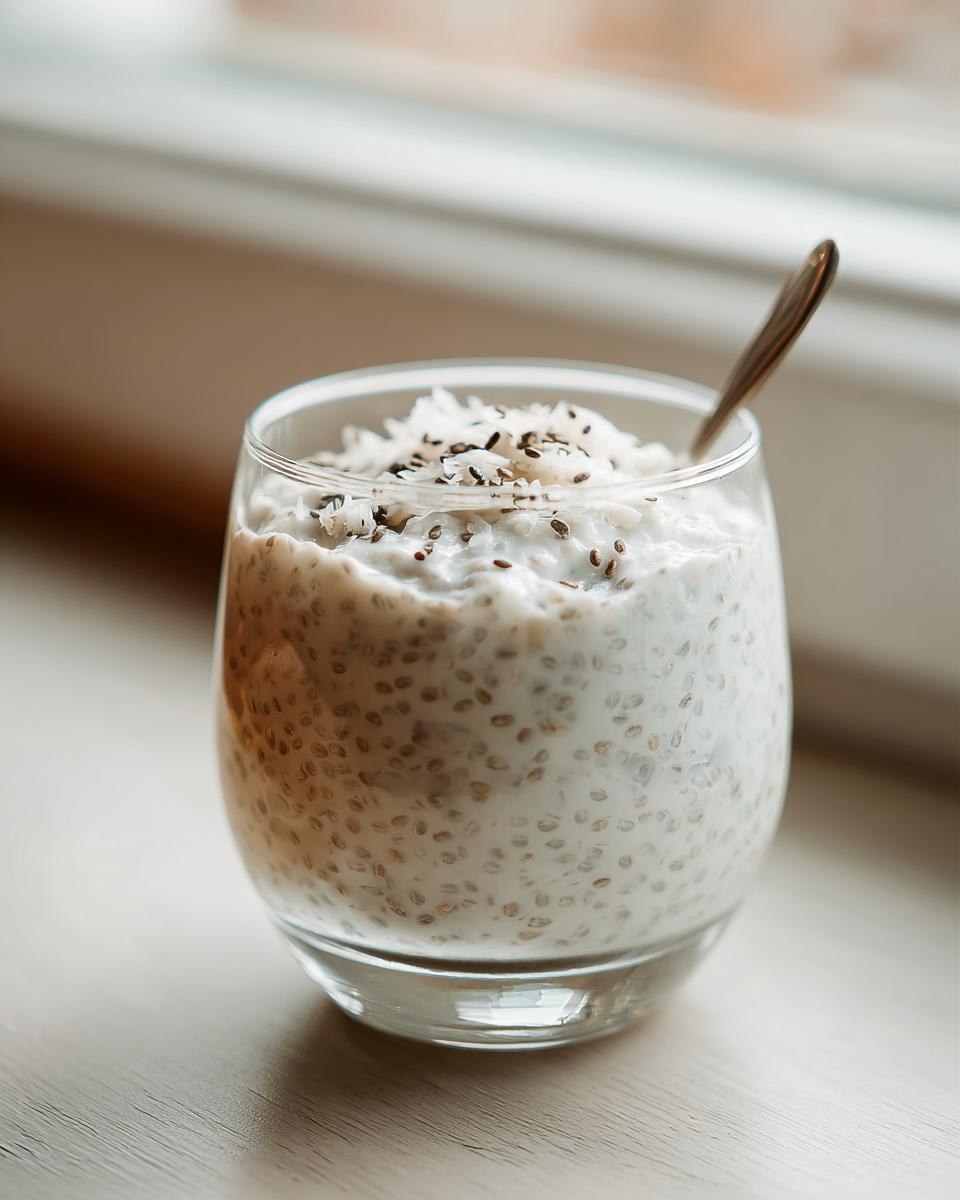
Serving Suggestions for Your Coconut Chia Pudding
So you’ve pulled your perfectly set **coconut chia pudding** out of the fridge, and it’s thick, cool, and ready to eat! Now comes the fun part: putting your own spin on it. This recipe is wonderfully versatile, which is why I love it for keeping things interesting all week long. You should absolutely load it up!
If you’re looking for crunch, you know where to go—my recipe for homemade granola is perfect here. But don’t stop there. Fresh berries, like raspberries or blueberries, are amazing because they cut through the richness of the coconut milk. Sliced banana works great too, especially if you like things sweeter.

Sometimes I even add a little something zesty or extra flavorful right into the base before the final set, but toppings are where you can really get creative!
Making a Raffaello Style Coconut Chia Pudding Variation
I saw a few people searching for that Raffaello vibe—you know, that delicate, creamy, almond-coconut flavor? You can totally nail that with this base recipe! To mimic that famous treat in your **coconut chia pudding**, you need to focus on texture and subtle almond flavor.
Here’s the trick: Before you serve, stir in a tablespoon of finely shredded, unsweetened coconut flakes directly into the pudding. This enhances the coconut flavor big time. Then, for that almond note, top it with a few chopped, toasted slivered almonds. Toasting them slightly brings out their oil and makes them taste way more intentional. It turns this simple breakfast into something that feels like a truly decadent, guilt-free dessert!
Storing Your Make Ahead Breakfast Coconut Chia Pudding
This recipe is practically designed for getting ahead of yourself, which is my favorite kind of cooking. Because we use that full-fat coconut milk, this **coconut chia pudding** keeps swimmingly well in the fridge. That’s the beauty of a good Make Ahead Breakfast—you grab it right from the fridge on your way out the door!
You can safely store this in an airtight container for up to four days. I usually portion mine out into little mason jars right after that second whisking stage and then let them set. That way, each morning is totally effortless.
Now, here’s the one thing you need to watch out for: chia seeds are powerhouses, and after day three, they might soak up *too* much liquid. If you pull your pudding out and it seems a little stiff or too thick for your liking—maybe it’s bordering on actual pudding instead of creamy goodness—don’t panic! Just stir in a tiny splash—maybe a tablespoon at a time—of plain water or some extra coconut milk. Whisk it gently, let it sit for five minutes, and BAM! It softens right back up to that perfect, luscious consistency.
Keeping things fresh and safe is important, so make sure your containers are truly sealed tight. If I’m prepping a huge batch, I’ll even tuck my sealed containers near the back of the fridge where it’s coldest. I’ve got a great recipe for easy chili that freezes beautifully, too, but this pudding definitely tastes best within the first four days!
Frequently Asked Questions About Coconut Chia Pudding
Whenever I share this recipe, the questions start rolling in, and honestly, that’s wonderful! It means people are ready to ditch boring breakfasts and embrace something healthy and easy. I’ve pulled together the most common things folks ask me about getting this **coconut chia pudding** just right.
Is this Easy Chia Pudding suitable for a High Fiber Breakfast?
Oh gosh, YES! If you’re looking for a major fiber boost to start your day, you’ve hit the jackpot with this **Easy Chia Pudding**. Chia seeds themselves are practically fiber bombs! Just looking at that last batch I made, we’re hitting 14 grams of fiber per serving, which is HUGE for keeping you full, happy, and moving throughout the morning. It is absolutely an amazing High Fiber Breakfast option without tasting like cardboard.
Can I substitute the maple syrup in this Dairy Free Breakfast?
You certainly can swap out the syrup! When we talk about a **Dairy Free Breakfast**, we also want to keep it plant-based if that’s your goal. Maple syrup is my go-to because it dissolves so easily and adds a nice, earthy sweetness, but if you need something else, go for it! Agave nectar works perfectly as a direct swap. If you prefer a zero-calorie option, a liquid stevia or monk fruit sweetening drops will work too, just add them slowly until you taste the sweetness you like. It keeps the recipe totally vegan, too!
What is the best way to ensure a Gluten Free Pudding?
This is an easy win! The base ingredients for this **coconut chia pudding**—the seeds, the milk, the vanilla, the salt—are all naturally gluten-free, so you’re already 99% there. The only time you might run into trouble is with whatever you put on top. You just need to be mindful of your add-ins. If you are adding store-bought granola or sprinkles, always take a quick peek at the label to make sure there hasn’t been any cross-contamination during processing, especially if you have a serious sensitivity. Otherwise, this is a wonderfully safe and simple Gluten Free Pudding!
Nutritional Estimate for This Coconut Chia Pudding Recipe
Now, I know we focus on the taste and the ease here at Kitchen Slang—because great food should taste amazing, right? But since this **coconut chia pudding** is so popular for meal prep and healthy fueling, I wanted to give you a rough idea of what you’re packing into that little jar. Remember, this is just a starting point!
These numbers reflect exactly half of the recipe using the full-fat canned coconut milk and 1 tablespoon of real maple syrup. They are totally estimates, and they will absolutely change depending on what toppings you load on top (hello, banana slices!).
- Serving Size: 1/2 recipe
- Calories: 300
- Fat: 22g (Good fats from the coconut!)
- Saturated Fat: 18g
- Carbohydrates: 25g
- Fiber: 14g (That’s fantastic!)
- Protein: 7g
- Sugar: 8g
- Cholesterol: 0mg
See that fiber count? That’s why this is such an engine-starter for the morning. Just keep in mind that if you decide to drizzle on half a jar of cashew butter or load it with dried mango, those numbers are going to climb. But for the base ingredients alone, you’re getting a super satisfying, nutrient-dense snack that feels luxurious. Happy prepping!
Share Your Creamy Coconut Chia Pudding Success
Well, that’s it! You’ve got the low-down on how to turn five simple ingredients into the creamiest, healthiest, most dependable **coconut chia pudding** that you can have ready before the sun even thinks about coming up. I truly believe that cooking knowledge—the real, practical know-how—shouldn’t be kept behind swinging kitchen doors. That’s the whole philosophy Zoe built Kitchen Slang on: real talk for real good food.
Now that you’ve made this fantastic 4-Ingredient Coconut Chia Pudding, I really want to hear about it! Did you manage to score some coconut cream for that extra rich texture? What amazing toppings ended up on your bowl? Did you dare try the Raffaello style I mentioned?
Please, head down to the comments below and give this recipe a rating! It helps other home cooks feel confident jumping in. If you made any tweaks or shortcuts that you think your fellow readers should know about, share them! We grow better when we share our kitchen lingo.
If you ran into any snags, or if you just want to tell me how much easier your mornings have become, please reach out through my contact page. Happy cooking, and enjoy that easy, healthy breakfast!
PrintCreamy 5-Ingredient Coconut Chia Pudding for Meal Prep

Make this easy, creamy coconut chia pudding the night before for a healthy, nutrient-dense breakfast or snack. It is naturally vegan and gluten free.
- Prep Time: 5 min
- Cook Time: 0 min
- Total Time: 4 hours 5 min
- Yield: 2 servings 1x
- Category: Breakfast
- Method: No Cook
- Cuisine: American
- Diet: Vegan
Ingredients
- 1/4 cup chia seeds
- 1 cup full-fat canned coconut milk (shake well before opening)
- 1 tablespoon maple syrup or preferred sweetener
- 1/2 teaspoon vanilla extract
- Pinch of salt
Instructions
- In a jar or container, combine the chia seeds, coconut milk, maple syrup, vanilla extract, and salt.
- Whisk the mixture well for about one minute to break up any clumps of chia seeds.
- Let the mixture sit on the counter for 5 minutes, then whisk again thoroughly. This second whisk helps prevent the seeds from settling at the bottom.
- Cover the container and place it in the refrigerator to set for at least 4 hours, or preferably overnight.
- When ready to eat, stir the pudding. If it is too thick, add a splash of water or extra coconut milk until you reach your desired creamy texture.
- Serve cold with your choice of toppings.
Notes
- For a richer, creamier texture, substitute 1/2 cup of the coconut milk with 1/2 cup of canned coconut cream (the thick part from the top of the can).
- Top with fresh berries, toasted coconut flakes, or sliced banana for added flavor and texture.
- This recipe is excellent for meal prep and keeps well in the refrigerator for up to 4 days.
Nutrition
- Serving Size: 1/2 recipe
- Calories: 300
- Sugar: 8
- Sodium: 50
- Fat: 22
- Saturated Fat: 18
- Unsaturated Fat: 4
- Trans Fat: 0
- Carbohydrates: 25
- Fiber: 14
- Protein: 7
- Cholesterol: 0