

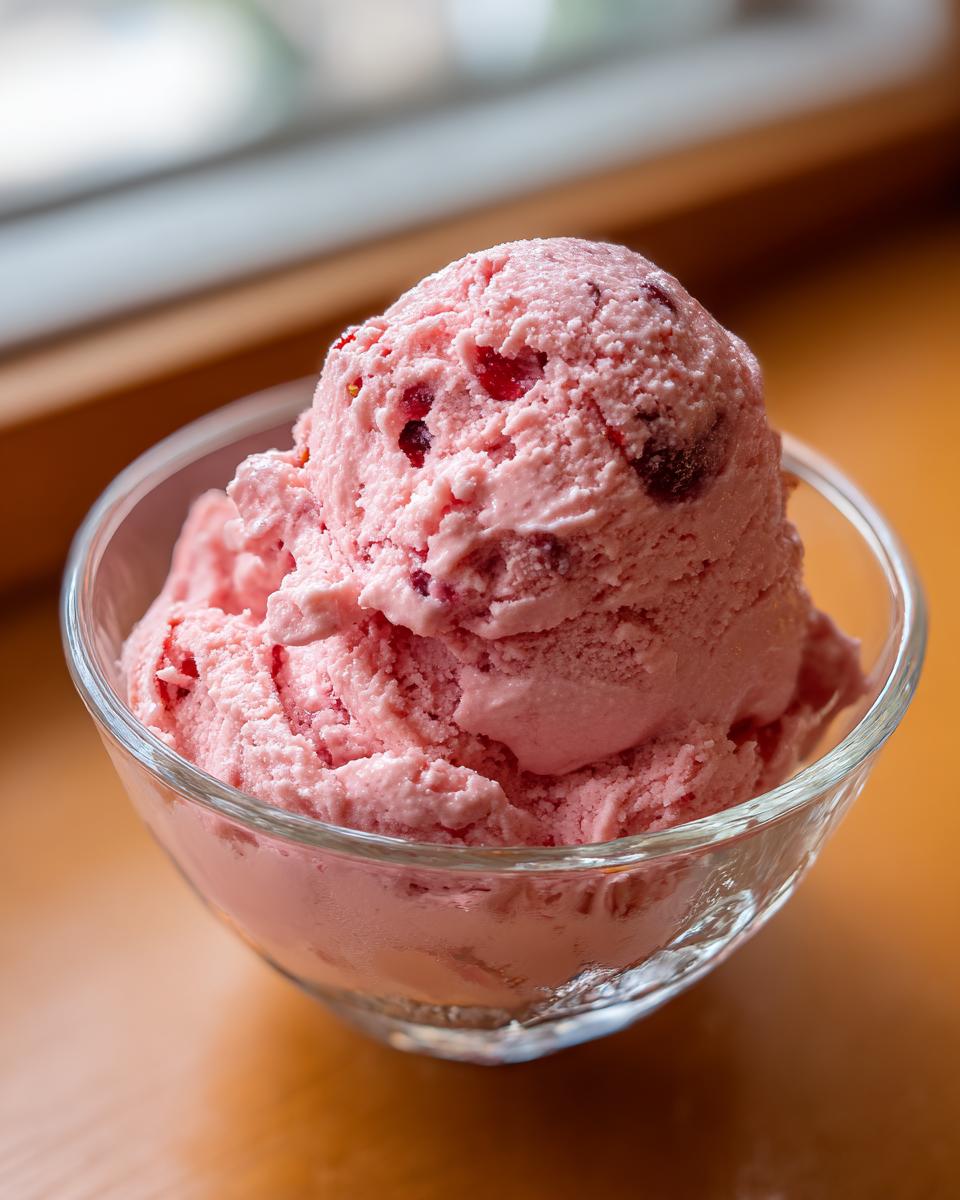
When the sun is blazing and you need a seriously good summer dessert, you absolutely need this recipe. Forget those pale, icy tubs from the grocery store; this is the ultimate creamy homemade strawberry ice cream recipe you’ve been dreaming about. We’re giving you the full translation here—the creamy secrets from professional kitchens—and lucky for you, we’ve included both the classic method for your ice cream maker and a totally foolproof no-churn option! Trust me, learning this lets you skip the intimidating jargon and just focus on making incredible frozen treats.
- Why This Homemade Strawberry Ice Cream Recipe Works
- Ingredients for Rich and Fruity Strawberry Ice Cream
- How to Prepare Creamy Strawberry Ice Cream Using an Ice Cream Maker
- Simple 3 Ingredient Ice Cream Alternative: No Churn Strawberry Ice Cream
- Adapting This Strawberry Ice Cream for Specific Appliances
- Ingredient Notes and Variations for Your Strawberry Ice Cream
- Storage and Making Ahead Summer Berry Desserts
- Frequently Asked Questions About Homemade Strawberry Ice Cream
- Estimated Nutritional Data for This Rich and Fruity Frozen Treat
- Share Your Best Homemade Ice Cream Creations
Why This Homemade Strawberry Ice Cream Recipe Works
Look, making amazing summer berry desserts at home shouldn’t feel like homework. This recipe is built for success, which is why it’s become our go-to. We focus on what matters: texture and honest, bright fruit flavor. You get versatility, too, since you can use your machine or skip it entirely!
- The base uses heavy cream and whole milk—that richness is key to cutting through the fruit sweetness.
- We use fresh lemon juice, which might sound weird, but it just makes the berry flavor *pop*.
- It works flawlessly whether you’re aiming for an Old Fashioned style or a quick weeknight treat.
Achieving the Ultimate Creamy Strawberry Ice Cream Texture
If you want the Best Homemade Ice Cream, you need fat, plain and simple. We rely heavily on the high-fat content from the heavy cream you whip up first. That, plus the right amount of sugar dissolved into the dairy, keeps those ice crystals tiny! It’s simple chemistry, but the result is velvety smooth every single time.
Tips for the Best Fresh Strawberry Dessert Flavor
The secret sauce for the absolute best fresh strawberry dessert? Maceration! Don’t rush Step One. Letting those strawberries sit with the sugar and lemon juice pulls out all the deep, natural flavor. That intense syrup is what transforms bland base ice into true, vibrant **strawberry ice cream**.
Ingredients for Rich and Fruity Strawberry Ice Cream
Okay, let’s talk ingredients because this is where we translate professional knowledge into reality. For this **strawberry ice cream**, quality truly matters. I use two slightly different measurements of sugar because the berries dictate how sweet we need to go. Don’t skip the lemon juice; it’s your flavor booster!
- For the Fruit Prep: You need 2 cups of fresh strawberries, and listen closely—they must be hulled and quartered before they hit the bowl.
- We mix those berries with 1/2 cup of granulated sugar and 1 tablespoon of fresh lemon juice while they macerate. That’s how we get that amazing syrup.
- For the Base: Get 2 cups of heavy cream and 1 cup of whole milk—this is our creamy foundation.
- Then, add 3/4 cup of granulated sugar, 1 teaspoon of vanilla extract, and just a tiny pinch of salt to balance everything out. It’s simple, dairy based goodness!
How to Prepare Creamy Strawberry Ice Cream Using an Ice Cream Maker
If you’ve got a machine, this is honestly the fastest way to get the most luxurious **strawberry ice cream**. We follow the professional lingo for building flavor first, then we let the machine do the heavy lifting. This is the classic route for achieving that dreamy texture found in the Best Homemade Ice Cream. Pay close attention to the chilling step—it’s a game-changer for quality!
Macerating the Strawberries for Deep Flavor
This is Step One, and honestly, it’s non-negotiable. Take your quartered strawberries, the 1/2 cup of sugar, and that splash of lemon juice, and mix them up. You need to let this sit on the counter for at least 30 minutes, stirring every so often. What you’re doing here is drawing out every bit of juice to create a super-flavorful syrup. Don’t rush it! Once they look juicy and soft, mash them gently or give them a quick pulse in your food processor.
Chilling and Churning Your Homemade Strawberry Ice Cream Recipe
While the berries are chilling out, mix up your dairy base—the cream, milk, the rest of the sugar, salt, and vanilla. Whisk it until that sugar is totally gone. Now, here’s the most important translation for your **Homemade Strawberry Ice Cream Recipe**: The entire base mixture absolutely must be ice-cold before it goes near the machine. We chill it for a minimum of two hours! Once it’s frigid, pour it into the maker and churn until it looks like thick soft-serve. Then, it hits the deep freeze for a few hours to truly set up.
Simple 3 Ingredient Ice Cream Alternative: No Churn Strawberry Ice Cream
So, maybe your ice cream maker is hiding in the back of the garage, or maybe you just need a batch of **strawberry ice cream** *right now*. No problem! This no-churn method is magic because we’re skipping the churning process entirely, but we still need to cheat a little to keep it creamy. This gets you that fantastic **Easy Strawberry Ice Cream** feel without the machine fuss. If you’re looking to explore more amazing sweets on the site, check out our collection of delicious dessert recipes.
For this, you’ll make your strawberry puree just like before, but instead of chilling the thin base, we start by whipping that heavy cream until it forms stiff, beautiful peaks. Think meringue, but creamier! Separately, gently whisk your milk, the remaining sugar, salt, and vanilla until dissolved. Now, you fold that thinner mix into the big bowl of whipped cream—gently, gently! You don’t want to knock all that lovely air out. Finally, fold in your luscious strawberry mixture. Pour it into a loaf pan or some sturdy freezer containers.
Achieving Smoothness in No Churn Strawberry Ice Cream
Since we aren’t churning to break up ice crystals, we have to do the work manually every so often. This is the pro trick to avoid turning your dessert into an icy brick. For the first three hours, you need to pull that container out every 90 minutes and give it a really vigorous stir all the way around. Really get down to the edges where things freeze first. It sounds annoying, I know, but this repeated agitation mimics what your machine does naturally. Do that a couple of times, and I promise your **No Churn Strawberry Ice Cream** will be incredibly smooth and worthy of that title!
Adapting This Strawberry Ice Cream for Specific Appliances
So many of you guys write in asking how to adapt recipes for the cool new gadgets you’re bringing home. That’s the beauty of translation here at Kitchen Slang—we want you to use what you have! If you’re a big fan of your Cuisinart, just follow the churning directions, but make sure your base is super cold before it goes in. If you happen to have jumped on the Ninja Creami train, you’ve got an even quicker path to **strawberry ice cream**!
For the Creami, the main thing I found when testing is you need to slightly dial back the liquid components—so maybe use a little less milk than the regular recipe calls for. You freeze the entire base solid in the pint cup first. Then, you process it and maybe add a tiny splash more milk later if it seems too crumbly. It’s way less fussy than churning, but you still get that incredible rich and fruity frozen treat flavor!
Ingredient Notes and Variations for Your Strawberry Ice Cream
Part of learning the kitchen lingo is knowing when you can be flexible! While I preach about sticking to the core recipe for the absolute **Best Homemade Ice Cream**, sometimes you need to improvise. If you want an **Old Fashioned Ice Cream** vibe, the best thing you can do is stick exclusively to the churning method and skip any stabilizers or extra thickeners. That pure, dairy-and-fruit mix is the classic way they did it!
Now for the fun part: variations! Remember when we made the base dairy mixture before adding the strawberries for both methods? Always save about half a cup of that plain, chilled base if you can manage. If you have extra patience, this leads straight into a gorgeous Vanilla Strawberry Swirl Recipe. You just freeze the pink strawberry layer and the plain white layer separately, layering them into your container before the final deep freeze. It looks so fancy, but it was just one easy step hiding in plain sight!
Storage and Making Ahead Summer Berry Desserts
Okay, you’ve made it! You have this perfect batch of creamy **strawberry ice cream**. The biggest mistake people make now is just sticking it in the freezer and walking away. Don’t do it!
For that top layer to stay smooth and not get those annoying little freezer crystals, you have to press a piece of plastic wrap directly onto the surface of the ice cream before you put the lid on. That keeps the air separated from the cold stuff. This totally works great because this **homemade strawberry ice cream recipe** qualifies as the ultimate make ahead summer dessert. Make it a day early for your party, and nobody will ever know you didn’t just churn it!
Frequently Asked Questions About Homemade Strawberry Ice Cream
I get so many questions about this recipe because everyone wants that perfect scoop! Here are some of the things I hear most often when people are making their first batch of **strawberry ice cream**.
Can I use frozen strawberries instead of fresh ones?
You totally can, especially if fresh berries are out of season or too expensive! If you use frozen strawberries, just make sure they are completely thawed before you macerate them with the sugar and lemon juice. You might even end up with a little extra syrup since frozen fruit releases more water when it thaws. It still makes a fantastic rich and fruity frozen treat!
Why did my homemade ice cream turn out icy instead of creamy?
Oh, I hate that! Icy texture usually happens for two reasons. First, you didn’t chill your base long enough before churning—it needs to be almost freezing already! Second, if you did the no-churn method, you skipped that crucial step of stirring it every 90 minutes during the first few hours of freezing. That manual churn breaks up the ice crystals so you end up with that desirable **creamy strawberry ice cream** texture we’re aiming for.
How can I make this a lighter, lower-fat strawberry sweet cream dessert?
This isn’t a skinny recipe, that’s for sure—it relies on cream for its texture! But if you absolutely want a lighter version, you can try replacing half of the heavy cream with good quality evaporated milk, or even try looking into making a homemade frozen yogurt style by swapping in Greek yogurt for some of the dairy. Just know that every swap means sacrificing a tiny bit of that signature richness!
Does this recipe work well for an easy strawberry ice cream recipe with kids?
Absolutely! The maceration step (Step 1) is perfect for involving little ones—they can mix the berries, sugar, and lemon juice together. And if you do the no-churn route, they can help you check on the mixture while it freezes. It’s a super easy strawberry ice cream project that results in an amazing payoff!
Estimated Nutritional Data for This Rich and Fruity Frozen Treat
Okay, I know that when you’re making something this decadent, you probably aren’t checking the label three times, but I’m a firm believer in bringing the whole vocabulary of cooking into your kitchen, including the numbers! Since we are using heavy cream and real fruit, this is definitely a rich treat, not a light yogurt style dessert. I took the time to estimate the full breakdown for you, based on the recipe measurements.
Just remember, this is all dependent on the exact sweetness of your strawberries and which method you use, so consider this your baseline guide for a 1/2 cup serving. If you’re skipping the churn and going no-churn, the slight variations in how the cream incorporates might change things slightly, but the core numbers stay true for this **dairy based strawberry dessert**.
Here’s what we’re looking at:
- Serving Size: About 1/2 cup (That’s one reasonable scoop!)
- Calories: Roughing it around 310 per serving. Worth every single one, trust me!
- Fat: We land right around 19 grams total fat. Don’t forget that 11 grams of that is saturated fat—that’s what gives us that luxurious mouthfeel.
- Carbohydrates: About 32 grams total carbs.
- Protein: You get a nice little boost for a dessert, clocking in around 3 grams.
- Sugar: This comes in around 30 grams, but remember most of that is natural sugar from the fruit and the required sweeteners to keep it perfectly smooth.
If you’re worried about the sugar, this is another place where using ultra-ripe strawberries helps! The riper they are, the less added sugar you need to make a wonderful **natural fruit ice cream**.
Share Your Best Homemade Ice Cream Creations
Seriously, I want to see those beautiful bowls of **creamy strawberry ice cream**! Once you’re done freezing it, please hop back here and give this recipe a 5-star rating—it really helps other cooks find this gem. Leave me a comment telling me whether the churn or the no-churn won the battle at your house! If you snap a picture, tag us online! And when you’re ready for your next challenge, you know exactly where to find more great summer recipes!
PrintThe Ultimate Creamy Homemade Strawberry Ice Cream (No-Churn Option Included)

Make rich, creamy strawberry ice cream using fresh strawberries. This recipe provides instructions for both traditional churning and a simple no-churn method.
- Prep Time: 20 min
- Cook Time: 0 min
- Total Time: 4 hr 30 min
- Yield: 6 servings 1x
- Category: Dessert
- Method: Churning or No-Churn
- Cuisine: American
- Diet: Vegetarian
Ingredients
- 2 cups fresh strawberries, hulled and quartered
- 1/2 cup granulated sugar (adjust to berry sweetness)
- 1 tablespoon fresh lemon juice
- 2 cups heavy cream
- 1 cup whole milk
- 3/4 cup granulated sugar
- 1 teaspoon vanilla extract
- Pinch of salt
Instructions
- Prepare the strawberries: In a bowl, combine the quartered strawberries, 1/2 cup sugar, and lemon juice. Stir well. Let this mixture sit at room temperature for at least 30 minutes, stirring occasionally, until the strawberries release their juices and create a syrup.
- Mash or blend the strawberries: Gently mash the strawberries with a fork for a chunkier texture, or pulse briefly in a food processor for a smoother puree. Set aside.
- Make the base (Churn Method): In a separate large bowl, whisk together the heavy cream, whole milk, 3/4 cup sugar, vanilla extract, and salt until the sugar dissolves completely. Stir in the prepared strawberry mixture.
- Chill the base: Cover the base mixture and refrigerate for at least 2 hours, or until very cold.
- Churn: Pour the chilled base into your ice cream maker and churn according to the manufacturer’s directions until it reaches a soft-serve consistency.
- Freeze: Transfer the soft ice cream to an airtight container. Press plastic wrap directly onto the surface to prevent ice crystals, then cover and freeze for at least 4 hours to firm up.
- Make the base (No-Churn Method): In a large bowl, whip the heavy cream until stiff peaks form. In a separate bowl, whisk together the whole milk, 3/4 cup sugar, vanilla extract, and salt until the sugar dissolves. Gently fold the milk mixture into the whipped cream until just combined. Fold in the prepared strawberry mixture.
- Freeze (No-Churn): Transfer the mixture to a loaf pan or freezer-safe container. Cover tightly and freeze for at least 6 hours, stirring vigorously every 90 minutes for the first 3 hours to break up ice crystals and maintain creaminess.
Notes
- For an Old Fashioned style, use only the churning method and ensure your cream and milk are very cold before starting.
- If you prefer a Vanilla Strawberry Swirl, reserve 1/2 cup of the plain chilled base before adding the strawberries, then layer the strawberry mixture and plain base into the container before the final freeze.
- For a Ninja Creami base, reduce the milk slightly and freeze the entire mixture in a Ninja Creami pint until solid before processing.
Nutrition
- Serving Size: 1/2 cup
- Calories: 310
- Sugar: 30g
- Sodium: 35mg
- Fat: 19g
- Saturated Fat: 11g
- Unsaturated Fat: 8g
- Trans Fat: 0.5g
- Carbohydrates: 32g
- Fiber: 1g
- Protein: 3g
- Cholesterol: 70mg