
If you have ever taken a bite of a cloud-like, impossibly soft, and deeply gooey bakery cinnamon bun and thought, “I could never make that at home,” I’m here to tell you that you absolutely can! I’m Zoe, and at Kitchen Slang, we translate chef secrets into real kitchen language. This recipe is my tried-and-true formula for the **ultimate soft & gooey homemade cinnamon buns** that use a super efficient one-rise method. Forget complicated weekend projects; we are bringing that intense flavor and heavenly texture straight to your countertop using techniques I picked up working the line. Trust me, once you master this yeasted sweet dough, you’ll never look back. If you love this style, you should also check out our recipe for amazing cinnamon roll casserole!
- Why This Homemade Cinnamon Buns Recipe Delivers Soft & Gooey Results
- Gathering Your Ingredients for Perfect Cinnamon Buns
- How to Prepare Fluffy Cinnamon Rolls from Scratch (One-Rise Method)
- Expert Tips for Perfect Cream Cheese Icing Recipe on Your Cinnamon Buns
- Troubleshooting Common Cinnamon Buns Issues
- Variations on Classic Cinnamon Buns
- Storage and Reheating Instructions for Doughy Cinnamon Rolls
- Frequently Asked Questions About Making Cinnamon Buns
- Enjoy Your Weekend Breakfast Baking
Why This Homemade Cinnamon Buns Recipe Delivers Soft & Gooey Results
I am obsessed with texture, and I know you are too! That’s why this recipe skips the tough, overly bready results you sometimes get. We focus on making rolls that are soft, fluffy, moist, and truly gooey while still promising that warm, yeasty flavor everyone craves. The best part? We use a streamlined one-rise method, meaning you can have these bakery-style beauties ready faster than you think. Seriously, this cuts down on waiting time drastically!

- Guaranteed softness thanks to the enriched dough base.
- Perfectly balanced filling that doesn’t leak out or dry up.
- We skip the second long bulk rise, appealing directly if you want Homemade Cinnamon Buns Recipe that saves time.
Achieving Melt in Your Mouth Cinnamon Rolls Texture
The secret weapon here is the dough itself. When we use whole milk warmed just right—not too hot, which kills the yeast—and a higher ratio of butter, we create a really rich environment for the gluten to develop softness. This isn’t a lean dough; it’s an enriched dough that ensures you get that wonderful melt in your mouth cinnamon rolls quality every single time. Don’t skimp on that softened butter in the filling either. That butter is what creates the steam pockets that keep everything wonderfully soft!
Gathering Your Ingredients for Perfect Cinnamon Buns
Okay, before we get this dough rising, we need to talk supplies. For truly incredible homemade cinnamon buns, preparation is key. We separate everything into three clear stages: the dough that gives us that amazing fluffy texture, the super gooey filling, and finally, that killer frosting we all crave. Having everything measured out, especially the butter, prevents panic later on. You want calm, controlled blending, not scrambling!
I’ve laid everything out below, but pay close attention to the temperature requirements for the dairy and eggs—that’s where folks slip up, especially when working with Yeasted Sweet Dough Recipes. Stick to these simple rules, and you are halfway to bakery heaven!
Ingredients for the Yeasted Sweet Dough Recipes
For our base dough, our goal is richness. Make sure your whole milk is nice and warm, targeting that perfect 105°F to 115°F zone—too cold and the yeast sleeps; too hot and it dies! Also, take your egg out a little early so it’s at room temperature. It mixes in much smoother that way.
Here’s what you need for the bread itself:
- 1 cup whole milk, warm (105-115°F)
- 2 1/4 teaspoons active dry yeast
- 1/2 cup granulated sugar, divided, used for yeast and dough
- 1/4 cup unsalted butter, melted, plus more for greasing
- 1 large egg, room temperature
- 3 1/2 cups all-purpose flour, plus more for dusting
- 1 teaspoon salt
The Gooey Cinnamon Filling Components
This is where the magic happens! The filling has to be spreadable like thick mud, so remember this: your butter absolutely must be softened—not melted, but soft enough that you can easily press your finger into it. We need that paste to coat every single little swirl.
Grab these for that ooey-gooey center:
- 1/2 cup unsalted butter, softened (for filling)
- 1/4 cup packed light brown sugar (for filling)
- 2 tablespoons ground cinnamon (for filling)
Making the Cream Cheese Icing Recipe
The final touch! If you want that classic, slightly tart, rich topping, you have to make sure your cream cheese and your butter are both softened. If they aren’t soft, you will end up with lumps, and nobody wants chunky icing on their melt-in-your-mouth cinnamon rolls. We want smooth, pourable goodness!
For the best Cream Cheese Icing Recipe, gather:
- 1/2 cup cream cheese, softened
- 2 tablespoons unsalted butter, softened
- 1 cup powdered sugar
- 1/2 teaspoon vanilla extract
- 1 tablespoon milk or cream
How to Prepare Fluffy Cinnamon Rolls from Scratch (One-Rise Method)
Alright, time to get baking! The beauty of this method—the one-rise wonder—is that we skip that long second proofing session. We are aiming for maximum flavor development in less time, which is perfect when you’re craving something sweet pronto. We move with purpose through the mixing, kneading, resting, and rolling steps. Follow me closely here; paying attention to the dough’s texture is how we guarantee those truly fluffy cinnamon rolls. This method is a real game-changer, almost as helpful as knowing how to manage yeast for perfect belgian waffles recipe crispy yeast!
Activating the Yeast and Mixing the Dough
First things first: wake up that yeast! We need the milk to be warm, around 105°F to 115°F. If you don’t have a thermometer, test it on your wrist; it should feel warm, not hot. Stir in your yeast and a tiny bit of the sugar. If it gets foamy and bubbly after about five to ten minutes, congratulations, your yeast is alive and ready to work! Now, whisk in the melted butter and the egg. In a separate bowl, mix the flour and salt—that’s our dry team. Slowly pour the flour mix into the wet ingredients, mixing until it just starts coming together into a shaggy ball. Don’t over-mix yet!
Kneading and the First Rise for Your Cinnamon Buns
Turn that shaggy mess out onto a lightly floured counter. Now it’s time to work those arms! Knead the dough for a solid 5 to 7 minutes. You’re looking for a transformation: it starts rough, but it should end up beautifully smooth and elastic when you poke it. Put it in a lightly buttered bowl, turn it over so it’s coated, cover it up, and let it rest in a warm spot for 60 to 90 minutes until it’s doubled. Oh my goodness, the smell during this rise? It’s pure heaven—cinnamon and warm yeast filling up your kitchen!
Rolling, Filling, and Cutting the Rolls
Once it’s puffy, gently punch the air out. Roll that beautiful mass into a large rectangle, about 12×18 inches—think big, almost square, but definitely longer on one side. Now, take that softened butter filling mixture and spread it edge-to-edge, leaving about half an inch bare along one long side. That bare edge acts like tape! Roll that dough up as tightly as you can starting from the opposite long edge. You need a tight seal so your rolls don’t unravel baking! Use unflavored dental floss or a very sharp knife to cut that log into 12 equal pieces, around 1 1/2 inches thick. Arrange them cut-side up in your greased 9×13 baking pan.
The Final Rest and Baking Instructions
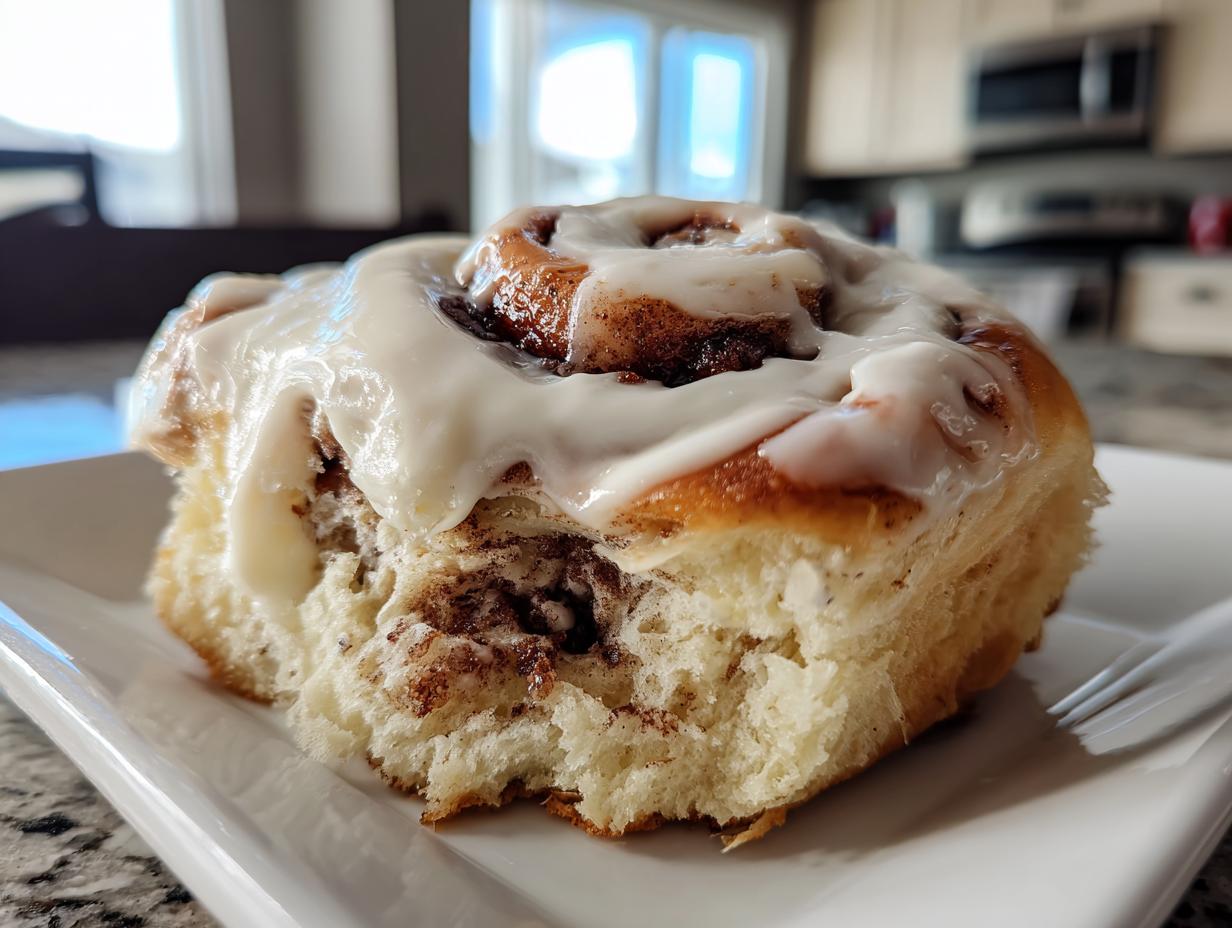
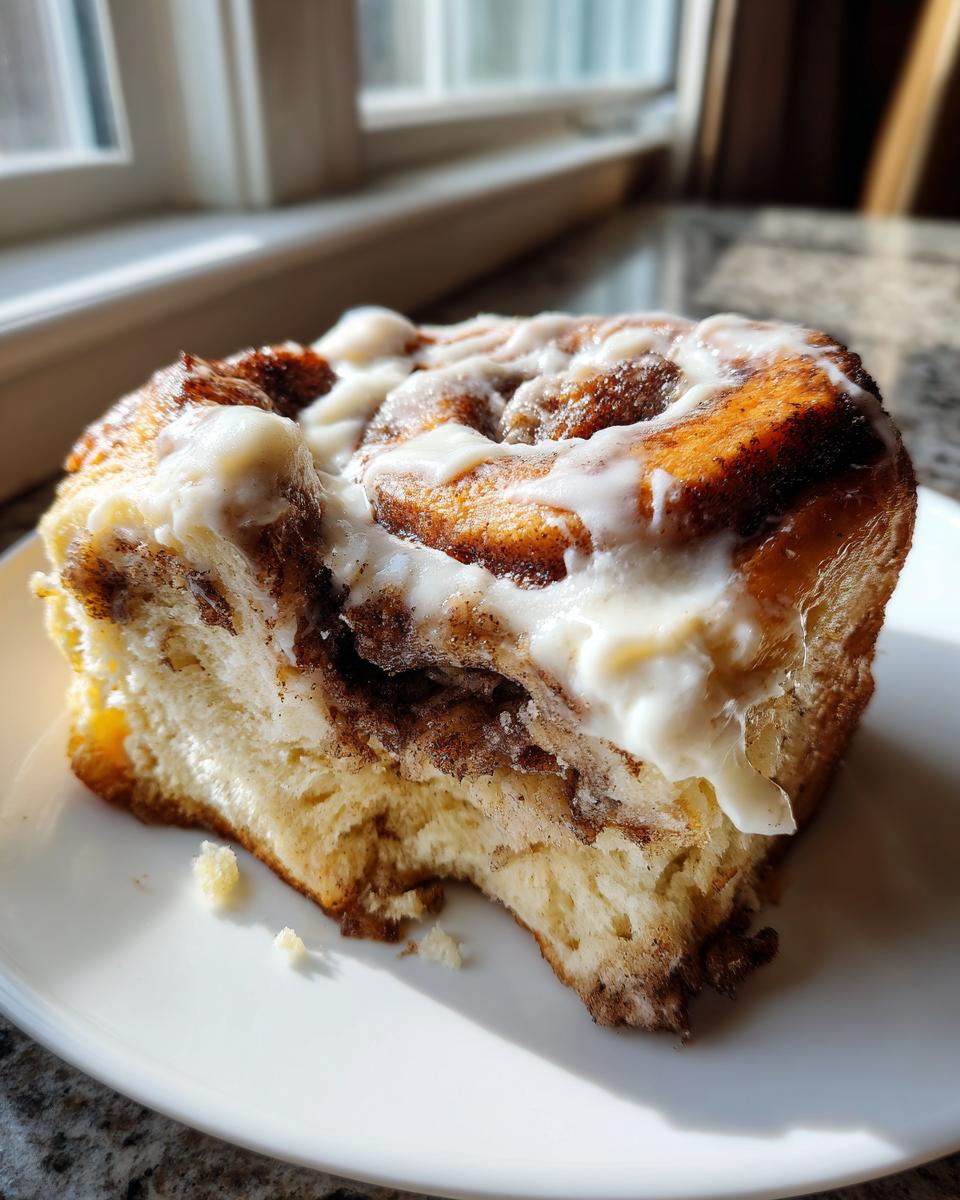
Cover the pan loosely and let those rolls relax for just 20 minutes—that’s our quick second rest. While they’re chilling out, crank your oven up to 375°F. After the short rest, pop them in. You’re looking for a golden brown top, which usually takes about 20 to 25 minutes. As soon as they come out—and I mean *immediately*—slather that prepared cream cheese frosting all over the hot tops. The heat melts the icing slightly, making sure you get those incredible, deeply satisfying, gooey cinnamon buns we’ve been dreaming about!

Expert Tips for Perfect Cream Cheese Icing Recipe on Your Cinnamon Buns
Listen up, because this is where we separate the good cinnamon buns from the legendary ones. The rolls need to be hot when you frost them, that’s mission number one for that delightful melt. But the icing itself? It can be tricky! Too runny, and it just disappears into the nooks and crannies—we want a satisfying layer of sweet, tangy goodness. Too stiff, and it sits on top like a cold mask, which is totally defeating the purpose of a wonderfully gooey treat.
If you want that perfect, thick coverage, the secret is temperature control on both sides. Make sure your softened butter and cream cheese for the Cream Cheese Icing Recipe are truly soft, like room temperature playdough. If they are cold, the powdered sugar will never incorporate smoothly, and you’ll end up whipping air into a stiff, clumpy mess.
As for getting that beautiful, slightly thick texture that clings perfectly? Be really careful with the milk or cream. I always add only half a tablespoon to start, beat it well, judge the thickness, and only then add the rest, maybe a half teaspoon at a time. You really do want to avoid adding too much liquid if you want that amazing, thick layer that screams “copycat Cinnabon!” If you do accidentally thin it out too much, don’t panic! Just quickly beat in another quarter-cup of powdered sugar. Adding a tiny splash of lemon juice instead of extra milk can also help stabilize the icing while adding a lovely, bright tang to cut through the richness of the dough. It’s a fantastic little trick for mastering your Baking Sweet Rolls! For other layered baked goods, check out my tips on achieving a tender crumb in my coffee cake with tender cinnamon streusel.
Troubleshooting Common Cinnamon Buns Issues
Hey, it happens to the best of us! Even when following the steps for Fluffy Cinnamon Rolls from Scratch, something can occasionally go sideways. The goal here is to anticipate those little kitchen mishaps so your weekend baking session doesn’t turn into a disaster. Don’t stress if your dough looks a little sad or your rolls seem flat. We can usually fix it! I’ve put together the most common problems people face when making these homemade cinnamon buns recipe dreams into reality.
Why Are My Cinnamon Rolls Not Rising?
This is almost always a yeast issue, usually stemming from temperature problems. Did you check your milk? If it was too hot (over 130°F), you killed the yeast before it even woke up, so it can’t make the bread airy. On the flip side, if the kitchen is too cold, the dough struggles to have the energy to proof properly. Also, make sure you kneaded long enough! Proper kneading builds strong gluten, and that gluten traps the gas the yeast makes. If you stopped kneading too soon, the dough won’t hold the rise you want in the end.
How to Fix Dry Cinnamon Buns After Baking
If you pull them out and they feel a little stiff already—don’t despair! The best fix is applied right when they come out of the oven, which is why I stress immediate frosting. The heat helps melt the icing and allows it to soak down nicely, providing instant moisture back into the top layer. If they are *truly* dry, try this trick: Microwave a tiny bit of milk or water with a teaspoon of sugar until dissolved. Poke a few holes in the tops of the cooled rolls and brush this light syrup over them right before you ice them. It might sound crazy, but it introduces moisture right back into the crumb. That heavy cream cheese frosting also does half the work keeping the centers soft overnight!
Variations on Classic Cinnamon Buns
Now that we have mastered the perfect texture for our Fluffy Cinnamon Rolls from Scratch, it’s time to get creative! I love taking staples and giving them a little holiday or weekend brunch twist. If you’re tired of the classic brown sugar and cinnamon combo—or if you need a showstopper for a holiday breakfast—we can easily pivot this recipe. You can find some amazing inspiration over at Butternut Bakery, but I have a couple of easy ideas that work right into my trusted dough formula. Think about how satisfying these will be as next-level Baking Sweet Rolls!
Butter Pecan Cinnamon Buns for Holiday Baking Treats
This variation is just stunning, especially when you need something for a cozy weekend or a special holiday breakfast. It’s super simple to inject that nutty, buttery richness directly into your rolls. You don’t need a whole new recipe; you just need smart additions!
To shift towards Butter Pecan Cinnamon Buns, you just change up what goes into the butter-sugar paste. First, use pecans—either finely chopped or lightly crushed—and mix them right in with your brown sugar and cinnamon. You want about a half cup of pecans mixed into that filling mixture before spreading it on the dough. That’s it! The pecans toast up beautifully while baking beneath the melting icing.

If you want to lean even harder into the nutty flavor, try adding toasted, chopped pecans on top of the frosting right after you spread it on the warm rolls. They stick right into that gooey layer. Or—and this is a fun one—swap out the milk in your frosting for a tablespoon or two of heavy cream infused with a tiny bit of maple extract. It gives the whole thing a glorious praline note that just screams special occasion. For other nutty inspiration that pairs well with sweet doughs, check out my recipe for banana nut muffins!
Storage and Reheating Instructions for Doughy Cinnamon Rolls
You made a huge batch of these incredible, soft cinnamon buns—yay! But let’s be real, are they going to last? Honestly, if my family has anything to say about it, they don’t last past breakfast. But if you are lucky enough to have leftovers, we need a plan to keep that fluffy texture intact. We don’t want sad, stiff rolls the next day; we want that fresh-from-the-oven, melt-in-your-mouth experience again!
For short-term storage, you can keep them right on the counter. Store them in an airtight container or wrap the entire baking dish tightly with plastic wrap and foil. They should stay wonderfully soft for about two to three days this way. If you manage to keep them that long, the moisture from that amazing cream cheese icing acts like a little blanket of protection.
If you need them to last longer—maybe you’re prepping for a holiday brunch next week—the freezer is your friend. Unwrap the cooled rolls (this is important, don’t freeze them iced!), wrap them tightly in plastic wrap, and then cover them again with foil or place them in a heavy-duty freezer bag. They keep perfectly for up to three months. If you want advice on maintaining that soft crumb in other baked goods, my recipe for Parker House Rolls Recipe has some great dough maintenance tips too!
Reheating is non-negotiable for that gooey texture:
- For Countertop Rolls: Take however many rolls you want, place them on a microwave-safe plate, and microwave them for about 15 to 25 seconds. This warms them just enough to re-activate the moisture and soften the icing slightly.
- For Frozen Rolls: First, let them thaw overnight in the fridge. Then, wrap the individual rolls in foil and bake them in a 350°F oven for about 10 to 15 minutes, or until they are just warmed through. This gentle heat brings back the original soft, doughy texture better than the microwave ever could!
Frequently Asked Questions About Making Cinnamon Buns
I know you’ve got questions! When you’re aiming for the absolute best, melt-in-your-mouth results, it’s normal to wonder about substitutions or timing. I gathered a few things I get asked all the time about achieving that perfect texture and keeping things quick, especially since we used that streamlined one-rise method earlier. If these don’t cover it, drop your questions below! We talk about everything from speedy simple breakfast ideas to advanced techniques here.
Can I make these cinnamon buns ahead of time?
Oh yes, absolutely! This is perfect for weekend baking when you want fresh rolls without waking up at 4 AM. You just complete Step 10—cutting the rolls and arranging them in the greased pan. Cover the pan tightly with plastic wrap and put the whole thing in the refrigerator overnight. They can chill like that for up to 18 hours. Just know that when you take them out the next morning, you need to let them sit on the counter while the oven preheats (maybe 45 minutes to an hour) to let them finish that final proofing step before baking. Don’t skip that warm-up time, or they might bake up a little dense!
What is the difference between cinnamon rolls and cinnamon buns?
Honestly? Nothing, for all intents and purposes in American baking! If you searched for “cinnamon rolls,” “cinnamon buns,” or even slightly different terms like Homemade Cinnamon Buns Recipe, you’ve come to the right place. The terms are used totally interchangeably here. If you see a regional difference elsewhere, it usually relates to the icing thickness, but for this recipe, consider them the same glorious, gooey treat!
Is it necessary to use active dry yeast for this recipe?
That’s a smart question focusing on speed! Active dry yeast is what I wrote the directions for, which requires that foamy activation step first. If you happen to have instant yeast (sometimes called rapid-rise yeast) on hand, you can totally use that instead! If you swap to instant yeast, you can skip Step 1 entirely—no need to proof it separately. Just mix the instant yeast right in with your dry ingredients (flour and salt) in Step 3. It will still need that full 60 to 90 minutes for the one rise, but you save the 10 minutes of waiting for foaming. Both give you fantastic results for those Doughy Cinnamon Rolls!
Enjoy Your Weekend Breakfast Baking
There you have it! You’ve got the blueprint for the absolute best, softest, gooiest cinnamon buns that will make your kitchen smell like the best bakery downtown. Seriously, I am so proud of you for tackling this yeasted dough—it’s way less scary than it looks, promise!
Now that you’ve made these for your weekend breakfast baking, I need to know everything! Please drop a star rating for this recipe right below, and tell me in the comments: What was your absolute favorite part about the process? Was it rolling the dough tight, or was it that final glorious moment when the cream cheese icing melted over the hot rolls? I live for hearing your successes! If you want to keep that weekend feeling going, my recipe for buttermilk pancakes fluffy recipe is next on your to-bake list!
PrintThe Ultimate Soft & Gooey Homemade Cinnamon Rolls with Cream Cheese Frosting (One-Rise Method)

Make bakery-style cinnamon rolls at home that are incredibly soft, fluffy, and moist. This recipe uses a simple one-rise method and results in a rich, gooey cinnamon filling topped with classic cream cheese icing.
- Prep Time: 30 min
- Cook Time: 25 min
- Total Time: 1 hour 55 min
- Yield: 12 servings 1x
- Category: Breakfast
- Method: Baking
- Cuisine: American
- Diet: Vegetarian
Ingredients
- 1 cup whole milk, warm
- 2 1/4 teaspoons active dry yeast
- 1/2 cup granulated sugar, divided
- 1/4 cup unsalted butter, melted, plus more for greasing
- 1 large egg, room temperature
- 3 1/2 cups all-purpose flour, plus more for dusting
- 1 teaspoon salt
- 1/2 cup unsalted butter, softened (for filling)
- 1/4 cup packed light brown sugar (for filling)
- 2 tablespoons ground cinnamon (for filling)
- 1/2 cup cream cheese, softened (for frosting)
- 2 tablespoons unsalted butter, softened (for frosting)
- 1 cup powdered sugar (for frosting)
- 1/2 teaspoon vanilla extract (for frosting)
- 1 tablespoon milk or cream (for frosting)
Instructions
- Warm the milk until it reaches 105-115°F. Pour the warm milk into a large bowl. Stir in the yeast and 1 tablespoon of the granulated sugar. Let stand for 5-10 minutes until foamy.
- Add the melted butter, remaining granulated sugar, and egg to the yeast mixture. Whisk briefly to combine.
- In a separate bowl, whisk together the flour and salt. Gradually add the flour mixture to the wet ingredients, mixing until a shaggy dough forms.
- Turn the dough out onto a lightly floured surface. Knead for 5 to 7 minutes until the dough is smooth and elastic. Place the dough in a lightly buttered bowl, turning to coat. Cover the bowl with plastic wrap or a clean towel. Let the dough rise in a warm place for 60 to 90 minutes, or until doubled in size.
- While the dough rises, prepare the filling: In a small bowl, mix the softened butter, brown sugar, and cinnamon until combined into a paste.
- Prepare the frosting: In a medium bowl, beat the softened cream cheese and butter until smooth. Add the powdered sugar, vanilla extract, and milk. Beat until the frosting is creamy and spreadable. Set aside.
- Once the dough has risen, gently punch it down. Turn the dough onto a lightly floured surface and roll it into a large rectangle, about 12×18 inches.
- Spread the cinnamon filling evenly over the entire surface of the dough, leaving a small border on one long edge.
- Starting from the long edge opposite the border, tightly roll the dough into a log. Pinch the seam closed.
- Use a sharp knife or unflavored dental floss to cut the log into 12 equal rolls, about 1 1/2 inches thick.
- Arrange the rolls, cut-side up, in a greased 9×13 inch baking pan. Cover the pan loosely and let the rolls rest for a second, short rise (about 20 minutes). Preheat your oven to 375°F during this time.
- Bake for 20 to 25 minutes, or until the tops are golden brown.
- Remove the rolls from the oven. Immediately spread the cream cheese frosting evenly over the hot rolls. Serve warm.
Notes
- For the softest texture, make sure your milk is warm but not hot, as high heat kills the yeast.
- If you want extra gooey rolls, place a small pat of butter on top of each roll before the final bake.
- You can make the cream cheese frosting ahead of time and store it in the refrigerator; let it sit at room temperature for 30 minutes before using.
Nutrition
- Serving Size: 1 roll
- Calories: 450
- Sugar: 45g
- Sodium: 350mg
- Fat: 22g
- Saturated Fat: 13g
- Unsaturated Fat: 9g
- Trans Fat: 0.5g
- Carbohydrates: 58g
- Fiber: 2g
- Protein: 7g
- Cholesterol: 55mg