
We’ve all been there, right? That moment when the invite lands, and suddenly you’re scrolling through hundreds of ‘party appetizer ideas‘ feeling like you need a culinary degree just to put out some chips and dip. Stop stressing! I want to share a little bit of that professional kitchen lingo with you today, the kind that makes entertaining feel effortless, not exhausting. This easy cheese ball recipe is my secret weapon. It’s a genuinely classic, time-tested formula that delivers massive flavor with almost zero cooking time. Trust me, when you bring this out, it instantly becomes the undisputed snack champion of the room.
- Why This Is the Best Classic Cheese Ball Recipe (The Crowd Pleaser)
- Ingredients for Your Easy Cheese Ball Recipe
- How to Prepare This Simple Cheese Ball Recipe Step-by-Step
- Tips for Success with Your Make Ahead Appetizers: The Cheese Ball Edition
- Serving Suggestions for Your Crowd Pleaser Appetizer
- Cheese Ball Recipe Variations: Bacon, Ranch, and More
- Storage and Reheating Instructions for Your Make Ahead Appetizers
- Frequently Asked Questions About Making a Cheese Ball Recipe
- Nutritional Estimates for This Cream Cheese Appetizer
Why This Is the Best Classic Cheese Ball Recipe (The Crowd Pleaser)
You do not need twenty fussy ingredients to win the appetizer game. This easy cheese ball recipe is pure, unadulterated flavor engineering. Chefs know that sometimes, simplicity is the loudest statement, and this cheese ball is practically shouting deliciousness across the room. It never fails, whether I’m throwing together snacks for a spontaneous Game Day Snacks spread or needing something impressive for Christmas Eve.
Here’s the insider take on why this specific formula—this Classic Cheese Ball—is unbeatable:
- True Make-Ahead Magic: You mix it, shape it, and honestly, forget about it until the guests arrive. Those two hours in the fridge aren’t just for chilling; they let the sharp cheddar and spices *marry* each other.
- Minimal Grocery Run: We are talking cream cheese, cheddar, a splash of Worcestershire, and some spices. No hunting down esoteric ingredients here. This is accessible flavor.
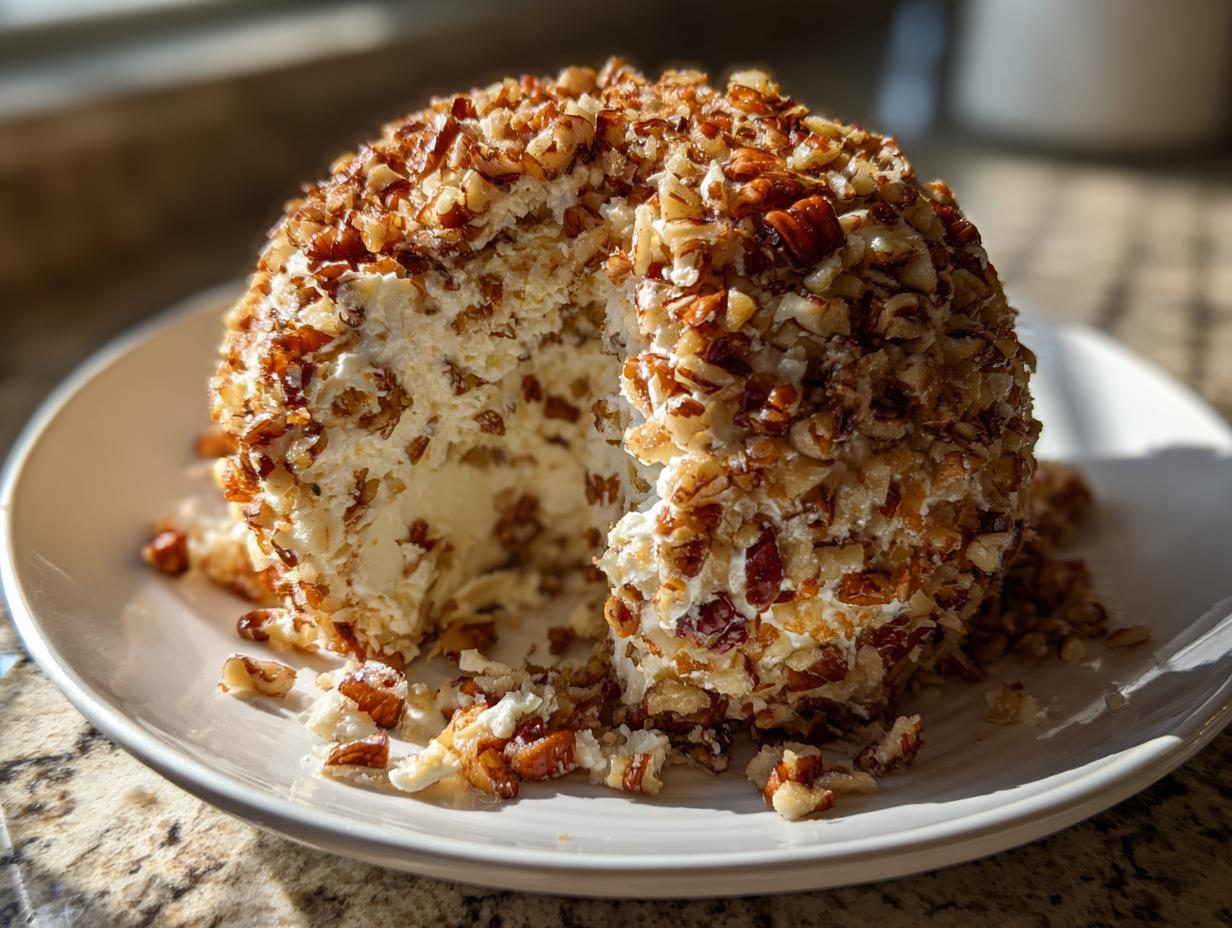
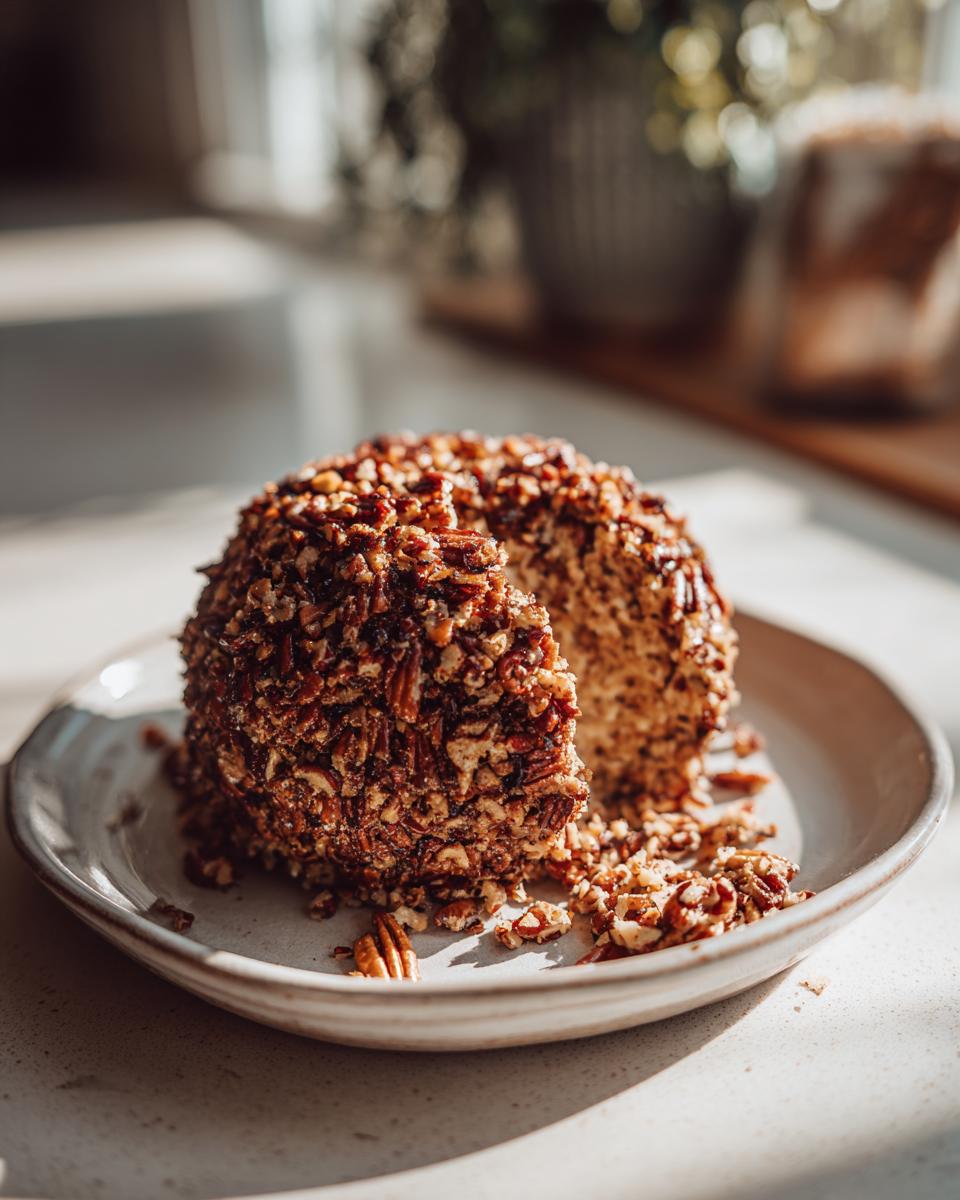
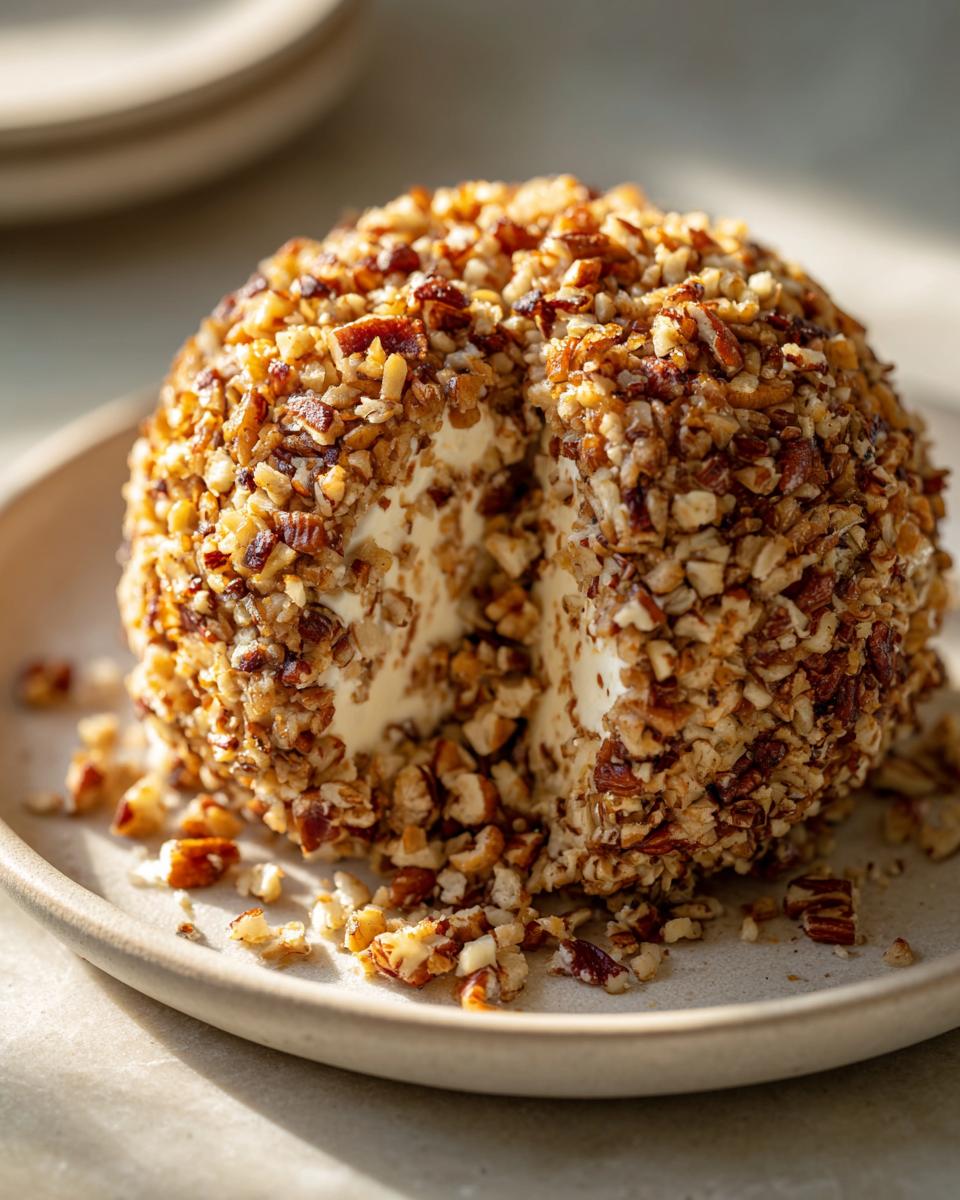
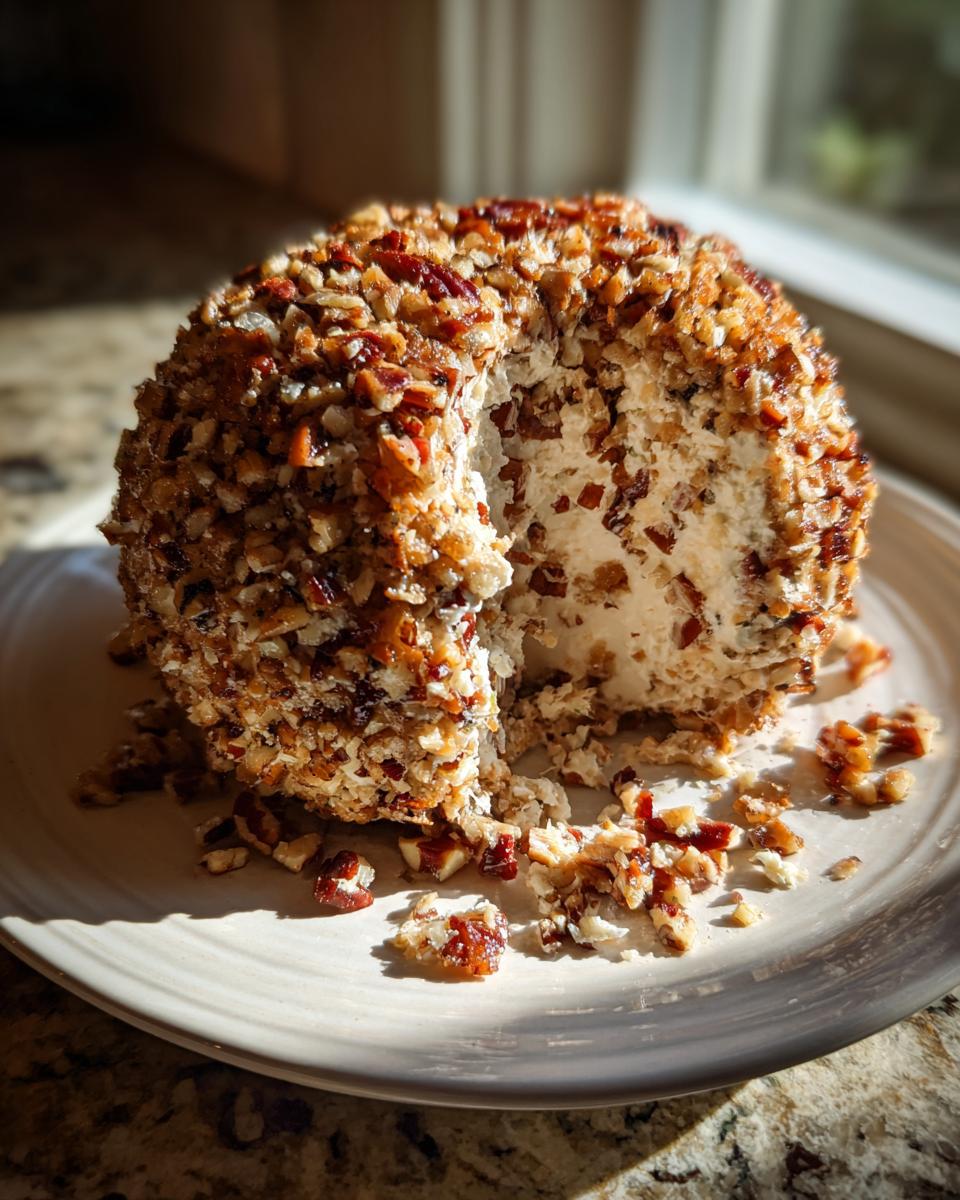
- Texture King: Most cheese balls are mushy. Mine isn’t! The balance of softening and sharp cheese, combined with using that exterior nut ‘shell,’ gives you a perfect creamy-to-crunch ratio in every bite. Seriously, try this one; it works every single time for entertaining.
Ingredients for Your Easy Cheese Ball Recipe
Okay, let’s talk components. Because this is a *Classic Cheese Ball*, we’re relying on quality basics, not weird additions. I only shop for these things once, and you’re set for party season. The real secret weapon here—besides the cream cheese, which needs to be fully softened—is the cheddar. Don’t skimp; grab the sharp stuff. It brings the necessary punch to cut through the richness. You’ll note the Worcestershire sauce; that’s pure umami doing heavy lifting, folks. No fancy dips needed when you have these foundational items.
- 8 ounces cream cheese, softened (important: room temp!)
- 8 ounces sharp cheddar cheese, shredded (freshly shredded is always better, trust me)
- 1 teaspoon Worcestershire sauce
- 1/2 teaspoon garlic powder
- 1/4 teaspoon onion powder
- 1/4 teaspoon salt
- 1/4 teaspoon black pepper
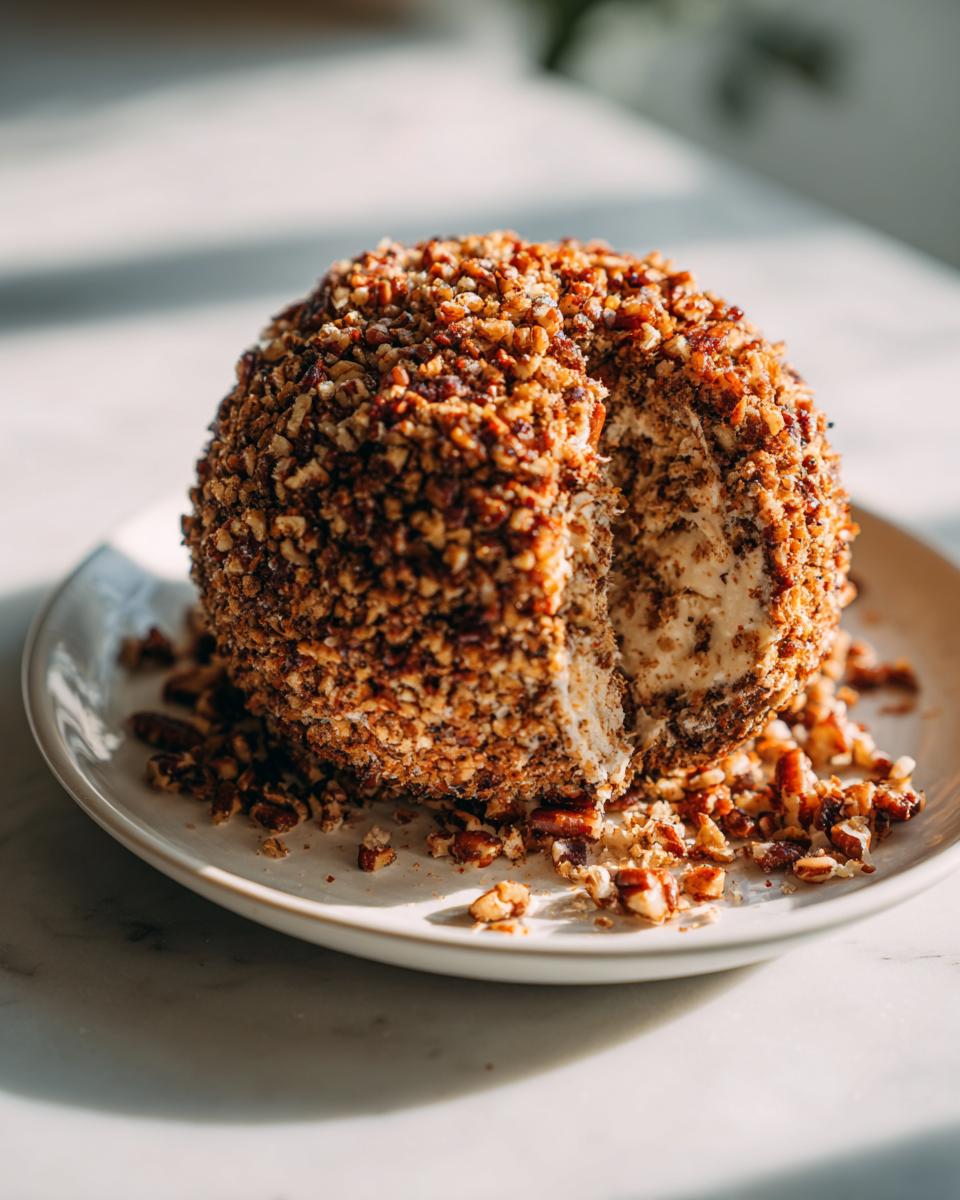
- 1 cup finely chopped pecans (for coating our beautiful ball)
How to Prepare This Simple Cheese Ball Recipe Step-by-Step
This is where we translate chef timing into home-cook reality. Since this is a fantastic make-ahead appetizer, you get to control when the kitchen chaos happens. We aren’t baking, which is wonderful, but we are mixing, and mixing is the spot where most people mess up the texture potential of their base. Follow these steps, and I guarantee you’ll pull out something firm, flavorful, and ready for applause.
Mixing the Savory Cheese Ball Base
First up, make sure that cream cheese is genuinely soft—like, room temperature soft. If it’s cold, you’ll end up with lumps, and cleaning those out while trying to keep everything else cold is just annoying! Seriously, take it out an hour early or give it tiny blasts in the microwave. Toss the softened cream cheese, that gorgeous sharp cheddar, Worcestershire, and all your dry seasonings into a bowl. Now, here is the insider tip: Mix just until it’s smooth and combined. If you whip this base forever, you incorporate too much air, and when it chills, it gets strangely grainy. We want creamy, not airy meringue. Stop mixing when those grated shreds of cheddar stop looking like separate pieces!
Shaping and Coating the Classic Cheese Ball
Once the base is perfectly mixed, it’s shaping time. This trick makes shaping so much easier than trying to roll it around in the bowl itself. Scoop the whole cheesy mixture right onto a large piece of plastic wrap. Use the wrap to press and encourage the mixture into a solid ball shape. Don’t squeeze too hard—we aren’t trying to force air out—but make sure it holds together nicely. Now for the fun part, the coating! Spread those finely chopped pecans (or whatever coating you pick) out on a plate. Take your wrapped ball and gently roll it around until every single inch is covered in crunch. Press the coating in lightly with your hands so it sticks permanently to your masterpiece.
Chilling for Maximum Flavor in Your Cheese Ball Recipe
This is the make-or-break step for any truly great cheese ball recipe. Wrap the coated ball tightly again and tuck it into the fridge. You need a minimum of two hours for it to firm up enough so you can actually serve it without it drooping sadly onto the platter. More importantly, the spices need that chill time to really infuse the cheese fats. That garlic powder and onion powder start working their magic best when everything is cold and patient. If you’re prepping for a party, you can easily leave this wrapped airtight for up to three days. It’s the definition of stress-free entertaining!
Tips for Success with Your Make Ahead Appetizers: The Cheese Ball Edition
Making this cheese ball recipe ahead of time is honestly the best gift you give your party-hosting self. But even with a simple formula, a couple of little insider checks will guarantee you hit that perfect texture every time. Listen up, because I’m going to give you the line-cook way to troubleshoot this thing.
First, let’s circle back to temperature. I mentioned it before, but it bears repeating: if your cream cheese is cold when mixing, you’re going to end up with soft spots that never quite firm up later. The texture will be okay, but it won’t be *great*. Make sure that base is pliable before you even think about introducing the cheddar. That room-temp base is the secret to that flawlessly smooth texture you see in professional photos.
Second, always, always taste before you wrap! Once this baby chills, you can’t adjust the seasoning easily without turning the whole thing into soup. Take a tiny nibble of the mixed base (I know, I know, we broke the raw dough rule for this). Does it need a tiny pinch more salt? A dash more Worcestershire? Now’s the time to dial it in. You’ll be so glad you tasted because those spices mellow out a lot once they hit the cold.
Finally, what if your kitchen is scorching hot, or you’re just working too slowly, and the whole mixture starts looking dangerously soft while you’re rolling it? Don’t panic! This is chef slang for: Stop working and chill out. Seriously. Just scoop the whole messy thing back onto the plastic wrap, wrap it tight, and stick it in the freezer for fifteen minutes. It doesn’t have to freeze solid, you just need it firm enough to handle again without your hands melting it. Bring it out, finish shaping, coat it, and back to the fridge it goes. A little chill time is easier than trying to wrestle a soft cheese blob!
Serving Suggestions for Your Crowd Pleaser Appetizer
Okay, you’ve mastered the mixing, you’ve chilled it perfectly, and now it’s time for the grand reveal! A brilliant Crowd Pleaser Appetizer deserves the right stage. You want variety here because everyone approaches the cheese ball differently. Make sure you have a mix of textures to contrast that creamy interior and the nutty coating. I always go for something sturdy.
For crackers, don’t just grab the basic water cracker. Grab those Ritz, or maybe some bagel chips—something that commits to scooping! If you want to keep things lighter, carrot sticks, celery, and maybe some sturdy bell pepper strips are non-negotiable. They give that refreshing, cool snap that cleanses the palate between bites of rich cheese. And please, don’t forget pretzels; the salty crunch works perfectly with the savory seasonings we added.
Presentation is important, too! When you put this on the platter, surround it completely with your dippers. It makes it look abundant and inviting. Serve it slightly cool—let it sit out of the fridge for about 15 minutes before guests arrive—so it’s spreadable without being sloppy. It’s your centerpiece; treat it like one!
Cheese Ball Recipe Variations: Bacon, Ranch, and More
Part of mastering this savory cheese ball is knowing where you can easily switch things up without calling in a professional mixer. Since we engineered this base to be so sturdy and flavorful, it’s a perfect canvas for playing around. The goal is always maximum flavor impact with minimum extra steps—we’re still aiming for that easy win here, remember?
If you want to add bacon, which, let’s be honest, is almost always a good idea, you just need to fold in about a half cup of crispy, crumbled bacon right at the end when you mix the cheese base together. Make sure it’s dry bacon, or you’ll have a greasy mess! For a total flavor explosion that screams Game Day, try adding a packet of dry ranch seasoning mix along with your salt and pepper. That’s right, just toss it in there with the garlic powder. The classic Cheddar Ranch combination is phenomenal, and you can see great inspiration over at their recipe if you want to get really wild.
You can also swap out the coating entirely if pecans aren’t your speed. Think about crushed pretzels for extra saltiness, especially if you make the ranch version! Or, for a sophisticated look, finely chopped fresh parsley gives you that gorgeous green speckled exterior. Just remember the rule: whatever flavor addition you choose, mix it into the cheese base *before* you shape it, unless it’s the external coating. Easy swaps, maximum payoff!
Storage and Reheating Instructions for Your Make Ahead Appetizers
Listen, the beauty of this cheese ball recipe is that it actually *improves* overnight. That chilling time isn’t just for structure, it’s for flavor melding. So, you made it yesterday? Perfect! You’re already ahead of the game.
Once you’ve rolled it in the pecans and wrapped it tightly in plastic wrap—and I mean tight, like you’re wrapping a mummy—it stays happy in the refrigerator for up to three days. Three days! That covers almost any host’s party window, from a casual Tuesday night gathering to a huge holiday blowout. Keep it the coldest spot in your fridge.
Now, the critical part: Serving. You absolutely cannot take this straight from the fridge and put it on the table. It will be too firm, and your guests will be sawing at it with crackers instead of scooping gently. Don’t let it sit out for just five minutes either; that’s not long enough.
Here’s the lingo: We want it workable, not melty. Pull that gorgeous, nutty orb out about 15 to 25 minutes before you plan to serve it. That little bit of time on the counter lets the cream cheese soften just enough to become perfectly spreadable again. If it’s a really hot room, maybe stick to 15 minutes.
What about freezing? If you have leftovers and you know you won’t eat it within three days, you can freeze it. Wrap the ball exceptionally well—I usually do plastic wrap, then aluminum foil—and freeze it for up to a month. When you’re ready for it, transfer it to the fridge overnight to thaw completely, and *then* let it sit on the counter for that 20-minute temper-up before serving. But honestly, just make one that’s the right size for your party; this stuff goes fast!
Frequently Asked Questions About Making a Cheese Ball Recipe
I know you’ve got questions! When you’re making a show-stopping Crowd Pleaser Appetizer like this, it’s good to have all the insider answers handy so you feel totally confident when it’s time to present it. Here are the things I hear most often about nailing this Classic Cheese Ball.
Q: Can I use the pre-shredded cheese instead of grating my own?
I’m going to give you the direct chef translation here: Please try not to. Pre-shredded cheese is coated in starches to keep it from clumping in the bag, and those starches just make your base mixture grainy and less compliant when you mix it up. For that unbelievably smooth texture in your standard Easy Cheese Ball Recipe, always shred your sharp cheddar fresh. It only takes two minutes, and the flavor difference is night and day. It’s worth the three extra strokes on the box grater, trust me!
Q: You keep saying this is a make-ahead appetizer; exactly how far ahead can I prep it?
That’s the magic phrase—make ahead appetizers! This is actually an even better appetizer the day *after* you make it. Once you’ve shaped the ball, wrapped it tightly, and chilled it, it’s good in the fridge for up to three full days. I often make mine on Tuesday for a Friday night party. When you pull it out on Friday, just let it sit on the counter for about 20 minutes before serving so it softens up perfectly. It’s stress-free entertaining at its finest!
Q: What if my entire family hates nuts? What coating can I use instead of pecans?
No problem at all! Pecans are just what I use because they toast up so nicely and blend beautifully with the savory spices, but you have total freedom here. If you want crunch, try crushing up some sturdy pretzels—the salty flavor is amazing. Or, for something totally different, toss it in plain seasoned breadcrumbs mixed with a little dried Italian seasoning. If you want a softer, greener look for your Finger Foods for Entertaining, you can even coat it in finely minced fresh parsley or chives. Just make sure whatever you pick is pressed on firmly!
Q: I have a really long, narrow platter. Can I make this look like a simple cheese log instead of a ball?
Absolutely! That’s a fantastic way to present it, especially if you’re serving it down the middle of a crowded table. When you mix up your base, instead of wrestling it into a round sphere on the plastic wrap, gently roll it into a log shape. You want it relatively firm and even. Then, wrap it up and chill it just like you would the ball. When it comes time to coat it, you can pour the pecans onto a baking sheet and roll the log through them, or just sprinkle them lavishly on top and press them gently by hand. It looks incredibly professional as a Simple Cheese Log!
Q: How long does it take for the cheese ball to be ready to serve after chilling?
This is critical for texture! As I mentioned, you need that minimum two-hour chill time to firm up the mixture. But don’t serve it straight from the fridge. Think of it like butter—when it’s ice-cold, it’s nearly impossible to spread. So, once it’s firm, take it out onto your serving plate and let it sit on the counter for about 15 to 25 minutes before anyone digs in. That brief rest softens the cheese just enough so that it’s creamy and dreamy to scoop onto your crackers.
Nutritional Estimates for This Cream Cheese Appetizer
Okay, let’s get real for a second. When you’re making something this decadent—this ultimate Cheesy Party Dip—you aren’t making it for the nutrition label, you know? But for those of you who track things, here are the ballpark figures based on my ingredient list. Remember, this is just a rough guide, because your choice of cheddar or the exact amount of pecans you use can shift these numbers a bit. Typically, one serving (about 1/12th of the ball) clocks in around 150 calories. It’s high on that good, satisfying fat content (around 14g) but offers a decent hit of protein too. Enjoy it guilt-free—it’s party food, and it’s absolutely worth it!
PrintThe Best Classic Cheese Ball Recipe: Easy Make-Ahead Party Appetizer

This is the classic cheese ball recipe you need for any gathering. It uses simple ingredients like cream cheese and cheddar, comes together fast, and is a guaranteed crowd pleaser for holidays or game day.
- Prep Time: 15 min
- Cook Time: 0 min
- Total Time: 2 hr 15 min
- Yield: About 12 servings 1x
- Category: Appetizer
- Method: No Bake
- Cuisine: American
- Diet: Vegetarian
Ingredients
- 8 ounces cream cheese, softened
- 8 ounces sharp cheddar cheese, shredded
- 1 teaspoon Worcestershire sauce
- 1/2 teaspoon garlic powder
- 1/4 teaspoon onion powder
- 1/4 teaspoon salt
- 1/4 teaspoon black pepper
- 1 cup finely chopped pecans (for coating)
Instructions
- Combine the softened cream cheese, shredded cheddar, Worcestershire sauce, garlic powder, onion powder, salt, and pepper in a medium bowl.
- Mix the ingredients thoroughly with a hand mixer or a sturdy spoon until the mixture is smooth and fully combined. This is your base.
- Place the chopped pecans on a shallow plate or baking sheet.
- Scoop the cheese mixture onto a piece of plastic wrap. Shape the mixture into a ball using your hands.
- Roll the cheese ball in the chopped pecans until it is completely coated on all sides.
- Wrap the coated cheese ball tightly in plastic wrap.
- Refrigerate for at least 2 hours, or up to 3 days, to allow the flavors to meld and the ball to firm up. This is the make-ahead step.
- Before serving, place the chilled cheese ball on a serving platter. Serve with crackers, pretzels, or vegetable sticks.
Notes
- For a different texture, you can substitute the pecans with crushed pretzels or dried parsley for coating.
- If you need to soften the cream cheese quickly, microwave it on 20% power for 10-second intervals.
- This recipe works well as a simple cheese log if you skip the shaping step and just form it into a log shape on plastic wrap.
Nutrition
- Serving Size: 1/12 of ball
- Calories: 150
- Sugar: 1
- Sodium: 250
- Fat: 14
- Saturated Fat: 7
- Unsaturated Fat: 7
- Trans Fat: 0
- Carbohydrates: 2
- Fiber: 0
- Protein: 6
- Cholesterol: 35