
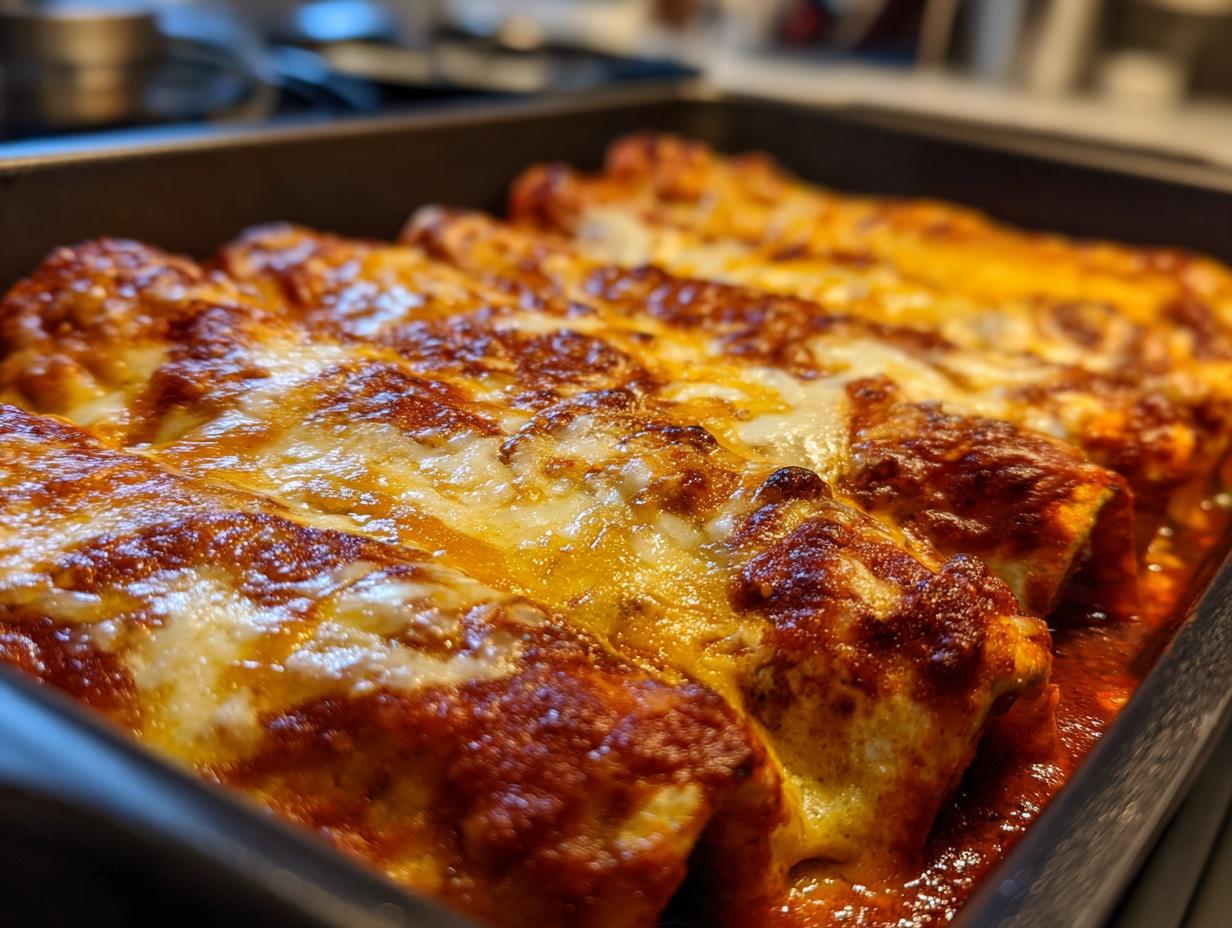
There’s nothing quite like a big, warm plate of deeply satisfying Mexican comfort food hitting the table after a long day. But let’s be real: sometimes those restaurant-style dishes feel way too complicated for Tuesday night. That’s why I’m translating this one for you. Forget stiff, dry tortillas—we’re talking about the ultimate, easy version of **cheese enchiladas** that deliver that signature, gooey, saucy Tex-Mex hit in about 35 minutes total. My time spent watching chefs hustle in the line versus my chaotic home kitchen taught me the shortcuts. This recipe cuts the noise and keeps the flavor. If you’re looking for genuinely great **Quick Weeknight Meals**, this is it. Now, let’s talk lingo and learn how to layer this flavor! Check out more of our easy ways to get dinner done fast right here on Kitchen Slang.
- Why You Will Make These Cheese Enchiladas Every Week
- Ingredients for Classic Cheese Enchiladas
- How to Make Restaurant Style Enchiladas: Step-by-Step
- Expert Tips for Perfect Cheese Enchiladas
- Variations on Your Simple Enchilada Recipe
- Serving Suggestions for Family Dinner Ideas
- Storage and Make Ahead Enchiladas Instructions
- Frequently Asked Questions About Cheese Enchiladas
- Nutritional Snapshot for This Tex Mex Favorite
Why You Will Make These Cheese Enchiladas Every Week
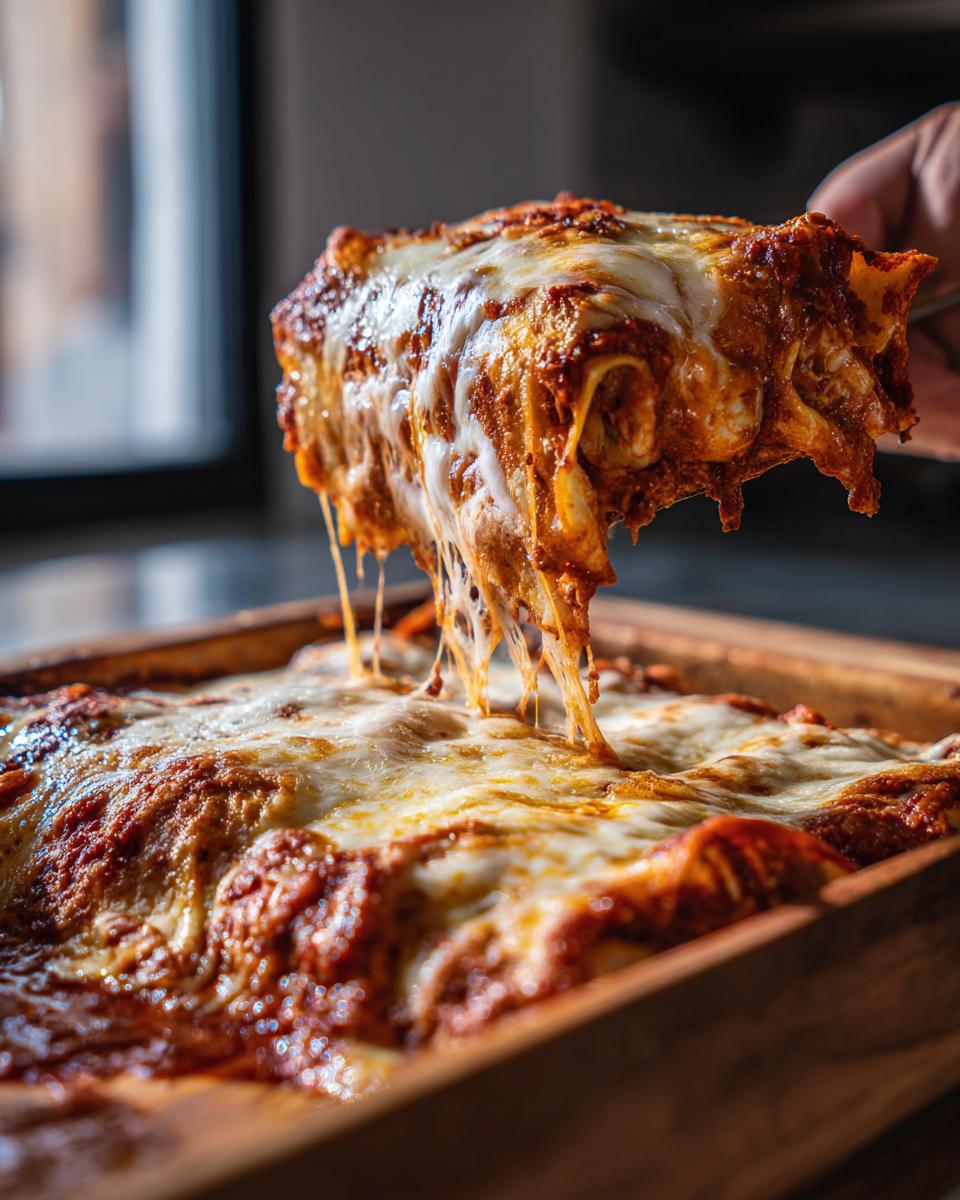
Honestly, these aren’t just good, they’re fast. That’s the real win for a weeknight warrior like us. You don’t need hours to nail that deeply satisfying flavor. Trust me, once you taste that **Gooey Cheese Filling** smothered in rich sauce, you’ll realize why people save this recipe.
- They are authentically **Restaurant Style Enchiladas**, without the 45-minute prep.
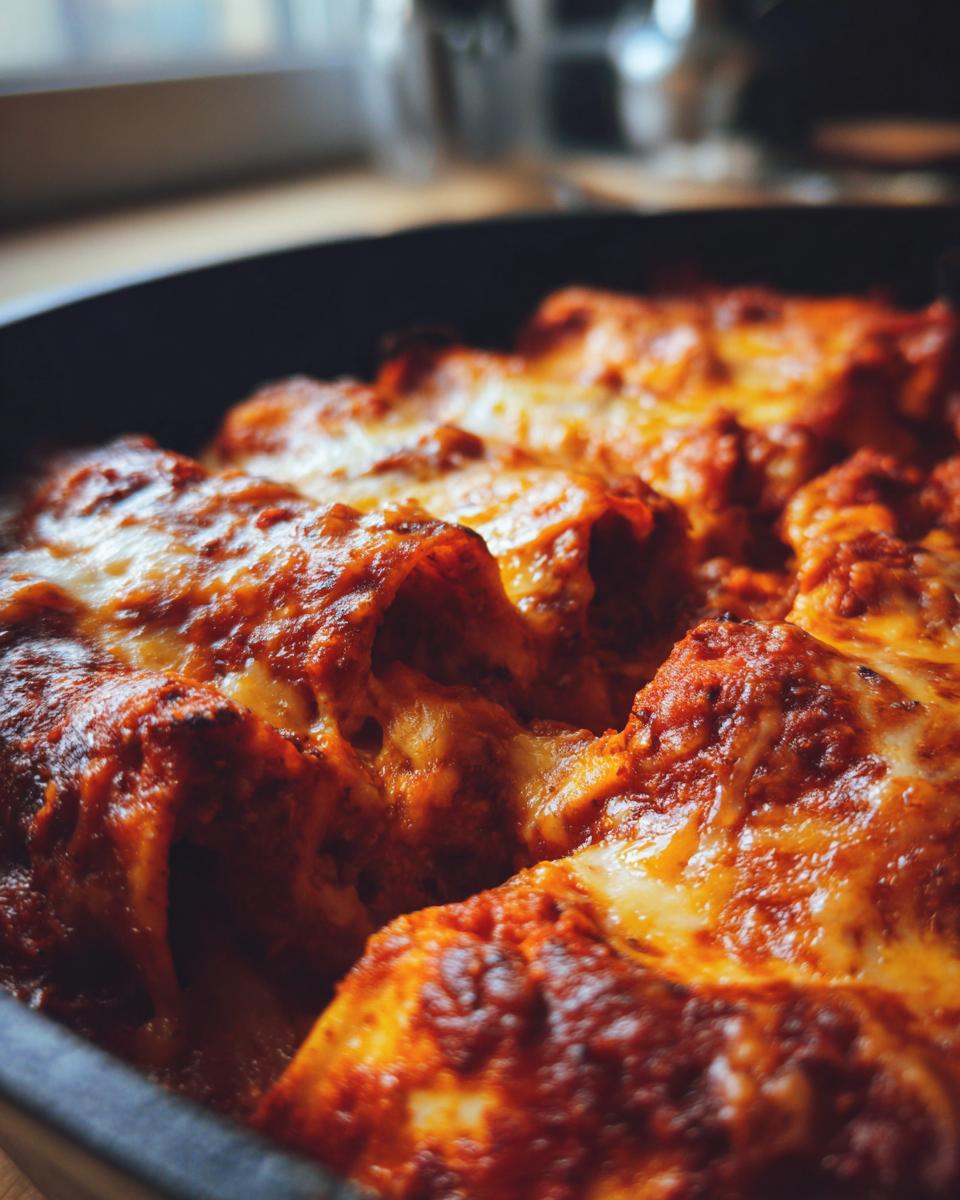
- They land squarely in the **Comfort Food Dinners** category—pure, saucy joy.
- Total hands-on time is minimal, clocking in under 30 minutes before they hit the oven.
Ingredients for Classic Cheese Enchiladas
Okay, listen up. The secret to making these taste like they came from your favorite spot downtown isn’t some crazy heirloom ingredient; it’s good quality basics handled correctly. You notice how I separated the sauce ingredients from the cheese stuff? That’s because we’re making that rich red sauce from scratch in about ten minutes. Don’t cheat yourself on the cheese, either—we need two different types working for us here!
For the Best Cheese Enchilada Sauce
This sauce is where the heavy lifting happens. That deep red color and the aroma that fills your house? That comes from blooming the spices. Trust me, that tiny extra step of toasting your chili powder with the flour makes a massive difference in getting that true **Best Cheese Enchilada Sauce** flavor.
- 1 tablespoon vegetable oil (Nothing fancy catches fire, right?)
- 1/4 cup all-purpose flour (This builds our roux, our flavor base!)
- 2 tablespoons chili powder (Use the good stuff; this is the star!)
- 1 teaspoon ground cumin
- 1/2 teaspoon garlic powder
- 1/4 teaspoon dried oregano
- 1/4 teaspoon salt
- 2 cups chicken broth
- 1 (8 ounce) can tomato sauce
- 1/2 cup water
For the Gooey Cheese Filling and Assembly
This is about texture. We need the wrapper soft enough to roll, and the filling needs to be satisfyingly plentiful. Three cups of cheese might sound like a lot, but remember, this is what makes them **Cheese Enchiladas** and not something else!
- 12 corn tortillas (We’ll warm these up so they don’t crack on us.)
- 3 cups shredded Monterey Jack cheese, or a nice Mexican blend.
- 1 cup shredded Cheddar cheese, for topping (Hello, bubbly golden crust!)
How to Make Restaurant Style Enchiladas: Step-by-Step
This is where we translate professional efficiency into your home kitchen. For these **cheese enchiladas**, speed is crucial because we want everything piping hot and fresh. First things first: get that oven preheated to 375 degrees F (that’s 190 degrees C), and grease up your 9×13 baking dish. Don’t skip the greasing; nobody likes scraping baked cheese off the bottom of a pan!
Creating the Rich Red Sauce Enchiladas Base
Time to build that flavor foundation! Grab a saucepan over medium heat and warm up your vegetable oil. Now, you’re making a quick roux right in the pan. Whisk in your flour until it’s smooth—we cook that for just about one minute. Next, toss in your chili powder, cumin, garlic powder, oregano, and salt. Stir constantly for about 30 seconds until you can practically smell those spices waking up. That’s the blooming part! Slowly, whisk in your chicken broth, the canned tomato sauce, and the water until everything is lump-free. Let this simmer, stirring occasionally, for about 5 to 7 minutes until it coats the back of a spoon lightly. Pull it off the heat; we’re done with sauce construction!
Assembling Your Easy Cheese Enchiladas Recipe
This is the fun part of making **homemade enchiladas**. Before you touch any cheese, you have to make your tortillas soft, or they will tear—that’s kitchen slang 101! Warm them quickly in a dry skillet or microwave. Now, here’s the pro move: dip each warm tortilla briefly into the red sauce until it’s coated. Don’t soak it, just a quick swim. Lay it flat, spoon about a third of a cup of that Monterey Jack cheese down the center, and roll it up tight. Place it seam-side down in your prepared dish. Repeat until all twelve babies are tucked in. Seriously, if your tortillas keep cracking, try frying them in hot oil for 10 seconds per side before dipping; it works miracles! If you are perfecting your chili game for next time, make sure you check out my tips for the best easy chili here.
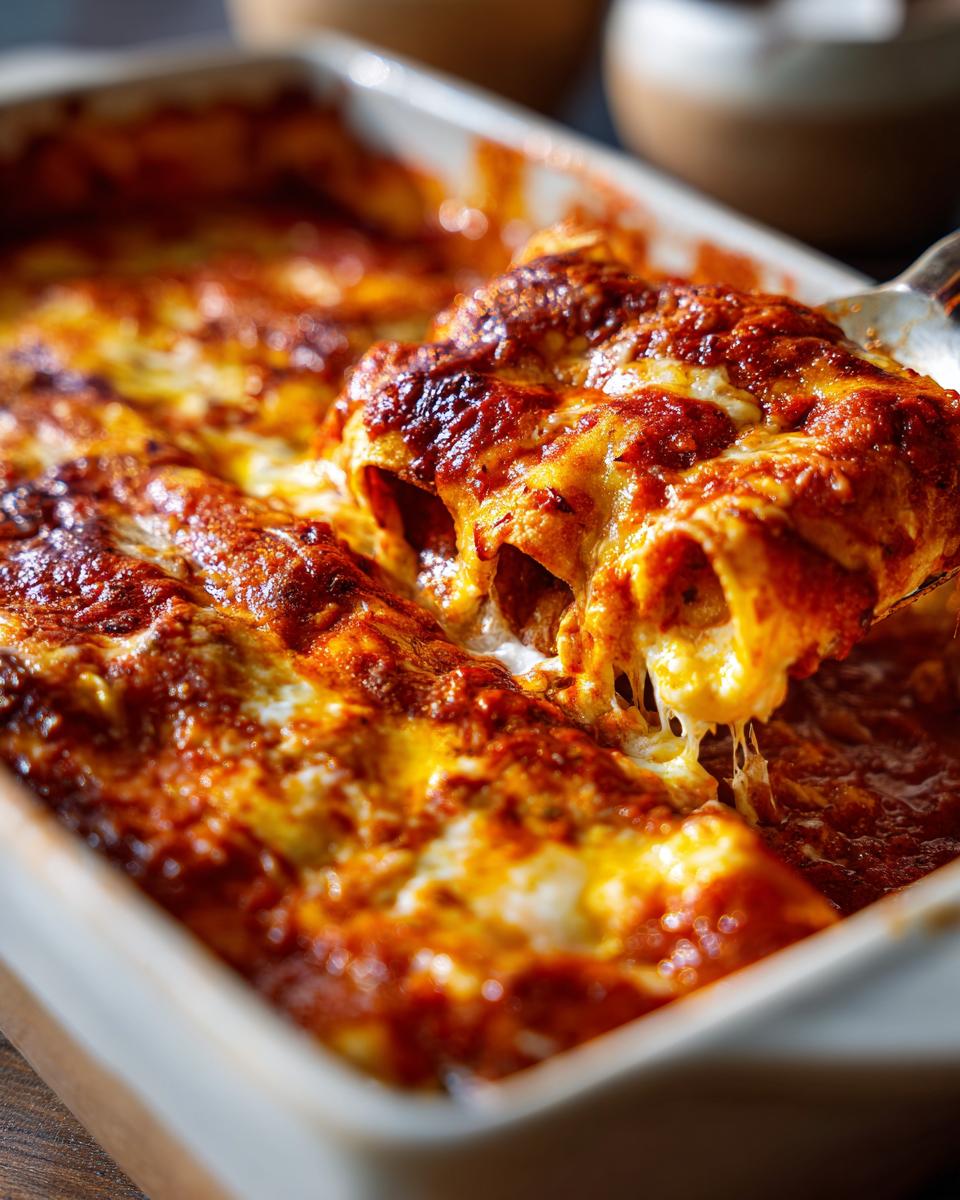
Baking and Finishing the Cheese Enchiladas
Pour any remaining red sauce right over the rolls. Don’t be shy! Then, shower the top with that cup of shredded Cheddar cheese. Pop the dish into the hot oven for 15 to 20 minutes. You are waiting for that sauce to bubble like crazy and the Cheddar to get melted and maybe just a little bit golden. The absolute hardest part? Letting them rest for 5 full minutes when they come out. This lets the cheese settle so you don’t get lava-hot filling sliding all over your plate when you cut into these perfect **cheese enchiladas**.

Expert Tips for Perfect Cheese Enchiladas
If you want these to taste like they came straight off a busy line, you need to speak the lingo. My time in those kitchens taught me that presentation and technique—even for something as simple as **cheese enchiladas**—make the difference between good and great. We’re bypassing the amateur mistakes here, making sure these are consistently amazing, not just sometimes.
First, let’s talk about flavor depth. That chili powder I put in the sauce? It needs attention. Don’t just dump it in; you need to “bloom” it. By cooking it briefly with the flour and oil before adding the liquid, you wake up those dry spice molecules. It brings out a warmth and earthiness that canned sauce just can’t touch. Seriously, this is the step that screams Restaurant Style Enchiladas.
Next up: the tortilla struggle. If you’ve ever had your corn tortilla crack while you’re trying to roll it, you know the pain. The recipe says warm them, right? But here’s the inside track: if they fight you, take them for a quick dip in hot, thin oil—just a flash, maybe 10 seconds per side—then drain them fast on paper towels. That flash-fry seals the edges, making them unbelievably pliable. They come out soft, sturdy, and ready to hold that Gooey Cheese Filling without tearing.
And speaking of cheese? Layering is everything for that perfect melt. We use Monterey Jack inside because it melts beautifully smooth. But we top with Cheddar because it browns a little better and adds that little bit of sharp contrast. Never mix that topping cheese into the filling, or the crust won’t form right. Keep them separate!
If you want to preserve that fresh salsa flavor we love for game days, make sure you read up on proper water bath canning methods. It’s all about control, just like keeping your sauce from getting watery! You can catch my guide on how to handle salsa properly for canning right here.
Variations on Your Simple Enchilada Recipe
Part of learning the lingo is knowing when you can safely riff on a recipe. This base for cheese enchiladas is solid gold, but sometimes you need to jazz things up a bit, right? Don’t worry, you don’t have to toss out the whole game plan. It’s all about minor adjustments that lead to big flavor changes.
If you’re looking to stretch this recipe even further or just add some interesting texture into that **Gooey Cheese Filling**, I have two favorite swaps. First, throw in some canned black beans; just rinse them really well and mash about half of them against the side of your bowl before mixing them with the hot cheese. That gives you body and fiber, turning it into a heartier dish for Family Dinner Ideas.
My other move for texture is adding diced green chiles. I love the mild ones because they give you that classic smoky note without adding any heat—perfect when you just want pure cheese satisfaction. Mix about half a cup of those right in with the Monterey Jack before you start rolling.
Now, if you’re feeling wild and want to move away from the classic red sauce for a bit, you absolutely can pivot to a white sauce. People LOVE that flavor profile when they are deep in that Cheesy Mexican Food craving. To do that, you just skip the tomato sauce and chili powder in the sauce base we made earlier. Instead, use more chicken broth and some heavy cream at the end, maybe a dash of pepper jack cheese melted right into the white base while it simmers. It’s a completely different dish, but equally comforting and just as easy. It’s really fun to pair that white sauce version with something tangy, like my favorite Jalapeño Popper Dip on the side!
Serving Suggestions for Family Dinner Ideas
Okay, you’ve got your glorious, cheesy pan of **cheese enchiladas** fresh out of the oven. They are rich, they are saucy, and they are probably screaming, “Eat me now!” But a true Tex-Mex spread is all about balance, right? You cannot survive on pure, molten cheese alone—well, you probably could, but your stomach might regret it later!
Since these are such a comforting, heavy centerpiece, we want sides that are quick, bright, or soak up that extra red sauce beautifully. This is where we turn a simple dinner into a great **Family Dinner Idea** without adding a ton of extra cooking time. Remember, we’re keeping it easy!
My go-to is always refried beans, but honestly, sometimes I don’t have the energy for that simmer. If you’re short on time, keep a can of quality black beans on hand. Just heat them up on the stove with a tiny splash of water and a pinch of dried cumin—that’s it. It gives you that classic pairing and tastes way better than just heating them plain.
For something fresh, you need some crunch to cut through that richness. Instead of a giant salad, I just chop up some crisp romaine lettuce, dice a tomato, and hit it with a quick squeeze of lime juice and a sprinkle of salt. That bright acidity is the palate cleanser you absolutely need between those cheesy bites. It pulls everything together.
And of course, we have to talk about the green gold: guacamole. If you’re making these, you absolutely need some creamy, cool dipping action happening on the side. If you want the absolute best, most foolproof method for crushing those avocados into creamy perfection, you need to check out my guide on making homemade guacamole. It’s designed to be fast, so you’re not stuck fiddling with avocados when those **cheese enchiladas** are begging to be eaten!
Storage and Make Ahead Enchiladas Instructions
This is the beautiful part of mastering **Classic Comfort Food**: you can plan ahead! Look, we all love eating these right out of the oven when the cheese is perfectly bubbly, but sometimes life gets noisy. These **cheese enchiladas** are fantastic for meal prepping, both baked and unbaked. The key is keeping that wonderful sauce and cheese filling insulated from freezer burn or dryness.
If you’re making these for a party later in the week, our chef trick is to assemble everything completely—sauce poured, topping cheese sprinkled—but skip the oven. Cover that 9×13 dish tightly with a couple of layers of plastic wrap, then wrap that whole thing in foil. You can stick that right into the fridge for up to 24 hours. When you’re ready to bake, just pull off the plastic wrap, keep the foil on for the first 10 minutes to heat through evenly, then take it off so the cheese can brown up nicely. It works like a charm.
Now, freezing is even better if you’re batch cooking! You can freeze these tightly covered (foil is non-negotiable here) for up to three months. When you’re ready to eat them, thaw them overnight in the fridge first. Then, you have two reheat options. Honestly, the oven is always my first recommendation for leftovers or thawed dishes. Baking at 350 degrees F, covered, until hot all the way through (about 20 minutes) keeps that sauce from exploding and drying out the edges.
If you’re in a real pinch, the microwave works, but you have to be careful. Only reheat one or two at a time, placing them on a microwave-safe plate and covering them loosely with a paper towel so the sauce doesn’t splatter across your kitchen. It gets hot fast, but sometimes the center cheese can stay cold while the edges get chewy. That’s why I always recommend the slow reheat in the oven if you have the time!
If you’ve got some leftover enchilada sauce that you don’t want to bake into more tortillas, you can do so much with it! It makes an amazing base for soup later on. Check out my recipe for Crockpot Chicken Enchilada Soup—it uses the leftover flavors and flips the whole dish into something completely new. It’s all about using what you’ve created!
Frequently Asked Questions About Cheese Enchiladas
Sometimes people have little sticking points when they try a new Mexican Food recipe, and that’s totally normal! I learned early on that the little details—like which cheese blend works best or how to keep the sauce sturdy—are the things that make the difference between a decent dinner and one you dream about. So, let’s clear up the last few things before you dive into making these Easy Cheese Enchiladas Recipe.
Can I use flour tortillas for these Homemade Enchiladas?
That is a million-dollar question for Homemade Enchiladas! Yes, you absolutely *can* use flour tortillas, and they will give you a softer, more pliable roll—kind of like a burrito wrapper. However, traditionally, especially when you are making a classic red sauce like this one, corn tortillas are the standard. Corn tortillas hold their shape better against the moisture of the sauce once they bake up in the oven. If you use flour, just remember that they are more likely to get *really* soft, so make sure you bake them long enough to get some structure back!
Why is my Cheese Enchilada Sauce thin?
If your sauce is thin, it means the roux didn’t get a chance to do its job, or you didn’t simmer it long enough! Remember how we whisked the flour into the oil first? That’s called making a roux, and it’s what thickens everything up. It acts like edible glue for liquids. If after whisking in your broth and tomato sauce, it still pours like water, you need to bring it to a gentle simmer and just let it bubble lightly for that full five to seven minutes. Stirring constantly helps it thicken evenly, binding the liquid together. If by some chance it is *still* too thin after simmering, don’t panic! Just mix a teaspoon of cornstarch with a teaspoon of cold water (make a slurry!) and quickly whisk that into your simmering sauce. It will thicken up almost immediately. See? Easy fix!
For other easy fix recipes that deal with texture and thickening without much fuss, you should absolutely check out how I make my 3-Ingredient Stovetop Mac and Cheese. It uses liquid science for major creaminess!
Nutritional Snapshot for This Tex Mex Favorite
Look, when you’re making something this satisfying, you know it’s not going to taste like a sad salad, and that’s okay! Food is meant to be enjoyed, and these **cheese enchiladas** are pure comfort. I always run the numbers just so we know what we’re working with, but take these figures as a general guideline.
These estimates are based on using the proportions listed in the recipe, assuming 6 servings (so 2 enchiladas each). Since we are relying on good fats from the cheese and homemade sauce, the numbers look exactly like the delicious, decadent **Tex Mex Favorite** they are!
- Serving Size: 2 enchiladas
- Calories: Around 410
- Fat: About 24g (A good chunk of that is the glorious cheese we used!)
- Carbohydrates: Roughly 32g
- Protein: A healthy 18g coming mostly from that cheese filling.
Remember, this is a general snapshot. If you double up on the cheese filling or swap out the broth for something richer, those numbers will shift! But for a hearty, cheesy dish that satisfies that deep craving, I think 410 calories gets you a massive win!
PrintRestaurant-Style Red Cheese Enchiladas
Make classic, restaurant-style red cheese enchiladas at home. This recipe focuses on a quick assembly and a rich, cheesy filling, perfect for a satisfying weeknight dinner.
- Prep Time: 15 min
- Cook Time: 20 min
- Total Time: 35 min
- Yield: 6 servings 1x
- Category: Dinner
- Method: Baking
- Cuisine: Tex-Mex
- Diet: Vegetarian
Ingredients
- 12 corn tortillas
- 3 cups shredded Monterey Jack cheese (or a Mexican blend)
- 1 tablespoon vegetable oil
- 1/4 cup all-purpose flour
- 2 tablespoons chili powder
- 1 teaspoon ground cumin
- 1/2 teaspoon garlic powder
- 1/4 teaspoon dried oregano
- 1/4 teaspoon salt
- 2 cups chicken broth
- 1 (8 ounce) can tomato sauce
- 1/2 cup water
- 1 cup shredded Cheddar cheese, for topping
Instructions
- Preheat your oven to 375 degrees F (190 degrees C). Lightly grease a 9×13 inch baking dish.
- Warm the tortillas briefly in a dry skillet or microwave to make them pliable. This prevents tearing when rolling.
- Make the red sauce: Heat the vegetable oil in a medium saucepan over medium heat. Whisk in the flour and cook for one minute, stirring constantly.
- Add the chili powder, cumin, garlic powder, oregano, and salt. Stir for 30 seconds until fragrant.
- Slowly whisk in the chicken broth, tomato sauce, and water until smooth. Bring the sauce to a simmer, stirring occasionally, until it thickens slightly, about 5 to 7 minutes. Remove from heat.
- Assemble the enchiladas: Dip each warm tortilla briefly into the red sauce to coat lightly. Place about 1/3 cup of the Monterey Jack cheese down the center of the tortilla. Roll it up tightly and place it seam-side down in the prepared baking dish. Repeat with the remaining tortillas and cheese.
- Pour the remaining red sauce evenly over the rolled tortillas.
- Top the enchiladas with the shredded Cheddar cheese.
- Bake for 15 to 20 minutes, or until the sauce is bubbly and the cheese topping is melted and lightly golden.
- Let the cheese enchiladas rest for 5 minutes before serving. Serve with your favorite toppings.
Notes
- For the best flavor, use good quality chili powder. This is key to the restaurant-style taste.
- If you want truly soft tortillas that do not crack, you can briefly fry them in hot oil for about 10 seconds per side before dipping them in the sauce. Drain them on paper towels before filling.
- This recipe is easy to scale up for a larger crowd or for making ahead. Cover and refrigerate unbaked enchiladas for up to 24 hours before baking.
Nutrition
- Serving Size: 2 enchiladas
- Calories: 410
- Sugar: 5
- Sodium: 650
- Fat: 24
- Saturated Fat: 14
- Unsaturated Fat: 10
- Trans Fat: 0.5
- Carbohydrates: 32
- Fiber: 3
- Protein: 18
- Cholesterol: 55