

Okay, let’s talk candy. Because honestly? Making your own beats anything you bag from the store, hands down. I’m talking about pure, cloud-like softness that dissolves perfectly on your tongue. We’re diving into homemade marshmallows today, and I promise you, this isn’t one of those fussy, impossible candy projects. I learned the secrets to making professional techniques work on a regular home counter while I was bouncing between my family kitchen and that chaotic bistro downtown. So, my goal here is translating that chef lingo into something truly simple. This recipe is straightforward and delivers the fluffiest, best homemade marshmallows you’ve ever bitten into. If you’re looking for simpler things, check out my guide to easy weeknight dinners, but for now, trust me on this one; it’s worth the five minutes of standing next to the mixer.
- Why This is the Best homemade marshmallows recipe (Kitchen Slang Translation)
- Gathering Your Ingredients for Fluffy homemade marshmallows
- How to Prepare homemade marshmallows from Scratch: A Step-by-Step Tutorial
- Using Your Amazing homemade marshmallows in Classic Ways
- Storage and Making Ahead Tips for homemade marshmallows
- Troubleshooting Common homemade marshmallows Issues
- Frequently Asked Questions about how to make marshmallows from scratch
- Estimated Nutrition for DIY vanilla marshmallows
- Share Your Homemade Marshmallows Creations
Why This is the Best homemade marshmallows recipe (Kitchen Slang Translation)
Look, making candy sounds scary, right? That’s the chef lingo talking. But this easy marshmallow recipe is totally different. We’re using a stand mixer, which is basically doing all the hard work for you while you watch. The trick isn’t needing fancy equipment; it’s understanding how the simple science works—hot syrup meeting the bloomed gelatin. That interaction is what locks in the airy structure. Once you nail the temperature, the machine handles the rest to give you the ultimate pillowy texture that store-bought brands just can’t mimic. You can read more about my background translating these techniques over on my About page.
Achieving Pillowy homemade marshmallows Every Time
The absolute non-negotiables here are the gelatin bloom and the syrup heat. If you short the gelatin ten minutes soaking time, your fluff will be weak. Seriously, just let it sit! Then, we need that 240 degrees Fahrenheit for the syrup. That temperature ensures the sugar mixture is stable enough to whip into those incredible soft cloud marshmallows. Don’t overmix, don’t undermix—the mixer tells you when it’s done because it gets ridiculously thick and shiny. That’s your sign!
Gathering Your Ingredients for Fluffy homemade marshmallows
Okay, gather your gear. When we’re making homemade marshmallows, we need precise measurements, especially when we’re dealing with sugar and gelatin. You’ll want to use a 9×13 inch pan, and you must prepare it correctly. Lightly grease it first, then line it with parchment paper, making sure you leave a good overhang on the sides. That overhang is your handle to lift the whole slab out later—trust me, you’ll thank me for that trick. You can find a whole bunch of other sweet recipes here, but let’s focus on this fluff!
The main players are simple: gelatin, sugar, light corn syrup, water, salt, and vanilla. That’s the base for these amazing DIY vanilla marshmallows. You can find all the exact amounts in the recipe card right here, but I want to talk about the quality of what goes in. If you want to level up to true gourmet marshmallows, you absolutely have to use real vanilla bean. We’ll talk more about that swap in a minute, but start prepping your ingredients now.
Ingredient Notes and Gourmet homemade marshmallows Substitutions
For the ultimate flavor? Skip the extract just once and scrape one vanilla bean pod right into your heating syrup. Strain out the pod, but keep all those gorgeous seeds in there. That’s how we make real vanilla bean marshmallows. Also, listen up about the coating: the cornstarch and powdered sugar mix isn’t just for looks. It’s the non-stick army! You need to whisk those two together really well so the final sticky-cut marshmallows don’t just fuse back together on the counter. It’s essential for clean cuts.
How to Prepare homemade marshmallows from Scratch: A Step-by-Step Tutorial
Alright, this is where the real fun starts in this fluffy marshmallows tutorial. It looks like a recipe, but it’s really a controlled chemistry experiment—except delicious! We need to get our base ready first. Remember that gelatin mixture we let bloom? Turn your stand mixer on low, and here is the crucial safety moment: slowly drizzle that scorching hot syrup down the side of the bowl. Do NOT dump it on the whisk or you’ll paint your ceiling! You’re explaining to the gelatin, “Hey, get ready for action!” You can read up more on general homemade candy making to feel more confident.
Then, you walk away for about 12 to 15 minutes while the magic happens on high speed. Seriously, don’t touch it until it looks like thick, stiff, brilliant white clouds. That’s the benchmark for great homemade marshmallows. Once it hits that stage, quickly fold in your vanilla, and then you’re moving fast to get it into the pan.

The Syrup Cook: Hitting the Soft-Ball Stage for perfect homemade marshmallows
The syrup cooking is zero guess-work here, language understood? You need a candy thermometer attached for this part. That sugar, corn syrup, and water mix has to reach exactly 240 degrees Fahrenheit—that’s the soft-ball stage. If it’s 238°F, it might weep later. If it’s 245°F, you’re making hard candy! So, watch that thermometer like a hawk. Once you hit 240°F, pull it off the heat right away. That precise temperature is what ensures stability in your homemade marshmallows.
Whipping and Setting Your Pillowy homemade treats
When you transfer that hot syrup into the gelatin and ramp the mixer up to high, you’re incorporating all that air that makes these so light—that’s the pillow part! Beat it until it stops looking gooey and starts holding stiff, dramatic peaks. That 12-to-15-minute window is key to those perfect pillowy homemade treats. When it’s done, it’s incredibly thick, so scrape it quickly and evenly into your prepared pan. Don’t spend too much time smoothing; it will spread a bit on its own. Dust the top liberally with your sugar/cornstarch mix, and then leave it completely alone for at least four hours, but overnight is always better. Patience is the final secret ingredient!

Using Your Amazing homemade marshmallows in Classic Ways
So, you’ve made the fluff! Now what? Honestly, these aren’t just for looks; they are meant to be used. Throwing one of these beauties into a mug of hot cocoa changes the whole game. Store-bought ones just float there and dissolve slowly, but our homemade marshmallows actually melt into the drink with a rich creaminess. It’s an upgrade you barely have to work for! You can learn how to make the perfect cozy cup by checking out my tips for creamy hot chocolate right here.
And if you’re taking them camping or making indoor s’mores, prepare for a totally different experience. They toast faster and melt deeper than those chalky supermarket versions.
Elevating S’mores with gourmet marshmallows
When you’re building a s’more, the marshmallow needs to be the star, not an afterthought. Because our version has better structure and richer flavor, it melts perfectly around the chocolate. Forget the crispy shell—you get total gooey goodness. If you want to check out another great simple recipe idea, you can see what my friends over at Two Sugar Bugs are doing with their treats!
These aren’t just marshmallows; they are the key gourmet s’mores ingredients you’ve been missing. Trust me on this one; your campfire game will never be the same after using these marshmallows for hot chocolate.
Storage and Making Ahead Tips for homemade marshmallows
The best part about making these homemade marshmallows? They are awesome for making ahead! Seriously, they are better the next day, which is huge when you’re planning a party or holiday baking spree. You want them to set up completely—at least four hours, but overnight is ideal. Once they’re cut, you need to keep them cozy. Toss them into a large zip-top bag or a good airtight container at room temperature. Keep them away from humidity, please! Don’t even think about sticking them in the fridge; that moisture turns them into a sticky mess fast. If you’re into making things ahead, check out my guide on how I handle Christmas jam!
Troubleshooting Common homemade marshmallows Issues
Even with the best instructions, sometimes things go sideways when you’re making homemade marshmallows. Don’t panic! This is just part of learning the lingo of homemade candy making. If your mixture seems too sticky when you pour it into the pan? Nine times out of ten, it just needed a minute or two more whipping time on high. Humidity can also give you trouble, so try to work on a dry day if you can.
If your sugar completely crystallized while cooking? That happens if you stirred the mixture even once after it started boiling. Remember, once it’s boiling, hands off! If the texture feels tough after cutting, odds are your syrup went way past 240°F. If you run into trouble, feel free to reach out to me on the contact page—we can troubleshoot together!
Frequently Asked Questions about how to make marshmallows from scratch
I figured we’d tackle a few lingering questions here because mastering how to make marshmallows from scratch involves a few specifics. People always ask me about the texture versus the time commitment for these truly best homemade marshmallows. It’s not hard, but you have to respect the process, especially the beating time.
Can I make homemade marshmallows without corn syrup?
That’s the big question, right? For this specific ultra-fluffy texture, corn syrup is our stabilizing friend. It keeps the sugar from crystallizing, which is key to that smooth melt. If you are trying to avoid it, yes, you absolutely can make no corn syrup marshmallows, but you’ll usually swap it for honey or agave, and that shifts the flavor and the final structure. It requires a slightly different approach to homemade candy making, so maybe save that for batch number two once you master this classic recipe!
Does it matter what kind of gelatin I use?
For this recipe, unflavored, standard powdered gelatin is perfect—the stuff you find right next to the pudding mix. You don’t need fancy collagen peptides or specialty brands for this baseline recipe. Just make sure it’s fresh! Old gelatin loses its ability to “bloom” properly, and if it doesn’t bloom, it won’t soak up the hot syrup right, meaning your soft cloud marshmallows won’t set right. Stick to the basic box, but make sure that box isn’t ancient!
Is 12 minutes of whipping time really necessary?
Yes! This is where the “fluffy” happens, so don’t rush it. You need high speed for that long to incorporate enough air and cool the mixture down enough so it holds its shape in the pan. If you stop at 8 minutes, you’ll end up with a sticky mess that flows everywhere and won’t cut cleanly. Trust the mixer; it’s doing the work you used to have to do by hand for hours—that’s the beauty of applying professional technique simply. Check out some more easy marshmallow recipes for timing tips here.
What is the texture best described as?
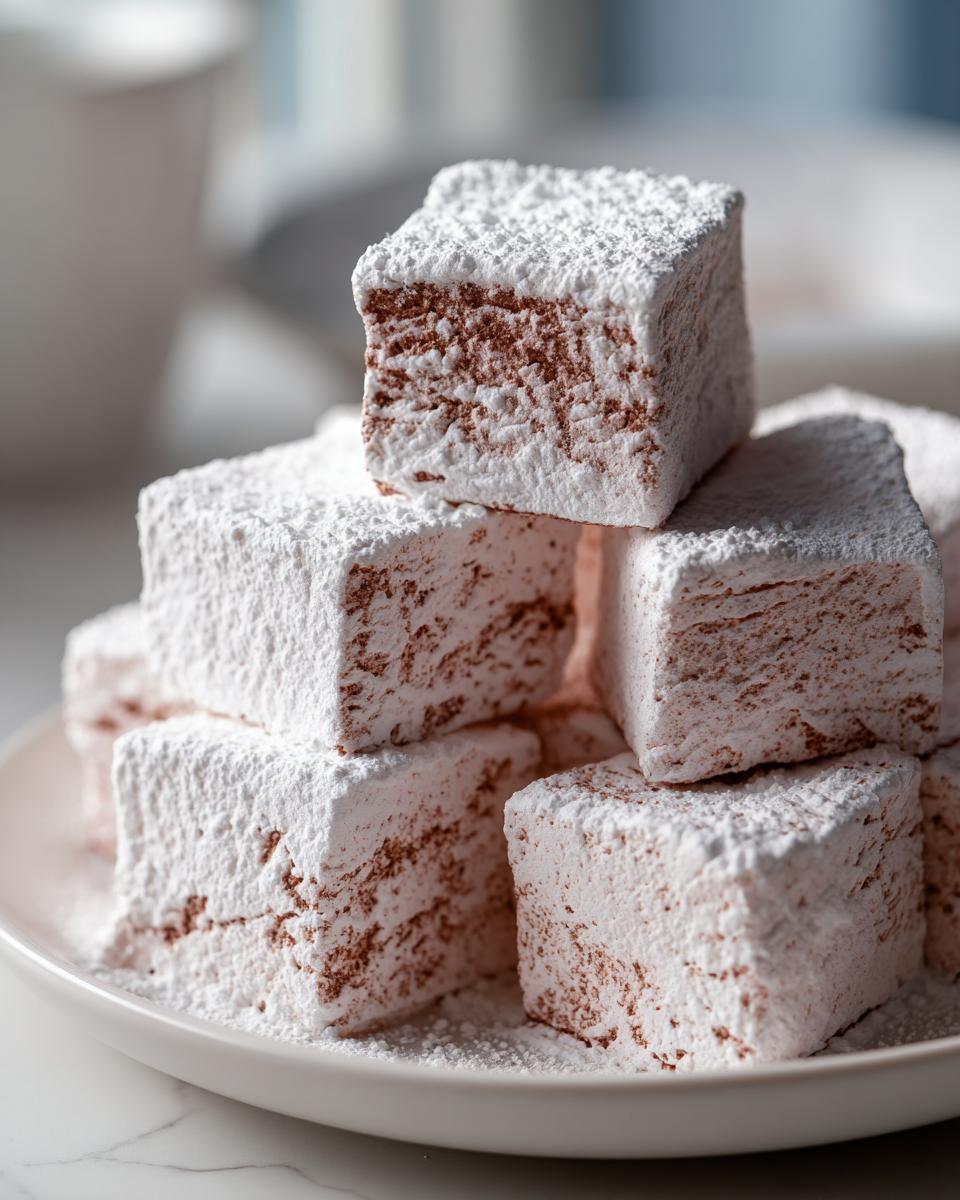
I always go back to the word ‘pillowy.’ They are lighter than commercial ones but denser than traditional fluff. They have a structure that stands up to heat, making them amazing for s’mores, but they are soft enough that they just melt when you bite into them. They truly are the definition of pillowy homemade treats.

Estimated Nutrition for DIY vanilla marshmallows
Alright, let’s talk numbers for these DIY vanilla marshmallows. I always warn people that since this is homemade candy making, everything depends on how big you cut the pieces and how much of that dusting powder you actually shake off. So, consider these figures estimates based on the yield listed in the recipe card above. This is standard Kitchen Slang disclaimer territory!
Based on the ingredients for about 40 large squares, here’s the rough breakdown:
- Serving Size: 4 squares
- Calories: 150
- Sugar: 35g
- Sodium: 5mg
- Fat: 0g
- Protein: 2g
Because we are working with sugar and corn syrup, the sugar content is naturally up there, but you’re getting that quality you just don’t find in the factory stuff. Remember, these are estimates, so if you’re worried about macros or planning a big bake sale, you might want to weigh your final product exactly. But for everyday enjoyment of your homemade marshmallows, this gives you the general idea.
Share Your Homemade Marshmallows Creations
Whew! You did it. You took on the fancy world of confectionery, and you conquered it. Now that you have these beautiful, soft homemade marshmallows, I want to see them! Seriously, I love when you guys take these recipes and make them your own.
Snap a picture of those pillowy squares—are they going into hot cocoa? Are they toasted to golden perfection in a s’more? Tag me! Connecting over food is the whole point of Kitchen Slang. We share the lingo, and we share the wins.
And hey, if you loved how easy this process was, please hop back up and give the recipe a quick star rating. That feedback helps other home cooks feel confident jumping into homemade candy making. If you have any lingering privacy questions about the site, you can always check out our Privacy Policy, but otherwise, go share those fluffy beauties!
PrintEasy Homemade Vanilla Marshmallows: Soft and Fluffy Treats
Make soft, pillowy homemade marshmallows from scratch. This straightforward recipe beats store-bought versions and is perfect for hot chocolate or s’mores.
- Prep Time: 20 min
- Cook Time: 10 min
- Total Time: 4 hr 30 min
- Yield: About 40 large marshmallows 1x
- Category: Candy
- Method: Mixing/Setting
- Cuisine: American
- Diet: Vegetarian
Ingredients
- 3 tablespoons unflavored gelatin powder
- 1/2 cup cold water (for blooming gelatin)
- 1 1/2 cups granulated sugar
- 1 cup light corn syrup
- 1/2 cup water (for syrup)
- 1/4 teaspoon salt
- 1 tablespoon pure vanilla extract
- 1/2 cup powdered sugar (for dusting)
- 1/2 cup cornstarch (for dusting)
Instructions
- Lightly grease a 9×13 inch baking pan. Line the pan with parchment paper, leaving an overhang on the sides for easy removal. In the bowl of a stand mixer, sprinkle the gelatin over 1/2 cup of cold water. Let this mixture sit for 10 minutes to bloom.
- While the gelatin blooms, combine the granulated sugar, corn syrup, 1/2 cup water, and salt in a medium saucepan. Stir over medium heat until the sugar dissolves. Stop stirring once it boils.
- Attach a candy thermometer to the side of the saucepan. Cook the syrup, without stirring, until it reaches 240 degrees Fahrenheit (soft-ball stage). This takes about 8 to 10 minutes.
- Once the syrup reaches 240°F, remove it from the heat immediately. Turn the stand mixer on low speed and slowly and carefully pour the hot syrup down the side of the bowl into the bloomed gelatin. Avoid pouring directly onto the whisk attachment.
- Increase the mixer speed to high. Beat the mixture for 12 to 15 minutes. The mixture will become very thick, white, glossy, and hold stiff peaks. Stop the mixer and mix in the vanilla extract during the last minute of beating.
- Prepare your dusting mixture by whisking together the powdered sugar and cornstarch in a small bowl.
- Working quickly, use a rubber spatula to scrape the marshmallow mixture into the prepared pan. Lightly dust the top with some of the powdered sugar mixture. Use oiled hands or an oiled offset spatula to gently spread the mixture evenly into the pan. Dust the top again.
- Let the marshmallows set, uncovered, at room temperature for at least 4 hours, or preferably overnight.
- Once set, use the parchment overhang to lift the marshmallow slab out of the pan onto a cutting board dusted with more of the sugar/cornstarch mix.
- Use a sharp, oiled knife or a pizza cutter to cut the slab into desired squares. Toss the cut sides of the marshmallows in the remaining dusting mixture to prevent sticking. Store in an airtight container.
Notes
- To make these gourmet marshmallows even better, substitute the vanilla extract with 1 vanilla bean, scraped. Add the seeds and pod to the hot syrup mixture, remove the pod before pouring, and add the seeds with the extract at the end.
- If you do not have a stand mixer, you can use a very powerful hand mixer, but be prepared for arm fatigue as the mixture thickens.
- For easy cutting, lightly spray your knife with cooking spray before slicing the set marshmallow slab.
Nutrition
- Serving Size: 4 squares
- Calories: 150
- Sugar: 35g
- Sodium: 5mg
- Fat: 0g
- Saturated Fat: 0g
- Unsaturated Fat: 0g
- Trans Fat: 0g
- Carbohydrates: 38g
- Fiber: 0g
- Protein: 2g
- Cholesterol: 0mg