

You know that moment when you bite into a pickle from the jar and it’s just… sad? Soggy, weak, and tasting suspiciously of factory brine? Yeah, I hate that. That’s why in the Kitchen Slang world, we don’t mess around with limp cucumbers. I learned in the chaos of a downtown bistro kitchen that great flavor doesn’t need a day of fussy canning. It just needs method. This recipe cuts out all the unnecessary boiling and water baths. We’re talking about the absolute best, seriously crispy refrigerator pickles that pack that perfect garlic dill punch, and you can eat them tomorrow. Trust me, translating that pro technique into something this easy is my specialty.
- Why This is the Best Quick & Crispy Garlic Dill Refrigerator Pickles Recipe
- Ingredients for Perfect Refrigerator Pickles
- How to Make Simple Cucumber Pickling Brine for Refrigerator Pickles
- Assembling Your Garlic Dill Refrigerator Pickles Jars
- The Crucial Chilling Time for Tangy Refrigerator Cucumbers
- Tips for Success with Homemade Dill Refrigerator Pickles
- Storage and Shelf Life for Your Refrigerator Pickles
- Serving Suggestions for These Quick Snack Recipes
- Frequently Asked Questions About Refrigerator Pickles
Why This is the Best Quick & Crispy Garlic Dill Refrigerator Pickles Recipe
If you want the snappy crunch of a deli pickle without the commitment of traditional canning, this is your blueprint. We bypass the complicated steps while keeping all the awesome flavor. It’s what I call a true Quick Pickling Recipe because the results are so immediate.
- They deliver maximum crunch—we prioritize texture above everything else here.
- The brine is incredibly simple, using just four pantry staples.
- You get rich, savory flavor that beats anything at the grocery store. I highly recommend checking out my tips for crispy fried pickles if you love that addictive dill crunch!
Flavor Profile: Tangy Garlic Dill Perfection
This is built around the ultimate flavor combination: Garlic Dill. It’s that assertive, tangy, unmistakable taste you want on every burger. We use tons of smashed garlic and fresh dill heads so you get that bright, herby punch in every single bite. It’s robust without being overwhelmingly sour.
The 24 Hour Pickles Promise (No Canning Required)
Seriously, no canning. That means no huge pots of boiling water, no special equipment—just a saucepan for the brine, a couple of jars, and your fridge. This is the ultimate Beginner Pickles Recipe because the safety factor is already handled by the cold storage. You want pickles today? You’ll have perfectly flavored, tangy refrigerator cucumbers ready by tomorrow. That’s the magic of no canning pickles!
Ingredients for Perfect Refrigerator Pickles
When you’re making no canning pickles, the quality of your starting ingredients is everything. Don’t skimp here! For this recipe, you’ll need two pounds of super firm pickling cucumbers—think Kirby or Persian varieties. Those little bumps mean crunch, which is non-negotiable.
For the brine, we stick to basics: water, vinegar, salt, and a touch of sugar. Always try to grab pickling salt if you can find it. Table salt has additives that sometimes make the brine look cloudy later, and we want clear, vibrant juice for our flavor infusion. If you like playing around with heat, check out my trick for candied jalapenos!
Cucumber Selection and Preparation for Crispy Refrigerator Pickles
Listen, this is where most people mess up their quest for crispy refrigerator pickles. You need to trim off both ends, but I want you to pay special attention to the stem end, sometimes called the blossom end. That little spot has enzymes that actively break down pectin, making your cucumbers soft.
Snip off about 1/8th of an inch from that end before you slice them up. It’s a tiny step, but it’s the difference between a satisfying snap and a sad mush later on. Always use the freshest, firmest cucumbers you can find for this quick method.

How to Make Simple Cucumber Pickling Brine for Refrigerator Pickles
Okay, let’s talk about the heart of the matter: the brine. This is the foundation for our simple cucumber pickling process, and the key here is restraint. You will combine one quart of water with one cup of vinegar—I often use apple cider vinegar because it gives a slightly rounder flavor, but white works too—along with two tablespoons of salt and one tablespoon of sugar.
We’re heating this up in a saucepan, but listen closely: we are NOT bringing this to a rolling boil. We only need gentle heat, just until you can no longer see any granules of salt or sugar floating around. Once everything is dissolved—think silky smooth juice—get it off the heat immediately. Overheating the brine is how you accidentally cook your fresh cucumbers slightly, and we want them crisp!
Assembling Your Garlic Dill Refrigerator Pickles Jars
Now that your cucumbers are sliced and your brine is warm and clear, it’s time to layer up! This is the fun part of making easy refrigerator pickles because it’s so visual. Take your clean, packed-tight jars and start layering in your flavor boosters first. We want these spices right up against the cucumbers so the brine can extract that powerful flavor fast.
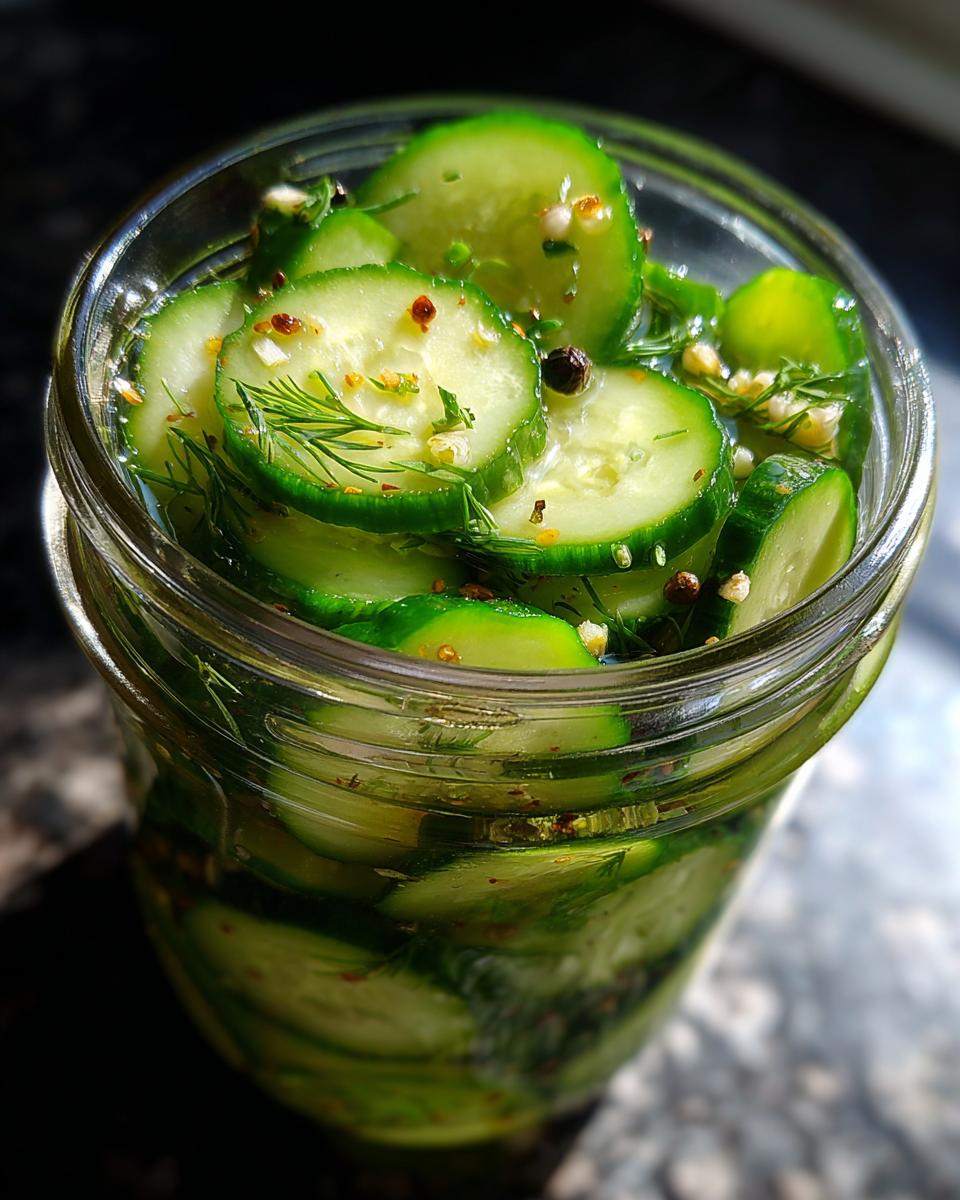
Divide up everything else evenly: those smashed garlic cloves, your fresh dill heads (or seed if you’re using that), and your peppercorns. Then, very slowly and carefully, start pouring that warm brine over the top of everything. Make sure every single cucumber slice is completely covered beneath the liquid line. Give the jars a gentle tap or two on the counter to make sure any tiny air bubbles hiding out decide to escape. If you have a pocket of air at the top, your pickles won’t soak up that brine properly!

Seal those lids fingertight—you don’t need that intense canning seal, just snug—and then we let them cool down before they hit the cold. If you want to check out how I use garlic in other ways, my recipe for garlic parmesan mashed potatoes is pure comfort food!
The Crucial Chilling Time for Tangy Refrigerator Cucumbers
Alright, this next step is where patience really pays off. You’ve done the work, you’ve packed them tight, and you’ve poured that beautiful brine over your garlic dill pickles. Resist the urge to stick them straight into the fridge! We need them to cool down a bit on the counter first, maybe for about an hour. This keeps the temperature change gradual, which helps maintain that delicate crispness we worked so hard for.
Once they’ve cooled, they go into the cold storage. Now, I know marketing loves to call these 24 hour pickles—and guess what? They are technically edible after 24 hours. They’ll be tangy! But if you want that deep, complex flavor that makes people ask where you bought them, you have to push it to 48 hours. Waiting that extra day lets the vinegar and dill fully integrate into the cucumber. If you’re looking for a quick baking companion to your pickles, try my recipe for easy garlic naan bread.
Seriously, let them chill for two full days. It’s the final secret to a truly great quick pickling recipe. You can peek, but don’t touch until then! You can see how fast this method works compared to traditional approaches over at this speedy guide.
Tips for Success with Homemade Dill Refrigerator Pickles
So, you’ve got your jars packed and they’re chilling, waiting to become amazing homemade dill pickles. But what if you want them to be next-level crunchy? I’ve got a couple of little professional secrets tucked away in my files for that extra snap. If you are worried about softness, you can cheat just a little!
For the absolute crispiest results, professional picklers often add a little something extra, like a tiny pinch of pickling crisping agent, which is basically just calcium chloride added to the brine. If you don’t have that, try dropping a clean, washed grape leaf (yes, from a vine!) into each jar. It sounds weird, but tannins in the leaf help stabilize that texture beautifully. Don’t forget to find recipes for zucchini fritters to serve alongside these tasty treats!

Remember, these are supposed to be tangy, but if you’re serving them to someone who loves things a bit sweeter, don’t sweat it. You can easily pivot to make sweet refrigerator pickles next time. Just use the exact same brine formula, but increase that granulated sugar from one tablespoon all the way up to three tablespoons. See? Easy adaptation. For more great no-canning techniques, you can check out the advice shared over at Nurtured Homes.
Making Sweet Refrigerator Pickles Variations
If you love the dill and garlic profile but prefer a sweeter journey, making the adjustment is dead simple. Just bump up the sugar content in the brine recipe before you heat it. I’d recommend going from one tablespoon to three tablespoons total. That little boost of molasses-like flavor from the sugar balances out the vinegar perfectly, giving you those delightful, slightly sweet, yet tangy refrigerator cucumbers. It’s the best way to customize these quick pickles without changing the prep time at all.
Storage and Shelf Life for Your Refrigerator Pickles
Okay, this is my least favorite part of any quick pickling recipe because it means the waiting period is over, and you have to stop eating them! Since we skipped the canning process and relied on that cold environment to slow things down, these are officially fresh pickles without canning—which means they don’t last forever like shelf-stable varieties.
Here’s the deal: once they’ve cooled down on the counter for that initial hour, they absolutely must go into the fridge. Don’t try to leave them on the counter overnight or anything, even if they are sealed. The cold is doing the heavy lifting in preserving that beautiful crunch and flavor.
If you keep them sealed and consistently cold, you can expect these refrigerator pickles to taste sensational for about three weeks. I try to use them up faster than that, honestly, because the texture tends to change right around the three-week mark. They might get a tiny bit softer than they were on day three, but they’ll still be miles better than anything store-bought. Just keep checking the brine level; if they aren’t submerged, grab a magnet and stick a note on the fridge reminding you to shake the jar gently once a day!
Serving Suggestions for These Quick Snack Recipes
The best part of making your own refrigerator pickles is knowing you have that sharp, vibrant crunch ready whenever you need it. Since they’re so easy to just pull out of the fridge, they fly off the shelves here! My favorite way to eat them is straight out of the jar—they are a fantastic quick snack recipe all on their own, especially when you’re craving something salty and tangy.
But they truly shine as the ultimate topping. Think about piling those garlicky ribbons onto a thick hamburger or slicing them thin for your next grilled cheese. They cut through richness like a champ. If you are making a big batch of comfort food, seriously, these pickles are non-negotiable alongside my easy chili recipe or nestled next to my favorite ham and cheese sliders. They balance everything out perfectly!
Frequently Asked Questions About Refrigerator Pickles
I know when you start a new technique, questions pop up faster than cucumbers in July! Let’s clear up anything holding you back from enjoying these homemade dill pickles right away. Don’t worry, we’re keeping this super simple, just like the approach we use for my beef taco casserole.
How do I keep my refrigerator pickles crunchy?
This is the magic question! First, remember what I said about trimming that blossom end off the cucumber—that’s vital. Second, while you can eat them after 24 hours, waiting the full 48 hours helps them stay snappy because the cold has fully permeated the cucumber structure. And if you’re really serious about that amazing crunch, toss a clean grape leaf into the jar along with your dill. It works wonders!
Can I use regular table salt instead of pickling salt?
You could, technically, but I really, really advise against it. Table salt has anti-caking agents and iodine in it, and those things turn your beautiful, clear brine cloudy. That might not affect flavor much, but it definitely doesn’t look as professional. If pickling salt isn’t in your cabinet, grab kosher salt next. It dissolves well and keeps the brine clearer than standard table salt.
Are these technically ‘Amish Refrigerator Pickles’?
That’s a fair question, since you see that term floating around! Generally, when people say Amish pickles, they mean simple, quick-brine pickles that skip canning, so we overlap there. However, this specific recipe is tailored for that heavy-hitting Garlic Dill flavor profile we love for sandwiches. So yes, they absolutely share the same safe, simple, no canning pickles foundation!
If you want to learn more about how fast these truly are, you can look up tips over at Jada’s Recipes to see how they manage their timing too.
PrintQuick & Crispy Garlic Dill Refrigerator Pickles Ready in 24 Hours (No Canning Required)

Make the best homemade refrigerator pickles with this easy, no-canning recipe. These tangy garlic dill pickles are ready in 24 hours and deliver maximum crunch for your snacks and sandwiches.
- Prep Time: 15 min
- Cook Time: 5 min
- Total Time: 1 hour 20 min (plus 24 hours chilling)
- Yield: 2 quarts 1x
- Category: Side Dish
- Method: Quick Pickling
- Cuisine: American
- Diet: Vegetarian
Ingredients
- 2 pounds pickling cucumbers (Kirby or Persian), ends trimmed
- 1 quart (4 cups) water
- 1 cup white vinegar or apple cider vinegar
- 2 tablespoons pickling salt (or kosher salt)
- 1 tablespoon granulated sugar
- 4 cloves garlic, smashed
- 2 heads fresh dill (or 4 teaspoons dill seed)
- 1 teaspoon black peppercorns
Instructions
- Wash the cucumbers well. Slice them into spears or rounds, about 1/4 inch thick. Pack the sliced cucumbers tightly into two clean quart-sized mason jars, leaving about 1 inch of headspace at the top.
- In a medium saucepan, combine the water, vinegar, salt, and sugar. Heat the mixture over medium heat, stirring until the salt and sugar completely dissolve. Do not boil the brine; just heat until the solids dissolve. Remove from heat.
- Divide the smashed garlic cloves, fresh dill (or dill seed), and peppercorns evenly between the two jars over the cucumbers.
- Carefully pour the warm brine over the cucumbers in each jar, making sure the cucumbers are fully submerged. Tap the jars gently to release any trapped air bubbles.
- Seal the jars with lids and let them cool on the counter for about 1 hour.
- Transfer the jars to the refrigerator. The pickles need at least 24 hours in the cold to fully develop flavor and crispness. For the best results, wait 48 hours before eating.
- Keep these refrigerator pickles stored in the fridge for up to 3 weeks.
Notes
- For extra crispiness, you can add 1/2 teaspoon of pickling crisping agent (like calcium chloride) to the brine, or add a small piece of grape leaf to each jar.
- If you prefer a sweeter pickle, increase the sugar in the brine to 3 tablespoons.
- Use fresh, firm cucumbers. Old or soft cucumbers will not yield crispy refrigerator pickles.
Nutrition
- Serving Size: 4 slices
- Calories: 10
- Sugar: 1
- Sodium: 290
- Fat: 0
- Saturated Fat: 0
- Unsaturated Fat: 0
- Trans Fat: 0
- Carbohydrates: 2
- Fiber: 0
- Protein: 0
- Cholesterol: 0