
You know that exact moment, right? Your brain switches gears and yells, “I need that perfect salty-sweet combination, and I need it now.” Forget walking to the corner store. We’re bypassing the baking drama entirely because I’m handing you the cheat code. This recipe for **peanut butter cups** isn’t just good; it’s the ultimate reeses cups copycat that requires zero turning on the oven. We’re talking unbelievably simple assembly here. I’ve translated the tricky candy-making lingo into steps you can trust. Seriously, if you can soften butter and melt chocolate, you can conquer these **homemade peanut butter cups**.
- Why This Homemade Peanut Butter Cups Recipe Translates to Success
- Gathering Your Ingredients for Perfect Peanut Butter Cups
- The Step-by-Step Method for Homemade Peanut Butter Cups
- Tips for Making the Best Peanut Butter Cups
- Variations on Classic Peanut Butter Cups
- Storage and Keeping Your Homemade Peanut Butter Cups Fresh
- Frequently Asked Questions About Making Peanut Butter Cups
- Serving Suggestions for These Simple Chocolate Treats
- Sharing Your Kitchen Slang Success
Why This Homemade Peanut Butter Cups Recipe Translates to Success
When we talk about achieving results that rival the store-bought versions, we’re focusing on technique, not complexity. This recipe for **peanut butter cups** isn’t just another throw-together; it’s engineered for success using simple inputs. We break down the intimidating parts into clear commands. You get the payoff of amazing homemade candy without needing fancy thermometers or tempering skills. This is translation at its best, giving you confidence in every batch.
- Easy to follow steps that minimize the chance of chocolate seizing or a runny filling.
- Zero oven time means you’re done faster than waiting for delivery.
- It uses ingredients you likely have right now.
The ‘No-Bake’ Advantage for Easy Peanut Butter Cups
Listen, if it’s a quick dessert idea you’re after, ‘no bake’ is the key phrase. We skip the fussy oven timers and the risk of burning your chocolate. This means fewer dishes, less stress, and faster satisfaction. That’s why these are some of the best **easy peanut butter cups** you’ll ever mix up.
Achieving the Perfect Reese’s Cups Copycat Texture
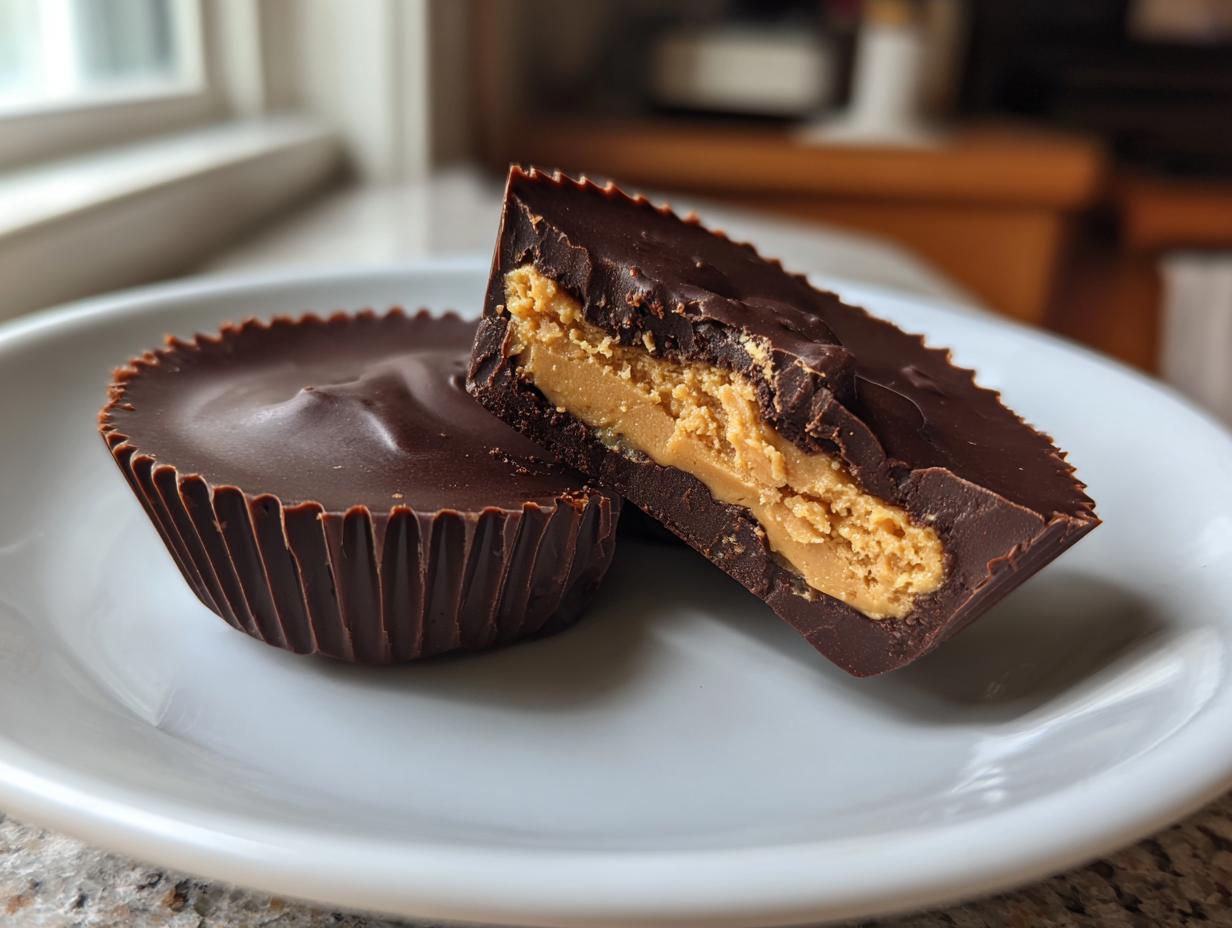
The secret sauce to mimicking that salty, slightly crumbly, yet perfectly smooth interior comes down entirely to the foundation ratio. It’s the right amount of softened butter cut with the right amount of powdered sugar mixed into the peanut butter. This blend creates the density you expect, stopping it from being too oily or too dry. That’s the chef knowledge translated for you—nail that filling mixture, and the rest is just smooth chocolate on top.
Gathering Your Ingredients for Perfect Peanut Butter Cups
Okay, let’s assemble the lineup. Since this is a **no bake peanut butter cups** recipe, the quality of what we start with really matters. We aren’t cooking it, so flavor has nowhere to hide! When I translate ingredients I learned from the pros, I focus on clear expectations. You need a solid foundation for the filling and smooth, melty chocolate for the coating. Don’t overcomplicate it, but do use the right stuff for the best **peanut butter cups** result possible.
- 1 cup creamy peanut butter (Use the standard kind, please! Not the oily, natural stuff that separates—we need stability here.)
- 1/2 cup unsalted butter, softened to that perfect room temperature squish.
- 2 cups powdered sugar, just heaped in there.
- 1 teaspoon vanilla extract (Don’t skip this; it rounds out the peanut flavor beautifully.)
- 12 ounces milk chocolate chips (or semi-sweet, if you like that darker bite.)
- 1 tablespoon coconut oil (This is optional, but trust me, it’s the pro move for silky chocolate.)
Ingredient Notes and Substitution Wisdom
This is where we talk about the texture translation. For the peanut butter—and this is vital if you want that classic, slightly drier *Reese’s Cups copycat* filling—you must use standard, shelf-stable creamy peanut butter. The natural, runny kind will make your whole filling weep. If you use it, you’ll see from my buckeyes recipe advice that you’ll need to add more powdered sugar to compensate, and it rarely ends up the same.
Now, about that chocolate coating: the coconut oil is our little hack. It’s completely optional, but when melted with the chips, it cuts the chocolate just enough so it sets up beautifully smooth and shiny, without that weird grainy texture chocolate sometimes gets when it cools down. It helps achieve those super clean edges essential for great **homemade candy recipes**.
The Step-by-Step Method for Homemade Peanut Butter Cups
Now that we have our ingredients prepped—the butter softened, the sugar ready—we get to the fun part: assembly! You don’t need a fancy dipping fork or a double boiler here. We’re talking about keeping things fast and effective. The process is mostly about layering and chilling, which locks in that classic texture we’re aiming for in these **peanut butter cups**. We rely on a little bit of freezer power, much like how you’d firm up homemade marshmallows before rolling them, to keep everything stable.
Setting the Peanut Butter Filling Base
First things first, grab that 12-cup muffin tin and line it up with the little paper liners. You’ll combine your peanut butter and softened butter in a bowl first—get those smoothly mixed until they look like soft buttercream. Then, slam in the powdered sugar and vanilla and stir it until it gets stiff. You want it firm enough that you can actually handle it. Divide that mixture right into your liners. Use the back of a tiny spoon or your fingers to press it down firmly. We’re building a sturdy base here! Once they are all packed in, pop that whole tin into the freezer for about 15 minutes. This chill time is non-negotiable; it keeps the filling from mixing up with the chocolate later.
Melting the Chocolate Coating for Your Peanut Butter Cups
While your filling is getting frosty, let’s tackle the coating. Put the chocolate chips and that optional tablespoon of coconut oil into a microwave-safe bowl. Here is the crucial pro tip from the line cooks: don’t try to nuke it all at once! Microwave it for 30 seconds, pull it out, stir it—even if it doesn’t look melted much. Then repeat in 20 or 30-second bursts, stirring vigorously after every single burst. This patience prevents scorching and ensures your chocolate stays beautifully smooth for that perfect finish on your **peanut butter cups**.
Assembly and Final Chill Time
Once that filling base is rock solid from the freezer, pull the tray out. Carefully pour the silky melted chocolate right over the peanut butter layer in each liner. Go slow so you don’t disturb the base! Make sure the chocolate covers everything right to the edges. Now, these need time to truly set up properly, so back into the refrigerator they go. Leave them chilled for at least an hour. If you try to rush this final chill, you’ll end up with soft centers and messy wrappers. Once they’re firm, peel off the paper, and boom—you’ve got perfect **no bake peanut butter cups**, no fuss!
Tips for Making the Best Peanut Butter Cups
Alright, so we’ve nailed the basic assembly, but if you’re aiming for that truly professional, “Did you buy these?” level of **peanut butter cups**, you gotta sweat the small stuff. This is what separates a good homemade candy from the absolute best. Think of these little secrets as the behind-the-scenes lingo that makes everything look flawless, like getting those perfectly clean edges or getting a killer salty-sweet pop.
If you check out my companion post on copycat candy recipes, you’ll see a lot of these principles apply across the board. It’s all about controlling temperature and friction!
Here are the things I always preach about to get your **homemade peanut butter cups** looking magazine-ready:
- The Sea Salt Finish: Remember that note about salt? Seriously, don’t skip the optional sprinkle of flaky sea salt on top of the wet chocolate right before it chills. That tiny burst of sharp salt cuts through the incredible sweetness of the filling and the coating. It lifts the entire flavor profile. It’s instantaneous flavor elevation.
- Cleaning Up the Edges: If your chocolate drips slightly over the paper liner edges, don’t panic. Wait until the cups are *nearly* set in the fridge—maybe 45 minutes in—then gently run a small, thin offset spatula or even a butter knife around the top edge of the shell where it meets the liner. It helps release that excess chocolate and gives you a sharp, defined top layer when you peel the paper off later.
- The Temperament Test (For the Chocolate): If your chocolate coating looks dull or breaks weirdly when you bite it, it means it seized up when melting or wasn’t quite right when it cooled. That tiny bit of coconut oil we add acts almost like a stabilizer, giving you that wonderful, snappy texture you crave. If you skipped it, make sure your chocolate wasn’t exposed to even a drop of water—water hates chocolate, and it will turn your smooth coating into grainy sludge immediately.
Trust me on the salt sprinkle; it’s the simplest way to show off your hard work. If you want more inspiration on making candy that impresses, check out what Karli does over at her site—she’s got some great ideas for presentation too!
Variations on Classic Peanut Butter Cups
One of the coolest things about mastering a **peanut butter cups recipe** is that once you understand the structure—stiffened filling, smooth coating—you can start improvising! We aren’t just stuck making copies of the store brand for every batch. We can tailor these **simple chocolate treats** to fit whatever mood or dietary plan we’re on. It’s all about swapping out components while respecting the structure we already built in those muffin tins.
You absolutely should experiment, which is why I always try to give you the translation key, not just the final answer. If you’re thinking about whipping up a batch of **keto peanut butter cups**, you’d focus on swapping the powdered sugar for a granulated keto blend that measures cup-for-cup, but you’ll need to make sure it dissolves completely so it doesn’t leave a gritty texture. That’s the part where the translation gets tricky!
Making Healthy Peanut Butter Cups
If your goal is leaning toward **healthy peanut butter cups**, you have a couple of easy adjustments you can make right away without needing a whole new recipe. The biggest change you can make is in the chocolate coating. Swap out the milk chocolate chips for a really dark chocolate—something 70% cocoa or higher. The higher cocoa content generally means less actual sugar, and I find the slight bitterness pairs perfectly with the sweetness of the filling.
For the filling, you could also play around with the sweetener base if you want to cut back dramatically, though you might need less butter to keep it stiff. If you want to see how others approach this, definitely take a peek at how Mari does her version over at her site; her approach often focuses on whole ingredients, which is fun to explore.
And hey, if you’re into boosting your macros, don’t forget you can sneak protein powder into the filling mixture. It works wonders! I’ve done similar structural testing when making protein ice cream, and the same rules apply: adjust the wet ingredients or fat slightly to maintain that perfect density so your **peanut butter cups** don’t crumble apart.
Storage and Keeping Your Homemade Peanut Butter Cups Fresh
So, you’ve made this incredible batch of **peanut butter cups**, and now you’re looking at the remaining half dozen like, “How do I keep these dreams alive?” I get it. Unlike the store-bought versions that sit on shelves forever, ours are made with real butter and real chocolate, so they have a shorter shelf life—but honestly, they rarely last long enough to worry about it!
Here’s the translation for storage: Because the filling uses actual butter, these beauties absolutely prefer the cold. Leaving them on the counter, especially if your kitchen runs warm, means you risk that creamy center getting too soft and oozing out when you peel the paper liner. Not pretty!
For the best texture and longevity, pop your finished **homemade peanut butter cups** into an airtight container. You can stack them, but use parchment paper or wax paper squares between the layers to stop them from sticking together. They will happily chill in the refrigerator for about two weeks. That’s plenty of time, right?
If you are like me and tend to over-produce during the holidays or just want to squirrel some away for a real moment of weakness, freezing works really well too. You can keep them frozen for up to three months if needed. I often prepare extra chocolate coating just for this reason—it’s handy to have extra on hand. Much like how I preserve summer berries for freezer jam, these candies freeze beautifully without getting icy.
When you pull them out of the fridge or freezer to serve, just give them about 10 minutes on the counter if they’re rock hard—that softens the chocolate just enough so you get that perfect ‘snap’ when you bite into your spectacular **peanut butter cups**.
Frequently Asked Questions About Making Peanut Butter Cups
Whenever I put a new recipe out there, I always get questions about the ‘what ifs’ and substitutions. That’s smart cooking! It means you’re already thinking like a translator, adapting the core concept for your own kitchen situation. These **peanut butter cups** are so simple, but a few tweaks can throw things off if you don’t know the reasoning behind the ingredient call. Here are the ones I hear most often when people are trying to nail that easy chocolate cake recipe logic in candy form.
Can I use natural, oily peanut butter?
This is the number one question! The answer is technically yes, but only if you love a much softer, slightly greasier filling. The natural stuff separates badly because it lacks stabilizers. If you must use it for your **homemade peanut butter cups**, you’ll need to drain off any excess oil first, and then you’ll need to add at least another half cup or more of powdered sugar to get that essential stiff texture. Be prepared for texture results that won’t look exactly like the ones you saved.
My chocolate got thick and gritty after microwaving. What happened?
Oh, that’s dreaded seizing! It means water got into your chocolate. Seriously, even a tiny speck of steam or moisture clinging to your stirring spoon can turn that beautiful, liquid chocolate into thick, crumbly sludge. If this happens, don’t throw it out! You need to introduce more fat. Stir in about a teaspoon of butter or coconut oil at a time, continuing to stir slowly over very low heat until it liquefies again. It might not be perfectly shiny, but it will still work as a coating for your **simple chocolate treats**.
Is the coconut oil really necessary for the coating?
No, it’s not mandatory, but I definitely recommend it for the absolute **best peanut butter cups**. It’s not there for flavor; it’s a textural agent. Coconut oil has a super low melting point, which helps the chocolate coating set super smooth and gives it that satisfying, fast melt-in-your-mouth quality when you bite in. If you skip it, your chocolate coating will be firmer and slightly harder, which some folks actually prefer for shelf stability.
How can I make these vegan peanut butter cups?
It’s surprisingly easy to pivot toward **vegan peanut butter cups**! Your peanut butter and powdered sugar base is usually fine (just check your sugar source). The switch is in the chocolate. Use good quality vegan dark chocolate chips, and make sure you use vegetable shortening or more coconut oil instead of the butter in the filling base. Easy peasy translation!
Serving Suggestions for These Simple Chocolate Treats
Now that you’ve mastered the art of making the **best peanut butter cups** at home, the real test begins: deciding when to enjoy this masterpiece of candy making. Honestly, you don’t need an occasion, but if you want to elevate the experience, I have a few thoughts on the translation from ‘snack’ to ‘event.’
First off, they are just begging to be served alongside a hot beverage. Think about it: the richness of dark chocolate and that salty-sweet filling cuts right through the acidity of a good black coffee or a rich espresso. They are the perfect little companion piece. Check out some of my favorite morning recipes, like these coffee cake muffins; the combination of warm spice and cool, homemade candy? Unstoppable.
If you’re putting together a dessert platter, these **simple chocolate treats** are fantastic because they look professional but require zero effort on your part beyond keeping them chilled. They pair beautifully with something bright, like fresh raspberries or sliced clementines, to add a little color contrast on the plate. Or, if you’re feeling generous, wrap them individually in little cellophane bags—maybe tie them with twine—because everyone appreciates a homemade gift straight from the fridge!
Sharing Your Kitchen Slang Success
And there you have it! You’ve officially demystified one of the trickiest-sounding categories in baking—homemade candy—and walked away with perfect **peanut butter cups** that taste miles better than the stuff you buy in the checkout aisle. That’s the power of learning the lingo, right? It’s translating the professional technique into something totally achievable on your counter.
Now, I’m not just going to leave you hanging here. I absolutely live to hear how these translations work out in your own kitchens! Did you sprinkle that sea salt on top? Did you manage to get that beautiful, clean chocolate shell?
I need you to come back and let me know! Drop a rating down below—five stars if you think these are the **best peanut butter cups** you’ve ever made. And please, if you snapped a picture of your perfectly lined **chocolate peanut butter candy**, tag me! I get such a kick out of seeing your results. We’re all learning this language together, and your success fuels the next translation.
If you want to dig deeper into the philosophy behind Kitchen Slang and why we break things down this way, you can always read more about our mission here. But for now, go hide a few of these **easy peanut butter cups** before someone else finds them. You deserve it!
PrintEasy Homemade Reese’s Style Peanut Butter Cups

Make the classic chocolate peanut butter candy at home with this simple, no-bake recipe. You get the creamy filling and rich chocolate coating without needing special equipment.
- Prep Time: 15 min
- Cook Time: 5 min
- Total Time: 20 min
- Yield: 12 servings 1x
- Category: Dessert
- Method: No-Bake
- Cuisine: American
- Diet: Vegetarian
Ingredients
- 1 cup creamy peanut butter
- 1/2 cup unsalted butter, softened
- 2 cups powdered sugar
- 1 teaspoon vanilla extract
- 12 ounces milk chocolate chips (or semi-sweet)
- 1 tablespoon coconut oil (optional, for smoother chocolate)
Instructions
- Line a standard 12-cup muffin tin with paper liners.
- In a medium bowl, mix the peanut butter and softened butter until smooth.
- Add the powdered sugar and vanilla extract to the peanut butter mixture. Stir until fully combined and the filling is stiff.
- Divide the peanut butter filling evenly among the 12 muffin liners, pressing it down slightly to form the base layer. Place the tin in the freezer for 15 minutes to set the filling.
- While the filling sets, prepare the chocolate. Place the chocolate chips and coconut oil (if using) in a microwave-safe bowl. Microwave in 30-second intervals, stirring well after each, until the chocolate is completely melted and smooth.
- Remove the muffin tin from the freezer. Pour the melted chocolate evenly over the peanut butter layer in each cup, ensuring the filling is completely covered.
- Return the muffin tin to the refrigerator and chill for at least 1 hour, or until the chocolate is firm.
- Peel off the paper liners and serve your homemade peanut butter cups.
Notes
- For a slightly firmer filling, use 1/4 cup of softened butter instead of 1/2 cup.
- If you want a salty contrast, sprinkle a tiny pinch of sea salt on top of the melted chocolate before chilling.
- Use high-quality chocolate chips; they melt better and give you a superior coating texture.
Nutrition
- Serving Size: 1 cup
- Calories: 280
- Sugar: 25
- Sodium: 120
- Fat: 19
- Saturated Fat: 7
- Unsaturated Fat: 12
- Trans Fat: 0
- Carbohydrates: 25
- Fiber: 1
- Protein: 6
- Cholesterol: 15