

Oh, I know that feeling. You’re staring down a long weeknight, the takeout apps are calling your name, but you want that sweet, sticky flavor without the deep-fried heaviness or the hour-long wait. Well, stop dialing! I’m going to give you the ultimate orange chicken recipe that completely changes the game. Forget everything you thought you knew about making crunchy chicken at home; this baked version delivers that perfect crispiness and that amazing sweet and tangy glaze faster than delivery—seriously, we’re looking at under 35 minutes total.
Here at Kitchen Slang, we’re all about translating that insider chef knowledge for your home kitchen. This recipe takes a professional trick—baking at a high heat with a specialized coating—and turns it into something you can master tonight. Trust me, once you see how easy it is to get that perfect texture without the mess of frying, this restaurant style orange chicken will become your go-to family favorite.
- Why This Orange Chicken Recipe is Better Than Takeout
- Gathering Ingredients for Your Crispy Orange Chicken Recipe
- Step-by-Step Instructions for the Best Orange Chicken Recipe
- Tips for Achieving Truly Crispy Orange Chicken Homemade
- Ingredient Notes and Substitutions for This Orange Chicken Recipe
- Serving Suggestions for Your Quick Weeknight Asian Chicken
- Storage and Reheating Instructions for Leftover Orange Chicken
- Frequently Asked Questions About Restaurant Style Orange Chicken
- Share Your Family Favorite Chicken Dinner Success
- Share Your Family Favorite Chicken Dinner Success
Why This Orange Chicken Recipe is Better Than Takeout
I understand why takeout is tempting, but honestly, this homemade version just hits different. We’re bypassing the deep fryer hassle, which means dinner isn’t heavy, and we keep the total time under 30 minutes. That’s my promise to you. You get all the sticky, amazing flavor but with a much better texture.
This isn’t just another recipe; it’s a technique upgrade. You are going to see why people are saying this is Better Than Panda Express Chicken, and you did it right in your own oven!
- Real Crispiness Without the Oil Mess: We use a specific flour and cornstarch dredge, plus high heat, to crisp up the chicken beautifully in the oven. No more soggy bottoms!
- The Perfect Sweet and Tangy Chicken Glaze: The sauce is bright, perfectly balanced, and coats every bite without being overly syrupy.
- Speedy Weeknight Dinner: Prep is minimal, and you’re looking at a complete dinner in about 35 minutes, hands down.
Gathering Ingredients for Your Crispy Orange Chicken Recipe
Okay, grab your cutting board and let’s check the pantry! The absolute beauty of this Easy Takeout Style Chicken Dinner is that it relies mostly on simple things you already have. We aren’t messing around with obscure ingredients here; we are making magic with staples. You’ll notice the list is actually split into two parts: what the chicken needs and what the killer sauce needs.
Since we are aiming for that truly crispy coating without drowning the chicken in oil, the coating mixture is important. Don’t skip that little bit of cornstarch mixed in with the flour—that’s part of the professional translation for texture!
Here is everything you need to get ready:
- 1.5 lbs boneless, skinless chicken breasts or thighs, cut into 1-inch pieces
- 1 large egg
- 1/4 cup all-purpose flour
- 1/4 cup cornstarch (this is key for the crisp!)
- 1/2 teaspoon salt
- 1/4 teaspoon black pepper
- Cooking spray or 1 tablespoon oil for baking
- 1 cup fresh orange juice (honestly, fresh is so much better here)
- 1/2 cup granulated sugar
- 1/4 cup rice vinegar
- 2 tablespoons soy sauce
- 1 tablespoon grated fresh ginger
- 2 cloves garlic, minced
- 1 teaspoon sesame oil
- 1/2 teaspoon red pepper flakes (only if you like a tiny kick!)
- 1 tablespoon cornstarch mixed with 2 tablespoons cold water (this is your slurry—keep it separate until the sauce is simmering)
- Zest of 1 orange
- Cooked white rice, for serving
- Sliced green onions, for garnish
See? Mostly things you have hanging around! Having all this prepped and ready means we can move fast when that oven hits temperature, which is what keeps this whole orange chicken recipe under that 30-minute window.
Step-by-Step Instructions for the Best Orange Chicken Recipe
Alright, buckle up, because following these steps precisely is how we make restaurant-quality chicken that tastes incredible without deep frying. We need to move efficiently here so we can brag about making this amazing orange chicken recipe in under half an hour. The process is simple: we coat, we bake high, and while that’s happening, we build that addictive, shiny glaze. Everything comes together in the final five minutes. Patience during the sauce phase is key—don’t walk away!
Preparing the Chicken Coating and Baking
First things first, crank that oven up to 425°F—we need it screaming hot for that crispiness to work! Line your baking sheet—and listen to my kitchen advice here—make sure every single piece of coated chicken has its own space. If they are touching or piled up, they steam instead of crisp. Don’t overcrowd the pan! We whisk the egg in one bowl and mix the flour, cornstarch, salt, and pepper in another. Dip your chicken pieces in the egg, let the extra drip off, and then really dredge it well in the dry mix. Shake off the excess coating gently. Arrange them on that prepared sheet and give the tops a good spritz with cooking spray. That little bit of fat hitting the heat is what mimics that deep-fried crunch!
Creating the Sticky Orange Sauce Chicken Glaze
While your chicken is baking away and getting golden, we move on to the magic part: the sauce. Grab a saucepan and toss in your orange juice, sugar, rice vinegar, soy sauce, ginger, garlic, sesame oil, and those optional pepper flakes. Get this mixture simmering gently until that sugar melts right away—that should take just a couple of minutes. Now, this is where we create that beautiful, thick Sticky Orange Sauce Chicken glaze. Remember that slurry we prepped? Whisk that cornstarch and water one last time to make sure it’s mixed, then pour it *slowly* into the simmering liquid while whisking nonstop. Keep stirring until it gets thick enough to coat the back of a spoon nice and glossy. Pull it off the heat immediately after it thickens and swirl in that fresh orange zest. Perfection!

Tips for Achieving Truly Crispy Orange Chicken Homemade
Look, I know the baking method is fantastic for speed and keeping things lighter, but when we talk about truly top-tier crunch, we have to discuss maximizing that coating integrity. This is the real secret to getting that Crispy Orange Chicken Homemade that rivals any place you’d order from.
The biggest player here is space. I cannot stress this enough: when you arrange your coated chicken pieces on that baking sheet, they need breathing room. If heat can’t circulate around the whole piece, steam forms under the chicken, and steam is the enemy of crispiness. You want every piece standing proud! If you buy two pounds of chicken, you might need two baking sheets. It’s worth it, trust me.
The Air Fryer Alternative for Maximum Crunch
If you happen to own an air fryer—and honestly, if you love crispy food, you should—that’s your next-level shortcut. For the air fryer instructions, you’ll want to preheat it to 400°F. You’ll toss those coated pieces in there for about 10 to 12 minutes total. The trick here is to shake the basket halfway through, just like you would with fries. The constant movement ensures every surface hits that hot air, giving you an unbelievable crunch instantly. For the best results, only air fry in batches; even the air fryer can’t crisp up food if it’s jammed in there too tight.
Don’t Rush the Dredge or the Bake
Before you even think about popping that tray in the oven, make sure your coating feels dry, not pasted on. When you take the chicken out of the egg wash and into the flour/cornstarch, really shake off the excess. We want a light dusting, not a heavy batter shell. That light coating fries up perfectly in the hot oven air, especially after that cooking spray kiss. Also, when the chicken comes out after the first 10 minutes, flipping it is non-negotiable. That second side needs direct contact with the hot metal (or the next blast of circulating air) to set that amazing golden texture we are looking for in this orange chicken recipe.
If you dive into the oven method, you might want to check out my thoughts on getting perfectly cooked poultry in general, though this technique is specifically tuned for thin pieces. Getting the temperature right for that crunch is half the battle!
Ingredient Notes and Substitutions for This Orange Chicken Recipe
So, let’s talk about the ingredients we chose for this orange chicken recipe because sometimes you run out of something, or maybe you just want to experiment a little. Remember, I’m trying to translate that professional wisdom for you, and usually, chefs are total sticklers about ratios. But for a weeknight meal, we can be flexible, as long as we know the *why* behind the swap!
I got a few messages after sharing this recipe about juice versus vinegar, so let’s clear that up quickly. Knowing what each ingredient does helps you adjust without messing up the whole balance.
Substituting the Vinegar
In the sauce, we call for rice vinegar, and I really emphasize that taste. Rice vinegar is milder and slightly sweeter than standard white distilled vinegar. If you swap it for regular white vinegar, you’ll end up with a sharper, almost harsh tang that doesn’t integrate as smoothly with the sugar and the orange oil.
So, if you absolutely *must* use white vinegar, start with just half what I listed in the sauce (maybe only 2 tablespoons). Then, taste it before you add the cornstarch slurry. You might need to add a tiny pinch more sugar to balance out that aggressive bite. Honestly, getting the right vinegar makes a huge difference in achieving that authentic takeout flavor profile we’re chasing.
The Orange Juice Question: Fresh vs. Bottled
This is my hill to die on, folks. If you are making the orange chicken recipe for a special occasion, please, please use fresh juice. Squeezing those oranges releases natural oils from the zest that go into the sauce later, which adds a layer of complexity bottled juice just cannot duplicate. You get bright citrus flavor, not just sweetness.

However, if you are rushing, a decent quality pasteurized bottled juice will work just fine for this Easy Takeout Style Chicken Dinner. If you use bottled, make sure it’s 100% juice and not from concentrate if you can help it. Also, since bottled juice is sometimes sweeter or more acidic depending on the brand, you’ll need to taste the simmering sauce carefully before adding your thickener. It’s a quick taste test that saves you from sauce failure!
What About the Cornstarch Coating?
The combination of flour and cornstarch in that dredge is crucial for the texture. The flour gives us structure, but the cornstarch is what keeps things light and incredibly crisp when baked or air-fried. Do not try to substitute only flour here, or you’ll end up with a tough, breaded exterior rather than a delicate, crispy shell.
If you happen to only have potato starch instead of cornstarch, go ahead and use that! Potato starch works wonderfully as a crisping agent too, often yielding an even slightly lighter coating. You can find more tips on mastering sauces over at my go-to sauce guide, which might help you tweak the thickness if need be!
Serving Suggestions for Your Quick Weeknight Asian Chicken
So, you’ve got this gorgeous, sticky, crispy orange chicken recipe ready to go. Fantastic! But what do we serve it with?
Since this is designed to be a super fast Quick Weeknight Asian Chicken dinner, we aren’t spending extra time making complex side dishes. We need speed and balance. The richness of that sweet and tangy glaze needs something simple underneath to soak up all the extra sauce!
Basic White Rice is Your Best Friend
Honestly, you can’t beat perfectly cooked white rice. It’s the ultimate sponge for that sauce. If you’re in a major hurry, use the instant rice packets, I won’t tell anyone! Just make sure you fluff it up well after it finishes cooking. If you’re using stovetop rice, make sure you finish it with a tiny splash of butter or sesame oil right before serving—it just lifts the flavor.
Adding The Green Touch
We talked garnish earlier, but let’s make it official. Sliced green onions are non-negotiable here; they add a fresh, sharp bite that punches through the sweetness of the glaze. Don’t skip them! If you want to add another vegetable without much effort, steam up some broccoli florets while the chicken is baking. Toss those hot, steamed veggies with a tiny drizzle of soy sauce and a splash of sesame oil on the side. It keeps the meal light and keeps the focus right where it belongs: on that incredible chicken!
If you’re looking to get ambitious with your rice base later on, check out my recipe for Mediterranean Lemon Rice—it’s brilliant, though definitely not a 30-minute side dish!
Storage and Reheating Instructions for Leftover Orange Chicken
Oh, leftovers! If you manage to have any of this amazing orange chicken recipe left over—and that’s a big *if* in my house—you have to store them smart so you can recapture that crucial crispiness when you reheat them tomorrow.
The main enemy here is moisture migration, which is just me being fancy for “the sauce soaks into the coating and makes everything sad.” Because we coated the chicken before glazing it, the glaze tends to make things even softer overnight. So, here is my hard-and-fast rule for saving this meal.
Storing Sauced Chicken for Maximum Flavor Retention
If you can manage it—and this is for those dedicated crunch-lovers—try to store the leftover chicken pieces *without* the sauce initially. If you have a small amount of leftover naked, crispy chicken, store that in an airtight container in the fridge. Then, next time you want some, reheat the naked chicken first, and then make a tiny, quick batch of the glaze using maybe half the ingredients listed in the main recipe, thickening it quickly. That’s the ultimate fix.

If that’s just too much work—and hey, I get it, sometimes you just want to throw it all in a container—then load the sauced-up chicken into a good, airtight container. Try to avoid packing it down too tightly. It will last about three days in the fridge, but be prepared: that glorious crispiness will be mostly gone. That’s just the nature of sauced-up fried things!
The Best Way to Reheat Your Orange Chicken Recipe
Forget the microwave. Seriously, unless you enjoy eating rubbery chicken coated in lukewarm syrup, put the microwave away. The microwave heats unevenly and turns that crispy coating into a texture somewhere between a sponge and a gummy bear. We are aiming for a second life for this dinner, and that means getting heat back into the chicken structure properly.
The absolute best method is using a skillet over medium heat. Spread the leftovers in a single layer and let them cook for a couple of minutes per side. This allows any excess moisture sitting on the chicken to steam off, and the sugars in the glaze caramelize just a tiny bit without burning. It perks things up beautifully.
If you have an air fryer, that’s your second-best bet! Set the temperature to about 375°F, place the chicken in a single layer (no crowding!), and cook for about 4 to 6 minutes. Give the basket a quick shake once. That blast of dry heat will shock the coating back into something wonderfully chewy-crisp. This keeps this orange chicken recipe feeling almost homemade again, even the next day!
If you need more ideas for quick meals that hold up well as leftovers, you might want to bookmark my post on easy weeknight dinners; sometimes you just can’t face leftovers!
Frequently Asked Questions About Restaurant Style Orange Chicken
I always get the same questions when people try this recipe for the first time, usually centering around texture and time. That’s how you know we’re getting close to that perfect, Restaurant Style Orange Chicken vibe! Because we’re using the oven instead of the fryer, folks wonder if the crispiness holds up, so let’s tackle the top concerns right here. No question is silly when we’re translating professional techniques for the home cook!
Can I use chicken thighs instead of breasts for this orange chicken recipe?
Oh, absolutely! Chicken thighs give you a juicier result, which is fantastic, especially if you sometimes worry about drying out the breast meat. In fact, many folks prepping for the ultimate Family Favorite Chicken Dinner prefer the flavor payoff of thighs. The cooking time remains virtually the same since we are cutting them into 1-inch uniform pieces—about 15 to 20 minutes in the 425°F oven.
The only thing I caution you about when using thighs is fat content. They are naturally fattier, so make sure you’re draining off any excess liquid before you dredge them in the coating mixture. We want that coating to stick to the meat itself, not float around in rendered fat. If you use thighs, you’ll get an incredibly tender bite underneath that perfectly sticky glaze!
How do I make the glaze less sweet? Is this truly a 30 Minute Orange Chicken?
That’s a great question about the sugar level! I totally get it; sometimes that takeout sweetness can be a bit much. If you want a more balanced, tangy flavor profile reminiscent of a truly authentic Chinese dish rather than the Americanized version, start cutting back on the sugar when you simmer the sauce component. I’d recommend starting by reducing the granulated sugar by 2 whole tablespoons.
When you taste the simmering sauce before adding the thickener, if it still feels too sweet, add another splash of rice vinegar—maybe an extra teaspoon—to bring back that necessary acid. This adjustment keeps the sauce from being cloying and really highlights that fresh orange zest. And yes, for a 30 Minute Orange Chicken, it absolutely is achievable! Preheat your oven while you prep the chicken; if you’re organized, the 15 minutes of baking time syncs up perfectly with how long it takes to whip up that glaze.
What if I don’t have time to bake? Can I still get a crispy coating?
If time is truly of the essence, or if it’s a rainy day and you don’t even want to turn on the oven, our trusty air fryer is here to save the day! This is where we lean into the Healthy Crispy Chicken Option, because we use very little added fat. You can use the exact same coating process we discussed for the Crispy Orange Chicken Homemade!
Set your air fryer to 400°F. Work in batches so the basket isn’t packed solid—again, crowded equals steamed! The chicken will need about 10 to 12 minutes total. Just pull the basket out around the 6-minute mark and give it a good shake to flip everything over. Keep an eye on it close to the end, as air fryers brown fast, but you’ll have perfectly crispy pieces ready for the sauce in under 15 minutes.
If you’re interested in other quick recipes where the air fryer is your best friend, check out some of my favorite speed meals, like my quick chicken ideas!
Why do I need both flour AND cornstarch for the coating?
This is pure kitchen slang translation right here! Many recipes just call for flour, but that often results in a heavy crust that gets soggy instantly once the sauce hits it. Flour gives us body, which is great, but cornstarch is the secret weapon for that lightness and *shatter-crisp* texture we love in the best takeout.
When you combine them, the flour helps the coating adhere firmly to the moist chicken, and the cornstarch sets much harder and crispier when exposed to high heat, which is why we need that 425°F oven. It’s a dynamic duo that gives you an extremely light, non-greasy shell that holds up much better to the sticky glaze than a straight flour coating would. It’s a little extra step that makes all the difference for your Sweet and Tangy Chicken Glaze adhesion!
Share Your Family Favorite Chicken Dinner Success
Seriously, I cannot wait to hear how this turned out for you! Making a Better Than Panda Express Chicken replica right in your own kitchen is such a win, especially when you nail that perfect crispiness using the baking method. I hope this orange chicken recipe finds a permanent spot on your weeknight rotation.
Did you try the air fryer trick? Did you cut back on the sugar? Let me know! Drop a comment below and tell me exactly how those 1-inch chicken pieces turned out. Star ratings are always welcome; they help other cooks trust the process. If you snapped a picture of your gorgeous, saucy masterpiece, please feel free to share it with me over on my contact page—I love seeing your successes!
Share Your Family Favorite Chicken Dinner Success
Seriously, I cannot wait to hear how this turned out for you! Making a Better Than Panda Express Chicken replica right in your own kitchen is such a win, especially when you nail that perfect crispiness using the baking method. I hope this orange chicken recipe finds a permanent spot on your weeknight rotation. It really is my ultimate goal to translate those professional secrets so you feel super confident back home.
Did you try the air fryer trick? Did you cut back on the sugar? Let me know! Drop a comment below and tell me exactly how those 1-inch chicken pieces turned out. Were they truly crispy? Star ratings are always welcome; they help other cooks trust the process when they are looking for that perfect Easy Takeout Style Chicken Dinner. If you snapped a picture of your gorgeous, saucy masterpiece, please feel free to share it with me over on my contact page—I love seeing your successes!
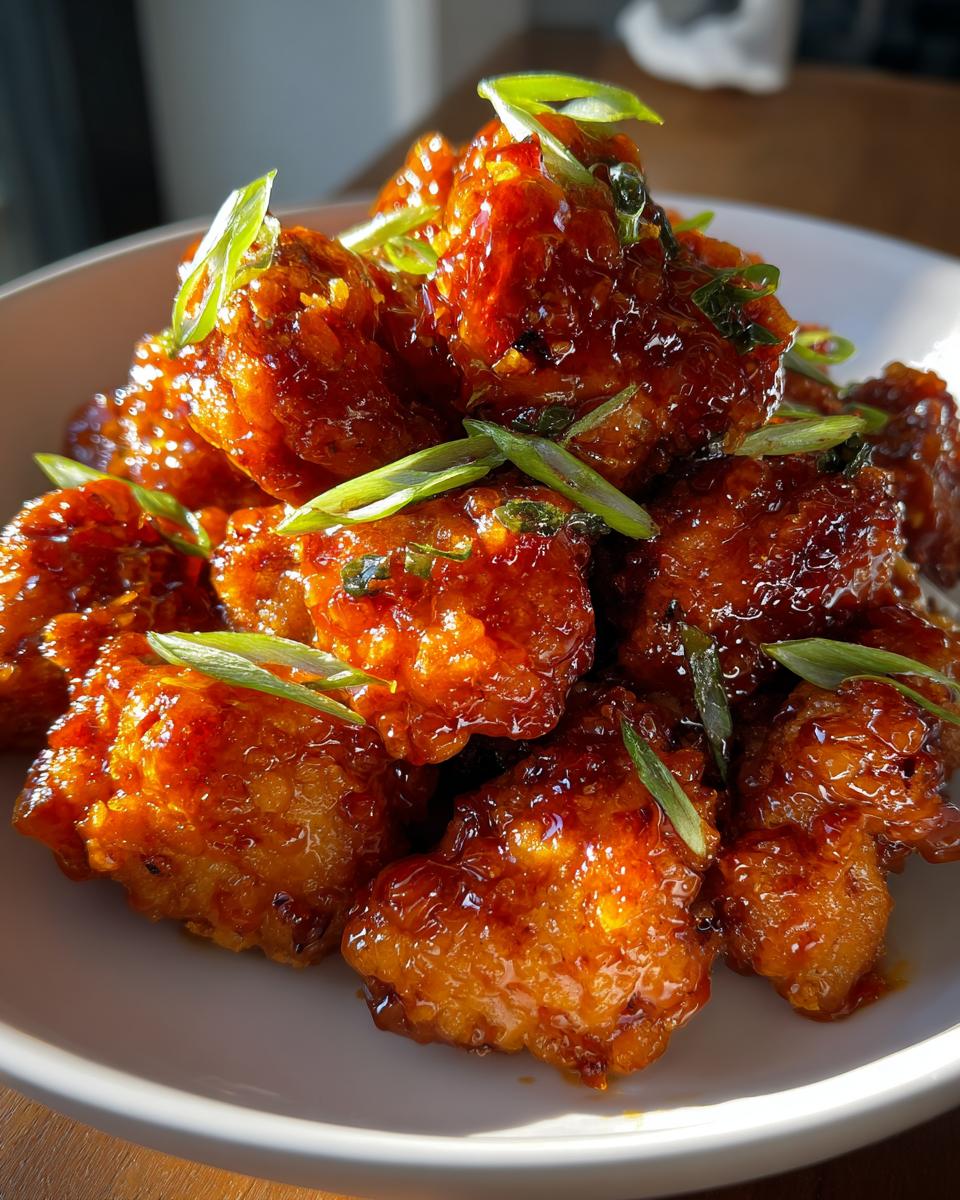
PrintCrispy Baked Orange Chicken: Better Than Takeout in 30 Minutes

Make restaurant-style orange chicken at home. This recipe delivers crispy chicken coated in a sweet and tangy orange glaze, ready in about 30 minutes using an oven for crispiness.
- Prep Time: 15 min
- Cook Time: 20 min
- Total Time: 35 min
- Yield: 4 servings 1x
- Category: Dinner
- Method: Baking
- Cuisine: Chinese-American
- Diet: Non-Vegetarian
Ingredients
- 1.5 lbs boneless, skinless chicken breasts or thighs, cut into 1-inch pieces
- 1 large egg
- 1/4 cup all-purpose flour
- 1/4 cup cornstarch
- 1/2 teaspoon salt
- 1/4 teaspoon black pepper
- Cooking spray or 1 tablespoon oil for baking
- 1 cup fresh orange juice
- 1/2 cup granulated sugar
- 1/4 cup rice vinegar
- 2 tablespoons soy sauce
- 1 tablespoon grated fresh ginger
- 2 cloves garlic, minced
- 1 teaspoon sesame oil
- 1/2 teaspoon red pepper flakes (optional)
- 1 tablespoon cornstarch mixed with 2 tablespoons cold water (slurry)
- Zest of 1 orange
- Cooked white rice, for serving
- Sliced green onions, for garnish
Instructions
- Preheat your oven to 425°F (220°C). Line a baking sheet with parchment paper and lightly coat with cooking spray or oil.
- In a medium bowl, whisk the egg. In a separate shallow dish, combine the flour, 1/4 cup cornstarch, salt, and pepper.
- Dip each piece of chicken first into the egg, letting excess drip off, then dredge thoroughly in the flour mixture, shaking off any loose coating.
- Arrange the coated chicken pieces in a single layer on the prepared baking sheet. Spray the tops lightly with cooking spray.
- Bake for 15-20 minutes, flipping halfway through, until the chicken is golden brown and cooked through.
- While the chicken bakes, prepare the sauce. In a small saucepan, combine the orange juice, sugar, rice vinegar, soy sauce, ginger, garlic, sesame oil, and red pepper flakes.
- Bring the sauce mixture to a simmer over medium heat, stirring until the sugar dissolves. Let it simmer for 3 minutes.
- Whisk the cornstarch slurry again and slowly pour it into the simmering sauce while stirring constantly. Continue to cook until the sauce thickens enough to coat the back of a spoon, about 1-2 minutes. Remove from heat and stir in the orange zest.
- Place the baked crispy chicken pieces into a large bowl. Pour the thickened orange sauce over the chicken and toss gently until every piece is evenly coated in the sticky glaze.
- Serve the orange chicken immediately over cooked white rice and garnish with sliced green onions.
Notes
- For extra crispiness without frying, you can use an air fryer set to 400°F (200°C) for 10-12 minutes, shaking the basket halfway through.
- If you prefer a less sweet glaze, reduce the granulated sugar in the sauce by 1-2 tablespoons.
- Use fresh orange juice for the best flavor in your sweet and tangy chicken glaze.
Nutrition
- Serving Size: 1 serving
- Calories: 450
- Sugar: 35g
- Sodium: 550mg
- Fat: 12g
- Saturated Fat: 2g
- Unsaturated Fat: 10g
- Trans Fat: 0g
- Carbohydrates: 45g
- Fiber: 1g
- Protein: 38g
- Cholesterol: 110mg