
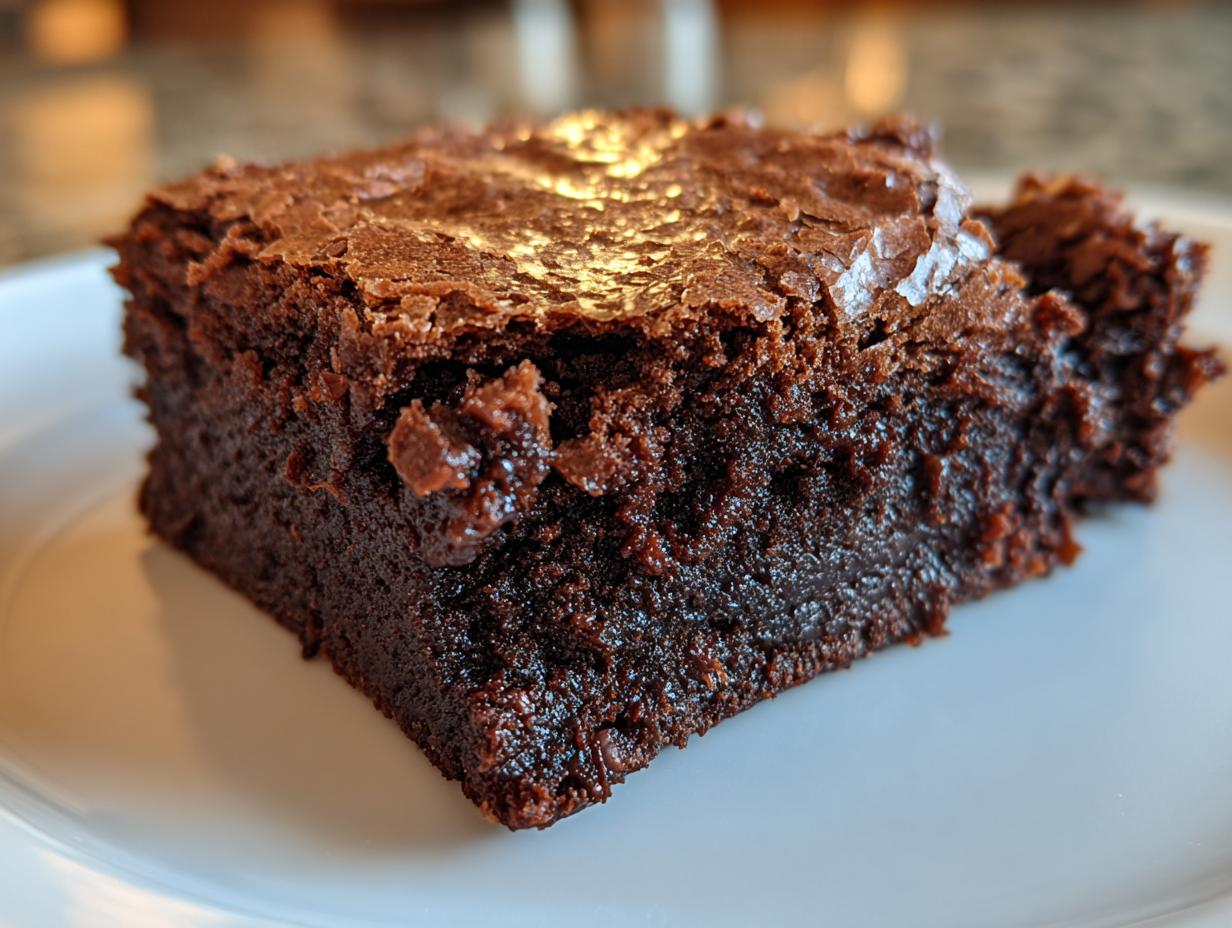
Oh, friend, are you ready for the ultimate chocolate hug in bar form? Seriously, when a chocolate craving hits, you don’t want a fluffy cake; you want something rich, dense, and utterly decadent. That’s why I’m handing over my secret to creating the most perfect, moist fudge brownies that boast that signature shiny, crackly crust. When I was learning the ropes in the kitchen, I noticed chefs had these little tricks—this ‘kitchen slang’—to get toppings perfect, and I translated exactly that knowledge just for you. You can see more about how we break down these professional secrets over on our About Page. Forget struggling with dry, crumbly disappointments. These classic brownie recipe squares deliver pure, soulful satisfaction every single time you pull them out of the oven.
- Why This is the Best Ever Chocolate Squares Recipe
- Essential Ingredients for Perfect Homemade Brownies
- Step-by-Step Instructions for Classic Brownie Recipe
- Tips for Success When Making Fudge Brownies
- Storing and Serving Your Fudge Brownies
- Frequently Asked Questions About Fudge Brownies
- Nutritional Estimate for Classic Brownie Recipe
- Share Your Best Ever Chocolate Squares Experience
Why This is the Best Ever Chocolate Squares Recipe
I promise you, these aren’t just any homemade brownies. If you’re chasing that deep, dense, almost-underbaked texture, this is the one. We skip the cocoa powder for a much richer result because we’re using real, melted chocolate—four ounces of it! That’s the first big move toward true fudge brownies.
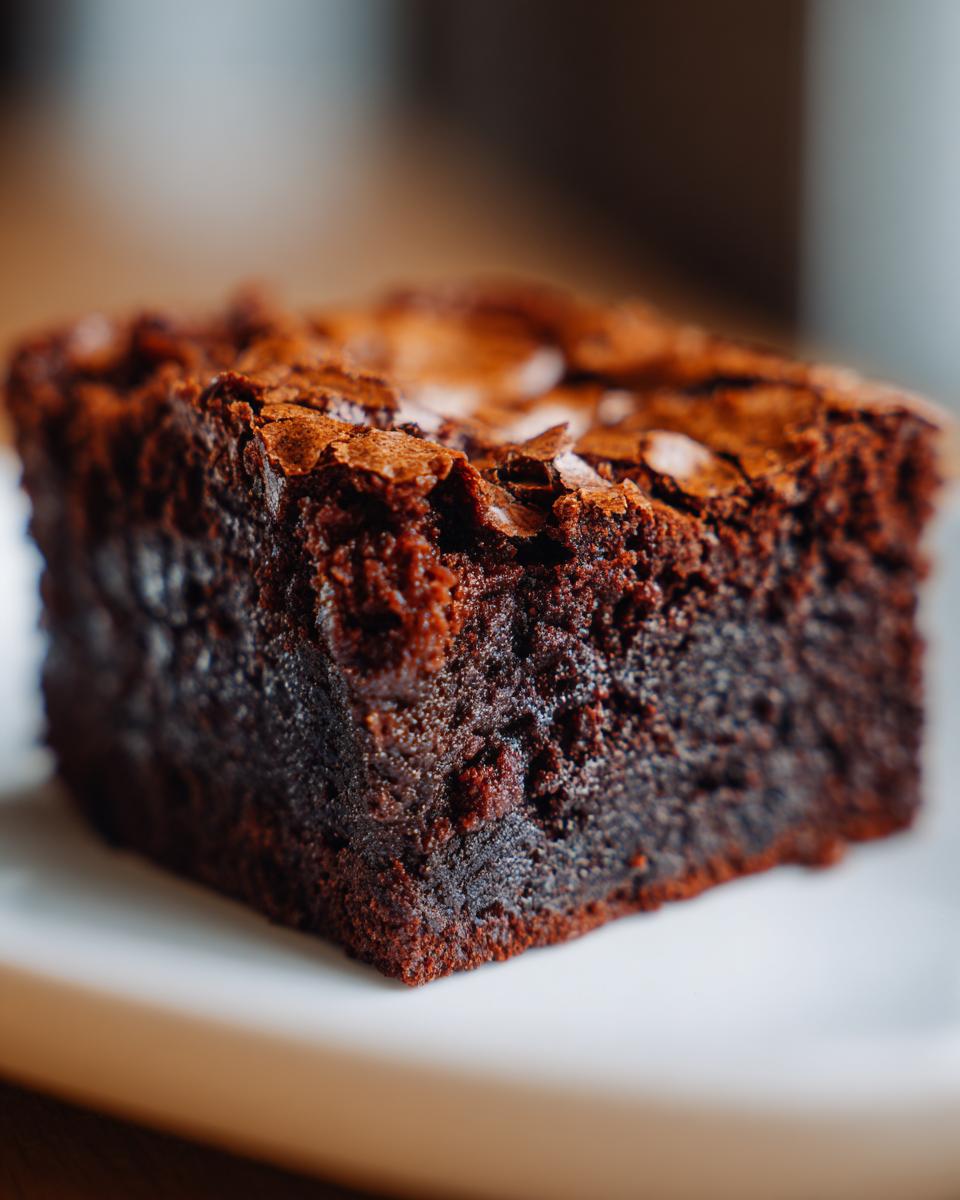
And then there’s the sugar ratio. We use both granulated and brown sugar; the molasses in the brown sugar is crucial for moisture and chewiness. These elements together ensure you skip the cakey texture and land right in that sweet spot of a dense fudgy bar.
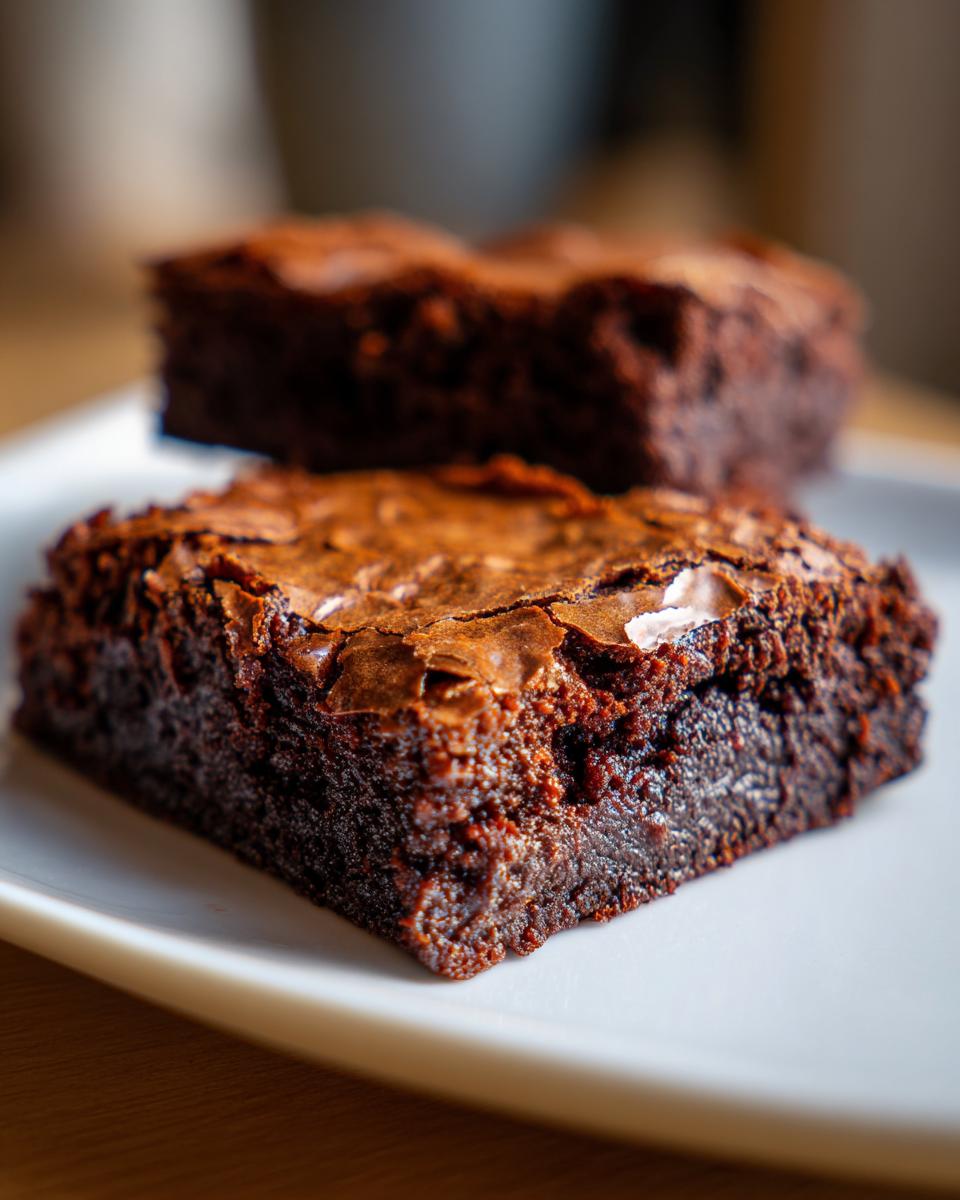
Achieving the Signature Shiny Crust on Your Fudge Brownies
That incredible, papery, shiny top? That’s the magic trick! It all comes down to the sugar. When you whisk your sugars vigorously into that warm melted chocolate and butter mixture—and especially when you beat those eggs until they’re thick and glossy—the sugar actually dissolves properly. When these little dissolved sugar crystals hit the heat and then cool rapidly, that glorious crust forms.
But here’s the real insider tip: Do not try to bake them until they look totally done! If you pull them when the toothpick still has moist crumbs clinging to it, the residual heat will do the rest as they chill. Overbaking is the fastest way to a dull, cakey top. Trust me on this one!
Essential Ingredients for Perfect Homemade Brownies
Okay, gathering your crew for these fudge brownies is half the fun! Because this recipe relies so much on that deep chocolate flavor, the quality of what you start with really matters. Since we’re building this bar on melted chocolate and butter, we need to be specific. You’ll notice we’re calling for four whole ounces of unsweetened chocolate. Don’t skimp here; use a good quality bar you like the taste of uncooked, because that forms the very soul of these chewy chocolate brownies.
You’ll need a full cup of both butter—that’s two sticks, people, no margarine allowed—along with granulated sugar and packed light brown sugar. Don’t forget the four large eggs; they help bind everything beautifully. Then for the dry stuff, we keep it simple: just 3/4 cup of all-purpose flour, the salt, and a whole cup of those lovely chocolate chips you want to fold in at the end. Seriously, if you measure your ingredients out nice and neat before you start melting anything, the whole process flies by!
Ingredient Notes and Substitutions for Dense Fudgy Bar
Let’s talk about the secret boosters. See that tiny bit of espresso powder I listed? It’s optional, but wow, does it turn the flavor up! It doesn’t make your treats taste like coffee, not at all. It just magically deepens that chocolate score, making everyone wonder what fancy trick you used. If you leave it out, your brownies are still awesome, but the espresso powder is what takes them to the next level of rich flavor.
When you pick your chocolate chips, I strongly recommend reaching for bittersweet or semisweet, maybe 60% cacao or higher. If you use sweet milk chocolate chips, the brownies end up too sugary and lose that necessary dark punch. Also, pay attention to your pan size! If you use the 9×13 pan as written, you get that perfect, melt-in-your-mouth fudgy texture. But if you want something truly substantial and extra thick—I mean, really pulling out all stops for a dense fudgy bar—you can absolutely use an 8×8 inch pan instead. Just remember that smaller pan means more time in the oven, usually about 10 extra minutes, to ensure they set properly in the middle.
Step-by-Step Instructions for Classic Brownie Recipe
Alright, let’s get down to the actual baking! First things first: get that oven humming at 350°F (175°C). I always line my 9×13 pan with parchment paper, making sure I leave those little overhang tabs—this is your handle for smoothly lifting out your perfect batch later. Don’t forget to grease that paper lightly!
Next is the big melt. You need to whisk together your butter and that chopped unsweetened chocolate until they are totally smooth. You can do this carefully over simmering water or in short bursts in the microwave. Once it’s silky, take it off the heat and let it hang out for about five minutes to cool down a touch. We don’t want scrambled eggs!
Now, whisk in both sugars until everything is incorporated. This is where we build that shiny crust foundation! After that, add your four eggs, one by one, and beat well after each one. You’re looking for the mixture to get noticeably thick and glossy—this step is non-negotiable for that dense structure you want in your fudge brownies. Fold in the vanilla.
For the dry stuff, just whisk your flour, salt, and that optional espresso powder together in a small bowl first. Then, gently *fold* those dry ingredients into the wet mixture using your spatula. And I mean gently! Stop folding the second you see the last bit of flour disappear. Over-mixing equals tough brownies every single time. Finally, fold in those chocolate chips. Spread it all evenly in your pan. If you’re making dinner too, check out my secrets for easy weeknight dinners later!
Crucial Baking Time for Chewy Chocolate Brownies
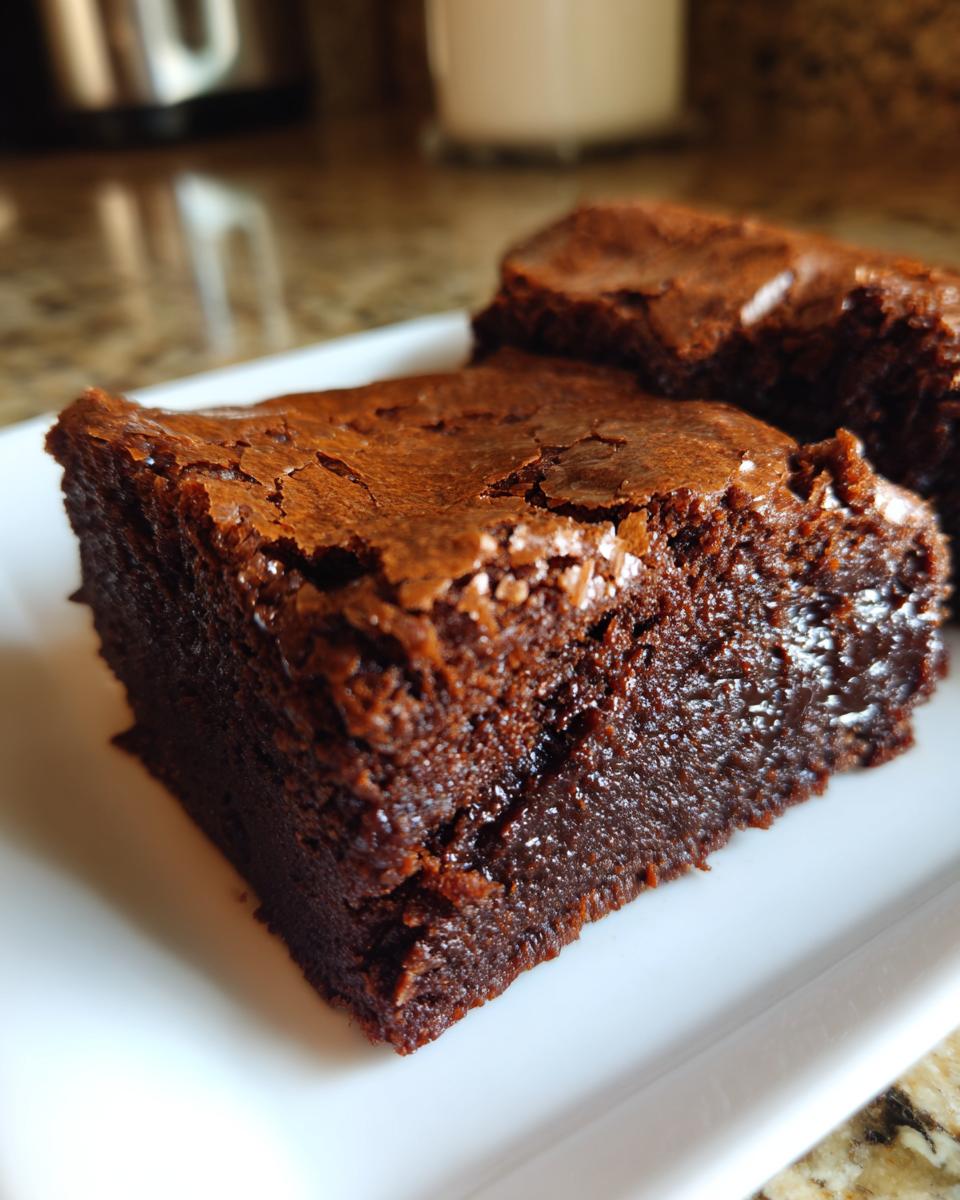
Baking time is where most people accidentally create cake instead of chewy chocolate brownies. You’re looking at 25 to 30 minutes in that 9×13 pan. Watch the edges—they should look set and maybe slightly pulled away from the sides of the pan. But the middle is the secret spot.
Don’t use a totally clean toothpick! That means you’ve baked too long for fudge brownies. You want the toothpick to come out with moist, fudgy crumbs stuck to it—not wet batter, but definitely not clean and dry either. That slight dampness is essential because the residual heat on the cooling rack will keep cooking them until they are perfectly gooey. Seriously, let them cool completely before you even think about cutting them. Patience equals perfect squares!
Tips for Success When Making Fudge Brownies
You’ve done the mixing; you’ve done the baking part—now let’s make sure these turn out exactly like the best ever chocolate squares you’ve dreamed of. A few final expert tidbits from my time working those busy dinner services will lock in that perfect texture and that sought-after shiny top.
First off, I cannot stress this enough: Do not overbake! I listed 25 to 30 minutes, but that’s just a guideline. If you pull them just as the edges look done and the center still seems a *little* too soft, you’ve nailed it. That slight underbaking is the professional secret for fudge. The residual heat trapped in that dense bar will finish the job on the counter. If you wait until the toothpick is totally clean, those fudge brownies will be tough by morning.
Another thing I learned from the line cooks is the power of the pan swap. If you decide halfway through you want something truly substantial, you can switch to an 8×8 inch pan. Yes, you absolutely can! Just be prepared to give them an extra 10 to 12 minutes in the oven. That smaller area means the batter is deeper, so it needs more time to set in the center. This swap trades a thin, easy-to-cut square for a thick, intensely chewy chocolate centerpiece that practically demands a dollop of whipped cream.

And while we aren’t freezing them, the cooling process is critical. They are incredibly fragile right out of the oven, just a pool of molten chocolate goodness. If you try to slice them warm, you’re going to end up with a mess of chocolate sauce instead of neat squares. Let them cool completely, ideally for at least two hours, on the wire rack before you even dare touch them with a knife. That patience buys you those perfectly clean edges on your homemade brownies.
Storing and Serving Your Fudge Brownies
Okay, they look perfect, they smell divine, but now comes the hardest part: waiting! If you try to cut these rich, dense fudgy bars while they are even slightly warm, you’ll end up with molten chocolate soup, all over your hands and cutting board. Don’t do it! The cooling process is actually the final, critical step that sets up that perfect crumb structure we worked so hard for.
Let them cool completely in the pan on that wire rack. I usually let them sit for a good hour on the counter, and then I actually tuck them into the fridge for about 30 minutes before slicing. The cold firms them up perfectly, which means you can get those beautiful, clean cuts for your squares. Feel free to browse some other great ideas for sweet finishes on our Delicious Dessert Recipes page!
Now, how do you keep this magic going? These fudge brownies are so moist that they don’t really need refrigeration, which can sometimes dry out the edges a bit. Just cover the pan tightly with plastic wrap, or if you’ve cut them, stack them gently in an airtight container. They’ll stay phenomenal at room temperature for a good three or four days.
If you want to bring back that fresh-from-the-oven gooey center, use the microwave! Just take one square, pop it on a plate, and give it about 10 to 15 seconds, maybe 20 if it’s cold from the fridge. Do not walk away, or you’ll end up with a puddle!
Making Ahead and Storing These Dense Fudgy Bars
Listen, these fudge brownies are absolutely fantastic for making ahead of time, which is a lifesaver when company is coming over. Seriously, if you make them the day before you plan to serve them, they are often even better! The flavors—that deep chocolate mixed with the molasses from the brown sugar—really have time to settle in and meld together overnight. They firm up just a touch more, making them easy to transport if you’re bringing them to a potluck.
For serving, I love keeping it simple because the chocolate is the star. A light dusting of flaky sea salt right before serving really wakes up the cocoa, or maybe just a tiny scoop of vanilla bean ice cream melting slowly over the top. But honestly, a perfect square of this rich, dense fudgy bar needs nothing else at all.
Frequently Asked Questions About Fudge Brownies
I get so many questions about these homemade brownies because everyone wants that perfect balance of chewy edge and gooey middle! Here are the ones I hear most often. Don’t worry if you mess up the first time; even I had to figure out the timing!
Can I make these fudge brownies without a mixer?
Absolutely! You don’t need a fancy stand mixer for these at all, and sometimes I skip it too because cleaning those beaters is a pain! For the first part, where you beat the sugar into the melted chocolate and then incorporate the eggs until they are glossy, a sturdy whisk works perfectly well. You just need a strong arm for a minute or two. The important part—folding in the flour and the chips—must be done by hand with a spatula anyway, so you’re only using the whisk for the initial, most energetic part of mixing. You can totally achieve those perfect chewy chocolate brownies with just simple kitchen tools, trust me.
Why are my homemade brownies cakey instead of fudgy?
Oh, that is the saddest sound in the kitchen—expecting fudge and getting cake! There are usually two culprits here that steal the fudge right out of your fudge brownies. First and most common: you baked them too long. If you wait until the toothpick comes out clean, the residual heat will dry them out even more as they cool. Remember what I said? You want moist crumbs clinging to it, not dry ones! Second reason: too much flour. Make sure you spoon your flour into the measuring cup and level it off, don’t scoop the measuring cup directly into the bag. That little cup of extra flour ruins the ratio and turns your dense bar into a much airier cake.
Nutritional Estimate for Classic Brownie Recipe
I always feel a little bad when people ask about the nutrition facts for something this decadent, but since we’re translating all the professional knowledge, let’s talk about the numbers too! Remember, these fudge brownies are an indulgence—they are rich! These estimates are based on the recipe yielding 16 squares, but remember that homemade food always varies depending on exact ingredients and pan size, so take this as a general guide, not gospel.
For one of these beautiful, best ever chocolate squares, you’re looking at about 250 calories. That’s a pretty solid hit of richness for one portion!
Here is a quick breakdown based on our ingredients list:
- Calories: Right around 250 per square.
- Fat: About 14 grams total, with 8 grams being saturated fat—hello, real butter and chocolate!
- Carbohydrates: Roughly 30 grams, with 28 of those being sugar. Yep, that’s where the deliciousness comes from!
- Protein: Around 3 grams.
- Sodium: Very low, about 90mg.
Just keep in mind that if you switch to an 8×8 pan, the squares get much bigger, and those numbers jump up because you’re eating a larger portion. We keep the flour low in this recipe to keep things fudgy, which keeps the carbs slightly lower than some of those super-cakey recipes you see out there. Enjoy them guilt-free—they are truly worth every single bite of that dense, fudgy goodness!
Share Your Best Ever Chocolate Squares Experience
So, there you have it! My whole system for turning simple pantry items into those unbelievably rich, shiny-topped fudge brownies that taste like you pulled them straight out of a high-end bakery display case. We decoded the egg mixing for gloss, figured out how to stop short of baking them dry, and made sure those sugars dissolved perfectly for that incredible top layer.
Now, I honestly can’t wait to hear what you think! Tell me, did you nail that shiny crust on your first try? Did that little secret hit of espresso powder actually deepen the chocolate flavor for you? Don’t be shy! Head down below and leave me a rating—stars are great, but I really live for the comments where you tell me how these best ever chocolate squares turned out for you.
If you managed to capture a photo of those perfect, dense bars, please tag us! I love seeing your kitchen successes pop up online. Cooking should never feel like a test you have to pass; it should just be about making genuinely delicious food with confidence, and that’s what we’re all about here at Kitchen Slang. If you want more of this ‘insider lingo’ translated into easy-to-follow recipes, make sure you check in with us over at our Contact Page. Happy baking, friend!
PrintUltimate Fudge Brownies with Shiny Crust

Make dense, moist, and intensely chocolatey fudge brownies with a signature crackly top using real melted chocolate for the best flavor.
- Prep Time: 15 min
- Cook Time: 30 min
- Total Time: 45 min
- Yield: 16 squares 1x
- Category: Dessert
- Method: Baking
- Cuisine: American
- Diet: Vegetarian
Ingredients
- 1 cup (2 sticks) unsalted butter
- 4 ounces unsweetened chocolate, chopped
- 1 1/4 cups granulated sugar
- 1 cup packed light brown sugar
- 4 large eggs
- 1 tablespoon vanilla extract
- 3/4 cup all-purpose flour
- 1/2 teaspoon salt
- 1/2 teaspoon espresso powder (optional, for deeper flavor)
- 1 cup chocolate chips (semisweet or bittersweet)
Instructions
- Preheat your oven to 350°F (175°C). Line a 9×13 inch baking pan with parchment paper, leaving an overhang on the sides for easy removal. Lightly grease the paper.
- In a medium, heatproof bowl set over a saucepan of simmering water (or in a microwave in 30-second intervals), melt the butter and chopped unsweetened chocolate together. Stir until completely smooth. Remove from heat and let cool slightly, about 5 minutes.
- Whisk the granulated sugar and brown sugar into the melted chocolate mixture until fully combined.
- Add the eggs one at a time, beating well after each addition until the mixture is thick and glossy. Stir in the vanilla extract.
- In a separate small bowl, whisk together the flour, salt, and espresso powder, if using.
- Gently fold the dry ingredients into the wet ingredients using a spatula until just combined. Do not overmix.
- Fold in the chocolate chips.
- Spread the batter evenly into the prepared pan.
- Bake for 25 to 30 minutes. The edges should look set, and a toothpick inserted near the center should come out with moist, fudgy crumbs attached, not wet batter. This is key for fudgy brownies.
- Let the brownies cool completely in the pan on a wire rack before lifting them out using the parchment overhang. Cut into squares.
Notes
- For the best shiny crust, do not overbake. The residual heat will continue to cook them as they cool.
- Using espresso powder deepens the chocolate flavor without making the brownies taste like coffee. This is a professional trick.
- If you prefer thicker, chewier brownies, use an 8×8 inch pan instead and increase the baking time to 35-40 minutes.
Nutrition
- Serving Size: 1 square
- Calories: 250
- Sugar: 28g
- Sodium: 90mg
- Fat: 14g
- Saturated Fat: 8g
- Unsaturated Fat: 6g
- Trans Fat: 0g
- Carbohydrates: 30g
- Fiber: 1g
- Protein: 3g
- Cholesterol: 65mg