
When you just need comfort, nothing beats that rich, deep chocolate flavor that only comes from scratch. We’re talking about the ultimate hug-in-a-bowl dessert sometimes, right? Forget the stuff in the box; I’m handing you the blueprint for the homemade chocolate pudding that will ruin you for all others. Trust me, achieving that perfectly creamy chocolate pudding recipe texture isn’t some restaurant secret. It’s just about translating what the pros know—the simple science of stovetop cooking—into your everyday kitchen routine. We’re trading intimidation for intuition here so you can serve something truly velvety tonight. If you’re looking for quick weeknight dinners that end this perfectly, this is your dessert.
- Why This Is the Best Homemade Chocolate Pudding Recipe
- Simple Ingredients for Decadent Homemade Chocolate Pudding
- Mastering the Classic Stovetop Pudding: Instructions for Homemade Chocolate Pudding
- Chilling and Setting Your Decadent Chocolate Pudding
- Serving Suggestions for Ultimate Chocolate Comfort Food
- Storage and Reheating for Your Homemade Chocolate Pudding
- Variations on the Best Chocolate Pudding Recipe
- Frequently Asked Questions About Homemade Chocolate Pudding
- Share Your Homemade Chocolate Pudding Success
Why This Is the Best Homemade Chocolate Pudding Recipe
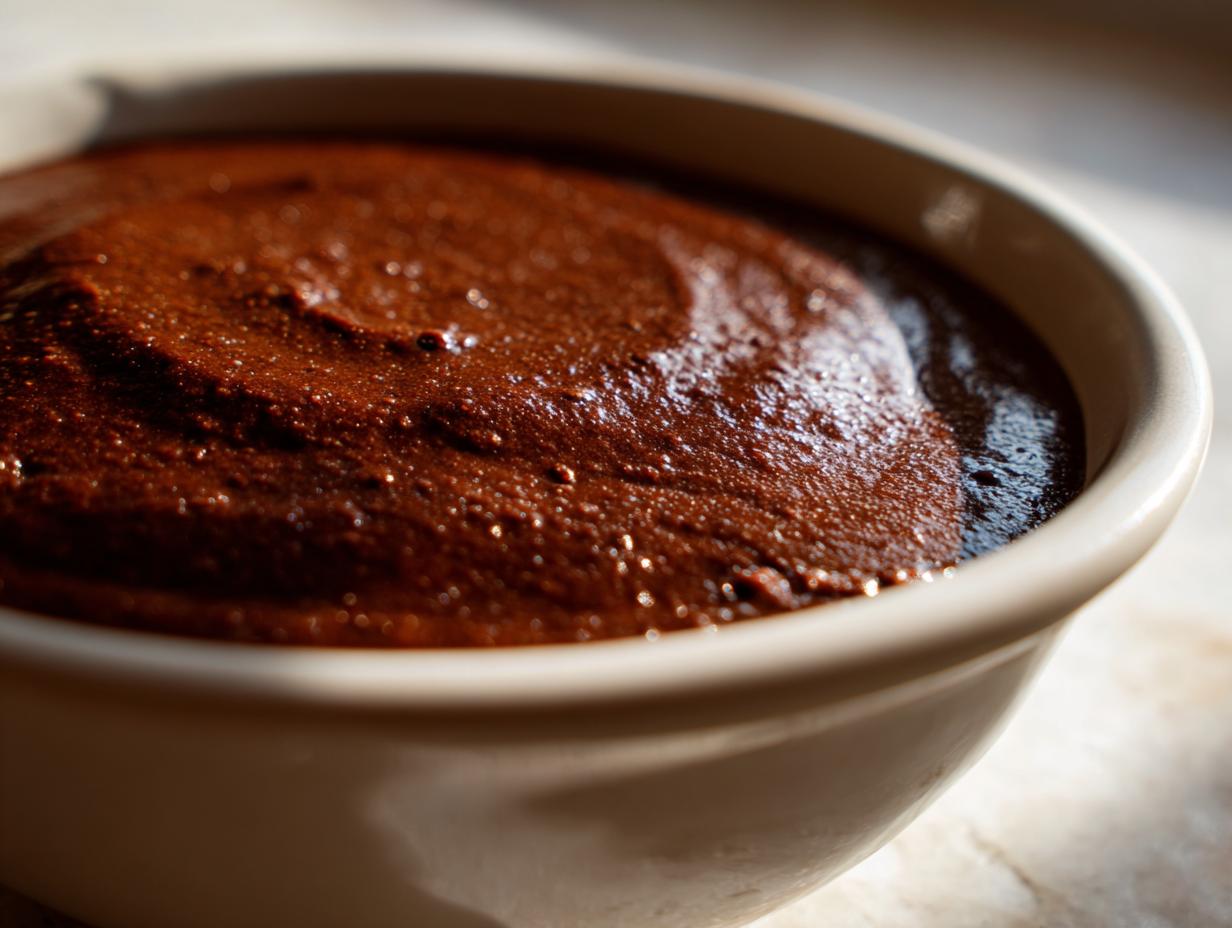
What makes this my go-to recipe? It’s pure, uncompromising silkiness—that rich, velvety chocolate dessert mouthfeel that boxed mixes just try (and fail!) to replicate. We’re achieving that incredible texture because we’re using the stovetop, not relying on setting agents. That high heat ensures our cornstarch fully activates, giving us that superior structural integrity. I promise you, this easy homemade pudding goes from pantry staples to chilled perfection incredibly fast. Many recipes take an hour or more, but we’re clocking in way under that!

Quick Prep for Your Homemade Chocolate Pudding
This whole symphony takes maybe 25 minutes total, which is insane for how decadent it tastes. Think about it: 10 minutes of prep time, maybe 15 minutes on the heat, and suddenly you have the most luxurious quick weeknight pudding you’ve ever made. I can whip this up right after dinner clears, and it’s ready for the fridge before I even start the dishes. It’s truly beginner-friendly, honestly. If you can whisk constantly, you can conquer this dessert. Check out my one-minute mug cake if you need something even faster on a truly desperate night!
Simple Ingredients for Decadent Homemade Chocolate Pudding
The beauty of this homemade chocolate pudding is that it relies on pure pantry staples. You don’t need fancy extracts or rare flavorings—just the proper ratio of milk, sugar, cocoa, and cornstarch. Because it’s cooked, we get that deep flavor that boxed mixes can only dream of. We keep our ingredient list tight, focusing only on what builds that incredible texture and flavor profile.
Here’s what you need for the world’s best simple chocolate pudding ingredients:
- 2 cups Whole Milk
- 1/2 cup Granulated Sugar
- 1/4 cup Unsweetened Cocoa Powder (Dutch process recommended for deep color)
- 2 tablespoons Cornstarch
- 1/4 teaspoon Salt
- 2 large Egg Yolks
- 2 tablespoons Unsalted Butter
- 1 teaspoon Vanilla Extract
Ingredient Notes and Substitutions for Homemade Chocolate Pudding
Listen up: the cocoa powder you choose makes a difference. I push for Dutch process because it gives us that moody, deep color and a less acidic taste, which just equals a better dessert straight up. Natural cocoa is fine, but Dutch is better for this application. Also, if you want to kick this into the stratosphere and make it an extra rich cocoa dessert, skip the instant espresso powder tip and just melt in two ounces of finely chopped bittersweet chocolate right at the end with the butter. It adds body and unbelievable depth. Don’t forget to check out my guide on old-fashioned chocolate fudge for more decadent cocoa ideas!
Mastering the Classic Stovetop Pudding: Instructions for Homemade Chocolate Pudding
Okay, here’s where we translate the restaurant rhythm into your home kitchen. Making homemade chocolate pudding on the stove is fast, but it demands focus. The entire goal here is achieving that silky smooth pudding texture without breaking the whole thing with lumps. We’re looking for speed and precision, just like on a busy dinner line.
Lump-Free Technique for Your Homemade Chocolate Pudding
Rule number one: We whisk the dry stuff first. Seriously, take five seconds to look at Step 1 in the ingredients list. You need to mix the sugar, cocoa, cornstarch, and salt until you can’t see streaks of white or brown powder anymore. That fully dissolved base is the secret sauce. If you skip this, you fight lumps later, and nobody has time for that! I learned this the hard way when I was trying to hustle during brunch service—I got impatient, tossed everything into cold milk, and ended up with an eggy, lumpy mess that I had to strain through a fine-mesh sieve. Don’t be me; whisk those dry ingredients properly to lock in that creamy chocolate pudding recipe outcome.
Next up, tempering the yolks—this is another non-negotiable step. You’re adding hot liquid to cold eggs, so you have to trick them gently. Slowly drizzle that hot milk mixture into your whisked yolks while whisking non-stop. This raises their temperature slowly so they thicken the pudding later instead of scrambling into little yellow rafts in your sauce. It’s a gentle dance!
Achieving the Perfect Thickness in Your Homemade Chocolate Pudding
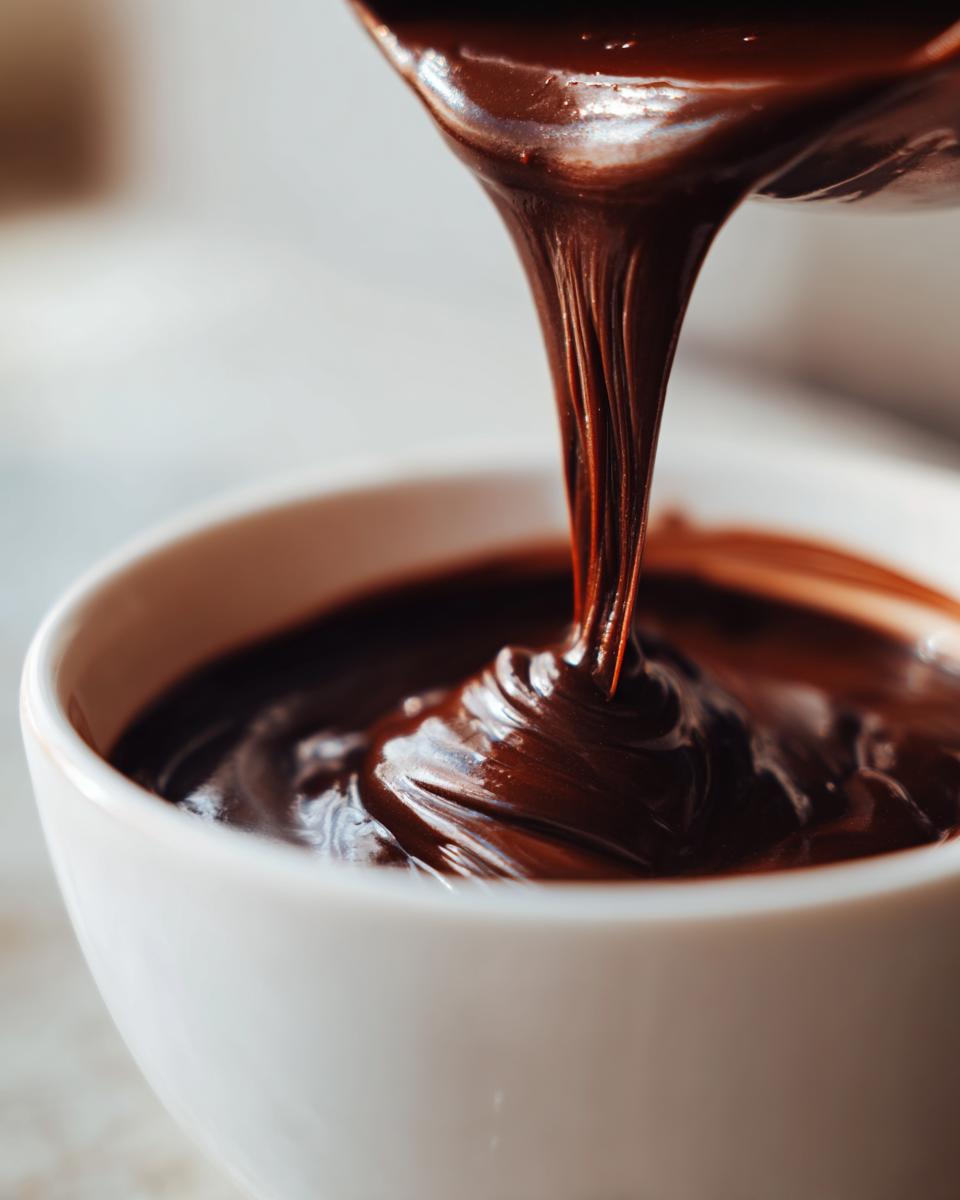
Once you have your tempered yolks back in the pot, you put it over medium heat and you *do not stop stirring*. Seriously, move that whisk around the entire bottom and sides of the pan constantly. After about 5 to 8 minutes, you’ll notice the entire mixture struggling to move around the bottom of the pan—it’s getting thick! The visual cue I look for, the moment I pull it off the heat, is when the pudding is thick enough to really coat the back of a spoon heavily. You should be able to run your finger across that coated spoon and the line should hold cleanly for a second or two before the pudding slowly flows back together. If it runs off immediately, give it another 30 seconds. That perfect thickness right before the boil is your texture guarantee.
Once off the heat, immediately cut in the butter and vanilla. Give it one last big whisk until it looks ultra-glossy. Don’t forget to check out some great binding agents at my chocolate mousse guide if you love texture variation!
Chilling and Setting Your Decadent Chocolate Pudding
We’re nearly done! This homemade chocolate pudding is cooked, but it’s not *ready*. It needs time to chill and let that cornstarch and those egg yolks truly set up to give you that amazing, dense mouthfeel. You must cover it immediately. Take a sheet of plastic wrap—like, right now—and press it directly against the surface of the pudding in the serving dishes. I can’t stress this enough: if you leave even a tiny gap, that weird film forms on top. We want every spoonful to be a pure, indulgent homemade treat, not one ruined by skin!

The absolute minimum chilling time is two hours, but frankly, for the best flavor and the firmest set, let it hang tough in the fridge for four hours. Trust me on the wait; it’s worth it.
Serving Suggestions for Ultimate Chocolate Comfort Food
Now that you’ve nailed the texture and it’s perfectly chilled, we get to the fun part—making this ultimate chocolate comfort food look as good as it tastes! This pudding is already rich enough on its own, but a little finishing touch can really elevate it from a simple dessert to something truly special.
My rule is simple: texture contrast is key. You don’t want a bowl of uniformly smooth stuff forever, right? You want something crunchy or airy to break it up.
- Whipped Cream Cloud: Always keep heavy cream around; the homemade whipped cream is essential. Whip it until it just starts to hold soft peaks, then add a tiny drizzle of maple syrup instead of powdered sugar for deeper flavor. Dollop heavily on top—don’t be shy!
- Chocolate Shavings: This is the easiest pro move. Grab a vegetable peeler and shave a high-quality bar of dark chocolate directly over the top of the pudding right before serving. It melts slightly on contact and looks gorgeous.
- Fresh Berries: Since we used such deep cocoa flavors, an acidic, bright fruit cuts through the richness perfectly. Raspberries are my number one choice here, but sliced strawberries work great too. They give you that little burst of freshness in every bite.
- A Little Crunch: If you’re feeling ambitious, crush up a few salty pretzels or some malted milk balls and sprinkle them on top of the whipped cream. That salty-sweet combo makes everything better!

When you take this out to serve, you’ll feel like a total rockstar because you made this beautiful, from scratch chocolate dessert yourself. If you love making treats in advance, you absolutely have to check out my recipe for no-bake chocolate rum balls—they’re perfect when you need a make-ahead indulgence!
Storage and Reheating for Your Homemade Chocolate Pudding
So, you made too much of this amazing from scratch chocolate dessert? Good call. This pudding is almost better the next day! Since we used real egg yolks in this recipe—which is what gives you that fantastic density and richness—it behaves a little differently than the instant stuff once it gets fully chilled.
For storage, keep it covered tightly in the fridge. Remember that plastic wrap we squished right onto the surface to stop the skin from forming? Keep that on! If you store it uncovered, yes, it will develop a layer, and you’ll have to scrape it off, which ruins the smooth top layer. Honestly, this homemade chocolate pudding stays absolutely fantastic for a solid three, maybe four days if you keep it cold and covered properly. It firms up even more as it chills, which is great for scooping.
Now, about reheating: I strongly advise against it. Because we used egg yolks as a primary thickener, trying to heat this back up will likely cause the yolks to overcook, turning your velvety dream into something grainy or even scrambled. We developed this recipe for that cool, silky-smooth payoff. So, plan on enjoying your leftovers chilled straight from the fridge! It’s truly the best way to experience this rich comfort food.
Variations on the Best Chocolate Pudding Recipe
One thing I always preach about is making a recipe your own. We’ve nailed the absolute best chocolate pudding recipe foundation here, but why stop there? Your stovetop knowledge means you can easily pivot this simple base into a few totally different, amazing experiences depending on what you’re craving. We only need simple pantry moves to completely change the flavor profile, which is what separates home cooks from recipe followers, you know?
If you’re tired of plain chocolate for a second night in a row, try one of these minor tweaks. It’s still fast, still from scratch chocolate dessert perfection, just with a little personality boost.
Creating a Rich Cocoa Dessert with Bittersweet Chocolate
If you want to take this flavor straight into the “I have champagne tastes on a weeknight budget” category, this is the move. Instead of just relying on the cocoa powder, we’re adding real chocolate for body and that deep, luxurious melt. For a truly rich cocoa dessert, remember that little note in the ingredients section? When you take the pudding off the heat right before stirring in the butter, toss in about two ounces of finely chopped bittersweet chocolate (aim for 65% cacao or higher). You need to stir it constantly until it melts in completely. It adds fat and depth of flavor that cocoa alone just can’t touch!
The milk volume stays the same, but the chocolate melts into the hot liquid, thickening it just a hair more and saturating the whole thing with intense flavor. It transforms this from a classic American pudding into something more European and decadent.
For another warm twist, try adding just a small pinch of ground cinnamon when you whisk those dry ingredients together—it complements the Dutch cocoa beautifully, adding warmth without making it taste like a spice cake. It’s a subtle secret that elevates the whole thing, kind of like the secret to my amazing banana nut muffins.
Frequently Asked Questions About Homemade Chocolate Pudding
When you’re deep into making a recipe for the first time—especially a beloved classic like homemade chocolate pudding—you often have nagging questions, and I totally get it. That’s why I want to translate a few common chef-level concerns right here so you can feel totally confident. We want that flawless, creamy chocolate pudding recipe texture, and sometimes the little things trip us up!
Can I use heavy cream instead of whole milk in this homemade chocolate pudding?
You absolutely can! If you swap the 2 cups of whole milk for 2 cups of heavy cream, you’re going to get an incredibly decadent chocolate pudding. It will be much richer, higher in fat, and it will set up a bit softer because the water content is lower. Think of it as moving from a good, classic pudding to an ultra-luxurious dessert. Just be aware it might not firm up quite as much during chilling, but the taste payoff is huge. If you want to make a lighter version—maybe for those easy peanut butter cookies you are making later—you can use 2% milk, but it won’t be quite as rich.
How do I ensure my homemade chocolate pudding sets firmly?
The structure rests mostly on two things: the cornstarch and the cooking time. You need that full two tablespoons of cornstarch, that’s the main heavy lifter here. But you *must* cook it until it’s visibly thick on the stove *before* you chill it. If you pull it off too soon—say, when it coats the spoon lightly—it might stay runny after chilling. Keep stirring until it’s almost hard to stir! The chilling process isn’t really “setting” the pudding entirely; it’s just cooling down what you already cooked into the right consistency. If your from scratch chocolate dessert is runny, it’s almost always an issue of not cooking long enough on the stovetop while stirring constantly.
I’ve got heaps more tips for quick baking fixes over on my easy peanut butter cookies page, too, if you want to keep the easy baking streak going!
Share Your Homemade Chocolate Pudding Success
Alright, now you’ve got the secret sauce! You’ve made the absolute best homemade chocolate pudding and you’ve achieved that velvety, melt-in-your-mouth texture that cheap mixes can only dream about. You’ve translated that professional knowledge into something truly comforting for yourself.
I really want to know how it went! Did you go for the standard setup, or did you try stirring in that bittersweet chocolate for that extra decadent hit we talked about? Head down to the comments right now and tell me about the texture you achieved. Was it perfectly silky? Did you serve it with whipped cream clouds? Did the plastic wrap trick save you from getting skin? Tell me everything!
If you snapped a picture of your beautiful, rich dessert, please tag me on social media! Seeing your results truly makes my day because it means that kitchen lingo worked for you. Don’t be shy—we are building a community here where great food is accessible to everyone, not just chefs behind swinging doors. If you’re curious about how I think about translating all my techniques, you can read more about the philosophy behind the slang over on my About page. Happy scooping!
PrintThe Best Ever Homemade Chocolate Pudding: Rich and Creamy From Scratch

Make the ultimate comfort dessert with this easy, from-scratch chocolate pudding recipe. You get a rich, silky smooth texture that beats any boxed mix, using simple pantry staples.
- Prep Time: 10 min
- Cook Time: 15 min
- Total Time: 25 min
- Yield: 4 servings 1x
- Category: Dessert
- Method: Stovetop Cooking
- Cuisine: American
- Diet: Vegetarian
Ingredients
- 2 cups Whole Milk
- 1/2 cup Granulated Sugar
- 1/4 cup Unsweetened Cocoa Powder (Dutch process recommended for deep color)
- 2 tablespoons Cornstarch
- 1/4 teaspoon Salt
- 2 large Egg Yolks
- 2 tablespoons Unsalted Butter
- 1 teaspoon Vanilla Extract
Instructions
- In a medium saucepan, whisk together the sugar, cocoa powder, cornstarch, and salt until no lumps remain. This step prevents lumps later.
- Whisk in the milk until the mixture is smooth.
- Place the saucepan over medium heat. Stir constantly with a whisk until the mixture thickens and just begins to bubble. This usually takes 5 to 8 minutes. Do not stop stirring.
- In a small bowl, lightly whisk the egg yolks. Scoop about 1/2 cup of the hot milk mixture into the yolks while whisking constantly to temper them. This prevents the yolks from scrambling.
- Pour the tempered yolk mixture back into the saucepan, whisking immediately.
- Continue to cook, stirring constantly, for 1 to 2 minutes until the pudding is very thick. It should coat the back of a spoon heavily.
- Remove the saucepan from the heat. Stir in the butter and vanilla extract until the butter is fully melted and incorporated.
- Pour the pudding into individual serving dishes or a single bowl. Press plastic wrap directly onto the surface of the pudding to prevent a skin from forming.
- Chill in the refrigerator for at least 2 hours, or until completely cold and set. Serve cold.
Notes
- For a lump-free texture, ensure you fully dissolve the dry ingredients in the cold milk before applying heat.
- If you want a mocha flavor, add 1/2 teaspoon of instant espresso powder with the dry ingredients.
- For a richer, more decadent chocolate pudding, substitute 1/4 cup of the milk with 2 ounces of finely chopped bittersweet chocolate, added with the butter at the end.
Nutrition
- Serving Size: 1 serving
- Calories: 280
- Sugar: 30
- Sodium: 150
- Fat: 12
- Saturated Fat: 7
- Unsaturated Fat: 5
- Trans Fat: 0.2
- Carbohydrates: 38
- Fiber: 2
- Protein: 7
- Cholesterol: 75