
If you’re still buying that thin, overly sweet stuff in the squeeze bottle, stop right there. I’m serious. You deserve better, and frankly, your ice cream deserves better. Most store-bought options are loaded with corn syrup and frankly, they taste kind of… flat. That’s why I’m translating one of the first things I learned on the line: how to make real, honest-to-goodness **chocolate syrup** that tastes like actual chocolate heaven. This isn’t some fancy technique; it’s the ultimate pantry staple trick. You need water, sugar, cocoa, and about ten minutes. That’s it. Trust me, once you try this rich, silky version, you’ll never look back. This is your new secret weapon.
- Why This Homemade Chocolate Syrup Recipe Beats Store-Bought
- Ingredients for Making Chocolate Syrup From Scratch
- How To Make Chocolate Syrup: Step-by-Step Instructions
- Tips for the Best Chocolate Syrup Consistency
- Versatile Uses for Your Homemade Chocolate Syrup
- Dietary Variations for This Cocoa Powder Chocolate Syrup
- Frequently Asked Questions About Homemade Chocolate Syrup
- Estimated Nutritional Data for Chocolate Syrup
- Share Your Silky Chocolate Sauce Success
Why This Homemade Chocolate Syrup Recipe Beats Store-Bought
Listen, I know the siren song of the supermarket aisle. Grabbing that familiar bottle seems easy, but convenience always comes with a trade-off. Are you really happy with what’s inside? I’m giving you permission today to say No Store Bought Syrup. We’re going from pantry staples to something genuinely decadent in less time than it takes to find your keys and drive to the store.
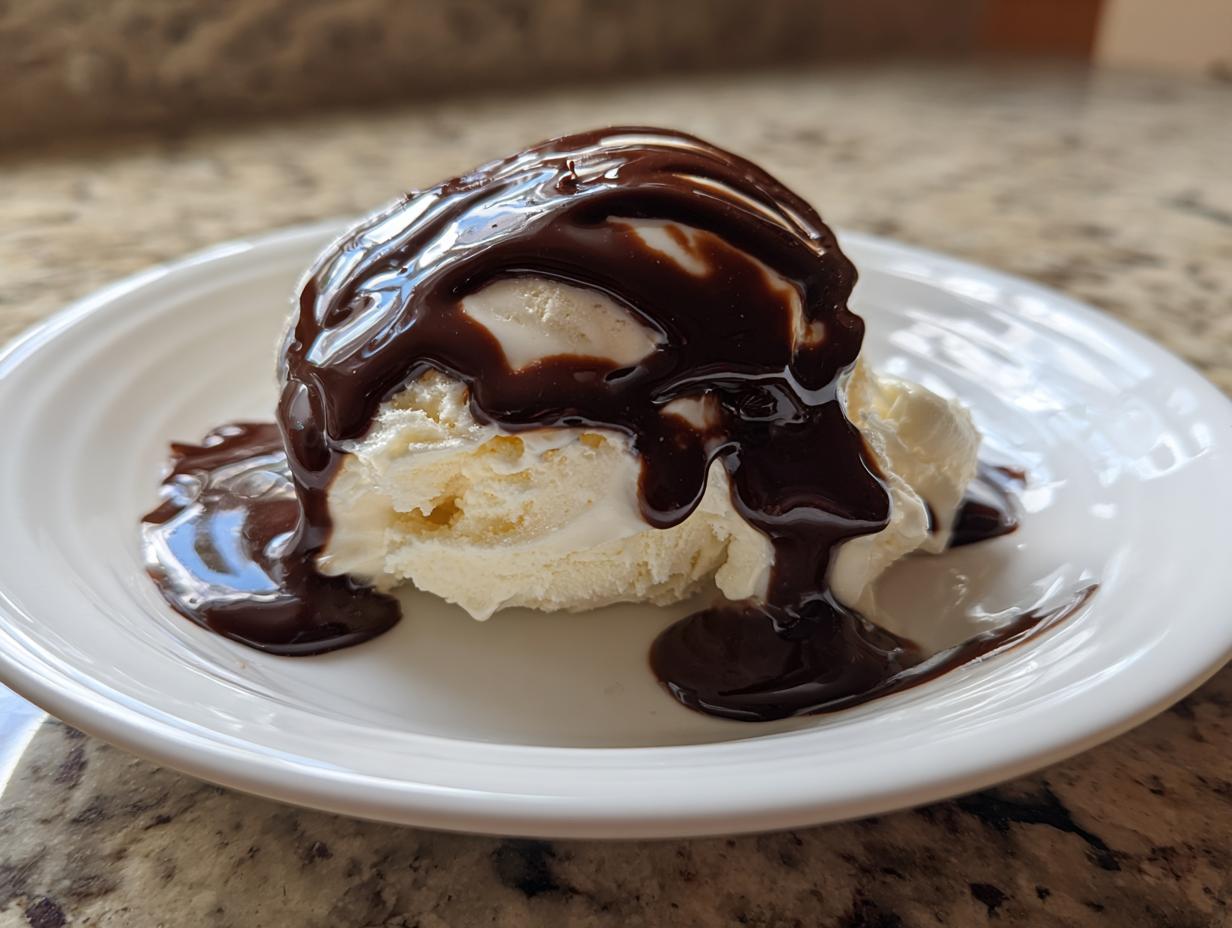
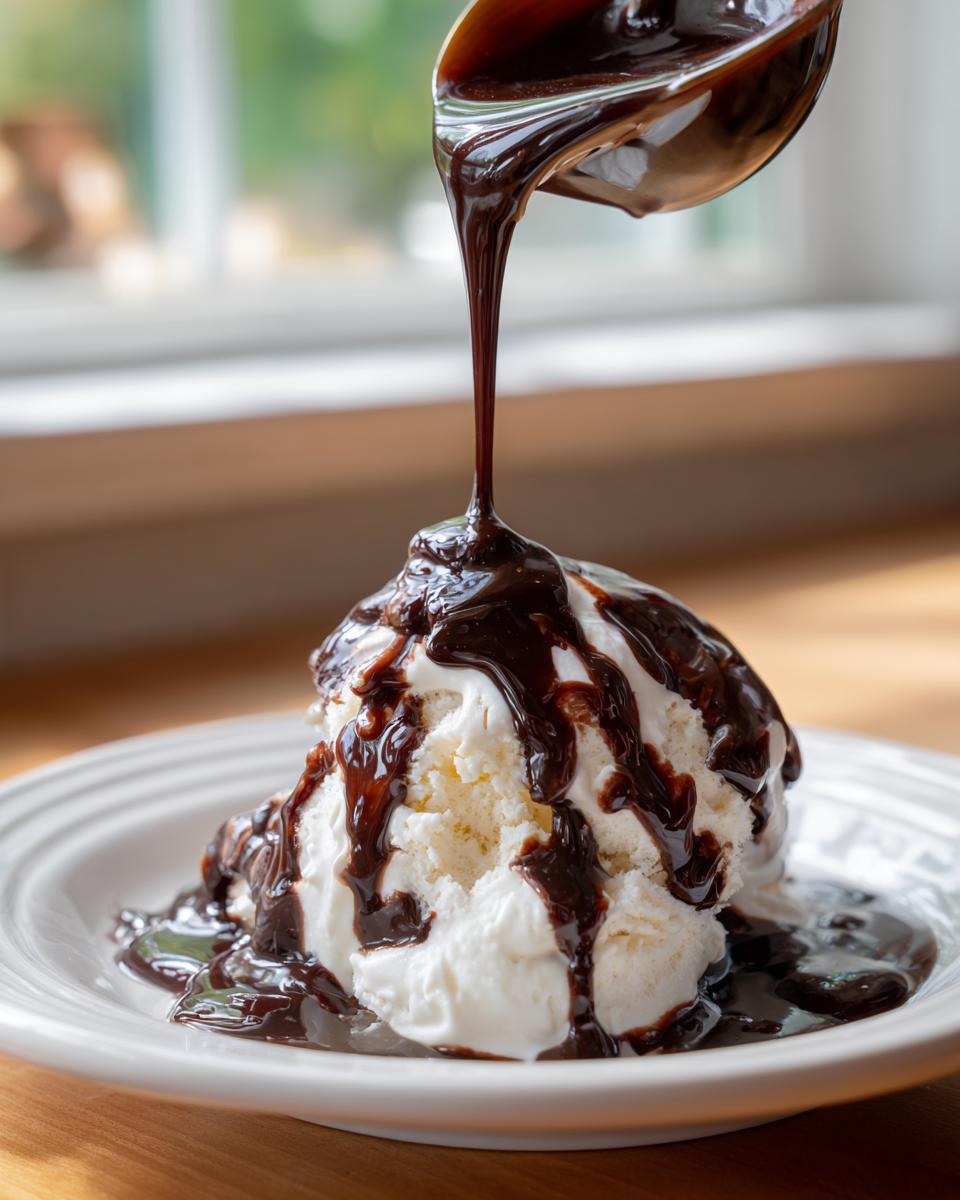
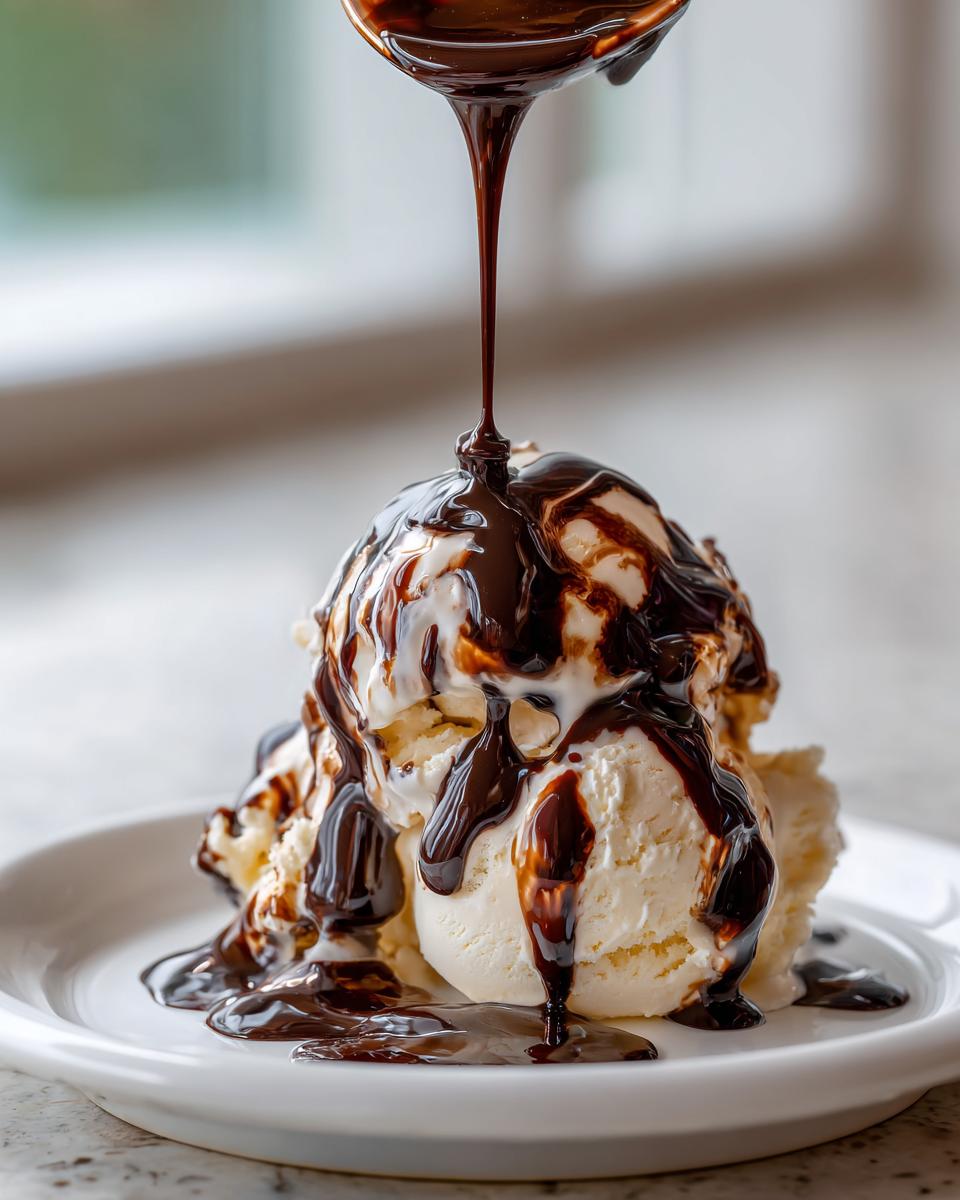
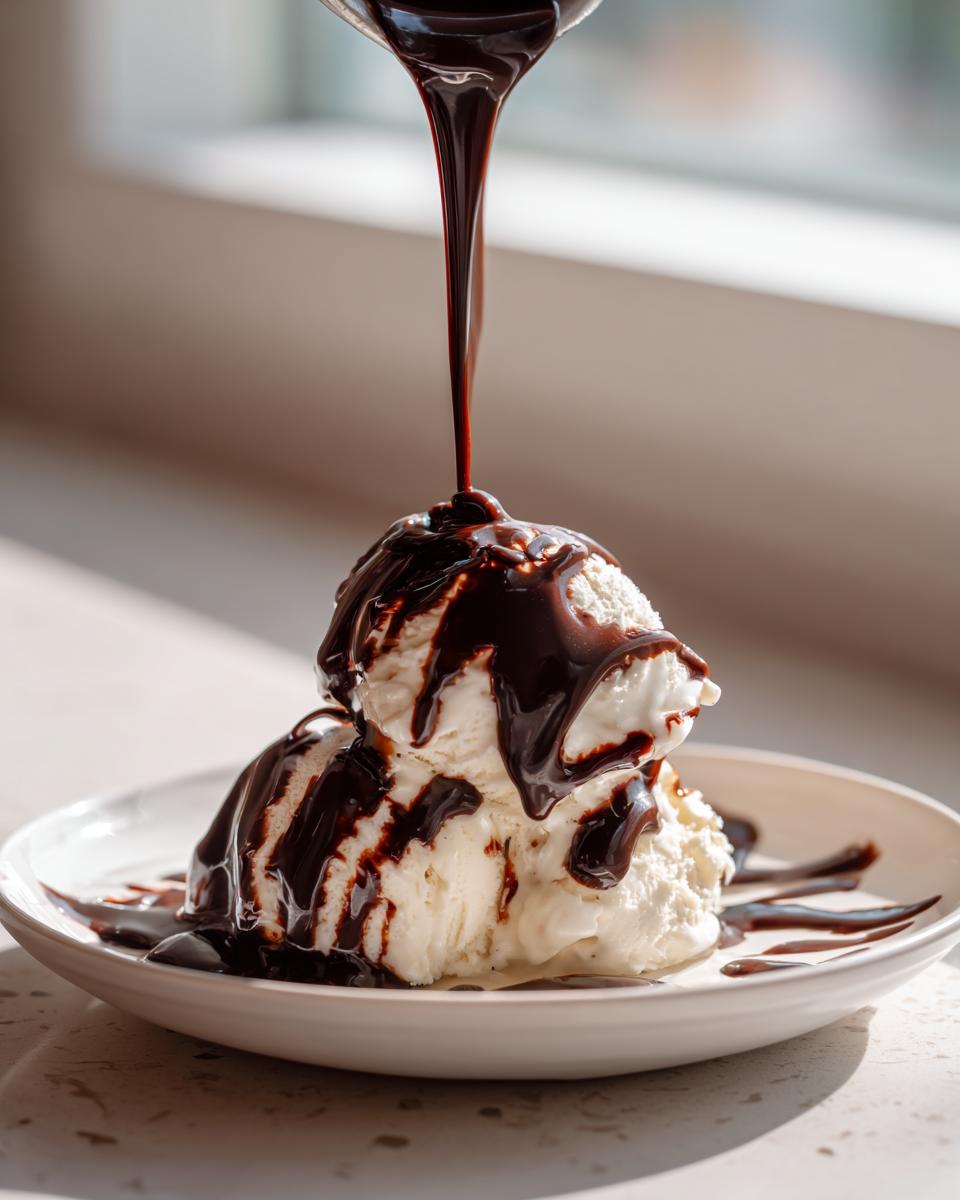
The difference isn’t just flavor; it’s texture. We are aiming for that perfect, decadent coating—a true **Better Than Hershey’s Syrup** experience. We want a thick, lush coating that slowly drips down the side of your ice cream sundae, not thin brown water. This recipe ensures that happens every single time because we control the liquid ratio.
The ‘Kitchen Slang’ Advantage: Rich Chocolate Drizzle
The pro secret here is bypassing melted chocolate bars or heavy corn syrup. We use good quality, unsweetened cocoa powder. When you combine that finely milled powder with sugar over gentle heat, you create an incredibly smooth base right on the stovetop. This method guarantees the perfect consistency for a beautiful **Rich Chocolate Drizzle** without any graininess—just pure, velvety chocolate.
Ingredients for Making Chocolate Syrup From Scratch
Okay, this is where ‘pantry staple recipes’ turn into magic. Seriously, look in your cabinets. You probably have everything you need right now. Don’t run out to the specialty store for this one; simplicity is the key to making our ultimate Homemade Chocolate Syrup Recipe. Precision matters here, just like in the restaurant kitchen, so grab those measuring cups!
Here’s what you need to gather up before you even think about turning on the burner:
- 1 cup water (plain old tap water is totally fine!)
- 1 cup granulated sugar (We’re keeping this classic and simple for now, but we’ll talk swaps later, I promise.)
- 1/2 cup unsweetened cocoa powder (Use the best quality you can justify; it really makes a difference in the final flavor.)
- 1/4 teaspoon salt (Don’t skip this! It’s the tiny secret that makes the chocolate flavor *pop*.)
- 1 teaspoon vanilla extract (Added right at the end, this is our aromatic finishing touch.)
That’s it! Five ingredients. See? No weird gums or stabilizers required. I love that this recipe gives us total control over what goes into our favorite Easy Chocolate Sauce.
How To Make Chocolate Syrup: Step-by-Step Instructions
This is where the magic happens, folks! Grab your ingredients and find a nice, small saucepan—we aren’t making a gallon here, just the perfect batch of homemade **chocolate syrup**. Remember what I told you about translating chef language? Well, this is the translation of ‘bring to a controlled simmer to bloom the cocoa.’ It’s easy, but you have to pay attention for just a few minutes.
- First, combine the water, sugar, your cocoa powder, and that tiny pinch of salt right into your saucepan. No need to pre-mix the dry stuff.
- We put it over medium heat. Now, listen close: you must whisk constantly! We need that sugar to dissolve completely. Once you see it start to gently bubble—just reaching a simmer—you’ve done the hard part.
- Reduce the heat way down to low. Now, let it hang out for about 5 minutes, stirring just occasionally. If you let it go wild, it gets grainy or sugary later. We want it smooth! For those making this for desserts later, this simmering time is non-negotiable for flavor depth.
- When it looks slightly richer, pull the pan off the heat immediately. Stir in the vanilla extract—that lovely aroma is your reward!
- Carefully pour your hot syrup into a heatproof jar. Don’t try to use it right away; it needs to settle down.
Simmering the Silky Chocolate Sauce Base
That five-minute simmer on low heat? That’s the chef thinking coming through. When you gently cook the cocoa powder and sugar mixture with the water, you aren’t just dissolving things; you’re actively deepening the chocolate flavor. If we just mixed it cold, it would taste flat, like the stuff you find in the back of the pantry. This gentle heat unlocks the richness we need for that intense, decadent profile. It’s where the flavor concentrates, trust me.
Cooling and Storing Your Chocolate Syrup
Once the vanilla is in, don’t be tempted to pour it straight onto ice cream! Once poured into your storage jar, let it sit on the counter until it cools down to room temperature. As it cools off, this **Easy Chocolate Sauce** will thicken up significantly—that’s the syrup setting its texture. Once cool, cap it tight and pop it in the fridge. It keeps beautifully for a couple of weeks, ready when you need that midnight snack drizzle!
Tips for the Best Chocolate Syrup Consistency
One of the coolest things about making this from scratch is that you are the master of texture. This recipe gives you a fantastic middle ground, perfect for most things, but sometimes you need it thinner or seriously thick. If you’re making this specifically as an Easy Chocolate Sauce for dipping fruit or coating something thick, just let it simmer for an extra minute or two on low heat before you pull it off. That slight extra reduction really amps up the viscosity.
Now, if you’re aiming for the ultimate Quick Dessert Topping that clings perfectly to a scoop of vanilla, make sure that cooling time is respected! It always thickens up a ton once it chills out.
On the flip side, if you’re pulling this straight out of the fridge and it seems too stiff for hot chocolate or iced mocha—don’t panic! That’s just the sugar solidifying slightly. Just add a teaspoon or two of warm water while stirring, and it instantly loosens right back up to that perfect pouring texture. That’s the translation for dealing with crystallization—just a tiny bit of gentle warming fixes everything!
Versatile Uses for Your Homemade Chocolate Syrup
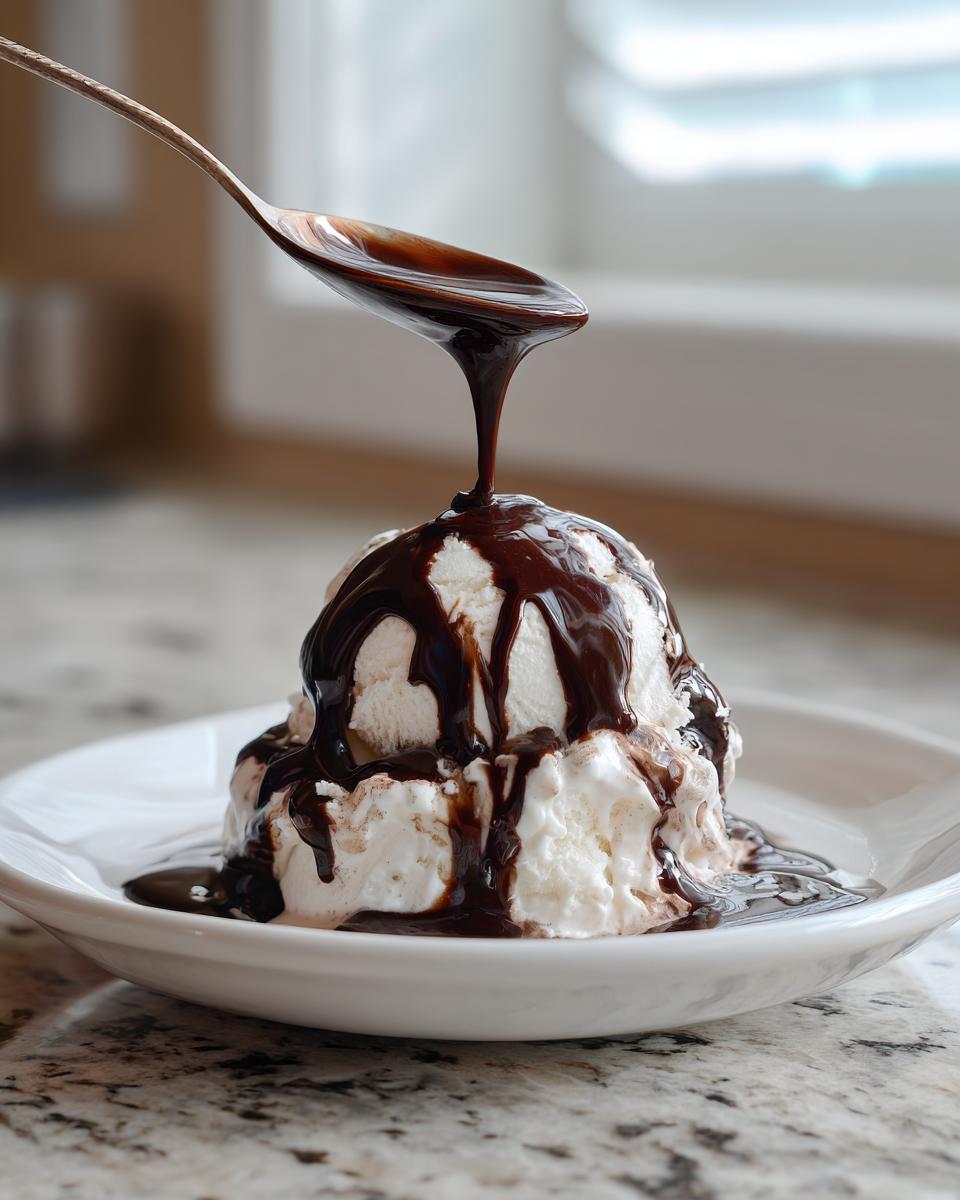
If you think this amazing **chocolate syrup** is only for drizzling on desserts, you’re totally missing out. This is where homemade shines against the store-bought stuff—it’s so much more versatile! Because we aren’t relying on weird stabilizers, this batch is perfect for everything from making the best Chocolate Milk Recipe Ingredient to serving as an amazing Ice Cream Topping Homemade.
For milk, just swirl a tablespoon or two into cold milk and stir well. The richness keeps it from sinking to the bottom quite as fast as the thin stuff! And yes, you absolutely have to try it over pancakes or waffles—it melts just right from the heat.
Making Chocolate Coffee Syrup
My favorite trick, especially when I’m running low on steam, is using this as a base for my morning coffee. Because our **chocolate syrup** has a better sugar and cocoa balance, it mixes into hot espresso or coffee without feeling gritty or separating like the cheap stuff does when it gets hot. Add two pumps to your latte, maybe a splash of milk, and bam—instant homemade mocha.
Dietary Variations for This Cocoa Powder Chocolate Syrup
I get asked all the time if we can adapt recipes for different needs, and yes, we absolutely can with this one! Since we are relying on simple sugar and cocoa powder, we’ve got a great base for tweaks. If you’re aiming for a **Vegan Chocolate Syrup**, the main thing you need to check is your sugar source. Most standard granulated sugar in the US is fine for most people, but if you’re strictly avoiding bone char, you might grab organic marked sugar that guarantees it. It’s easy to keep this recipe totally plant-based!
For those looking to cut down on sugar, you can certainly try swapping the granulated sugar for your favorite 1:1 sugar substitute, but know that it will change the texture slightly. The sugar is what helps give this **Cocoa Powder Chocolate Syrup** its body when it cools! If you need to go totally sugar-free, you might need a different base altogether—maybe something involving monk fruit and a thickening agent—but for now, stick to the original for that perfect silkiness. If you love making vegan treats, check out my recipe for vegan brownies; they use a similar philosophy of simple, good ingredients!
Frequently Asked Questions About Homemade Chocolate Syrup
When you’re learning the lingo, it’s normal to have questions about the new tools in your pantry. We want you to feel totally confident pulling this jar out, whether you’re making an emergency mug of hot cocoa or whipping up a fancy dessert. Don’t worry if the consistency seems off when it’s hot; that’s just the difference between a chef’s quick sauce and what shows up in a plastic bottle. We’ve got answers for the most common things people ask about this amazing **chocolate syrup**!
How long does homemade chocolate syrup last in the fridge?
Because we aren’t packing this with preservatives, it won’t last until next Christmas, but it lasts plenty long for regular use! Once you’ve let your batch cool down completely, store it in an airtight container in the refrigerator. I’ve always found that it stays absolutely perfect for up to two weeks. If you notice it getting a little cloudy or smelling a bit ‘off,’ just toss it. But honestly, it usually disappears before then!
Can I make this recipe thicker for an Ice Cream Topping Homemade?
Oh yes, you totally can! Remember Step 3 in the instructions? That gentle simmer builds the body. If you’re planning ahead and know you want a super thick, decadent coating that holds its shape on vanilla ice cream, just let that mixture simmer for an extra minute or two on low heat before you take it off the burner. That slight extra evaporation concentrates the sugar solids just a bit more, giving you that seriously thick **Ice Cream Topping Homemade** consistency once it chills. Just be careful not to let it go too long, or it might start crystallizing!
If you’re looking for more great ways to use your pantry staples, check out my guide on homemade granola—it uses some great pantry basics, too!
Estimated Nutritional Data for Chocolate Syrup
Okay, I’m going to give you the numbers here, but remember—this is the restaurant translated way of thinking. These figures are estimates based on standard granulated sugar and pure cocoa powder, so they might shift a tiny bit based on what brands you use. We’re looking at a serving size of about two tablespoons here, which is usually what you’d drizzle over a slice of cake or stir into your milk.
- Calories: 105
- Sugar: 25g (Yep, it’s a treat!)
- Protein: 0.5g
- Fat: Less than 1g
The biggest thing to keep in mind is that this is a classic sugar/cocoa sauce. When you use this **chocolate syrup** at home, you’re swapping out those industrial thickeners for pure sugar and flavor, which is why it tastes so much lusher!
Share Your Silky Chocolate Sauce Success
Alright, you’ve translated the slang, you’ve made the batch, and now you have this incredible, smooth, homemade **chocolate syrup** sitting in your fridge. I absolutely want to hear about it! Did you stir a big spoonful into an afternoon latte? Did you finally manage to top your kids’ pancakes without them complaining it wasn’t ‘real’ syrup? Let me know!
If this recipe saved you from that disappointing trip to the grocery store, please, leave me a star rating below. A five-star rating really helps other cooks find this translation when they’re looking to upgrade their pantry. If you haven’t tried it yet, pull those cocoa beans out! You won’t regret it. Don’t forget to check out my recipe for easy peanut butter cookies soon; they need a good drizzle of this stuff!
PrintUltimate 10-Minute Homemade Chocolate Syrup (Better Than Store-Bought)

Stop buying syrup. Make this rich, silky homemade chocolate syrup in under 10 minutes using basic pantry staples. It is the best chocolate syrup recipe for topping ice cream, making chocolate milk, or mixing into coffee.
- Prep Time: 5 min
- Cook Time: 10 min
- Total Time: 15 min
- Yield: About 1.5 cups 1x
- Category: Dessert Topping
- Method: Stovetop Cooking
- Cuisine: American
- Diet: Vegetarian
Ingredients
- 1 cup water
- 1 cup granulated sugar
- 1/2 cup unsweetened cocoa powder
- 1/4 teaspoon salt
- 1 teaspoon vanilla extract
Instructions
- Combine the water, sugar, cocoa powder, and salt in a small saucepan.
- Place the saucepan over medium heat. Whisk constantly until the sugar dissolves and the mixture just begins to simmer. Do not let it boil rapidly.
- Reduce the heat to low and continue to cook, stirring occasionally, for about 5 minutes until the syrup thickens slightly. This step builds the rich flavor.
- Remove the saucepan from the heat. Stir in the vanilla extract.
- Pour the chocolate syrup into a heatproof jar or container. Let it cool completely to room temperature. The syrup will thicken more as it cools.
- Store the finished chocolate syrup in an airtight container in the refrigerator for up to two weeks.
Notes
- For a vegan chocolate syrup, confirm your sugar source is bone-char free, though standard granulated sugar is usually fine for most home cooks.
- If you want a thinner consistency for chocolate milk, use slightly more water next time. For a thicker ice cream topping, simmer for an extra minute or two.
- This recipe makes a great homemade gift; bottle it nicely and tie a ribbon around it.
Nutrition
- Serving Size: 2 tablespoons
- Calories: 105
- Sugar: 25
- Sodium: 15
- Fat: 0.3
- Saturated Fat: 0.2
- Unsaturated Fat: 0.1
- Trans Fat: 0
- Carbohydrates: 27
- Fiber: 1
- Protein: 0.5
- Cholesterol: 0