
There is nothing, I mean absolutely nothing, that beats the feeling of pulling a truly great homemade pizza out of your own oven. Forget that sad, floppy delivery box! We’re talking about getting that intense heat and achieving real, restaurant-quality results with our DIY pizza recipe, every single time. When I was learning in the kitchen, the techniques chefs used to get that perfect chew felt like a secret language, right? Well, I’m translating it all for you here. This recipe is about mastering the dough so you get that piping hot pizza with a perfect crust that makes everyone forget they ever called a delivery driver.
- Why This Homemade Pizza Recipe Delivers the Best Pizza Crust
- Gathering Ingredients for Your Homemade Pizza
- Step-by-Step Instructions for Perfect Homemade Pizza Dough
- Baking Your Homemade Pizza: Mastering High Heat
- Tips for Success with Your DIY Pizza Recipe
- Making Homemade Pizza for Family Pizza Night
- Storing and Reheating Leftover Homemade Pizza
- Frequently Asked Questions About Making Pizza at Home
- Estimated Nutritional Breakdown for This Homemade Pizza
Why This Homemade Pizza Recipe Delivers the Best Pizza Crust
Getting that piping hot pizza with a perfect crust—crisp on the outside but tender inside—is why we make our own. The secret to this incredible homemade pizza dough isn’t just luck; it’s using the right stuff and using your oven like a professional. We rely specifically on bread flour because it has higher protein content. That’s the ticket for achieving that satisfying chew you normally only find at your favorite pizzeria. If you’re looking for fantastic weeknight meals that feel like a treat, this DIY pizza recipe is truly unmatched.
I also use the highest heat my oven allows, which is non-negotiable if you want those beautiful browned spots. If you follow these steps for this homemade pizza recipe, you’ll never go back to ordering in again. Check out the science behind why this exact combination works so well below.
The Science Behind the Best Pizza Crust
The chewiness you crave comes from gluten developing properly. Bread flour has the higher protein content necessary to build up strong gluten strands when you knead the dough. Don’t skip that kneading time!
That long, slow rise—especially if you chill the dough overnight—allows those gluten structures to relax perfectly. Relaxed gluten stretches beautifully into a thin crust without tearing while giving you that springy edge when it hits the super-hot oven. It’s pure textural magic!

Gathering Ingredients for Your Homemade Pizza
Before we start making the magic happen with this homemade pizza, we need our players on the field. This recipe is simple, but the ingredient quality really shines through, especially since we’re making the dough from scratch. Pay attention to the temperature of that water—it’s important!
Here’s what you need to grab for two amazing pizzas. Don’t skimp on the olive oil; it adds flavor right into our homemade pizza dough. These proportions are what guarantee that perfect crust texture we talked about earlier.
- 1 1/2 cups warm water (make sure it’s between 105-115°F—like a warm bath!)
- 2 1/4 teaspoons active dry yeast
- 1 teaspoon sugar
- 3 3/4 cups bread flour
- 2 teaspoons fine sea salt
- 2 tablespoons olive oil, plus some extra for greasing the bowl
- 1/2 cup pizza sauce (trust me, use low-moisture sauce, or your pizza will weep!)
- 1 1/2 cups low-moisture mozzarella cheese, shredded
- Whatever toppings are calling your name tonight!
Step-by-Step Instructions for Perfect Homemade Pizza Dough
Okay, this is where the real fun starts! Making the dough is satisfying, and once you nail this part, the rest of your homemade pizza journey is just assembly. We’re going through activating the yeast, getting that gorgeous feel when kneading, and letting it breathe. Remember, the better the dough sleeps, the better the rise on your final oven baked pizza! If you love working with dough, you’ll also want to check out my recipe for easy garlic naan bread; it uses similar rising magic.
Activating Yeast and Mixing the Homemade Pizza Dough
First things first: check your water temperature! It should feel like a warm bath, not hot. Pour that into your big bowl with the sugar and sprinkle the yeast on top. Don’t stir it; just let it sit until it gets foamy—that confirms your yeast is alive and ready to work. Then, toss in the flour, salt, and olive oil. Mix it until it looks like a total mess—we call that a shaggy dough. Don’t worry, it’s supposed to look rugged here!
Kneading and Rising for Optimal Homemade Pizza
Now, get those hands dirty! Turn that shaggy mess onto a floured surface and knead it until it feels smooth and holds its shape—that takes about 8 to 10 minutes by hand. You are looking for elasticity; it should stretch without instantly snapping back. Put that beautiful ball of homemade pizza dough into an oiled bowl, cover it tight, and let it double in size in a warm spot (about 1 to 1.5 hours). Honestly, for the absolute best flavor on your pizza, try covering it and putting it in the fridge for 12 to 24 hours. It develops such a deeper flavor base for your final homemade pizza!

Baking Your Homemade Pizza: Mastering High Heat
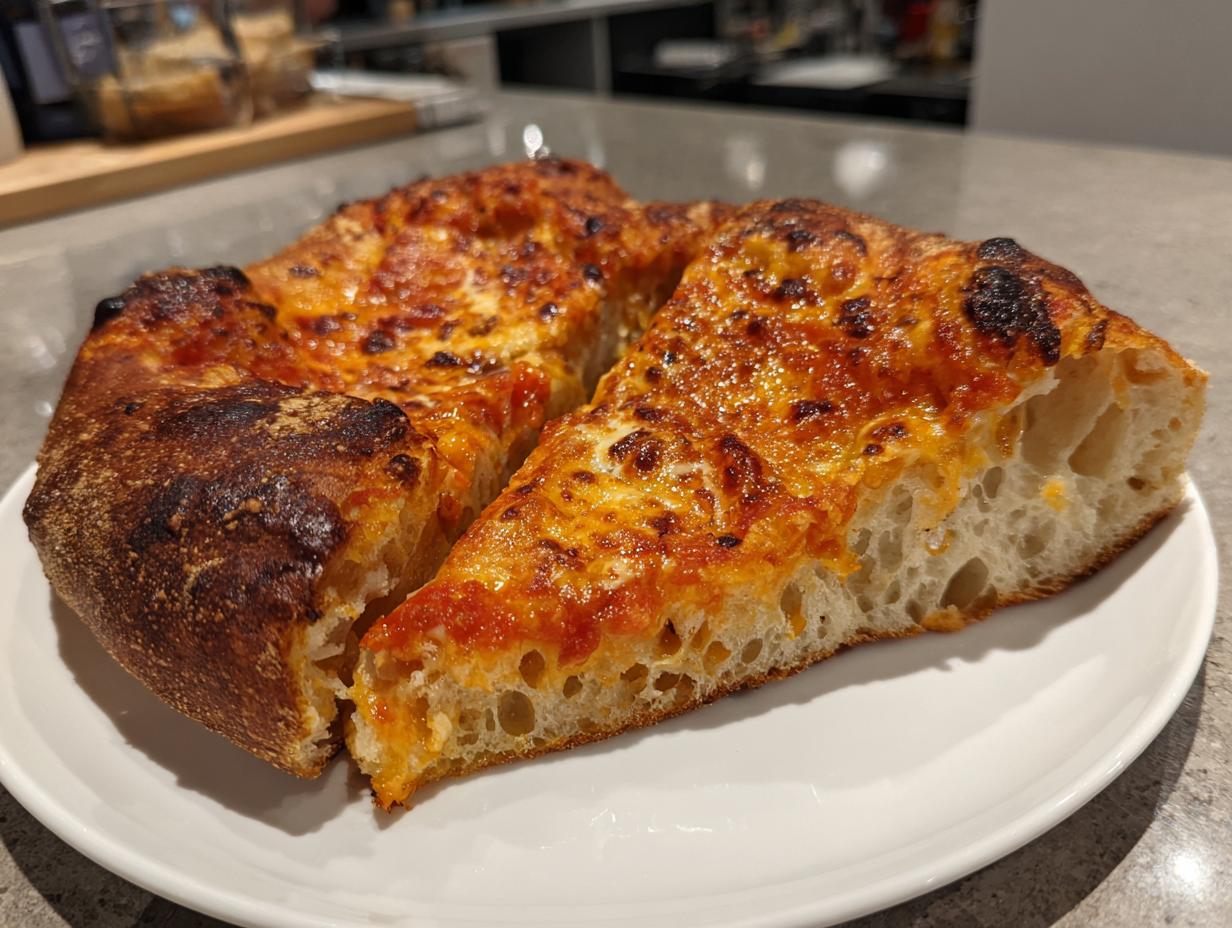
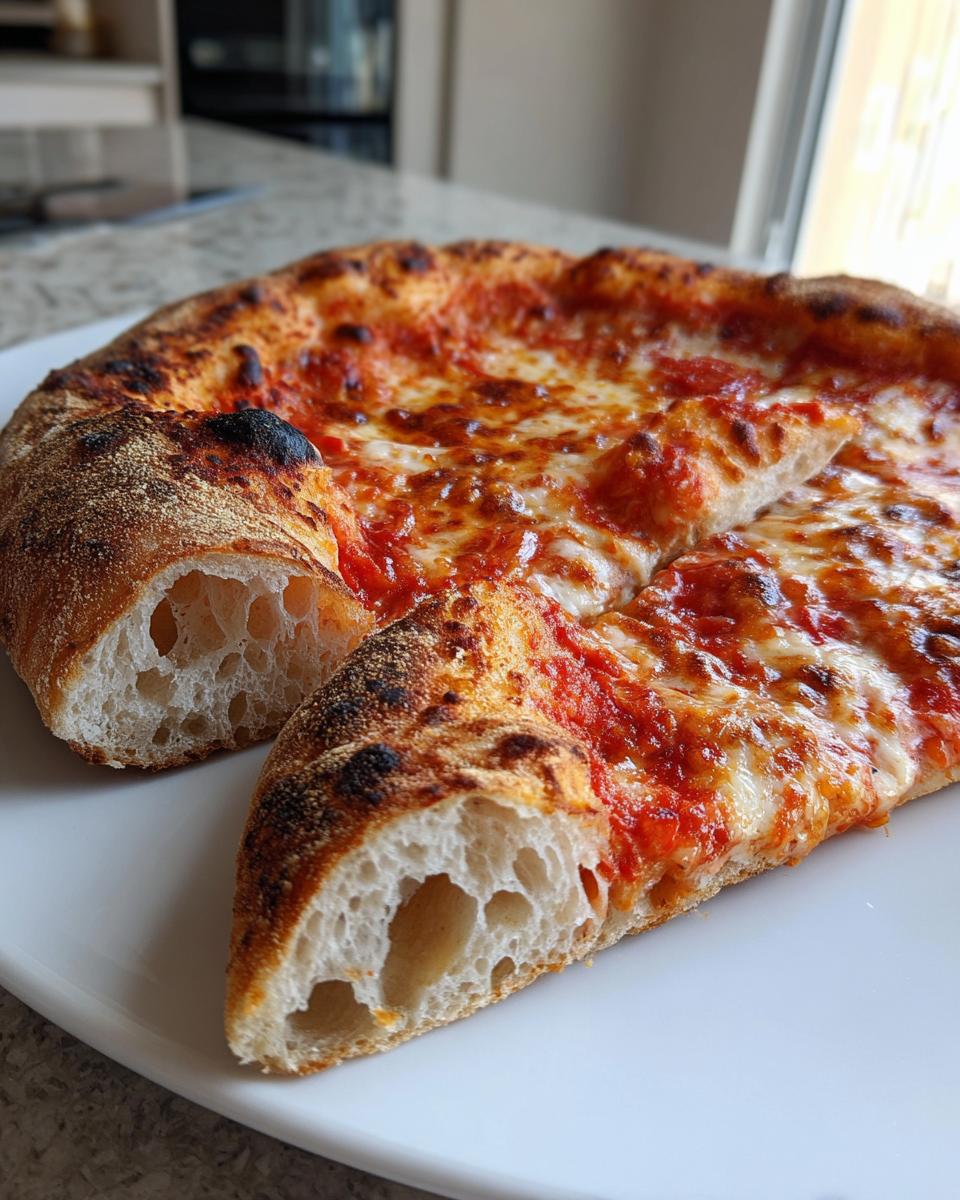
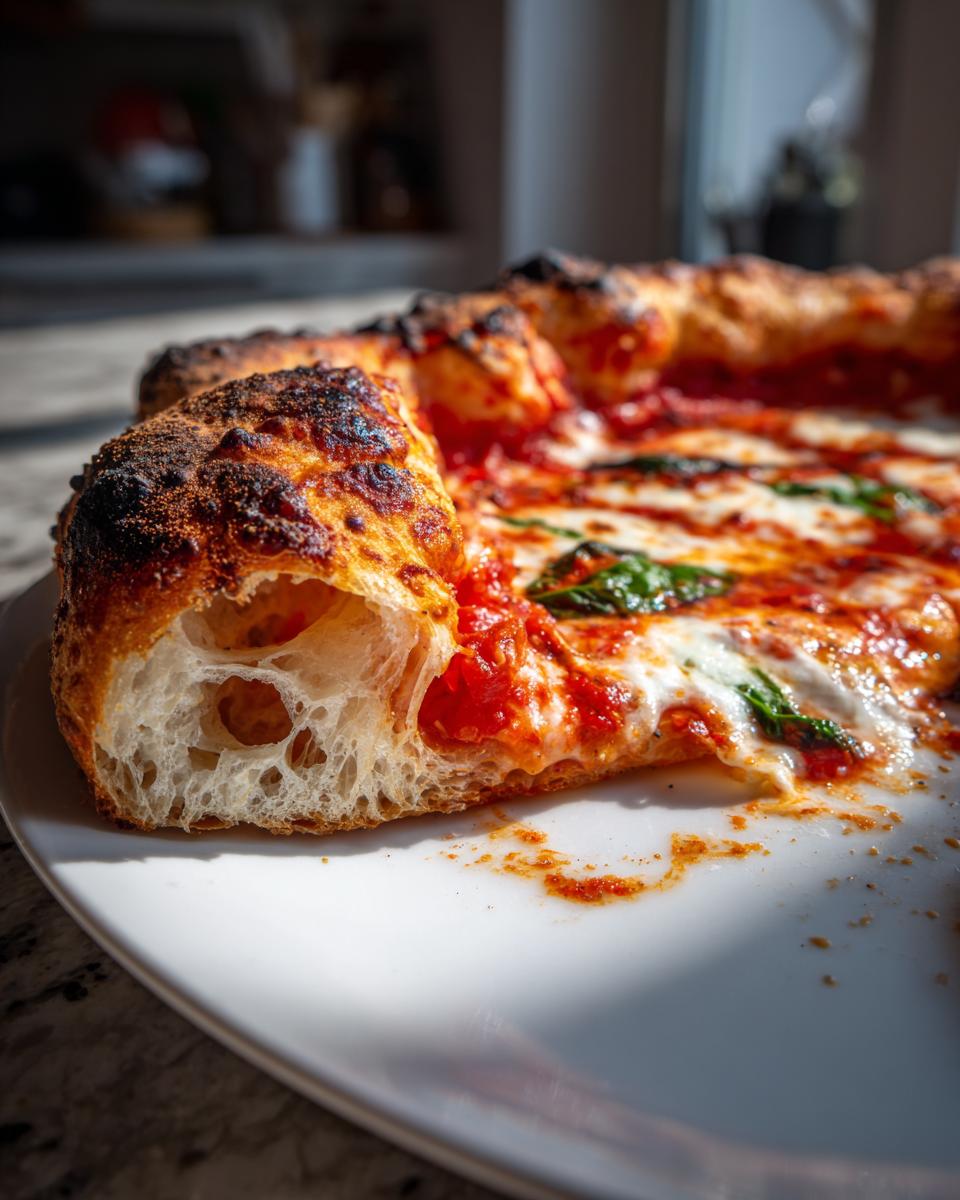
If you want that restaurant-quality experience, you have to respect the heat. This step is absolutely crucial for getting that crisp bottom on your homemade pizza. You can’t just lightly warm up the oven; we need volcanic temperatures! I mean it: crank your oven to the absolute highest setting it has, usually 500°F or 550°F.
Here is the secret sauce for that perfect result: you need to preheat pizza stone or steel for a full 45 minutes once the oven hits temperature. It has to be screaming hot. Make sure that stone is sitting on the middle rack so the heat hits the top of your homemade pizza evenly while cooking underneath. This intense, immediate heat transfer is what creates that fantastic texture on your final oven baked pizza.
Shaping and Assembling the Oven Baked Pizza
When you’re ready to shape the dough, be gentle! I learned the hard way that if you press all the air out of the outer edge, you end up with a cracker instead of a puffy crust. Stretch it lightly into a 12 to 14-inch circle, keeping that border airy. Now, here’s the crucial transfer tip:
Dust your pizza peel heavily with cornmeal or semolina flour—this acts like little ball bearings so it slides off easily. Don’t assemble the whole thing right on the peel unless you are fast! Work quickly once the sauce goes on. And please, please use that low-moisture mozzarella. Fresh cheese releases too much water, and we are fighting sogginess every step of the way to that beautiful final pie.
Tips for Success with Your DIY Pizza Recipe
Even with the best homemade pizza dough, little things can go wrong, right? I still remember one chaotic family pizza night where my assembled pie stuck fast to the peel! Never again! My biggest tip, besides using semolina flour on the peel, is knowing your backup plan. If you don’t have a pizza stone—and I know not everyone does—don’t sweat it.
Just flip over a heavy baking sheet and let that preheat for the full 45 minutes along with the oven. It’s not quite as good as a steel, but it gets hot enough to crisp that homemade pizza crust beautifully as it bakes.
One last thing: resist the urge to slice immediately! Letting that finished homemade pizza rest for two minutes before cutting lets the cheese settle just right so it doesn’t slide right off the second you cut into it. This small resting period makes a huge difference!
Making Homemade Pizza for Family Pizza Night
This is honestly my favorite part of making homemade pizza—turning it into a real event for family pizza night! Why settle for one boring set of toppings when everyone can customize their slice? It’s interactive, it’s fun, and suddenly everyone is excited about what’s for dinner.
Once you have that perfect dough base, let everyone take charge of their half or their own personal little pie. Assign topping stations! Kids absolutely love sprinkling the cheese and choosing their (sometimes very weird) combinations. It takes the pressure off me, and everyone feels proud of the amazing homemade pizza they helped create. It builds such a great connection around the table.
Storing and Reheating Leftover Homemade Pizza
Okay, let’s talk about the next day, because chances are you won’t finish the whole thing! If you have any delicious homemade pizza left, you need to treat it right. Don’t just throw the whole stack in a bag; you’ll end up with one giant cheesy brick. Store slices in an airtight container, and if you’re stacking them, separate the layers with a little square of wax paper so the cheese doesn’t glue together.
The microwave is the enemy of great crust, trust me. To bring that homemade pizza back to life, use a dry, hot skillet over medium heat for a few minutes, or reheat slices directly on the oven rack until the cheese melts again. This wakes the crust right up!
Frequently Asked Questions About Making Pizza at Home
I get so many messages asking little troubleshooting questions, which is awesome because it means you’re getting in the kitchen! Here are the things I hear most often when folks are trying out this DIY pizza recipe for the first time.
What if my dough won’t rise properly?
If your dough is being stubborn, the yeast is usually the culprit. Either the water was too hot and killed the yeast, or the yeast was old. If you see zero foam after 10 minutes, dump it and start over with fresh yeast. If it rises slowly, don’t stress! A cold kitchen slows things down. Just give it more time, or try warming your oven slightly (turn it on for two minutes, then turn it OFF) and letting the bowl sit inside the turned-off oven for a slow, cozy proof.
Can I use all-purpose flour instead of bread flour for the homemade pizza dough?
You totally can, but your texture will change, so I want you to know that going in! All-purpose flour has less protein, so your best pizza crust won’t have quite the same strong, chewy structure. It tends to be a bit softer. If that’s what you have, use it, but remember that bread flour is what gives you that true pizza parlor stretch.
What is the best sauce for homemade pizza and how much should I use?
This goes back to avoiding sogginess! You need a low-moisture sauce. Many store-bought sauces are too watery. I often just crush good quality canned tomatoes, add a pinch of salt and oregano, and call it done! Use just enough sauce to thinly coat the dough—too much sauce means a gummy center, no matter how hot your oven is!
How do I prevent my oven baked pizza from sticking to the peel?
I already mentioned this, but it bears repeating because a stuck pizza is soul-crushing! Dust heavily with cornmeal or semolina flour. Also, build your pizza fast! Once the sauce hits, the dough starts getting wet and the clock is ticking before it bonds to the wood. Assemble, load the cheese, and launch it onto that hot stone right away.
Estimated Nutritional Breakdown for This Homemade Pizza
So, we made the best pizza ever, but let’s talk numbers just briefly. Based on the dough, sauce, and mozzarella listed in the recipe—and remembering this is for one slice out of the eight we cut—you’re looking at roughly 280 calories per serving. That’s pretty solid for such incredible homemade pizza, right?
You get about 7 grams of fat and 11 grams of protein in that slice. Keep in mind these numbers are just a baseline! If you decide to add five pounds of pepperoni or tons of veggie toppings to your homemade pizza, those figures are obviously going to change quickly. This just shows you how manageable this dinner is!
PrintThe Best Homemade Pizza with a Perfect Crust

Make restaurant-quality pizza at home using this straightforward dough recipe and high-heat baking method for a crisp exterior and tender interior.
- Prep Time: 25 min
- Cook Time: 12 min
- Total Time: 1 hour 47 min
- Yield: 2 medium pizzas 1x
- Category: Dinner
- Method: Baking
- Cuisine: American
- Diet: Vegetarian
Ingredients
- 1 1/2 cups warm water (105-115°F)
- 2 1/4 teaspoons active dry yeast
- 1 teaspoon sugar
- 3 3/4 cups bread flour
- 2 teaspoons fine sea salt
- 2 tablespoons olive oil, plus more for the bowl
- 1/2 cup pizza sauce (low moisture recommended)
- 1 1/2 cups low-moisture mozzarella cheese, shredded
- Your favorite toppings
Instructions
- Activate the yeast: In a large bowl, combine the warm water, yeast, and sugar. Let it sit for 5 to 10 minutes until foamy. This confirms your yeast is active.
- Mix the dough: Add the bread flour, salt, and 2 tablespoons of olive oil to the yeast mixture. Mix with a wooden spoon or stand mixer until a shaggy dough forms.
- Knead: Turn the dough onto a lightly floured surface. Knead for 8 to 10 minutes until the dough is smooth and elastic. If using a mixer, use the dough hook for 6 to 8 minutes.
- First rise: Lightly oil a clean bowl. Place the dough in the bowl and turn it to coat. Cover the bowl tightly with plastic wrap. Let the dough rise in a warm spot for 1 to 1.5 hours, or until doubled in size. For better flavor, you can refrigerate the dough for 12 to 24 hours after the initial rise.
- Preheat the oven: Place a pizza stone or steel on the middle rack of your oven. Preheat the oven to the highest setting it can reach, usually 500°F or 550°F, for at least 45 minutes. High-CPC phrases: preheat pizza stone.
- Shape the dough: Gently punch down the risen dough. Divide it in half for two medium pizzas. On a lightly floured surface, gently stretch or roll one piece into a 12 to 14-inch circle. Avoid pressing the air out of the outer edge if you want a puffy crust.
- Assemble: Carefully transfer the dough to a pizza peel dusted heavily with cornmeal or semolina flour to prevent sticking. Spread half of the pizza sauce evenly over the dough, leaving a 1-inch border. Top with half of the mozzarella and your chosen toppings.
- Bake: Slide the pizza quickly from the peel onto the preheated stone or steel. Bake for 8 to 12 minutes, rotating halfway through if necessary, until the crust is golden brown and the cheese is bubbly and slightly browned.
- Finish: Remove the pizza from the oven. Let it rest for 2 minutes before slicing and serving immediately. Repeat with the remaining dough.
Notes
- For a crispier bottom crust, place your pizza stone on the lowest rack during preheating.
- Use low-moisture mozzarella; fresh mozzarella contains too much water and can make your pizza soggy.
- If you do not have a pizza stone, use an inverted heavy baking sheet preheated in the oven.
Nutrition
- Serving Size: 1 slice (1/8 of pizza)
- Calories: 280
- Sugar: 2
- Sodium: 450
- Fat: 7
- Saturated Fat: 3
- Unsaturated Fat: 4
- Trans Fat: 0
- Carbohydrates: 45
- Fiber: 2
- Protein: 11
- Cholesterol: 15