
That moment hits when you just *need* something tender, drizzly, and utterly decadent, but the thought of frying is a hard pass. I get it. That is exactly what drove me to translate one of my old bistro secrets into something you can whip up fast on a Tuesday morning. We’re talking about the absolute best maple donut bars you’ll ever bake. Forget the greasy cleanup; these come out soft, fluffy, and swimming in glaze right from the oven. If you’ve been searching for that ‘bakery style at home’ magic without the hassle, hang tight. My goal here at Kitchen Slang is to give you the insider knowledge—the chef’s know-how—so these maple donut bars taste like they took all day when they actually took half an hour.
- Why You Need These Soft Baked Maple Donut Bars Today
- The Essential Ingredients for Perfect Maple Donut Bars
- How to Prepare Fluffy Maple Donut Bars: Step-by-Step
- Mastering the Homemade Maple Glaze for Your Maple Donut Bars
- Tips for Achieving Bakery Style Maple Donut Bars at Home
- Storage and Reheating Maple Donut Bars
- Frequently Asked Questions About Maple Donut Bars
- Serving Suggestions for Your Maple Breakfast Treats
- Estimated Nutritional Data for Maple Donut Bars
- Share Your Maple Donut Bars Creations
Why You Need These Soft Baked Maple Donut Bars Today
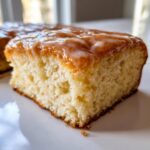
Trust me, these Soft Baked Maple Donut Bars are about to change your mornings. They hit every checkpoint if you’re looking for that sweet spot between dessert indulgence and easy breakfast prep. You won’t miss the fryer one bit. In fact, these deliver that melt-in-your-mouth texture with zero mess.
- They are the ultimate No Fry Donut Recipe—all the flavor, none of the oil splatter.
- Perfect for whipping up as impromptu Sweet Brunch Ideas when company drops by.
- The aroma alone is worth the 25 minutes of bake time; they smell like a proper doughnut shop!
- This recipe is so straightforward, you can easily make a double batch for later.
If you loved how simple our cinnamon roll casserole was, get ready; these bars are even quicker to assemble. Check out the casserole recipe if you’re looking for more fast breakfast wins!
The Essential Ingredients for Perfect Maple Donut Bars
Look, the beauty of these maple donut bars is that they hang out in this easy, pantry-friendly territory. You generally have most of this stuff already, which keeps us on track for that quick prep time. We need to build a structure that bakes up light, not dense like a brick, so pay attention to your fat and liquid balance here.
- 1 3/4 cups all-purpose flour
- 1 1/2 teaspoons baking powder (Make sure it’s fresh, trust me!)
- 1/2 teaspoon salt
- 1/4 teaspoon ground nutmeg (This is my secret spice—don’t skip it!)
- 1/2 cup (1 stick) unsalted butter, softened (Not melted, softened!)
- 3/4 cup granulated sugar
- 2 large eggs
- 1/2 cup buttermilk
- 1 teaspoon vanilla extract
- 1/2 cup pure maple syrup (This goes *into* the actual bars)
When you make your glaze later, you’ll need 1 1/2 cups powdered sugar, 3 tablespoons more pure maple syrup, and about 1 tablespoon of milk or cream. If you feel like your batter needs a little something extra, check out my banana nut muffin recipe—it uses similar foundational dry structure!
Ingredient Notes and Pro Swaps for Your Maple Donut Bars
Here is where we earn that bakery quality. You absolutely must use *pure* maple syrup for the bars and the glaze; the pancake syrup flavor profile just won’t cut it here. If you don’t have buttermilk, an easy swap is taking 1/2 cup of regular milk and stirring in 1/2 teaspoon of white vinegar or lemon juice. Let that sit for five minutes, and bam—you’ve got your acid to activate that baking powder perfectly.
How to Prepare Fluffy Maple Donut Bars: Step-by-Step
Okay, now for the actual assembly. This is where we treat the batter right so we get those heavenly Fluffy Donut Bars and not something sad and tough. First things first: Preheat that oven to 350°F (175°C) and get your 9×13 pan greased up good and proper. We want these bars to slide right out later, so don’t skimp on the prep!
Mixing the Batter for the Best Maple Donut Bars Texture
This is the crucial part for that melt-in-your-mouth feel. Start by creaming your softened butter and sugar until it looks pale and happy—like whipped clouds, not just mixed. Then, beat those eggs in one at a time. Once that’s looking smooth, we alternate! Add one-third of your dry stuff, mix just until barely there, then pour in half of your buttermilk/maple mix. Keep going until everything is incorporated. Seriously, stop mixing the second that last flour streak disappears. Overmixing is the enemy of fluffy!
Baking and Glazing Your Maple Donut Bars
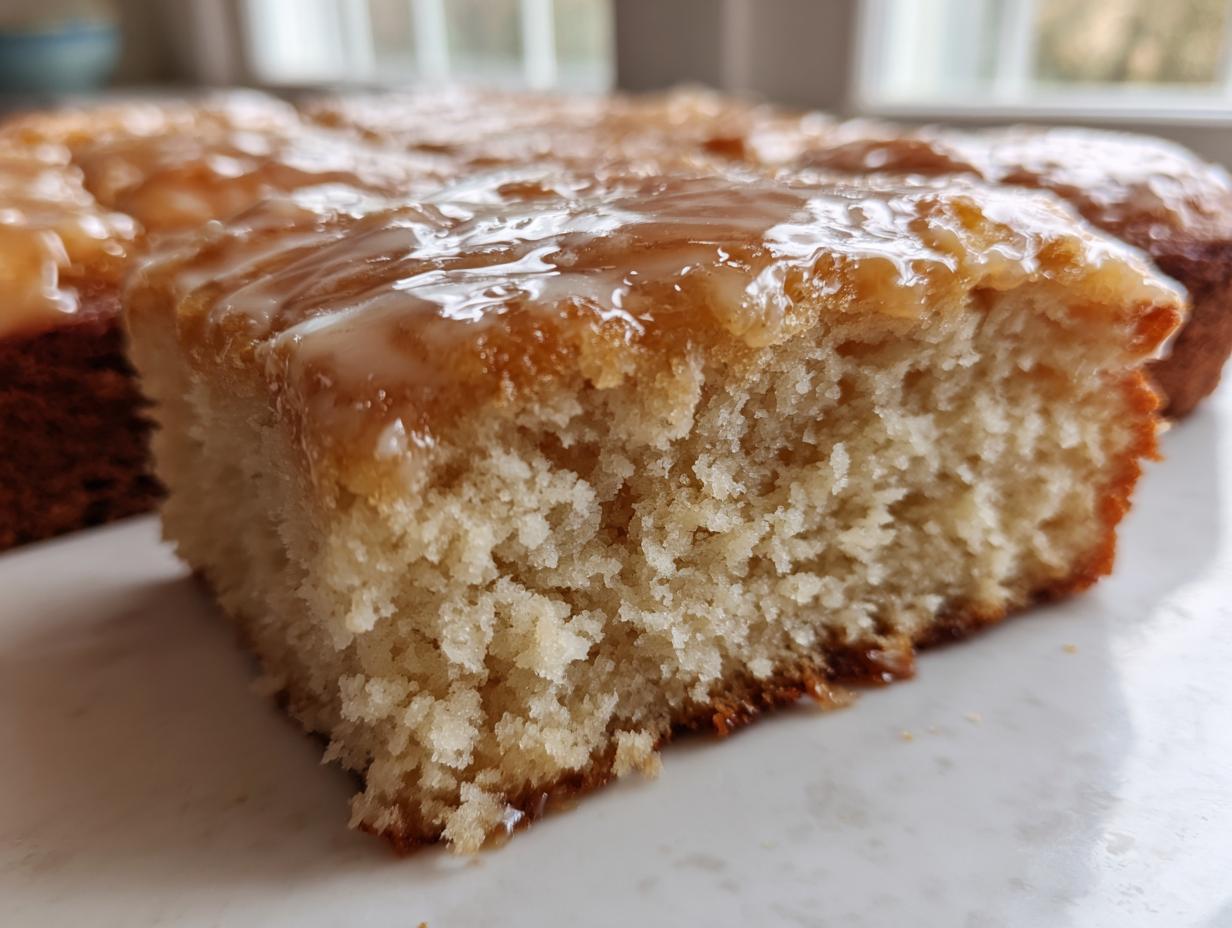
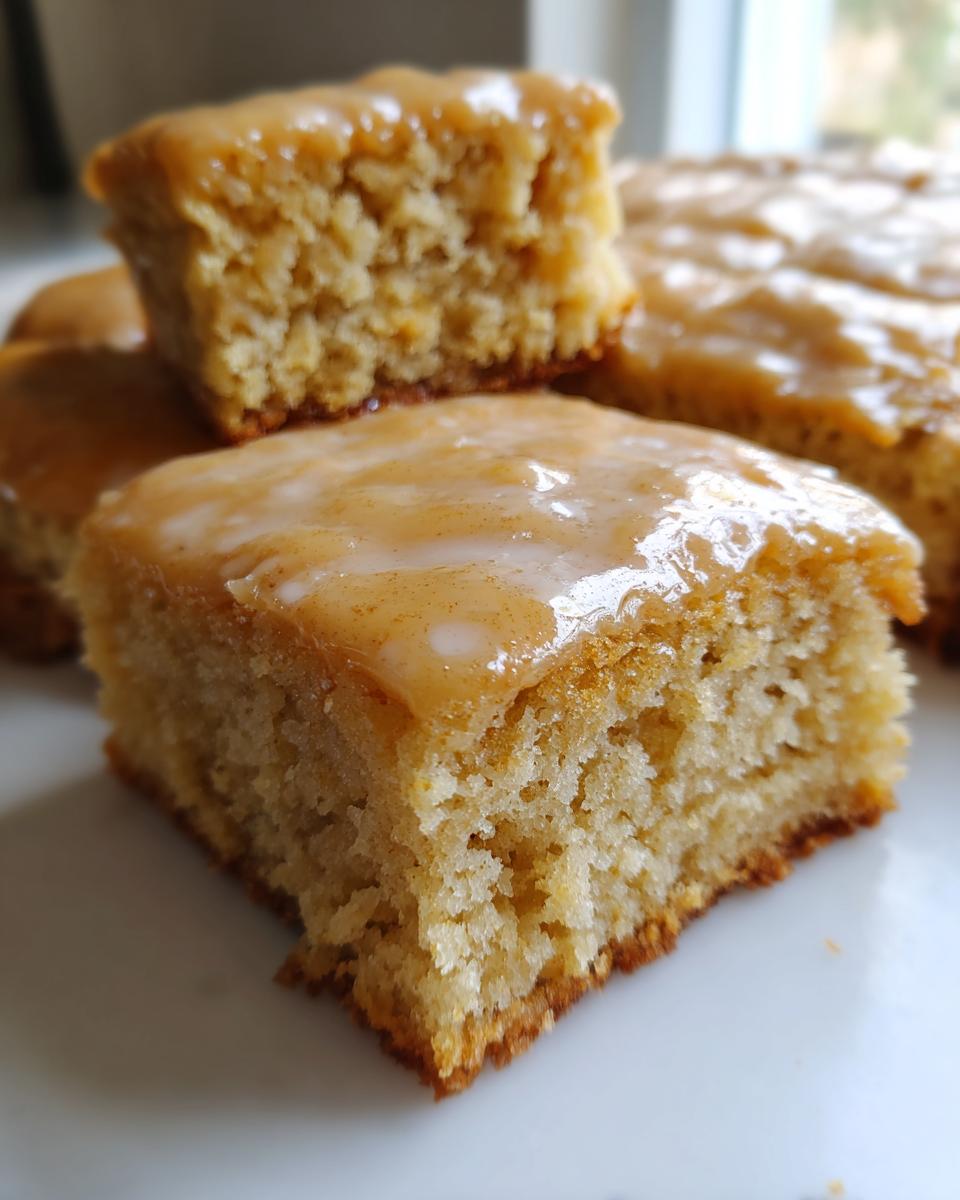
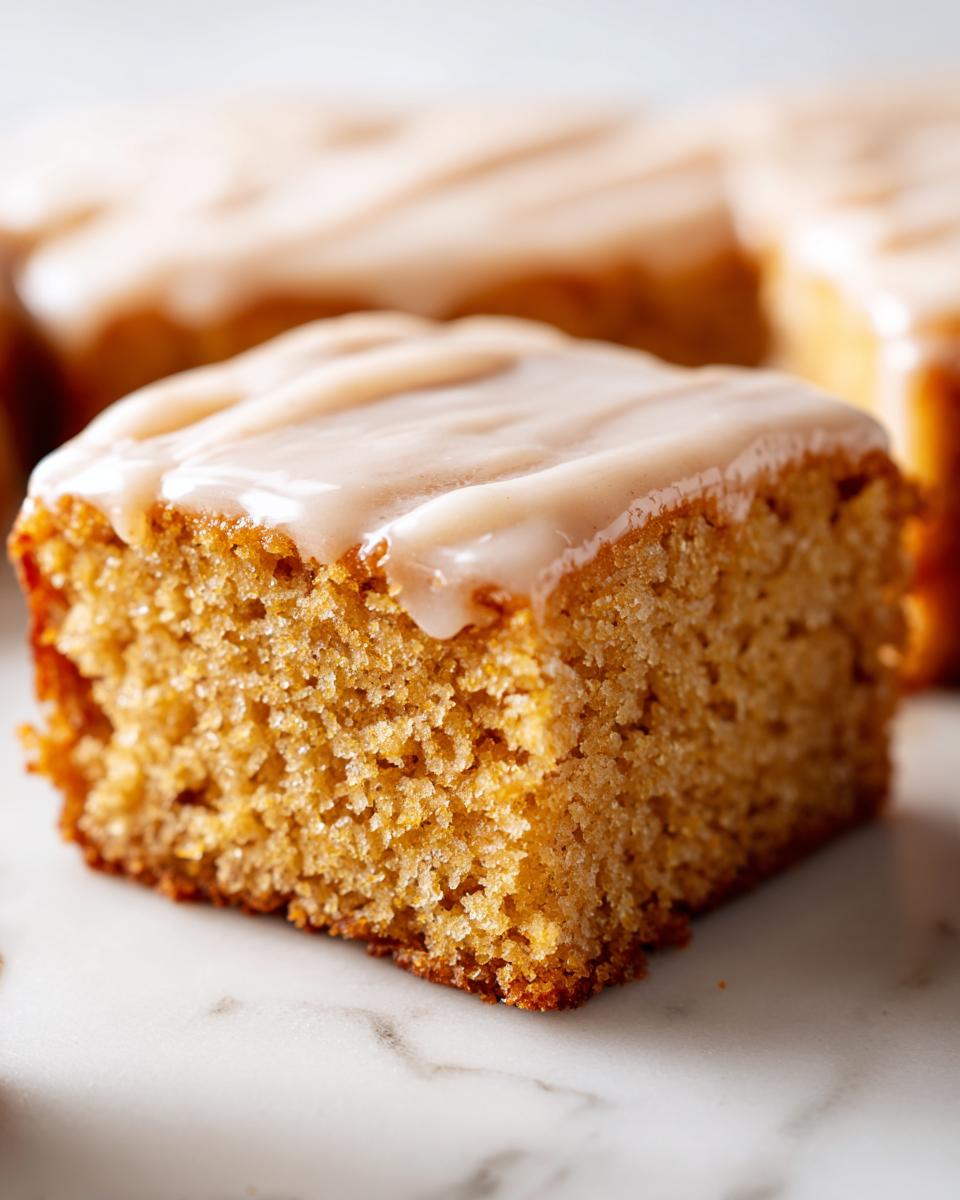
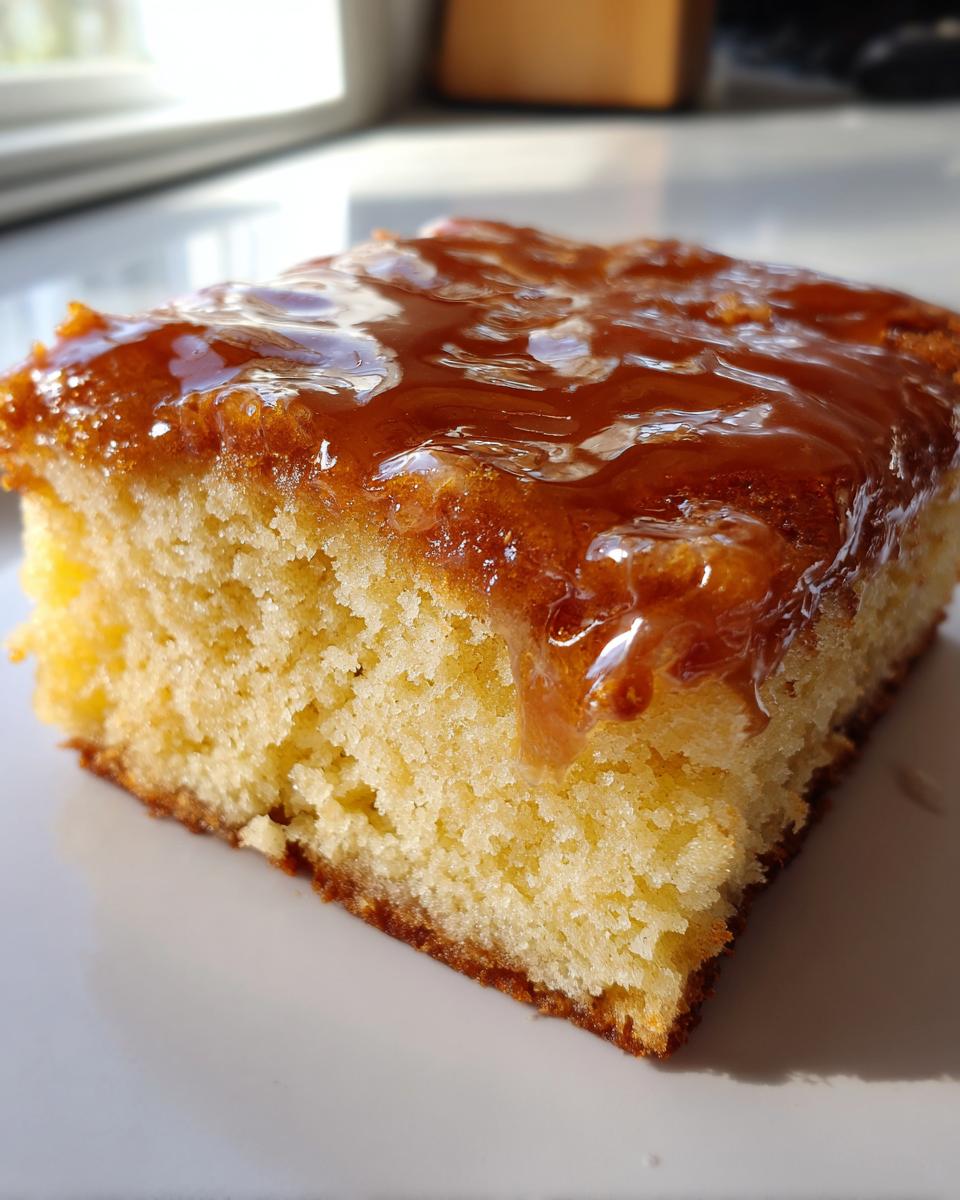
Spread that perfect batter evenly into your prepared pan (you want it level for even baking). Pop it in the oven for about 20 to 25 minutes. You know it’s done when a toothpick comes out clean, but I usually check for it to pull back just a hair from the edges. While that’s happening, mix up your glaze. The key to that perfect finish is glazing those bars when they are still warm, but not piping hot. Pour that beautiful glaze right over the top and spread it fast, bringing that Bakery Style Donut Bars at Home look to life before it sets up!
If you want to see the full breakdown of the glaze mixing—because that part is almost as important—you’ll find the instructions right after the ingredient list, but I promise, this baking technique is what locks in the softness! If you need a refresher on mixing fats and dry ingredients from some of my other baking posts, remember our apple crumble walkthrough covers a lot of the fundamentals, too.
Mastering the Homemade Maple Glaze for Your Maple Donut Bars
Okay, let’s talk glaze. This is where we turn a great baked bar into a showstopper. If the bars are too hot, the glaze melts right into nothingness. If they are stone cold, it just sits on top chunky. The sweet spot is warm—you want the heat of the bar to slightly warm the glaze so it spreads like velvet.
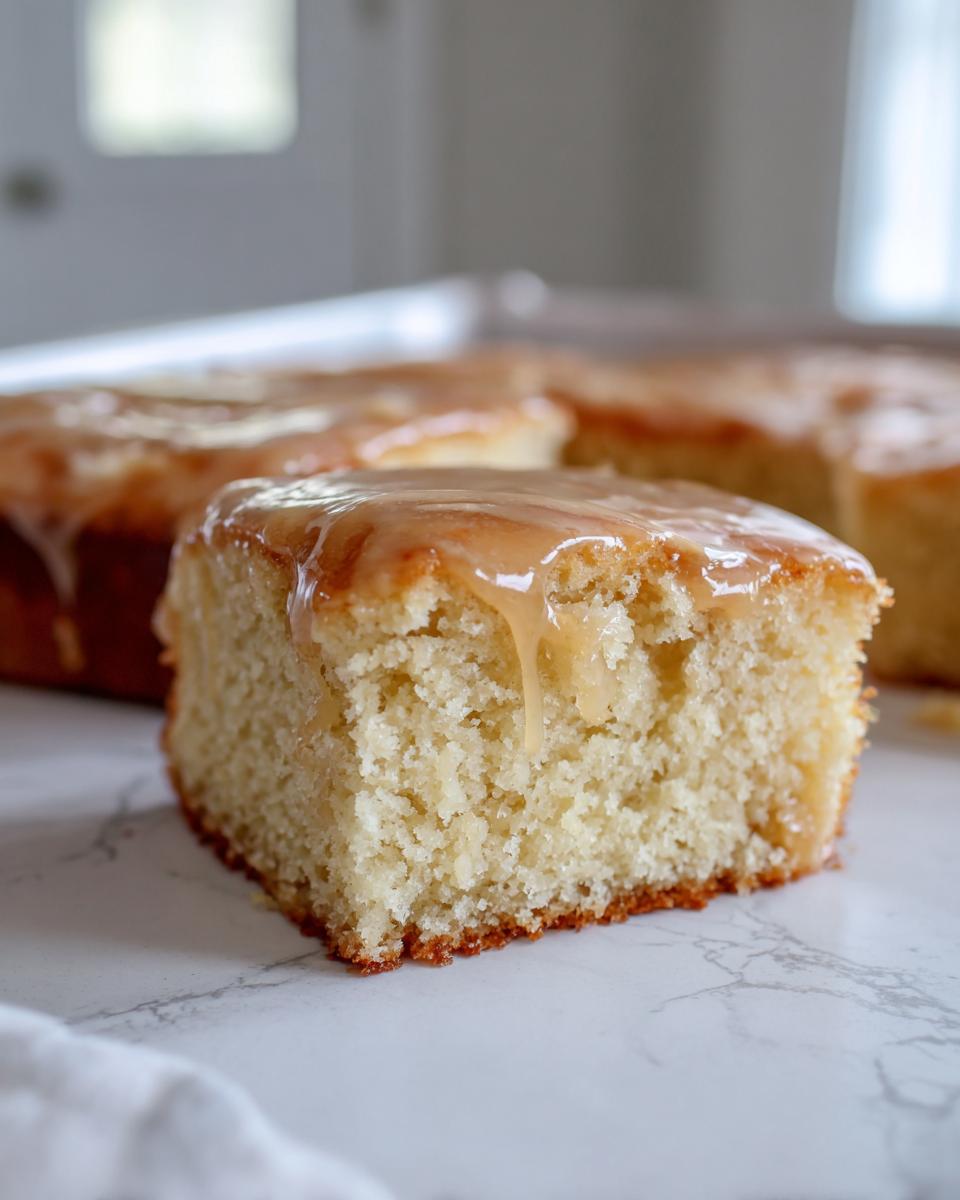
For that thick, shiny look that screams professional, you need to whisk your powdered sugar with the 3 tablespoons of pure maple syrup and that splash of milk or cream. I aim for something that flows off the whisk but doesn’t immediately drip off the bar. If it’s gloppy and hard to spread, thin it down with a tiny drop more milk, maybe half a teaspoon at a time. If you accidentally make it too runny, don’t sweat it—just whisk in a spoonful more powdered sugar. This Homemade Maple Glaze sets up beautifully and gives you that perfect sugary crunch!
Getting this glaze right separates the good maple donut bars from the absolutely great ones. For more tips on achieving perfect textures in sweet baking, make sure you check out my guide on whipped shortbread cookies—creaminess takes practice!
Tips for Achieving Bakery Style Maple Donut Bars at Home
If you want these maple donut bars to actually taste straight from a high-end bakery, we need to talk about temperature control. This isn’t just about tossing things into a bowl; it’s about coaxing the flavor out. First rule: Room temperature ingredients, especially the butter and eggs—this helps them emulsify properly when you cream them, trapping necessary air for that fluffy lift.
When you are making soft baked goods, moisture is everything. That’s why we use buttermilk; the slight acidity keeps the crumb tender. A big pitfall I see cooks fall into is letting the batter sit out too long before it hits the oven, or worse, overbaking by five minutes. That slight dryness turns those delightful bars into something chewy.
When you’re done baking, don’t leave them cooling on the counter for too long uncovered; the air will wick the moisture away. I always cover the pan loosely with foil for about 15 minutes before glazing. For more deep dives into baking fundamentals, check out my guide on sourdough pumpkin bread; the principles of structure hold true across all baked goods.
If you’re curious about other methods people use for similar results, I saw a great recipe that uses a slight amount of maple extract alongside the real syrup for even more punch; you can read about that approach right here. But honestly, stick to the pure syrup, bake smart, and you’ll nail that bakery taste.
Storage and Reheating Maple Donut Bars
So you baked a massive batch of these incredible maple donut bars—good call! Now, we need to keep that fluffy texture locked in. Once the glaze sets, it gets a little firm, which is normal, but the actual cake part should stay soft.
For up to three days, keep them stored in an airtight container at room temperature. Don’t stick them in the fridge if you can help it; the cold air sucks the moisture right out, and we don’t want that!
If they feel a little stiff the next morning, don’t worry; there’s a super quick fix. Just pop a single bar onto a microwave-safe plate for about 8 to 10 seconds. That little burst of warmth brings the moisture right back, making them taste newly glazed. It’s just like reheating leftovers from an easy chili—a quick zap makes it better!
Frequently Asked Questions About Maple Donut Bars
I get so many DMs and comments after people try these maple donut bars, so let’s clear up a few things right here. When you’re aiming for that **Bakery Style Donut Bars at Home**, sometimes little questions pop up, and I want to make sure you feel totally confident with this **Easy Maple Donut Recipe**!
Can this Easy Maple Donut Recipe be made into traditional donuts?
That’s a great question! You *could* try to pipe this batter into a donut pan and bake them, but shaping them freeform as traditional donuts isn’t ideal. Frying requires a very different, usually looser batter consistency than this one, which is designed for the sturdiness of a bar or a cake. For frying satisfaction, you’d need a whole different game plan!
What is the best way to ensure my maple donut bars are fluffy?
This is all about gentle handling once the wet and dry elements meet up. The absolute best way to keep your bars fluffy is to stop mixing when you see just a few streaks of flour left. Remember, we are developing gluten every second you keep that mixer running! Secondly, check your baking powder. If it’s old, your bars won’t get that beautiful springy lift, leading to dense results.
If you are looking for other comforting, easy-to-manage recipes, you have to try my hashbrown casserole recipe—it’s pure comfort food!
If you’re after a slightly different take on the glaze, some folks swear by the results they get from this technique mentioned here, but I still stand by the simple powdered sugar base we used!
Serving Suggestions for Your Maple Breakfast Treats
These Maple Breakfast Treats are amazing on their own, but pairing them right elevates them into a full experience. If you’re serving them up for brunch, they go fantastic alongside some salty bacon or a big bowl of fresh fruit to balance that sweetness. They are also incredible dunked briefly into a hot cup of coffee!
For dessert, think cozy vibes. A little dollop of vanilla whipped cream or even a scoop of pecan ice cream turns these Maple Dessert Bars into something truly decadent. If you haven’t tried my coffee cake muffins, those make a perfect sweet sidekick if you need more baked goods on the table!
Estimated Nutritional Data for Maple Donut Bars
When we pull together a recipe this delicious, I always like to give you a rough idea of what’s in each square. Because we are using real butter and pure maple syrup, we know these are treats, not diet food! Keep in mind that these numbers are just estimates based on standard ingredient measurements, and where you use your specific ingredients—like lower-fat milk versus cream in the glaze—can shift things around a little bit.
Here is the breakdown per bar, based on 12 servings:
- Calories: 320
- Fat: 14g (Saturated Fat: 8g)
- Total Carbohydrates: 47g (Fiber: 1g)
- Protein: 4g
- Sugar: 35g
- Cholesterol: 65mg
This information helps us appreciate what we are making—a rich, satisfying treat. If you are looking for other ways to pack in some breakfast goodness without the sugar rush, you should really check out my high-protein overnight oats in the morning for a change of pace!
Share Your Maple Donut Bars Creations
Now that you’ve got the inside track on mastering those maple donut bars, I genuinely want to know how they turned out for you! The best part about translating these pro techniques is seeing you all use them confidently in your own kitchens. Did that buttermilk swap work out? Did you get that glossy, bakery-style glaze?
Don’t be shy! Drop a rating below—five stars if they melted in your mouth like I promised they would. And if you snapped a picture of your beautiful, glazed squares, share it in the comments. Seriously, I love seeing your results, whether you ended up eating them for breakfast (which is totally acceptable) or serving them up as an afternoon Maple Dessert Bar.
If you’re looking for another simple baked success to try next weekend, my recipe for easy peanut butter cookies is always a guaranteed crowd-pleaser. Happy baking, friends!
PrintSoft Baked Maple Donut Bars: Bakery Style at Home
Make unbelievably soft baked maple donut bars that melt in your mouth. This easy, no-fry recipe delivers that rich, bakery-style maple flavor perfect for breakfast or dessert.
- Prep Time: 15 min
- Cook Time: 25 min
- Total Time: 40 min
- Yield: 12 servings 1x
- Category: Breakfast
- Method: Baking
- Cuisine: American
- Diet: Vegetarian
Ingredients
- 1 3/4 cups all-purpose flour
- 1 1/2 teaspoons baking powder
- 1/2 teaspoon salt
- 1/4 teaspoon ground nutmeg
- 1/2 cup (1 stick) unsalted butter, softened
- 3/4 cup granulated sugar
- 2 large eggs
- 1/2 cup buttermilk
- 1 teaspoon vanilla extract
- 1/2 cup pure maple syrup (for the bars)
- 1 1/2 cups powdered sugar (for the glaze)
- 3 tablespoons pure maple syrup (for the glaze)
- 1 tablespoon milk or cream (for the glaze)
Instructions
- Preheat your oven to 350°F (175°C). Grease and flour a 9×13 inch baking pan.
- In a medium bowl, whisk together the flour, baking powder, salt, and nutmeg. Set this dry mix aside.
- In a large bowl, use an electric mixer to cream the softened butter and granulated sugar until the mixture is light and fluffy. This takes about three minutes.
- Beat in the eggs one at a time, mixing well after each addition. Mix in the vanilla extract.
- In a small bowl, whisk together the buttermilk and 1/2 cup of pure maple syrup.
- Gradually add the dry ingredients to the wet ingredients, alternating with the buttermilk mixture. Begin and end with the dry ingredients. Mix only until just combined; do not overmix the batter.
- Spread the batter evenly into the prepared baking pan.
- Bake for 20 to 25 minutes, or until a toothpick inserted into the center comes out clean.
- While the bars bake, prepare the maple glaze. In a medium bowl, whisk together the powdered sugar, 3 tablespoons of maple syrup, and milk or cream until smooth and pourable. Add more milk if the glaze is too thick.
- Let the baked donut bars cool in the pan for 10 minutes.
- Pour the warm maple glaze evenly over the warm bars. Spread quickly to cover the surface.
- Allow the glaze to set completely before cutting the bars into squares.
Notes
- For a stronger maple flavor in the bars, substitute 1/4 cup of the buttermilk with an extra 1/4 cup of pure maple syrup.
- If you want a thicker, richer glaze, reduce the liquid in the glaze slightly.
- These are best eaten the day they are made for the softest texture, but they store well for up to three days in an airtight container.
Nutrition
- Serving Size: 1 bar
- Calories: 320
- Sugar: 35
- Sodium: 210
- Fat: 14
- Saturated Fat: 8
- Unsaturated Fat: 6
- Trans Fat: 0
- Carbohydrates: 47
- Fiber: 1
- Protein: 4
- Cholesterol: 65