
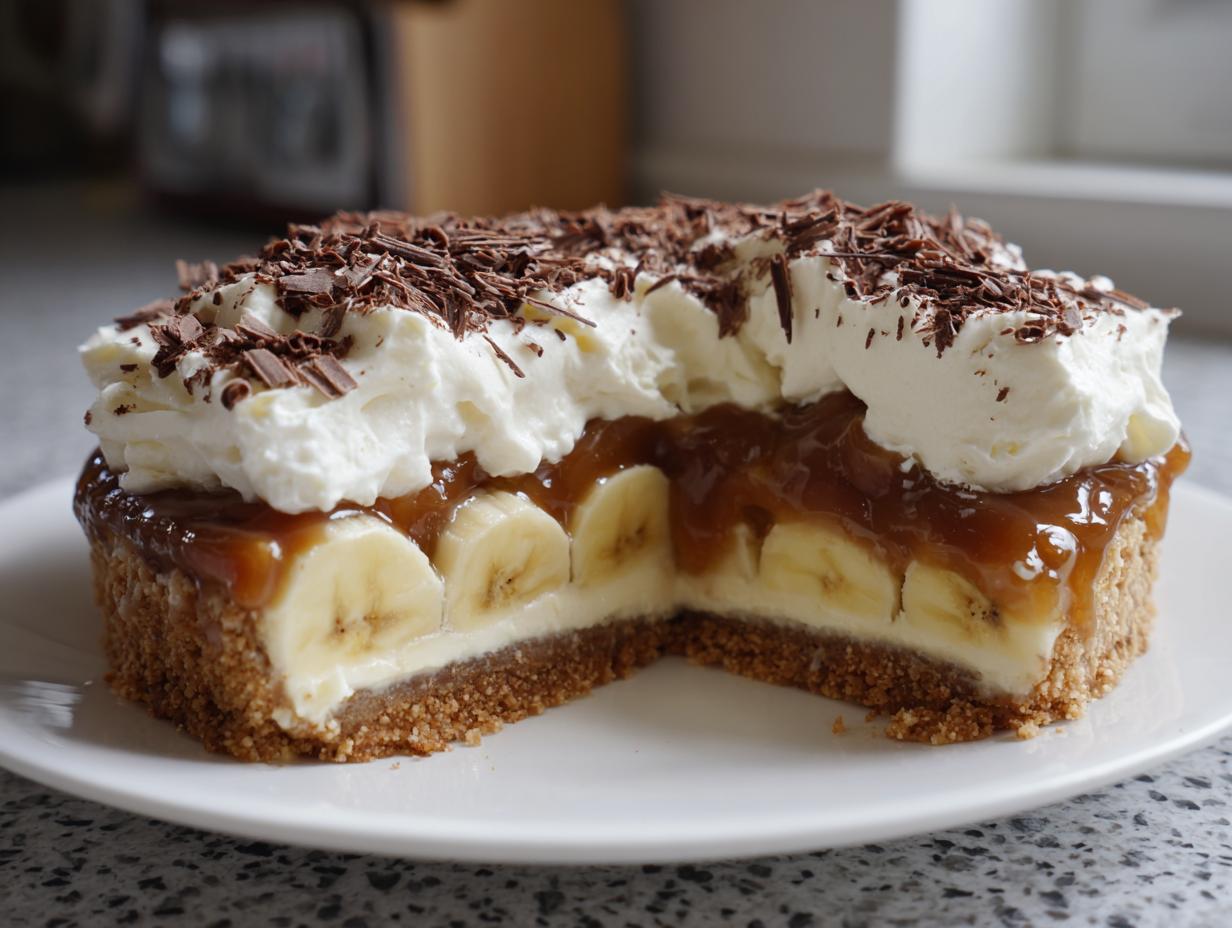
Okay, listen up, because we’re about to unlock a British secret that is criminally overlooked over here. Forget the fuss and the oven heat; we’re diving straight into what I consider the holy grail of no-fuss desserts: the ultimate, easy, **banoffee pie**. Seriously, this creation—layers of buttery crunch, rich, gooey toffee, sweet bananas, and cloud-like cream—sounds like it should require brigade timing, right? Nope. That’s the kitchen slang I translate for you. My time spent bouncing between my childhood kitchen and those frantic bistro lines taught me that the best food uses insider knowledge to stay simple. I’m Zoe, and I’m here to take this supposedly intimidating dessert and make it totally yours. You’ll nail this, trust me. Check out all my best delicious dessert recipes while you’re here!
- Why This No-Bake banoffee pie is the Best Ever
- Gathering Ingredients for Your banoffee pie
- Step-by-Step Instructions for the Ultimate No Bake banoffee pie
- Tips for the Perfect banoffee pie Every Time
- Serving Suggestions for Your Crowd Pleasing Dessert banoffee pie
- Storage and Make Ahead Tips for banoffee pie
- Variations on the Classic banoffee pie
- Frequently Asked Questions About banoffee pie
- Estimated Nutritional Values for This banoffee pie
- Share Your Kitchen Slang Success
Why This No-Bake banoffee pie is the Best Ever
When I first tried making a Banoffee Pie years ago, I thought I could skip chilling the crust. Spoiler alert: I ended up with a soupy, sad mess that tasted mostly of regret. No more! This recipe is my hard-won proof that you can have an absolutely stunning **Classic British Dessert** without ever touching your oven. It’s the definition of results over effort. That’s why this **Easy Banoffee Pie** is the one you need. If you’re looking for other minimal-fuss desserts, you should check out my easy apple crumble recipe!
Key Benefits of Our banoffee pie Recipe
- It’s officially recognized as a **No Oven Dessert**—pure bliss when it’s hot outside.
- We guarantee a crisp crust base; no more soggy bottoms here, ever.
- Total assembly time is lightning fast, making it a perfect **Make Ahead Dessert**.
- You get that incredible, rich flavor profile that makes people think you slaved all day.
We take the secrets of making a sturdy base and perfectly set toffee and cook them down for you. You just follow the steps, and boom, success!
Gathering Ingredients for Your banoffee pie
Alright, let’s talk supplies. For the **banoffee pie** to sing, every player on the team needs to be top-notch, especially when they’re going to hang out uncooked in the fridge! We need unsalted butter, trust me on the unsalted part, and make sure your powdered sugar is fine for that fluffy topping. And those bananas? They absolutely must be ripe—not rock hard, not mushy brown, but that perfect, sweet yellow. If you want to see what else I love to have on hand when baking, check out my easy peanut butter cookies recipe!
Ingredient Notes and Substitutions for banoffee pie
Here’s where we translate the British lingo. Over in the UK, they usually use Digestive biscuits for the crust instead of graham crackers. Feel free to swap them out—it just gives the base a little more buttery depth! If you’re pressed for time, using a can of good quality, thick dulce de leche instead of cooking your own toffee is perfectly acceptable. That’s your shortcut right there! One more thing to keep those bananas looking pretty: brush the slices lightly with fresh lemon juice before layering them on top of the caramel. It works like magic to keep that lovely fresh color!
Step-by-Step Instructions for the Ultimate No Bake banoffee pie
Okay, this is the main event, the moment we stop talking and start building. Since this is a no-bake dessert, timing is everything to make sure this amazing **banoffee pie** holds up like a champion. Remember what I said about my early failures? It all came down to rushing the chill times. We’re going to treat that crust like it needs a nice, long spa day in the freezer. If you want some real bang for your buck on quick techniques, check out my stuff on easy dumpling sauce recipes, but for now, focus right here!
Crust Preparation: Building the banoffee pie Foundation
First things first: you mix those graham crumbs—or those lovely digestive biscuits, if you went that route—with the melted butter until it looks like wet sand. Then, you press. And I mean *press*. Use the bottom of a measuring cup to really compact it into your pie dish, getting it up the sides too. This step is what stops the dreaded soggy bottom. Once it’s packed tight, pop that whole thing into the freezer. We need it ice cold before the warm toffee hits it, so aim for at least 15 minutes chilling time while you handle the next step.
Making the Homemade Toffee (The Heart of the banoffee pie)
This is where we make that incredible **Creamy Caramel Pie** element. Get your sweetened condensed milk, that extra butter, and a pinch of salt into a saucepan over medium-low heat. Your job here is constant stirring. Don’t walk away! You gotta watch it for about 10 to 15 minutes. It’s going to go from white to pale yellow to a gorgeous, deep golden brown—that’s the flavor building. When it looks like rich, melted caramel, take it right off the heat. For more caramel magic, take a peek at my easy homemade salted caramel sauce guide!
Assembling and Chilling Your banoffee pie
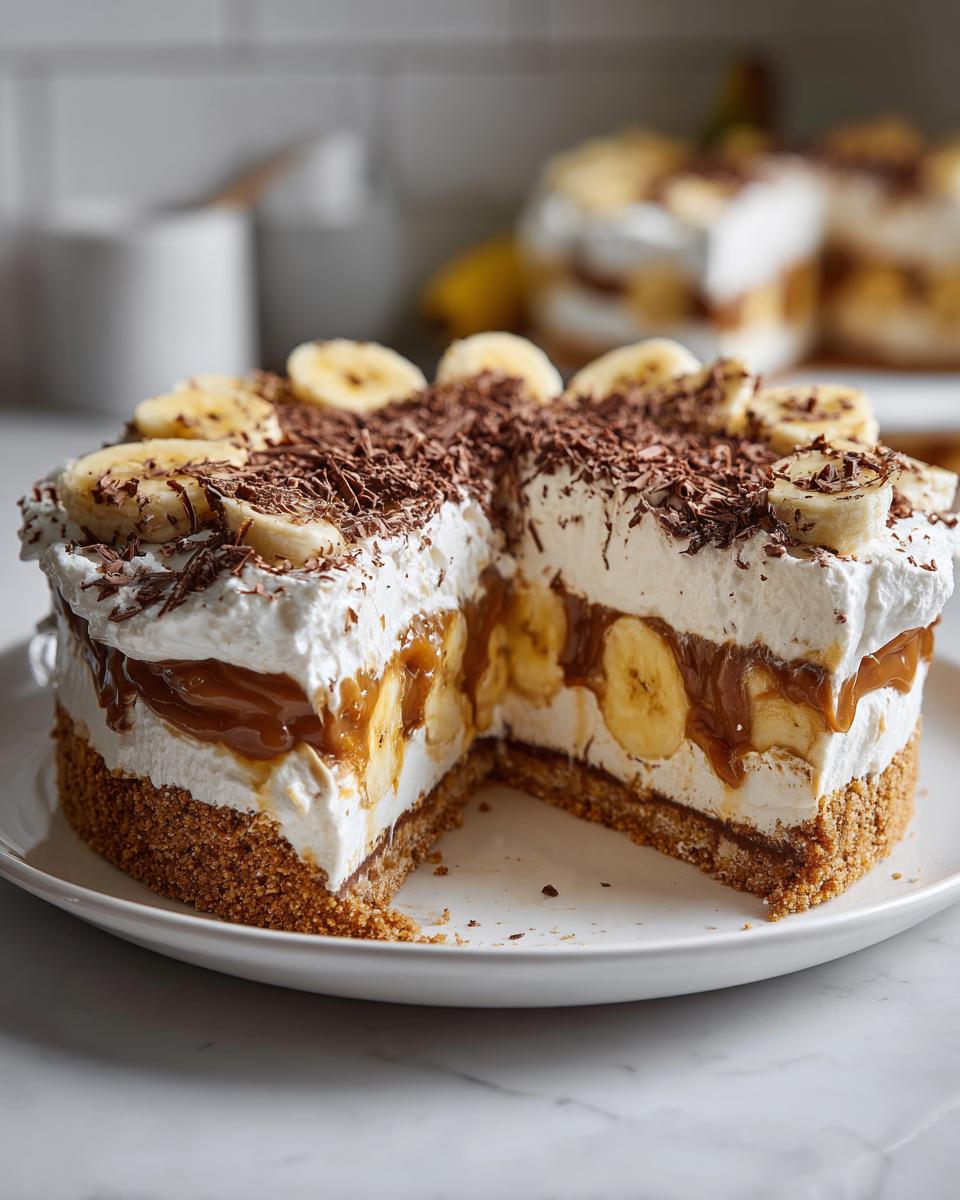
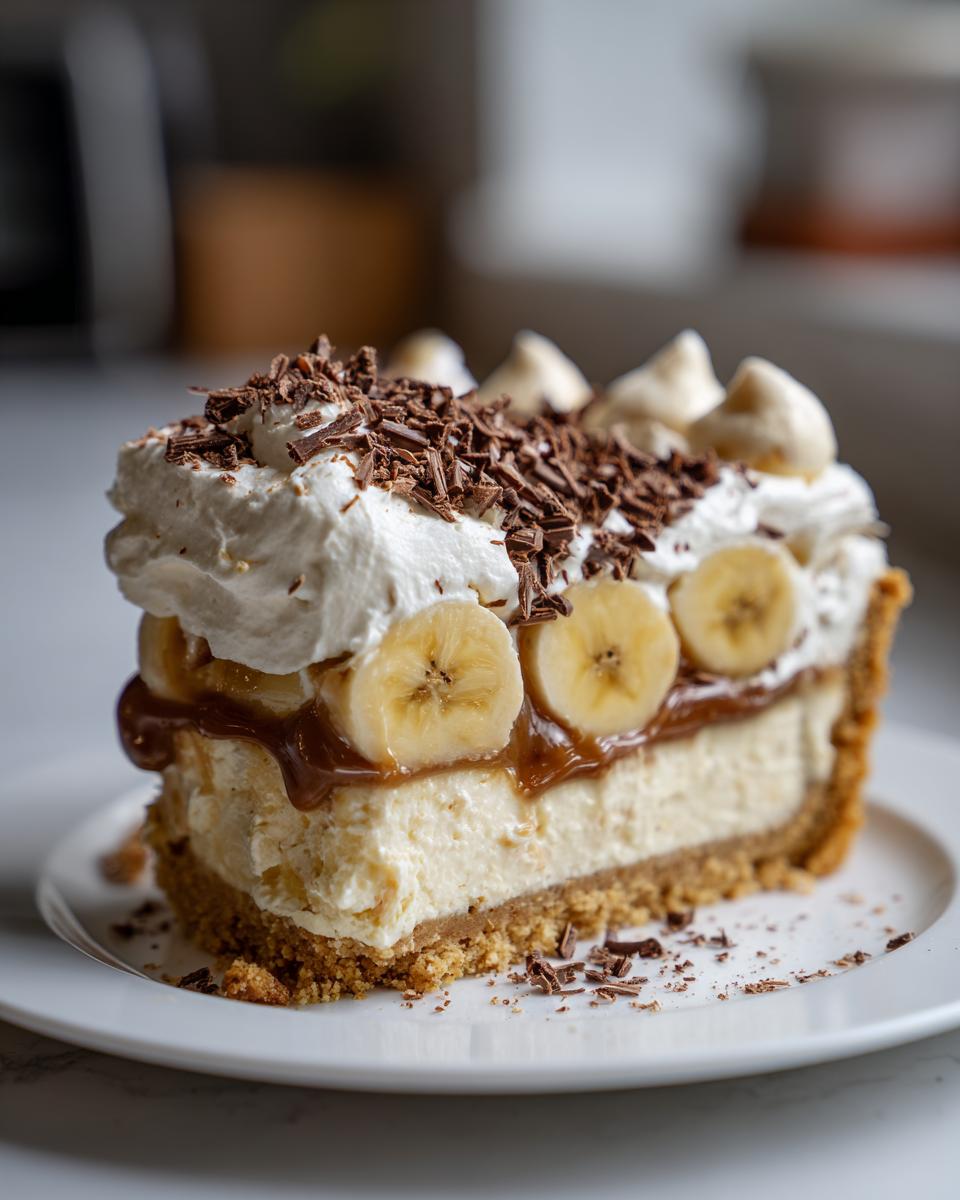
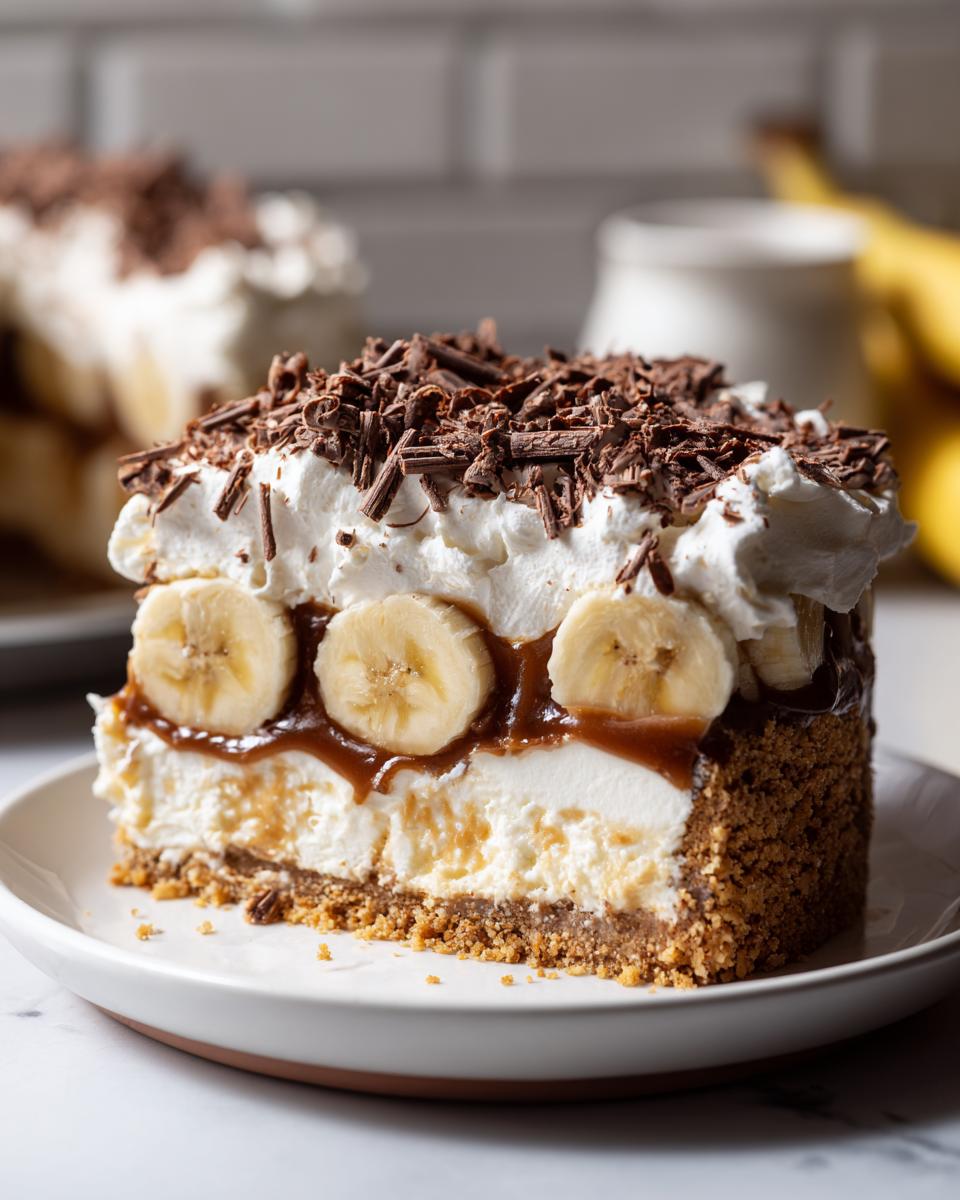
Once the crust is frozen, pour that glorious hot toffee right over it and spread it out fast. Let it sit on the counter to cool for about 30 minutes, then it needs to go into the fridge for at least an hour until that caramel layer is totally firm. After that, layer on those sliced bananas—remember the lemon juice trick if you want! Finally, dollop on your stiffly whipped cream topping. Spread it nice and smooth to seal in all that goodness. This whole **Simple Layered Dessert** needs to hang out in the fridge for a minimum of two hours before slicing. It needs time to set up so it doesn’t slide all over the plate when you cut into it!

Tips for the Perfect banoffee pie Every Time
Listen, making this **banoffee pie** look as good as it tastes is all about knowing the little tricks the pros use to stop things from going sideways. We’re talking about those tiny adjustments that keep the bananas looking bright and the cream looking impossibly fluffy. Think of these as your new kitchen slang for foolproof dessert engineering. If you want to master another tricky technique, my guide on poaching eggs is a great place to start!
Preventing Banana Discoloration in Your banoffee pie
Bananas look amazing fresh, but five minutes later they start turning that horrible grey-brown color. I told you about the lemon juice trick earlier, right? That’s your first line of defense. You want to slice those bananas and toss them gently in a tiny bowl with just a squeeze, maybe half a teaspoon, of fresh lemon juice. It neutralizes the enzyme that causes browning, and honestly, you can’t taste it at all against the sweet toffee. Now, if you’re assembling the pie way ahead of time—like, say, the morning of a big party—you need a better shield. Cover those banana slices completely with the whipped cream layer. The cream acts like a seal, blocking out all that oxygen that causes the discoloration. No air, no browning. Simple as that!
Achieving Stiff Peaks for the Whipped Cream Topping Pie
We want peaks that hold their shape when you lift the whisk, not something that droops sadly back into the bowl. That means temperature control is key for your **Whipped Cream Topping Pie** layer. Before you even think about turning on the mixer, shove your mixing bowl and the whisk attachment into the freezer for about 15 minutes. Yep, super cold equipment helps the fat in the cream lock into place faster. Use your heavy cream cold, and don’t forget to add the sugar and vanilla before you start whipping! The second you see things start to look thick, slow your speed down. If you keep going when you think it’s done, you’ll end up with buttery sadness instead of airy cream. Stop *just* before you think it’s ready, then fold it gently—that’s your **Easy Banoffee Pie** topping locked in!
Serving Suggestions for Your Crowd Pleasing Dessert banoffee pie
Look, this **banoffee pie** isn’t just something you eat; it’s an *event*. When you pull this beauty out, everyone stops talking. Since this is such a rich **Crowd Pleasing Dessert**, presentation matters! My top recommendation for the finishing touch is a generous shower of grated dark chocolate. Don’t just sprinkle a few flakes; really shave it over the top—it adds that bitter edge that cuts through the sweetness beautifully. That’s your signature **Chocolate Shaving Topping** move!
When it comes to serving, simplicity wins. I like to use high-contrast plates—maybe a dark slate or a pure white dish so those creamy layers really pop. If you’re using it as a heavy-hitter at your next get-together, remember this falls right into the **Party Dessert Ideas** category. Because it’s so sweet and dense, it pairs perfectly with something sharp to clean the palate. I always serve it with a tiny, strong espresso shot—the bitterness is a wonderful contrast. Sometimes, if we’ve made it for an evening party, a small pour of a sweet sherry or a chilled dessert wine works wonders too. It just elevates the whole experience from ‘easy dessert’ to ‘restaurant-worthy indulgence’. If you need a good start for your morning after, check out my homemade granola recipe!
Storage and Make Ahead Tips for banoffee pie
The beauty of this **banoffee pie** is that it’s a fantastic **Make Ahead Dessert**, but you have to be smart about when you layer everything. If you want my honest advice, never try to make the entire thing start to finish on the day you plan to serve it—you’ll be frantic! The key to success here is breaking it into stages.
You can—and I highly recommend this—make your graham cracker crust and your homemade toffee layer entirely the day before you plan to eat the pie. Store that crust at room temperature if it’s sealed well, but definitely chill that firm toffee layer in the pie dish, covered tightly with plastic wrap, overnight. It just makes sure that caramel is perfectly set up for the next day’s assembly.
Now, the most important part of my make-ahead strategy: the bananas and the whipped cream topping. Seriously, do *not* slice those bananas or whip that cream until you are ready to serve, or at the very latest, the morning you plan to eat it. Bananas brown faster than you can say “toffee,” and whipped cream starts weeping after about 12 hours, even in the fridge.
When you’re ready to plate up, just follow the assembly steps: bananas on the set toffee, then pile on that fresh whipped cream, and finish with your chocolate shavings. Always cover the final pie tightly with plastic wrap or a cake dome before putting it back in the fridge. You want to enjoy this gorgeous thing within 24 hours for total flavor and texture perfection. For another great make-ahead tip, check out how I handle my no-bake pumpkin cheesecake!
Variations on the Classic banoffee pie
Now that you’ve mastered the classic, let’s talk upgrades, because that’s what cooking is all about, right? Seeing a recipe and instantly thinking, “How can I make this mine?” This **banoffee pie** is almost begging for you to play with it. I’ve seen some absolutely brilliant twists people come up with that still feel totally authentic to that sweet, creamy flavor profile. If you want to see another deep dive into layered deliciousness, check out my recipe for chocolate caramel toffee crunch cake! But keep reading, because we’re sticking to the pie world for now.
The easiest place to experiment is the base. If you’re bored of graham crackers or even the classic digestive biscuit, let’s talk Biscoff. Crushing up those spiced speculoos cookies and mixing that with your melted butter gives you a crust that already has cinnamon and caramel notes built in! It’s subtle, but wow, does it elevate things. My advice? Try the best banoffee pie recipe this way at least once!
Remember how we talked about using extra chocolate shavings as garnish? Well, what if we make that a real layer? If you want to pull out all the stops for a truly decadent experience, you can melt down a small amount of good quality dark or milk chocolate—maybe three ounces—and drizzle it right over the cold toffee layer *before* you add the bananas. You want it thin so it just cracks when you slice it. This small addition instantly turns it into a richer, almost truffle-like dessert. Also—and this is a fun one—sometimes I blend a little peanut butter into the cream cheese layer if I’m feeling wild. It’s totally unexpected, but those banana-toffee-peanut notes are unbelievable. Don’t be afraid to experiment; that’s the best kitchen slang you can learn!
Frequently Asked Questions About banoffee pie
I know you might still have a few niggles swirling around after building this amazing thing. That’s totally normal! When we translate professional kitchen secrets, sometimes we leave a few things ambiguous for the sake of flow, but I want you totally confident. So, let’s run through a couple of the questions I hear the most about nailing the **banoffee pie** every single time. If you need more general dessert help, I’ve got deep dives on everything over on my beef taco casserole page—just kidding! But seriously, ask away below!
Can I use store-bought dulce de leche instead of making homemade toffee for my banoffee pie?
Absolutely, yes! That’s the great shortcut, remember? If you don’t have 15 minutes to constantly stir that saucepan, grab a can of good quality dulce de leche. But here’s the insider scoop: check the can! You want a thick product that looks like it could already hold a peak. If the stuff you buy is super thin and runny, it’s going to soak right into your crust and we’ll be back to that soggy middle ground we worked so hard to avoid. Thickened, luscious caramel is what we’re aiming for!
What is the difference between a banoffee pie and a banana cream pie?
That’s a sharp question that usually comes up when folks are debating which banana dessert to make! The fundamental difference is the sauce. A classic banana cream pie relies on a pastry cream or custard base—it’s smooth, often cooked on the stove like pudding, and sets up softly. Our **banoffee pie**, on the other hand, absolutely *requires* that thick, boiled-down, almost chewy butterscotch/caramel layer. That intense, cooked flavor is what makes it “toffee” and separates it from a regular **banana cream pie** base. You need that rich sweetness interacting with the fruit!
How long can I store leftover banoffee pie?
My answer here is going to hurt your feelings a little bit: eat it fast. This pie is amazing on Day One, still pretty good on Day Two, but after that, we’re playing a losing game against science. Specifically, the bananas are going to brown, no matter what you do, and that gorgeous cloud of whipped cream loses its loft. If you must keep leftovers—maybe you made it for a huge party—wrap each slice individually and tightly in plastic wrap and refrigerate. But honestly, try to enjoy the entire King Cake–sized dessert within 24 hours for the absolute best texture!
Estimated Nutritional Values for This banoffee pie
Now, look, I’m not a registered dietitian. I’m a cook who wants you to enjoy rich, decadent desserts without having to worry about charts and graphs all the time. But when you’re dealing with butter, condensed milk, and graham crackers, you know it’s going to be a treat! So, here are the estimated numbers based on the recipe we just made, serving 8 slices. Keep this in mind: this is just a guideline for your **banoffee pie**, not a strict daily requirement. We’re counting calories for joy here, not judgment!
You can find more healthy habit inspiration over on my high-protein overnight oats post if you need a reset the next morning!
- Serving Size: 1 slice (about 1/8th of the pie)
- Calories: Around 450 per slice
- Total Fat: Roughly 25g (Yeah, there’s butter in that crust and toffee—it’s worth it!)
- Saturated Fat: About 15g
- Carbohydrates: Around 55g
- Sugar: This is high, folks, maybe 45g, thanks to all that caramelized goodness.
- Protein: Approximately 6g
The numbers look big, but remember, this is a special occasion, **crowd pleasing dessert**, not your Tuesday night salad replacement! Enjoy every bite of that creamy caramel and soft banana layer!
Share Your Kitchen Slang Success
So, there you have it! You’ve successfully translated the cryptic chef-speak into a gorgeous, perfectly structured, no-bake **banoffee pie**. I’m genuinely so excited for you to try it! Now comes the most important part: joining the Kitchen Slang family by telling me how it went.
Did the crust hold up like a rock? Did your toffee get that perfect deep gold color? I want to hear all the details! Head down to the comments section right now and give this recipe a rating—let me know if it’s an easy weeknight treat, a party superstar, or if you made some secret variation I need to know about!
And if you snapped a picture of that creamy, layered beauty, tag me! Seeing your successes is honestly the best part of what I do here. It proves that everyone can speak the language of real, good food. If you have any final questions after making the pie, don’t hesitate to hit up my contact page. Happy baking—or, in this case, happy *no-baking*!
PrintUltimate Easy No-Bake Banoffee Pie

You need this recipe for a classic British dessert that skips the oven. This pie layers a buttery crumb crust with rich homemade toffee, fresh bananas, and fluffy whipped cream for a crowd-pleasing treat.
- Prep Time: 20 min
- Cook Time: 15 min
- Total Time: 1 hour 35 min
- Yield: 8 servings 1x
- Category: Dessert
- Method: No-Bake
- Cuisine: British
- Diet: Vegetarian
Ingredients
- 1 1/2 cups graham cracker crumbs
- 6 tablespoons unsalted butter, melted
- 1 (14 ounce) can sweetened condensed milk (for toffee)
- 2 tablespoons unsalted butter (for toffee)
- 1/2 teaspoon salt (for toffee)
- 3 large ripe bananas, sliced
- 1 1/2 cups heavy whipping cream
- 2 tablespoons powdered sugar
- 1/2 teaspoon vanilla extract
- Chocolate shavings, for garnish
Instructions
- Prepare the crust: Mix the graham cracker crumbs and 6 tablespoons of melted butter until the crumbs are evenly moistened. Press this mixture firmly into the bottom and up the sides of a 9-inch pie dish. Place the crust in the freezer while you make the toffee.
- Make the toffee (dulce de leche): In a medium saucepan, combine the sweetened condensed milk, 2 tablespoons of butter, and salt. Heat over medium-low heat, stirring constantly, until the mixture thickens and turns a deep golden brown color, about 10 to 15 minutes. Watch this closely to prevent burning.
- Pour the hot toffee evenly over the chilled crust. Let the toffee cool completely at room temperature, about 30 minutes, then chill in the refrigerator for at least 1 hour until the toffee is set.
- Prepare the topping: In a large bowl, whip the heavy cream, powdered sugar, and vanilla extract using an electric mixer until stiff peaks form. Do not over-whip.
- Assemble the pie: Arrange the sliced bananas over the set toffee layer. Top the bananas with the prepared whipped cream, spreading it evenly to cover the entire surface.
- Chill the pie for at least 2 hours before serving. Garnish with chocolate shavings just before you slice and serve your best banoffee pie.
Notes
- For a sturdier crust, use digestive biscuits instead of graham crackers, which is common in the UK.
- If you want to skip making the toffee, use one can of pre-made dulce de leche instead.
- To keep the bananas from browning, brush the slices lightly with lemon juice before layering them over the toffee.
Nutrition
- Serving Size: 1 slice
- Calories: 450
- Sugar: 45g
- Sodium: 200mg
- Fat: 25g
- Saturated Fat: 15g
- Unsaturated Fat: 10g
- Trans Fat: 0g
- Carbohydrates: 55g
- Fiber: 2g
- Protein: 6g
- Cholesterol: 75mg